• Skip to secondary menu
  • Skip to main content
  • Skip to primary sidebar
  • Skip to footer
  • The Pressure Canning Cookbook
  • Blog
    • Subscribe
    • Welcome!
  • Perfectly Preserved Podcast
  • About
    • ADW Manifesto
    • Work With Me
      • Read
  • Shop
    • My Account
    • Cart
    • Checkout

The Domestic Wildflower

Handmade Food & Craft Tutorials for Beginners

  • Courses
    • Free Canning Basics
    • Everything Canning Course
    • Steam Canning Workshop
    • Free Homemade Cocktail Mixers
    • Wildflower Mixology
    • Crochet Basket Workshop
  • Can & Preserve
    • Never Canned?
    • Steam Canner Equipment Bundle
    • Shrubs Course
  • Sew
  • Cook
  • Craft
    • Crochet Step-by-Step Guides
      • Crochet Basket
      • Giant Yarn Throw
      • Thick & Thin Throw
  • Living
    • Creativity Challenge
    • Clean
    • Kids
  • Rentals

Jenny Gomes

The Canning Process Explained

June 23, 2016 by Jenny Gomes Leave a Comment

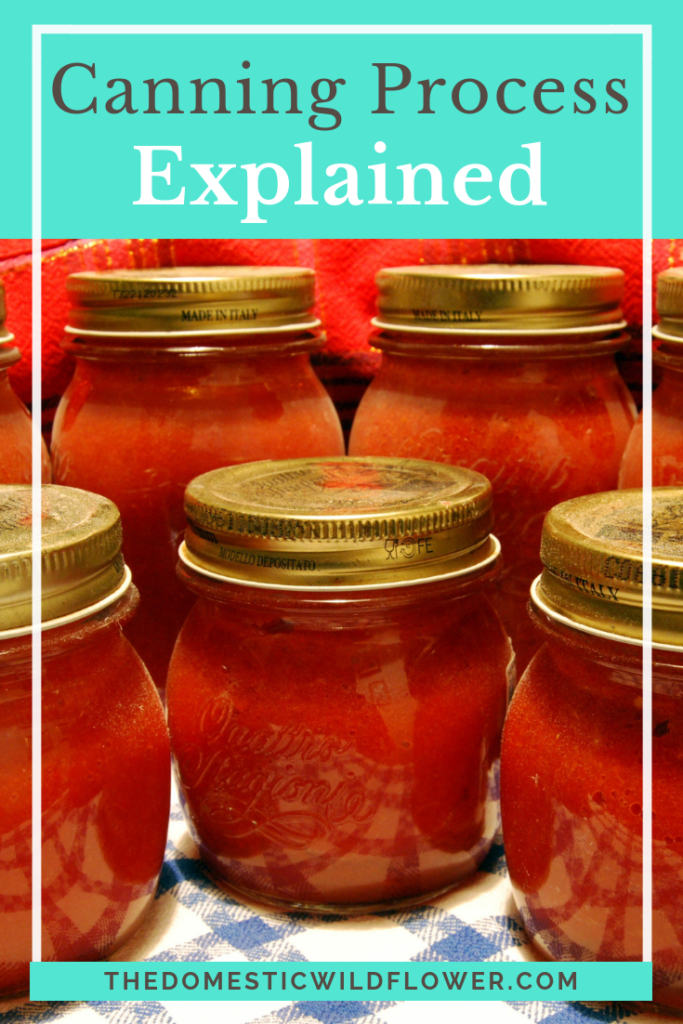
This post will explain clearly the canning process and detail what is boiling when so you can begin canning with confidence.

The Canning Process Explained

The part about canning the really makes newbies worried (other than food safety) is not knowing what has to happen when. When you were a kid, you might remember someone canning in your family and looking up at the stove and seeing what seemed like 10 pots of boiling water. Well, canning does not require 10 pots, but I know it can seem like it to a busy beginner.

I like to mentally break the canning process into two main parts. You have to PREPARE and then you PROCESS. Prepare and process; that’s the name of the game, Wildflowers.

First, you must prepare the big water bath processing pot in which your jars will hang out. Fill it and the jars with hot tap water, turn the stove on high, and bring to a boil.

Prepare the preserving pan. In the preserving pan, you will be cooking the fruit into jam, the tomatoes into sauce, or bringing a brine to a boil.

Then it is time to PROCESS. This is where the action happens. Your food is cooked according to the recipe, and your jars are warm.

The process begins with you pulling one jar out of the processing pot at a time. Pour the boiling water out, place the hot jar on a towel on the countertop. Fill the hot jar with hot food (your cooked jam, applesauce, etc). Put a lid and ring on to the jar. Return the hot jar (now full of food) into the boiling water bath. Pull your next empty jar from the pot and repeat the process. Here’s what you need to keep in mind as you repeat the process:

  • You may need to lower the heat on the processing pan. As the amount of food decreases (because you are putting it into the jar) the remaining food will boil faster. Keep an eye on the preserves and stir often. You want it hot but not burning or scorching on the bottom.
  • As you fill hot jars with hot food and return them to the processing pot, you will notice the water level rising. Avoid overflowing by pulling a jar from the boiling water and pouring the water from it into the sink.
  • This water level issue is compounded a bit by the vigor of the boil and the amount of water that is lost to steam. There are plenty of times where I have had to dump water in the sink to only have to add a bit more once all the jars are filled with food. The jars need to be covered by a minimum of 1 inch of boiling water in order to process.

Once all the jars are filled with food and submerged in the boiling water bath, bring the pot back up to boil. This is when you may have to add hot water to the pot to cover the lids sufficiently. I have filled a drinking glass with hot tap water or used water from the tea kettle. It isn’t advisable to move the very heavy pot full of boiling water and jars from the stove. Use a vessel to fill it.

Once the water is boiling, set a timer for the time specified in the recipe, be sure to adjust for your elevation. Because of the change in atmospheric pressure the higher you get in altitude, you must add 5 minutes of processing time for every 1000 feet you are canning above sea level. I go through my cookbook with a pencil and change all the processing times so I never have to think about it.

If during the canning process the water stops boiling (if you turned the stove down a bit too much, or you lost power) stop the timer, and once the boil is resumed, resume timing.

Once the time required has passed, turn the stove off and use the jar lifter to pull one jar at a time from the boiling water bath and set each jar carefully on a towel covered countertop.

Listen and watch for the lids to make a ping, ding, or click type of noise, and to become firmly concave on the jars. It may take up to 12 hours for the lid to seal and that is perfectly okay. Sometimes the lids seal while they are still in the air, clasped in the jar lifter. That is also okay. Don’t disturb the jars until they are cool and sealed, at least 12 hours later. Label and store in a cool, dark spot.

That’s the order of events, Wildflowers! When people tell me it seems like a lot going on or that they don’t think they can do all that at once, I ask if they have ever cooked or helped cook a big holiday dinner. I think that those cooking marathons are way more complicated; you have meat in the oven, gravy on the stove, veggies in the fridge, dressing to whisk, timers for a bunch of different dishes, rolls to warm, pies to cut… THAT is a lot to manage. Canning is just 3 burners going and once your food is in the processing pot, you usually don’t have to move around the kitchen that much.

While you are actively filling the jars, I would say that is the part that might be stressful for a newbie. I make my small children stay out of the kitchen just in case I splash hot water and I make sure my sweet but underfoot Lab is outside and not going to trip me on accident.

The first few times you can, this may seem like a lot but I’d advise a beginner to focus on the task at hand to ensure low stress and fun experience.

If you wish you had a friend to invite you over to SHOW you how this all works so you could learn to can with confidence, I’m that friend.

I have created a canning course for the busy beginner where I share more than 10 videos of me actually canning so you can see the process for yourself.

Start Canning E Course | The Domestic Wildflower the canning course for busy beginners! Click to enroll now and learn how to can with confidence!

If you are thinking you don’t have time to learn, I assure you that I don’t teach every recipe (who has time for that?). I teach a set of TECHNIQUES that you can apply to countless other recipes. Once you watch me make strawberry jam, you will be ready to try apricot jam on your own.

With the course comes to access to a community of like-minded souls who are brand new to canning just like you, where you can share successes, ask questions, swap recipes, and learn from one another.

Enroll Now!

I can’t wait for you to join this course and learn how to feed your loved ones food you can feel good about and share the love all year long, months after harvest.

This price won’t be around for long and I want my blog readers to be the ones getting the best deal since you are the smartest, raddest Wildflowers on the internet. Enroll now and get instant access to the course!

Enroll Now!

Filed Under: Can

Homemade Vanilla Ice Cream

June 20, 2016 by Jenny Gomes Leave a Comment

This post will share a simple, classic recipe for homemade vanilla ice cream featuring the vanilla extract, paired with the amazing cranberry chocolate fermented mole I made that knocks the trio of recipes into the stratosphere. Read on for the final layer of homemade dessert divinity!

Homemade Vanilla Ice Cream

Now that you have fermented your cranberries, cherries, cocoa, and chile together into a paste, and you have your vanilla beans soaking to make vanilla extract, you can now make your homemade vanilla ice cream.


Vanilla is a term that has unfairly been applied to the boring, mediocre, and forgettable. My cousin dated a girl that was described as “vanilla” because she was nice…and that was about all she was.


How unfair to both the girl and the flavoring because vanilla really shines when favorably paired, as with the fermented mole.


When scooped together on the same dish, the cool, sweet, creamy vanilla ice cream is a perfect foil for the fruity heat of the mole and you can actually taste the vanilla really well.


It is weird, delicious, and totally unusual. Make it and impress a crowd, Wildflowers.


This ice cream recipe was shared with me by my neighbor and friend Nan who is a goat farmer and homeopath. She makes it with her own fresh goat milk and if you can get your hands on such heavenly dairy, you should. If that isn’t available to you, use plain cow’s milk.   


Recipe:

2 and 3/4 cups whole fresh goat milk or cow’s milk

1/4 c heavy cream

*Use goat cream if you can get it; heavy cow’s (whipping) cream works fine too. You can also substitute whole (not light) coconut milk – make sure to shake well. Also acceptable is sour cream, or whole-milk plain, high-quality yogurt such as Straus brand.

*You can also vary the proportions within the 3 c. of milk/cream as far as1 cup whole milk and 2 cups cream


3/4 c white sugar


small pinch salt


1 tablespoon vanilla extract. Use the best you can afford because this is what really makes the taste, which is exactly why I like to make my own. Read how I do it here.


Put milk, sugar, and salt in mixing bowl and use hand or stand mixer to combine until sugar dissolves. This can take a while (up to several minutes) so keep stirring.

Stir in cream and vanilla. Chill in the fridge for 1 hour (or as long as 8 hours).


Process according to the directions for your ice cream maker until thickened and creamy, usually about 20 minutes.


Store in the freezer but bear in mind when you make homemade, preservative-free ice cream it is very best devoured fresh.


And there you have it, Wildflowers. Have you entered to win the corresponding dessert post’s giveaways? For the fermented mole post, one lucky reader will win a copy of “Fermented Vegetables” which is over 300 pages of fermentation instruction, photography, recipes, and inspiration.

Enter to win the "Fermented Vegetables" cookbook!

For the homemade vanilla extract post, we have been kindly gifted a Mason Jar Tap lid which makes your infusions perfectly pourable. To further elevate your canning jar affection, the winner will also get a drinking lid to transform their jar into a to-go cup.

Click to enter the Mason Jar Tap & Drinking Jar Lid Giveaway!


If you are loving this homemade goodness, and want to learn even more about putting food and love into jars, sign up here to know when the Start Canning Ecourse is live. I can’t wait to help you busy beginners Start Canning this month!


Filed Under: Cook

Homemade Vanilla Extract

June 16, 2016 by Jenny Gomes 2 Comments

Making vanilla extract at home is easy, fun, and the result is way better than storebought. This post will explain exactly how to make vanilla extract, and you can make it now so next week when I share how to make an amazing cranberry-cocoa fermented paste and an amazing homemade vanilla ice cream recipe, you’ll be ready to rock dessert. Read on Wildflowers!

Homemade Vanilla Extract

Vanilla beans + alcohol (typically vodka, but we’ll get to other options in a bit) is all it takes to make homemade vanilla extract. That, and time.

Vanilla beans are typically very, very expensive. In my local grocery store, I could buy 2 vanilla beans in a glass jar for $12. I did not buy the shriveled, brown beans that way. I went on Amazon and bought a package for $25 that has 25, 5 to 6-inch tall vanilla beans in a vacuum sealed bag. I have purchased this package 3 separate times, over a year between instances, and haven’t been sorry yet. The label (which has remained unchanged) makes me laugh every time. It tells the buyer how to make vanilla extract, and step two says, “Chop the beans into ½ inch pieces. Slicing is ok, but is a waste of time.” Thanks, www.vanillaproductsusa.com for not wasting my time!

I realize that there are probably fresher, better, more expensive alternatives out there but I live a very, very long way from a metropolitan area that might sell such high-quality beans and this is a great way to add real, customized vanilla flavor to the sweet things I like to make.

If you haven’t ever handled whole vanilla beans, you are in for a treat. They smell divine even through plastic packaging. It almost becomes a worry when faced with how to wrap up the remaining beans after you have made your extract. I usually split the purchase with a friend in order to maximize the freshness. As the helpful label explains, “For best results, triple wrap in ziplock freezer bags immediately upon receipt.” I wrapped twice and put them in a mason jar when I have had leftovers. They are not to be frozen or refrigerated, either.   

The versions of extract I have tried to feature different types of alcohol and each has its merits.

I used Bacardi Oakheart Spiced Rum (left at my house after some festive occasion) for my first batch and it turned out to be a great way to use up the spiced rum. The “notes of brown sugar, vanilla, and cinnamon” are an obviously nice, however not-top-shelf it may be, pairing. I think this is my favorite- I use vanilla extract in homemade ice cream and in whipped cream and in both applications I find it to be so, so good.

I have used bourbon as the medium after I saw vanilla beans advertised as being infused with bourbon flavor (I never bought them myself, but was intrigued nonetheless). I found this option to be the least desirable of the three because the whiskey flavor was really strong, and when mixed in things like whipped cream…it was too much competition for the vanilla. The vanilla should be the star.

The standard go-to alcohol for making homemade vanilla extract is inexpensive vodka. While this isn’t all that creative, it is certainly very versatile and foolproof.

Chop up the vanilla beans as the package describes and cover with the alcohol of your choice. I used a quart of vodka to cover the 25 vanilla beans that came in my package. Lid, shake and store on a shelf. The extract gets better and better the longer you can wait, but I have used it in a week in a pinch and it was okay. When I am ready to use it, I give the jar a shake and pour it into my measuring spoon. I leave the beans in the jar and never remove them until the liquid has been all used up.

Homemade Vanilla Extract | The Domestic Wildflower click through to read this simple tutorial to make your own super flavorful vanilla extract in a mason jar!

Homemade Vanilla Extract | The Domestic Wildflower click through to read this simple tutorial to make your own super flavorful vanilla extract in a mason jar!

After you create your infusion, you then get to use a delightful infusion lid with which to dispense your flavorings. You can get an infusion lid from the delightful folks at Cuppow. They are the clever minds behind the BPA drinking lid that turns a canning jar into a travel mug  They have kindly shared an infusion lid called the Mason Tap AND drinking for this post giveaway and you can enter to win here! Remember, the giveaway program rewards you with extra entries so share, share, share!

Click to enter the Mason Jar Tap & Drinking Jar Lid Giveaway!

If infusions are right up your alley, then you are in for a treat. I found some terrific recipes from other blogger friends that you might enjoy making and that you could use with the above infusion lid. Head here to buy your own!

More Infusion Inspiration:

Make Rosemary Infused Olive Oil with this simple tutorial.

http://www.thriftynorthwestmom.com/rosemary-infused-olive-oil/

Blueberry Vinegar looks simple and perfect for vinaigrettes. http://www.sidewalkshoes.com/2013/08/blueberry-vinegar.html

Homemade Mint Extract would be right at home in lots of sweets- and who doesn’t love mint in their iced tea on a hot day? http://www.sidewalkshoes.com/2013/11/diy-mint-extract.html

Rhubarb is one of my favorite fruit flavors and this Rhubarb Infused Vodka infusion sounds easy and delicious. Pass the whiskey and sparkling water please 🙂  http://simplydarrling.com/2013/07/rhubarb-infused-vodka/

If you love making homemade and found this tutorial helpful, you are going to love this:

I have created a  completely free canning basics course for busy beginners (that is as clear and simple as this post!) that will teach you the equipment, the process, and the way to know how canning is safe. Get in the free course here!

What infusions have you tried, Wildflowers?

Filed Under: Cook

Chocolate Cranberry Mole

June 13, 2016 by Jenny Gomes Leave a Comment

Chocolate Cranberry Mole: A Fermented Paste from The Fermentista’s Kitchen. This post will share the recipe for a fermented paste that is sweet, spicy, totally unusual, and utterly delicious. Read on for the full tutorial!

Chocolate Cranberry Mole

I live very rurally, as many of you know, so when something exciting happens in my neck of the woods, I try my best to go. When I saw that there was a fermenting workshop a mere 90 minutes drive (as in 90 miles) from my home, on a school night, I corralled two of my dear friends to accompany me and attended. The workshop was hosted by the cooperative extension office, which is a fabulous resource. Nationwide, universities have extension offices that basically offer education in a very wide range of topics for free or cheap to adults. The availability of programs ranges widely with some counties having super up to date websites and tons of programs from crafts, food, garden, livestock, health, and more to some little counties with just a few programs and understaffed offices. Your local extension office could be a wealth of Domestic Wildflower-themed information and I encourage you to investigate your nearest office.

The fermenting workshop was particularly interesting to me because fermentation is something I have really wanted to learn more about but was a bit hesitant to try on my own. I made my first batch of sauerkraut this winter with the help of the GoFerment lid (which I love) with great success and our weekly, toddler-requested hot dogs were greatly improved as a result. Beyond that, the realm of zymology got a bit fuzzy for me and in a classic flaw of my personal character, I didn’t experiment further because I only like to do things I am good at.

I was also excited for this workshop because the featured teacher was the authoress of “Fermented Vegetables,” Kirsten Shockey. I thought to myself that I HAD to attend this workshop because when in the heck else would I get to meet a published author of a super rad book, on a topic that is hot hot hot, in my super remote slice of heaven on Earth? Participation was not optional.

Well, my friends and I drove across state lines, got Mexican food to go, and miraculously arrived on time to the workshop.

In the workshop, we learned about the basics of fermentation, saw several different types of recipes prepared, and were enlightened by several pearls of fermentation wisdom including the fact that fermented foods are much higher in vitamins than their unfermented counterparts. This is due to the fact that the vitamins are no longer bound to their cellulose walls once fermented, making the vitamins more accessible to our bodies. Fermented foods are more easily digested and contribute to overall digestive health, and cultures around the world known for longevity and overall good health consume fermented foods.

It is widely stated by the fermenting community (and I could find no evidence to dispute this claim) that no one has ever died from fermented foods. In some ways, fermenting is much easier than you might think because when the good bacteria are overcome, the result is food that you clearly and instinctively would not eat.

Thus, for those of us interested in cooking more at home, eating better, and creating more of what we enjoy, fermenting is a fun and safe avenue full of culinary delights.

At the end of the workshop, we were treated to a sampler of so many cultured foods I could never have tried them all. I personally gravitate towards fruit more so than pickles, and sweet more than savory, so I filled my plate with fermented rhubarb, apple, raisins, and the like, in addition to many delightful and totally unusual krauts and pickled vegetables.

In between sampling, I got to meet the lovely Fermentista herself and I can say without reservation she not only knows what she’s doing but she’s a kind, fun soul to boot. I also learned that I didn’t have to feel like I would never have a chance to meet her ever again because she actually lives in Southern Oregon, so that joke was on me. I am so glad I felt that way, actually, or I might not have rearranged childcare, Heaven, and Earth to attend.

Kirsten was kind enough to share a copy of her beautifully photographed, entirely comprehensive book (375 pages!) for one lucky reader. Remember, the giveaway rewards you for sharing with extra entries for you, so share away!

Enter to win the "Fermented Vegetables" cookbook!

Chocolate Cranberry Mole: A Fermented Paste from The Domestic Wildflower click to read this fermenting tutorial for a delicious, spicy-sweet fermented paste that is amazing with vanilla ice cream!

Because of what I learned in the workshop, I felt inspired and excited to try a recipe from Kirsten’s blog for Chocolate Cranberry Mole. I have a real sweet tooth and this sounded weird and delicious and because it pairs with ice cream I was sold. Here is her recipe and I will note where I changed a few things; namely I used frozen cranberries instead of fresh.

Fermented Chocolate Cranberry Mole

1 pound cranberries (I used frozen- let them sit out and soften a bit before processing in the food processor)

1 cup dried cranberries (unsweetened)

1/2 cup dried cherries (unsweetened, and sub in more cranberries if you prefer)

5 tablespoons pasilla chile powder (2 ounces)

2 ¼ teaspoons cocoa powder

¾ teaspoon salt

½ cup fresh orange juice (I used bottled lemon juice and it turned out lovely but I bet orange would have been really good)

Process all ingredients in a food processor until a paste is formed. This ferment will not be wet the way sauerkraut would be and is in fact almost dry.

Press paste into a clean vessel (I used a quart mason jar, though it would have fit in a pint and a half jar), try your best to press tightly so air pockets are removed. Press plastic wrap against the surface and lid with a loose canning lid & ring or another fermenting lid (I used my GoFerment and it worked swimmingly).  Allow to sit on the counter and ferment for 7-10 days. Mine sat for 10. You know it is “done” when it has a lemon flavor and a whole new flavor is created. I tasted on day 5, 7, and 10, and I suggest you do the same just so you can taste how it changes. It is remarkable how it just happens overnight. Fermentation is magic, my friends, and Kirsten the Fermentista is a wizard.

Lid and store in the fridge with a round of wax paper atop the ferment, or store in a container just the right size for the amount of mole.

Chocolate Cranberry Mole: A Fermented Paste from The Domestic Wildflower click to read this fermenting tutorial for a delicious, spicy-sweet fermented paste that is amazing with vanilla ice cream!

I served this with homemade vanilla ice cream made with homemade vanilla extract and together it is the perfect combination of spicy hot, chocolate and fruit, cool sweet, creamy and piquant. If you like Mexican Hot Chocolate cake, you’d love this ferment. Next, I want to try it on cheesecake 🙂

Chocolate Cranberry Mole: A Fermented Paste from The Domestic Wildflower click to read this fermenting tutorial for a delicious, spicy-sweet fermented paste that is amazing with vanilla ice cream!

Oh, and it is THE most beautiful shade of red. No wonder it was featured at Valentine’s Day ferment.

Enter to win your copy of “Fermented Vegetables” here!

Enter to win the "Fermented Vegetables" cookbook!

Or, don’t risk missing out and grab your copy from Amazon from this affiliate link here!
Chocolate Cranberry Mole: A Fermented Paste from The Domestic Wildflower click to read this fermenting tutorial for a delicious, spicy-sweet fermented paste that is amazing with vanilla ice cream!
Cheers to fermenting, Wildflowers! What ferments have you tried? Share in the comments below!  

Psst- one more thing! If the idea of preserving foods really lights your fire, I want you to check out my canning course, Start Canning, that will be ready in about 2 weeks! Sign up here to be the first to know and to download your checklist so you are ready to Start Canning!

Filed Under: Cook

New Canning Products

June 6, 2016 by Jenny Gomes 2 Comments

This post will share with you the new canning products available this canning season and I will share the ways I plan to use them in my little kitchen. Read on for the list, Wildflowers!

New Canning Products

This post may contain affiliate links. All opinions remain my own and I would never recommend a product or company that I wouldn’t recommend to my grandmother, the nicest lady in the world. 

I have said it before and I will say it again; I love canning jars. Aside from being super sturdy, classically designed, and plastic-free, they are so helpful beyond their primary purpose for canning. I use jars to store sugar, crayons, bobby pins, to drink from, to pack my lunch, and more. I love that the regular size lids and rings ALWAYS fit ALL of the regular size jars and the wide lids fit the wide jars. There’s no wondering if the lid will fit…they just do. There is magic in simplicity, and God knows I need a little more simplicity in my life.

Enter to WIN the Fall into Canning Giveaway: The Start Canning Course + Beginner Tools! The winner is drawn October 26!

Ball® brand Home Canning Products have several fun new items out just in time for canning season and they have shared some of them with me. Because we are all birds of a canning-jar-loving feather, they have kindly shared a flat of Wide Mouth Pin Collection Elite Series Jars for a giveaway to one lucky reader. Enter to win here!

Click to enter to win the blue Wide Mouth Pint Jars Giveaway!

The first item that is new this year is the Pour & Measure Cap that fits on a wide mouth jar of any size. This clever little lid has two useful spouts; one that is wider, for pouring out cereal, grains, and other dry goods and a narrow spout for liquids like salad dressing. I think I will use mine to pour my shrub straight into my cocktail glass this summer 🙂  The lid is a marked with ¼, ⅓, and ½ cup measurements which eliminate the need to rustle up a measuring cup, which I absolutely appreciate. I think this jar + lid combo will be on the regular rotation in my pantry because 1) I have ants (big ones, little ones, you name it…) and I try to store most dry goods in jars to prevent the ants from having a reason to invade and 2) I have made an attempt (a very poor one, I admit) to reduce the waste I bring into the kitchen and the foods I buy in bulk can be stored in a jar with this handy lid. I’m thinking of those little bulk chocolate peanut butter cups living in this jar right now…

New Canning Products for 2016 | The Domestic Wildflower click to read the list of the new Ball brand canning products out for 2016's canning season. There are some super cute and totally useful items on the list- click to read now!

The Ball® brand Super Wide Mouth decorative half gallon jar is the pretty and practical new girl on the countertop. While this jar is not made for canning, it is perfect for storing pantry items. The lid is a lovely brushed silver color, (which matches my imaginary refrigerator!) and creates a nice seal to keep cookies fresh.

New Canning Products for 2016 | The Domestic Wildflower click to read the list of the new Ball brand canning products out for 2016's canning season. There are some super cute and totally useful items on the list- click to read now!

The color of the season is blue at Ball® and the blue jars and matching lids & rings are positively dreamy. The blue jars are not navy, but an almost aqua blue and I think they are a great alternative to the regular (read: boring) clear glass. If you were making the sensible switch to drinking from jars, these would be a fun way to dress your table and still be able to can in them, and use the universal, oh-so-wonderful lids. The lids & rings are fun because sometimes, you want the pretty color of your canning product to be shown through clear glass (I made strawberry syrup last week that was a gorgeous ruby color for example) but the blue lids and rings allow you to dress your item up for gifting or organizing. You could use the blue lids & rings together with the blue jars, or separately, and I always love options.

New Canning Products for 2016 | The Domestic Wildflower click to read the list of the new Ball brand canning products out for 2016's canning season. There are some super cute and totally useful items on the list- click to read now!
OLYMPUS DIGITAL CAMERA
New Canning Products for 2016 | The Domestic Wildflower click to read the list of the new Ball brand canning products out for 2016's canning season. There are some super cute and totally useful items on the list- click to read now!
1440030013 CE COLOR SERIES WM LIDS & BANDS LIFESTYLE

While the practicality of the Ball® brand Canning Jars has remained the same over the years, the variations on the exterior of the jars have been many. This year, they have brought back the retro-fabulous jam jar to great effect. These pretty little jars feature fruit around the outside, hinting at the possible contents, and hold just the right amount of jam for my liking. I hate canning items in jars bigger than what my little family will eat up. For me, little 8 ounce jars are THE way to go for canning because the food inside always is eaten before it goes bad or is lost in the depths of the refrigerator. Wasting food you have canned is the worst thing ever because of the effort you spent to put it in jars in the first place. These little gems are perfect for beginning canners. I also use mine to bring trail mix to snack on in between classes. Or during class- who am I kidding? 😉

New Canning Products for 2016 | The Domestic Wildflower click to read the list of the new Ball brand canning products out for 2016's canning season. There are some super cute and totally useful items on the list- click to read now!

Now that I have personally moved past the beginner stage of canning and into the depths of overly enthused and utterly confident intermediate, I have begun doing totally crazy things (you will too if you start, mark my words) like buying many, many pounds of produce on a whim (the price was so good! They smell so wonderful! I can make XYZ!) with little plan and even less time. Because of my enthusiasm and impulsive purchasing, I am always looking for ways to speed up the canning process.


Canning does take time, and it absolutely varies by the recipe, the quantity, your comfort level in front of the stove, and more. When I choose a fairly labor intensive recipe and have flats upon flats of produce, I need to process the veggies and fast.


Enter the last item on the list of new Ball® brand Home Canning Products for 2016. The Ball® brand Harvest Pro is a sauce making a processor that is designed to process (puree) items like tomatoes, apples, and faster so you can get to the more enjoyable parts of the canning process. I haven’t put the sauce maker to my own timed test yet but you better believe I will once the tomatoes are on in my neck of the woods. The claim is that it can process up 15 QUARTS (that is a lot!) of tomatoes in 20 minutes. That is remarkable, to say the least and for days when my living room is filled with flats of Romas aging by the moment and toddler supper time rapidly approaching, the sauce maker would be invaluable. If you don’t know how to can (yet!) you absolutely could make good use of it to make fresh tomato or apple sauce, to make baby food, and to process other vegetables. It works in a way similar to that of my favorite Kitchen Aid attachment that I use to grind up buck meat. They both produce a smooth grind and separate out the parts you don’t want to eat. It is simple and smart. This sauce maker would be a wise investment especially if you can larger quantities, are short on time, or hate the laborious hand food milling/processing that comes with the intermediate canning territory. I will put this baby to the test soon and will write an extensive post of my findings during tomato season. In the meantime, I want to hear from you that have tried it. Let me know what you make!

New Canning Products for 2016 | The Domestic Wildflower click to read the list of the new Ball brand canning products out for 2016's canning season. There are some super cute and totally useful items on the list- click to read now!

New Canning Products for 2016 | The Domestic Wildflower click to read the list of the new Ball brand canning products out for 2016's canning season. There are some super cute and totally useful items on the list- click to read now!

Here’s a treat that I am so thrilled to share with you, Wildflowers.

The lovely folks at freshpreserving.com have shared a flat of the Wide Mouth Pint Collection Elite Series jars for one lucky reader. Enter to win here and remember; the giveaway rewards you for sharing, which increases your chances of winning. So share, share, share, Wildflowers!

Click to enter to win the blue Wide Mouth Pint Jars Giveaway!

Giveaway! Ball brand wide mouth pint jars in adorable blue!

All these products can be found on the Fresh Preserving site. Are you all stocked up for canning season?

Do you know what equipment you need to round up to get started? Print this handy list and start rounding up pots and jars!

CLICK TO PRINT!

Why You Should Start Canning : Canning Equipment List | A Domestic Wildflower click to download this super helpful checklist that details everything you need to start canning your own jam, salsa, tomato sauce, & more!

Filed Under: Can

  • « Go to Previous Page
  • Page 1
  • Interim pages omitted …
  • Page 46
  • Page 47
  • Page 48
  • Page 49
  • Page 50
  • Interim pages omitted …
  • Page 66
  • Go to Next Page »

Primary Sidebar

Categories

Follow me here, there, & everywhere!

  • Email
  • Facebook
  • Instagram
  • Pinterest
  • RSS
  • Twitter
  • YouTube

Search

Get The Pressure Canning Cookbook

Get 10 Free Recipes Now!

Best Chicken Coop

Footer

Get Started Pressure Canning

Shrubology Ebook

Shrubology: Refreshing Homemade Fruit and Vinegar Syrups for Cocktails
Make easy, no-cook fruit & vinegar syrups for cocktails & mocktails! This ebook shares crowd pleasing recipes and simple to understand ratios so you can make a shrub on your countertop any time- without a recipe. Dive into these Prohibition Era drinks today!

Copyright

Copyright 2019
The Domestic Wildflower
www.thedomesticwildflower.com.
All content created by Jennifer Gomes unless otherwise noted.

Copyright © 2025 · Lifestyle Pro on Genesis Framework · WordPress · Log in