• Skip to secondary menu
  • Skip to main content
  • Skip to primary sidebar
  • Skip to footer
  • Blog
    • Subscribe
    • Welcome!
  • Perfectly Preserved Podcast
  • About
    • ADW Manifesto
    • Work With Me
      • Read
  • Shop
    • My Account
    • Cart
    • Checkout

The Domestic Wildflower

Handmade Food & Craft Tutorials for Beginners

  • Courses
    • Free Canning Basics
    • Everything Canning Course
    • Steam Canning Workshop
    • Free Homemade Cocktail Mixers
    • Wildflower Mixology
    • Crochet Basket Workshop
  • Can & Preserve
    • Never Canned?
    • Steam Canner Equipment Bundle
    • Shrubs Course
  • Sew
  • Cook
  • Craft
    • Crochet Step-by-Step Guides
      • Crochet Basket
      • Giant Yarn Throw
      • Thick & Thin Throw
  • Living
    • Creativity Challenge
    • Clean
    • Kids
  • Rentals

Clean

DIY Home Renovation

December 18, 2020 by Jenny Gomes Leave a Comment

Rental House Before and After

Want to see how we bought a house that needed some love and renovated it into a furnished rental? This is the blog post that shares all the before and after photos, the products we used, the steps we took, and lots of money saving ideas along the way. Welcome to our rental house renovation! 

We bought the little rental house in December of 2019. It happened to be such fantastic timing because my husband was able to take 2 months off of work to do a lot of the work himself. He’s not a contractor but a lineman who builds power lines. Nearly 20 years ago, he worked in the construction trade. I have no real renovation experience. I mention this to share our level of expertise before starting this project. It was a little more than the average bear but not a lot. 

When assessing all the things that needed to be done, we considered what we could do ourselves, learn via YouTube, asking friends in the construction industry, and what we were willing and able to pay to be done. The budget we had in mind was to keep the costs of renovation under twenty thousand dollars. We were able to stay under this number, thank goodness. 

If you want to check out the listing, see it here!

Lot & Location 

We found a place that was a small size (1000 sq feet) in a great location- Main Street of our little town. It is surrounded by the neighbor’s backyards, making it feel private as well as centrally located. We own the driveway (rather than having an easement) which was really important to us. 

Flooring

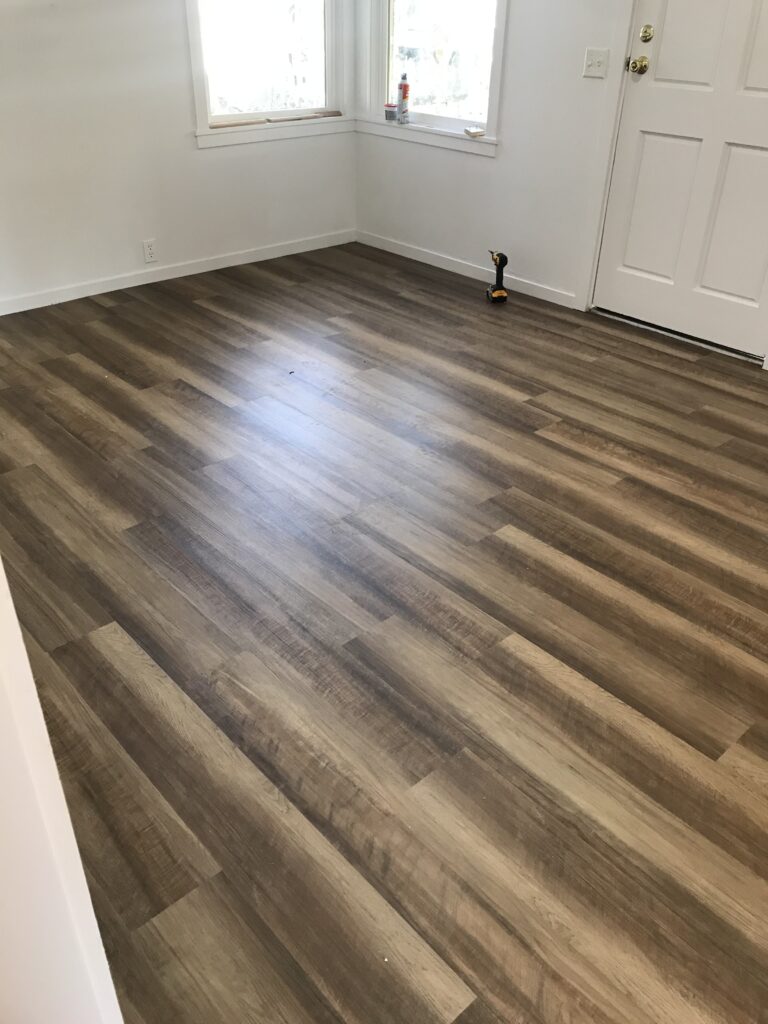
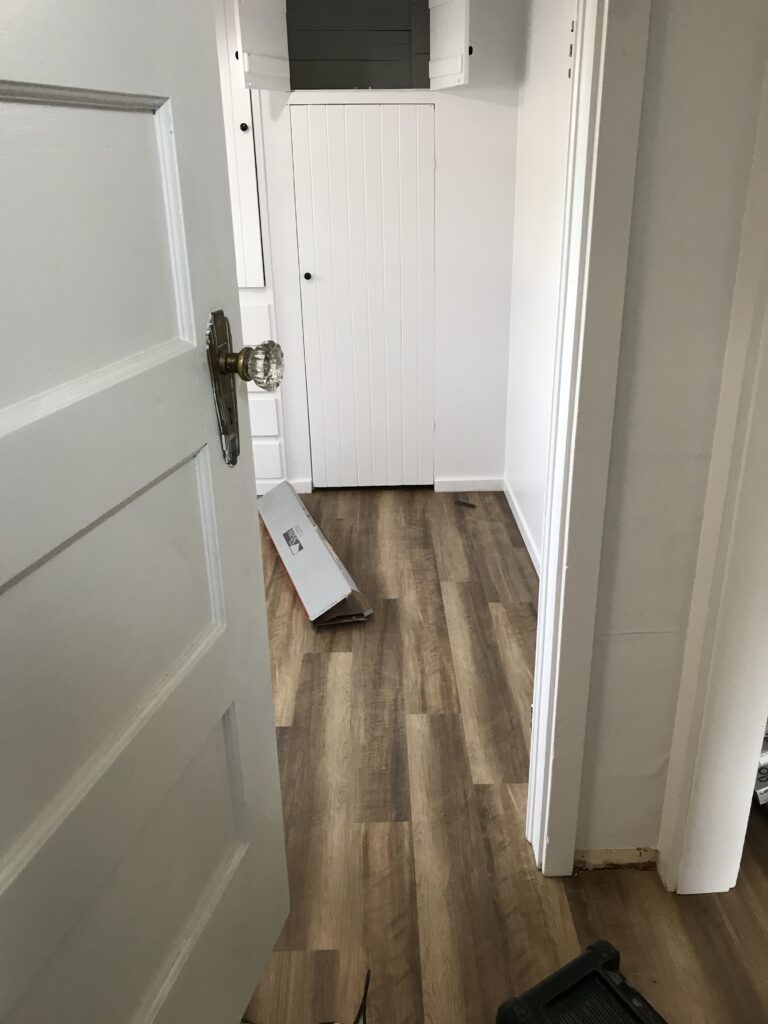
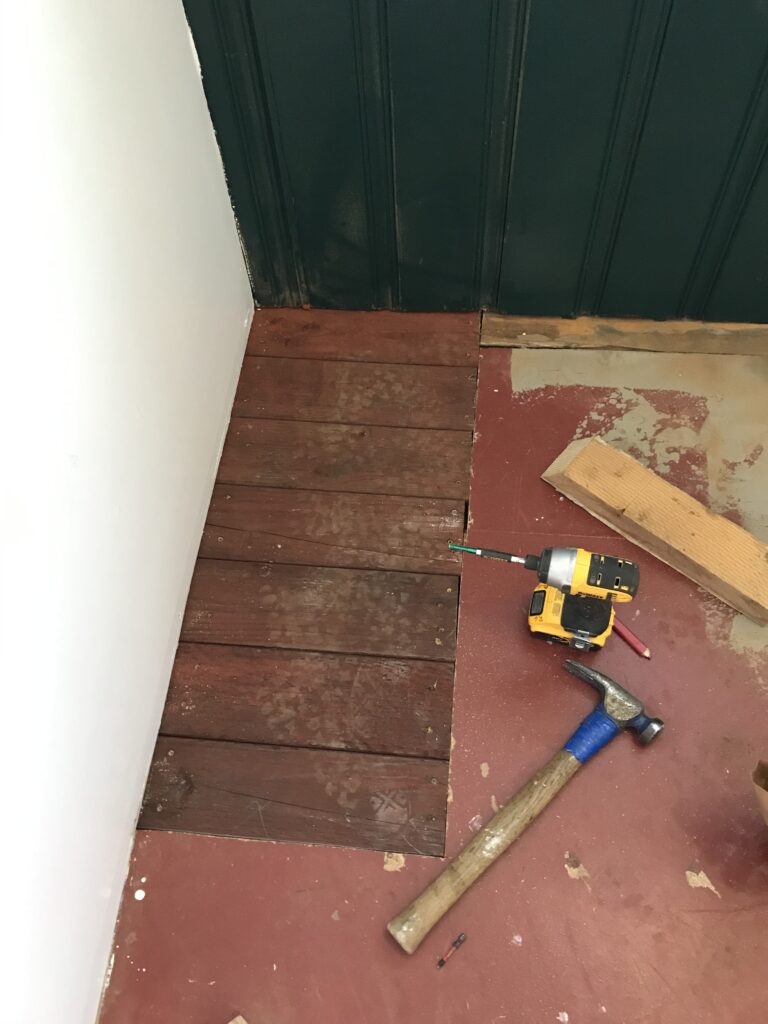
Before: along two sides of the house the flooring was painted and worn OSB. The center was wood (not hardwood, but wood) flooring that needed sanding and refinishing. The best choice for a rental and for our budget was vinyl waterproof click in laminate flooring. I really wanted wood, of course, but it would have cost twice as much to make new wood line up and match the existing wood. 

Waterproof vinyl flooring was installed after they leveled a few uneven places. The cost was about $6000 for the flooring and installation. This is usually where people comment that “you can install it yourself!” And that’s true. We probably could have. My husband had a limited amount of time off work and we had to decide which projects he could do quickly himself versus who we could pay to do a job quickly. In hindsight, we’d still have a pro install it, as it took 2 days I think, and they had the tricky job of leveling some really uneven parts. The result is a waterproof, beautiful floor that’s cohesive throughout the house and it’s super easy to clean. I stained the wooden threshold that goes between the living and kitchen to match the black tones of the flooring.

Bathroom Vanity

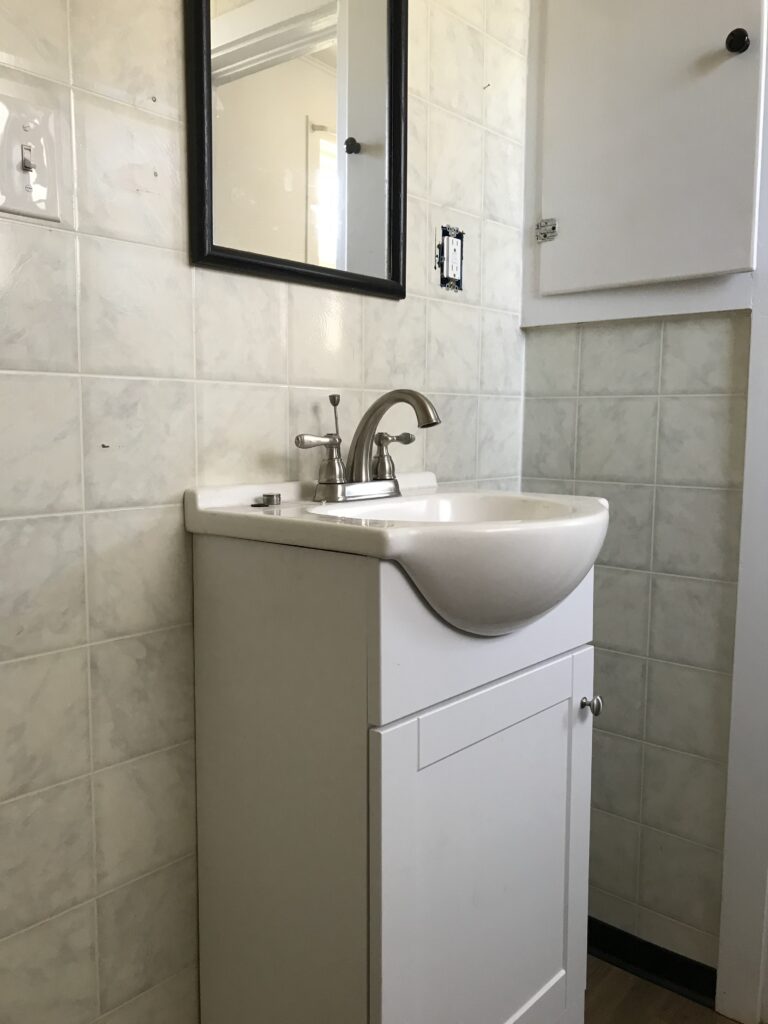
The bathroom needed a vanity. We got this one at Lowe’s and the tiny size was most critical.
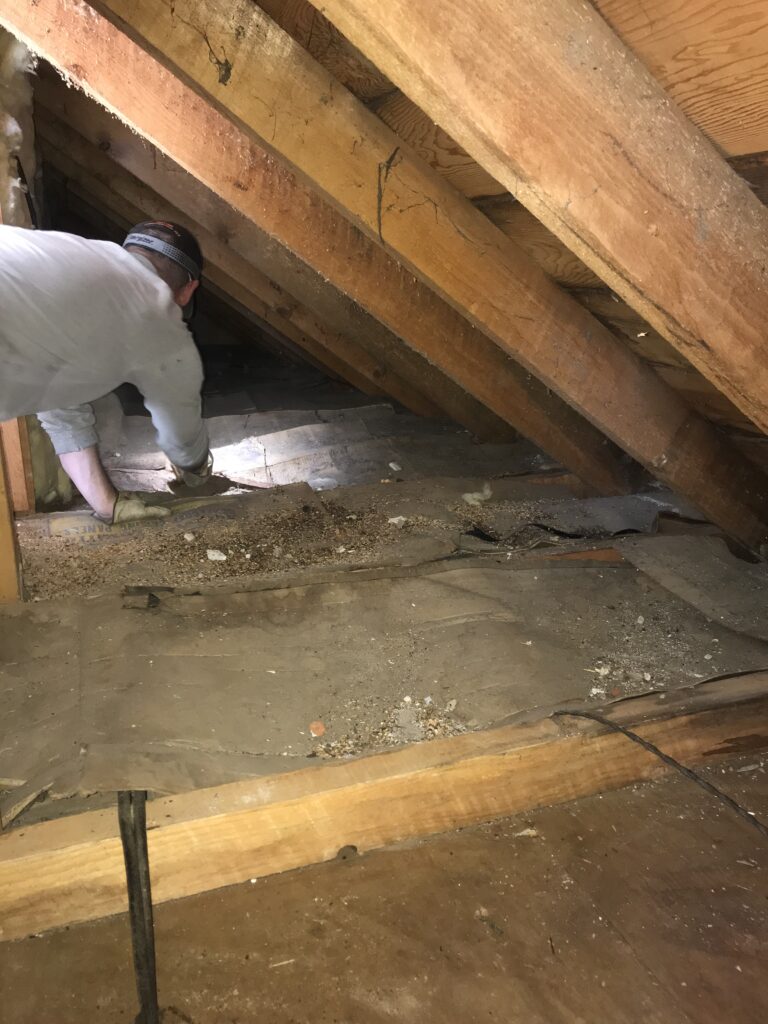
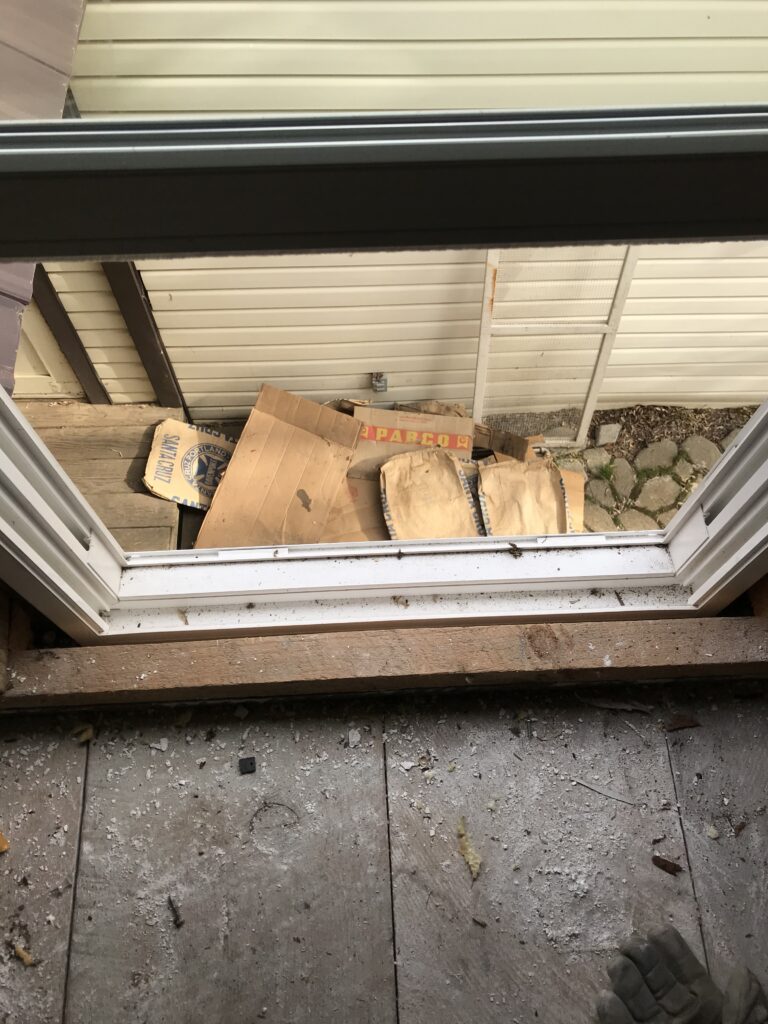
Attic crawl space

The crawl space was insulated with old feed sacks and cardboard, and had to be cleaned out before the re wiring project (more on that later). My husband and I drug filthy newspaper, cardboard, and feed sacks out of the crawl spaces and tossed them out the upstairs window. We vacuumed up decades of filth and prepared the space for my husband and our electrician to spend a lot of time in there re-wiring the whole house. 

Electrical

 My husband and our electrician (life-long family friends) did all new wiring, re-wired what needed to be re-wired, and updated all outlets. They put in several new light fixtures. There was no ground and now all outlets are up to date. They were able to work together (they were such a great team!) to get a ton done that made the electrical safer and better. Now there’s a switch at the bottom and top of the stairs, for example, to light the stairway, and a porch light off the kitchen, etc.  
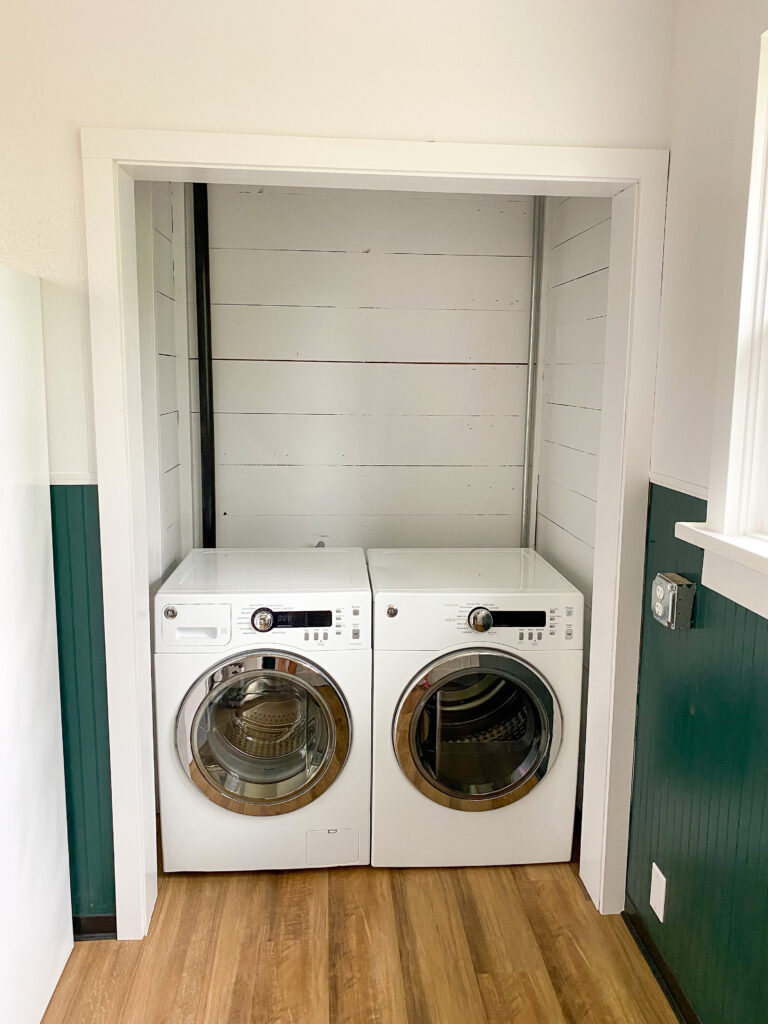
Laundry Nook 

A carpenter friend of my husband’s tore out the doorway of the pantry to create a laundry nook where we put a small capacity GE washer dryer pair on Sears Outlet. Getting a dinged up set from the outlet offset the cost of the small size. Delivery took nearly a month but for the price it seems worth it.  A great tip I got from a customer service helper was to buy items that you need to match or correspond from the same outlet. Buying from different outlet stores in different cities created multiple problems but getting the set from the same store assured they’d match, arrive the same time, etc. 

Washer and dryer were about $1200 total and my husband’s friend wouldn’t let us pay him for his work but it was a few hours of work for him to rip out the wall. 

As I write this, we’ve had about 2 months worth of renters in the space and I just had the current renter share that the dryer belt broke. This makes me unsure as to the value of going to an outlet. I have our private repair man planned to fix it asap but at this time, the jury is out on if the outlet was worth it. 

We also paid a plumber to plumb the nook as it was only a pantry before and had no plumbing. That was $600.
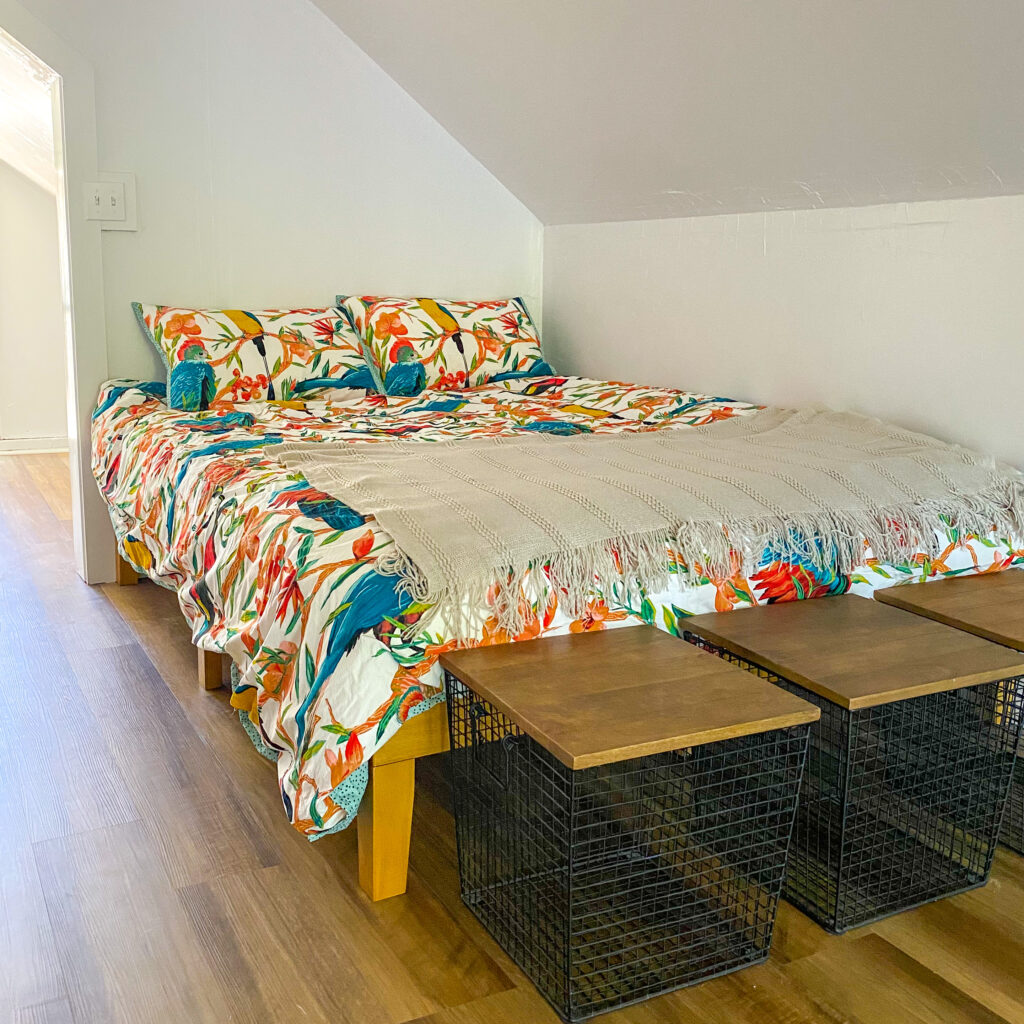
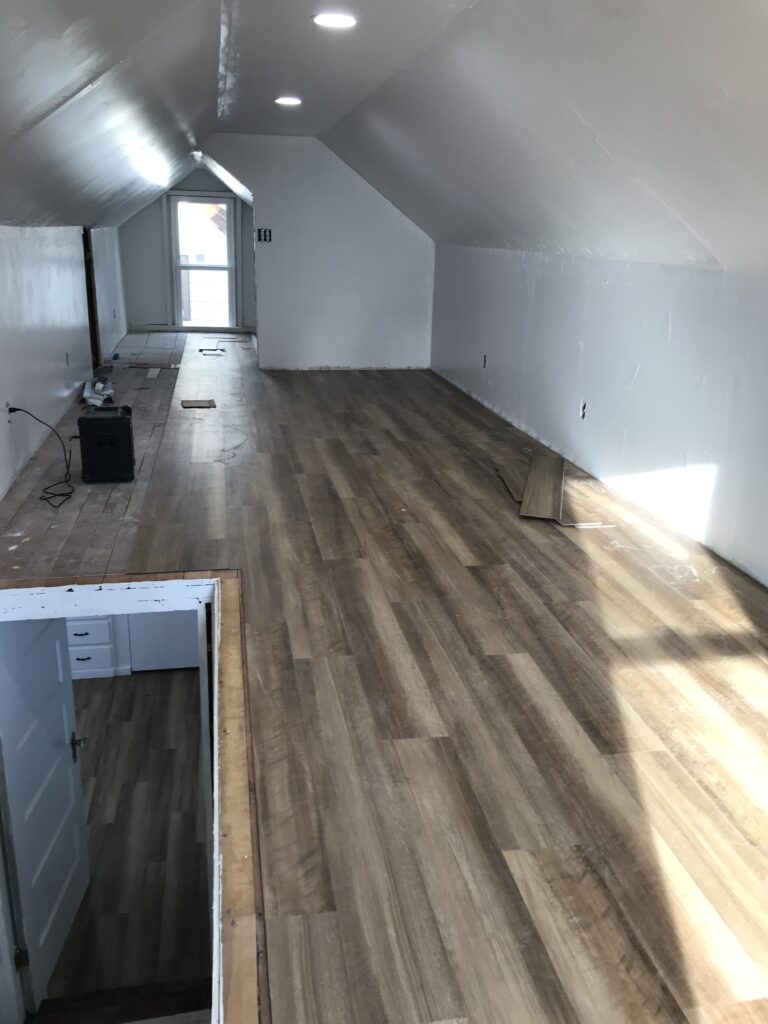
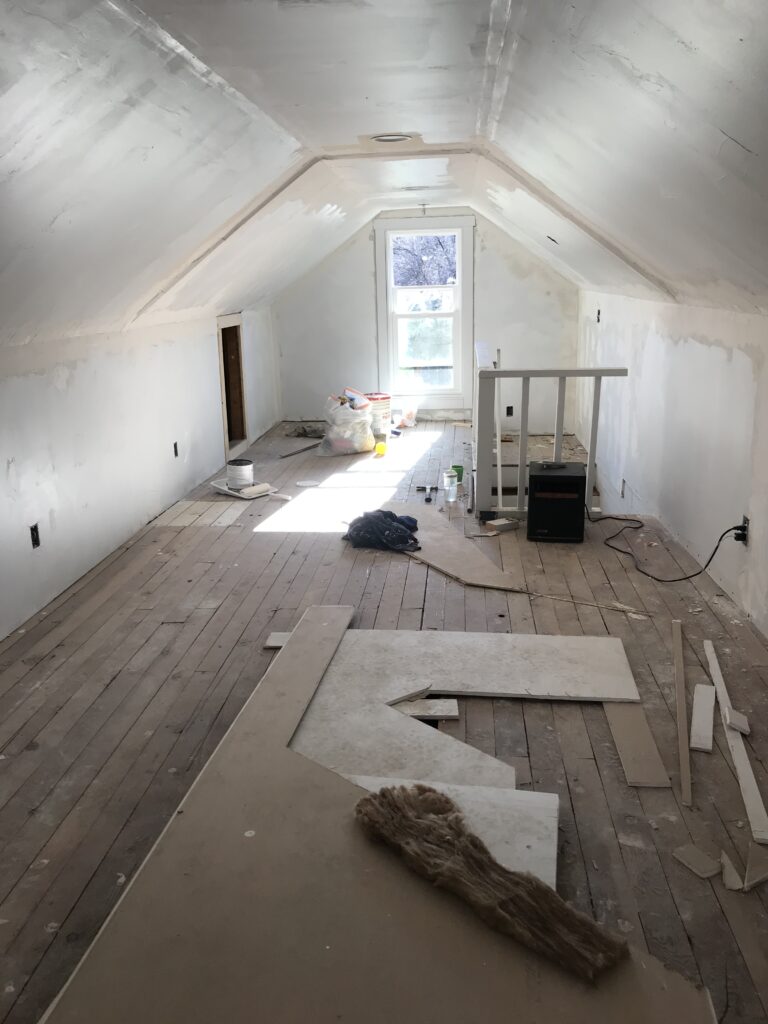
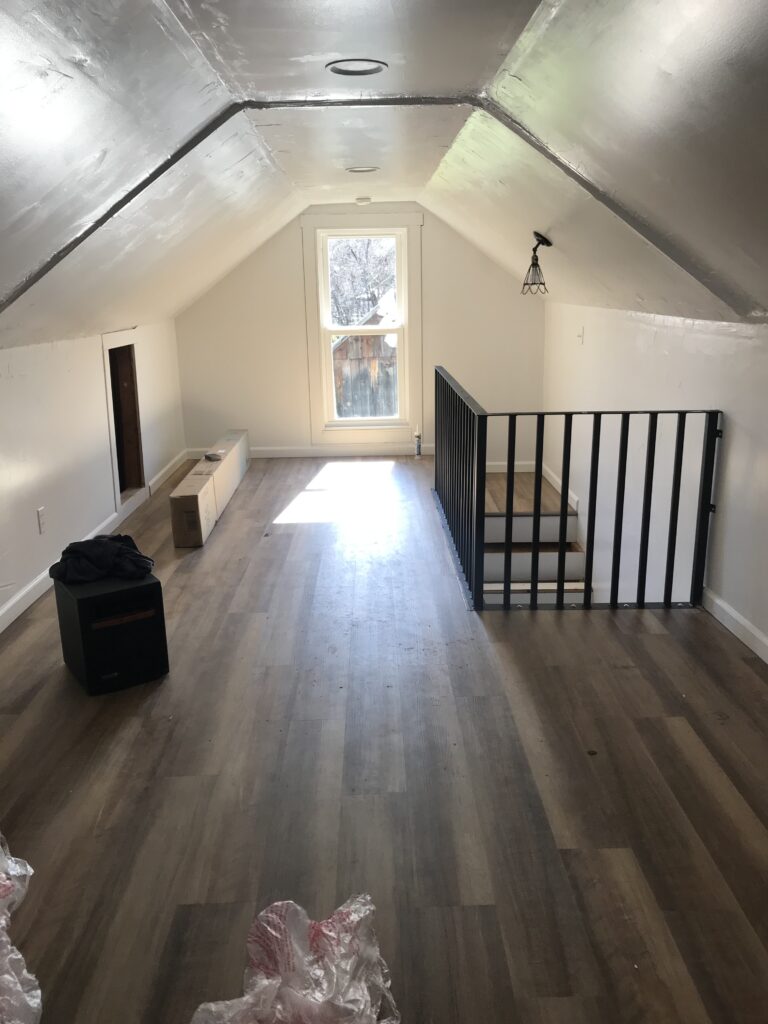
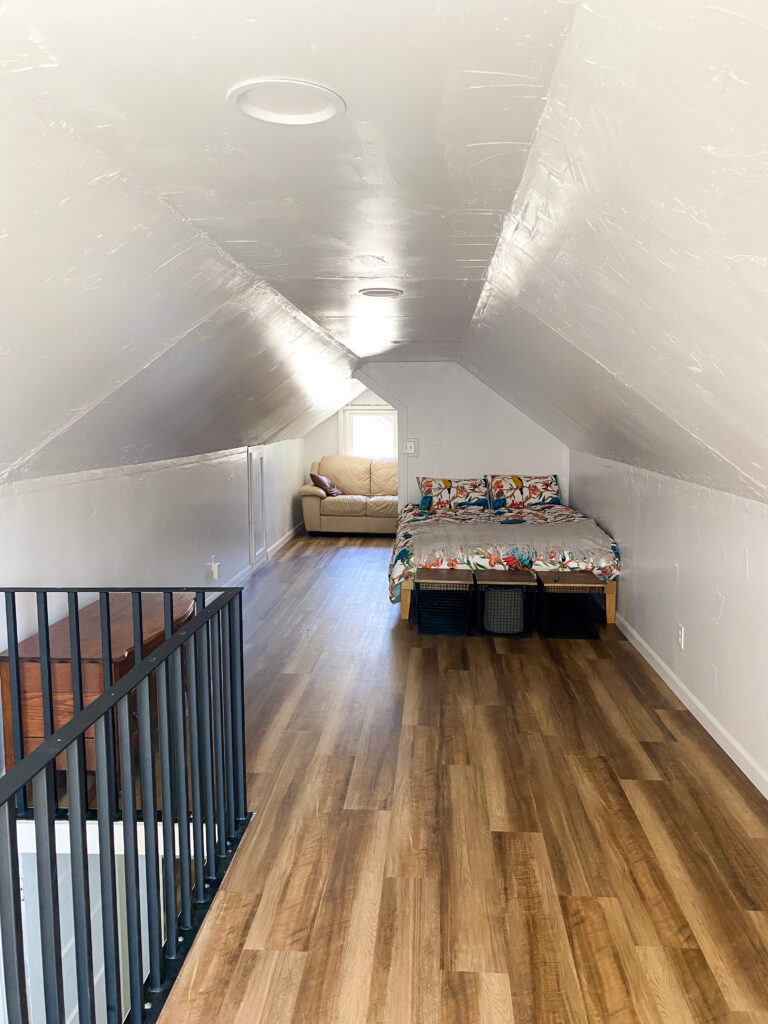
Upstairs

At first we weren’t sure if we’d refinish the upstairs at all. The floor was wood but kind of a disaster in terms of there were holes, it was majorly uneven, there was the book nook that had been kind of badly dry walled by someone in the past but never finished, and it felt initially like it would be easier to leave it unfinished. Indeed, it would have been easier. Of course, we decided to “just do it” and finish the whole space so it added 300 sq feet to the house and has been one of the best decisions of the whole project. We are so glad we did it; even though I didn’t know if we’d remain married after trying to do the drywall together lol. 
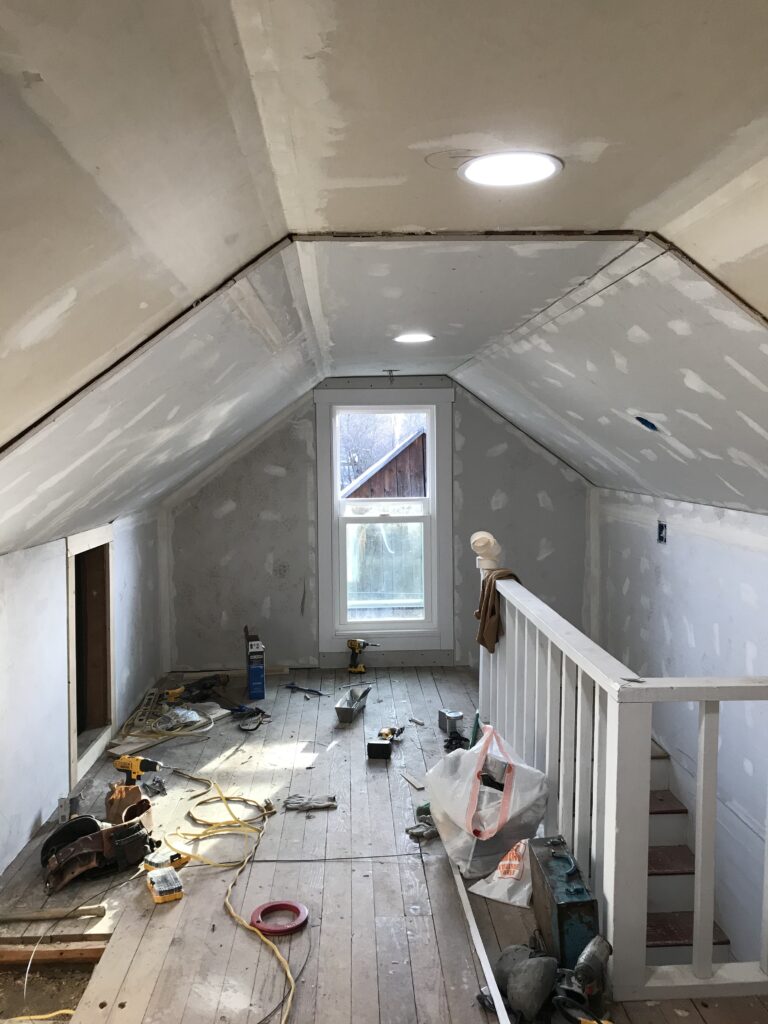
Drywall 

Initially I thought I wanted the shiplap that existed to remain but a wise man (our electrician) pointed out how drafty, dusty, spidery, and impractical that would be. My husband dry walled the whole upstairs (300 square feet) with my help and this was the worst part. The attic ceiling was tricky, it’s heavy, awkward, and my husband is a perfectionist which makes for beautiful finish work but also for very slow work. I then got a five minute tutorial from my husband’s uncle who is a drywall guy and I had to tape and texture the whole dang thing. This was also the worst part because I’m honestly not that good at it and I hated it with all my heart. At the end we decided we just won’t rent to sheetrockers. It isn’t perfect and that’s okay because the price of labor was free and it’s so dramatically better than it was before. My husband had to rebuild one window wall with OSB which took a great amount of time (see note about him being a terrible perfectionist above). Sheet rocking the stairwell was also terrible (!!!) My husband tore the stair treads off (after they’d been painted of course) to get the drywall hidden and it looks very nice.

Approximate cost to drywall the upstairs: $12 a sheet, and as this was at a stressful time of the project I don’t know how much we ultimately spent. I paid more in effort and patience than I’d like to in the future. I’m not the accountant in the family- that’s my sister. 

It was a few hundred bucks, took a week maybe, and I’m glad it is over 🙂 If we got another rental and we needed to save money, I’d probably do it again because we know how but I’d dread it. One tip I can say is those Sheetrock gloves were totally worth it; they made holding the Sheetrock for my husband so much easier; that stuff is so slippery! 

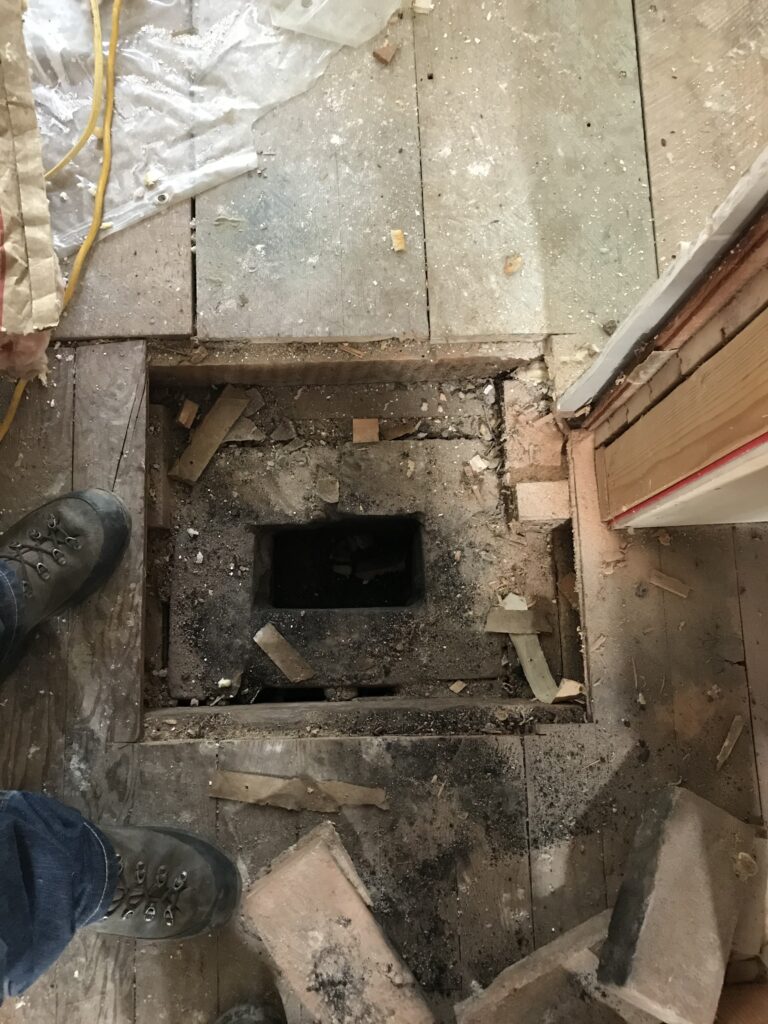
Chimney in the Floor

We found the original brick chimney in the floor of the upstairs. It was weirdly closed off from extending to the bottom floor in the small bedroom closet- it was encased in wood (closet ceiling and upstairs flooring) rather than removed and I thought it was worth trying to remove the bricks. This was something I’d work on while waiting on Ruben to need my help, waiting on paint to dry, etc. I used a hammer to gently tap the bricks loose and haul them outside. In hindsight, took a lot of time and I guess I’ll use those rad old bricks somewhere. 
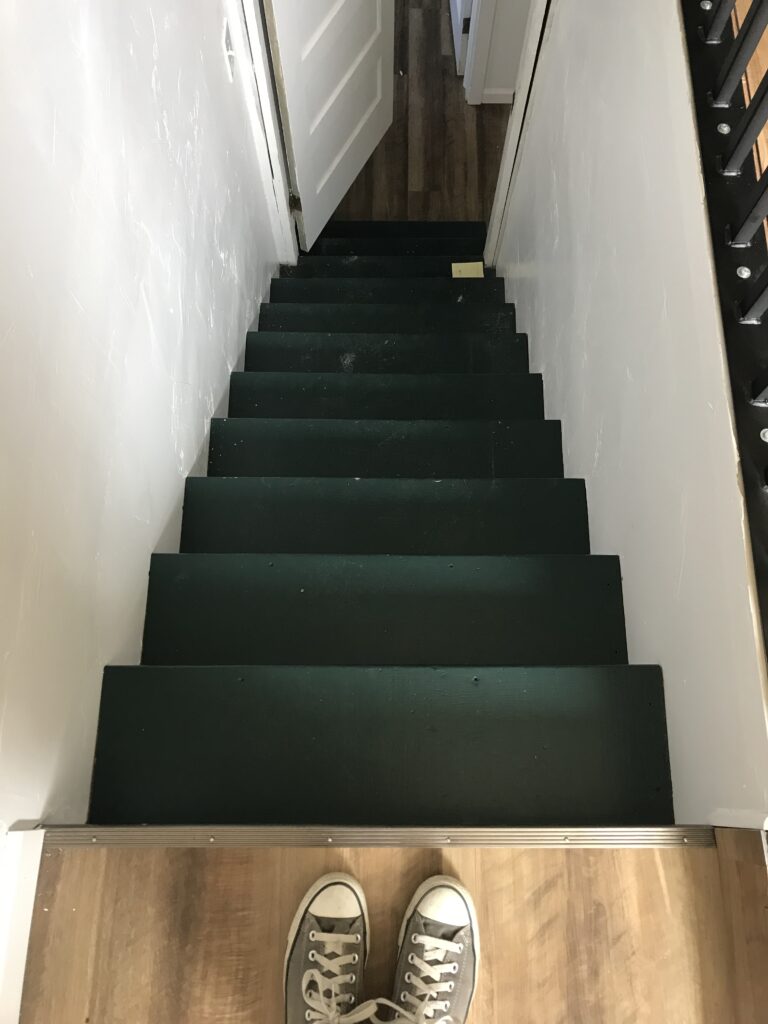
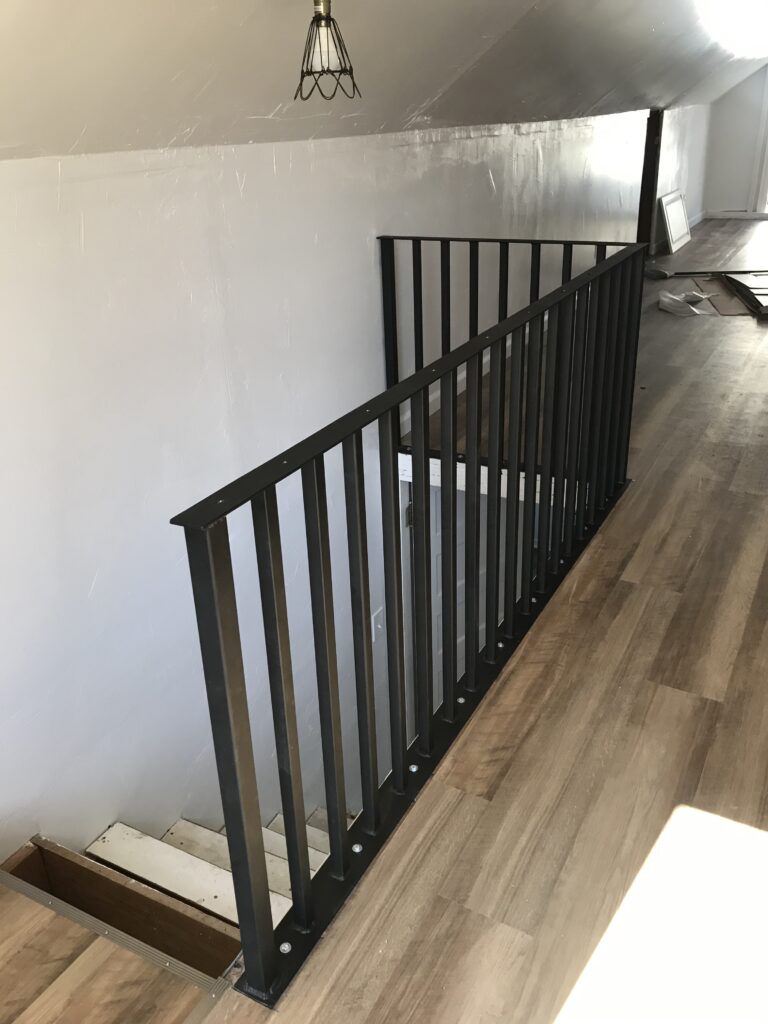
Stair Railing

We had a local auto body shop fabricate a railing for around the top of the stairs. I think the original was little more than painted 2x4s. It’s beautiful, hell for stout, and was money well spent.  Approximate cost: $900
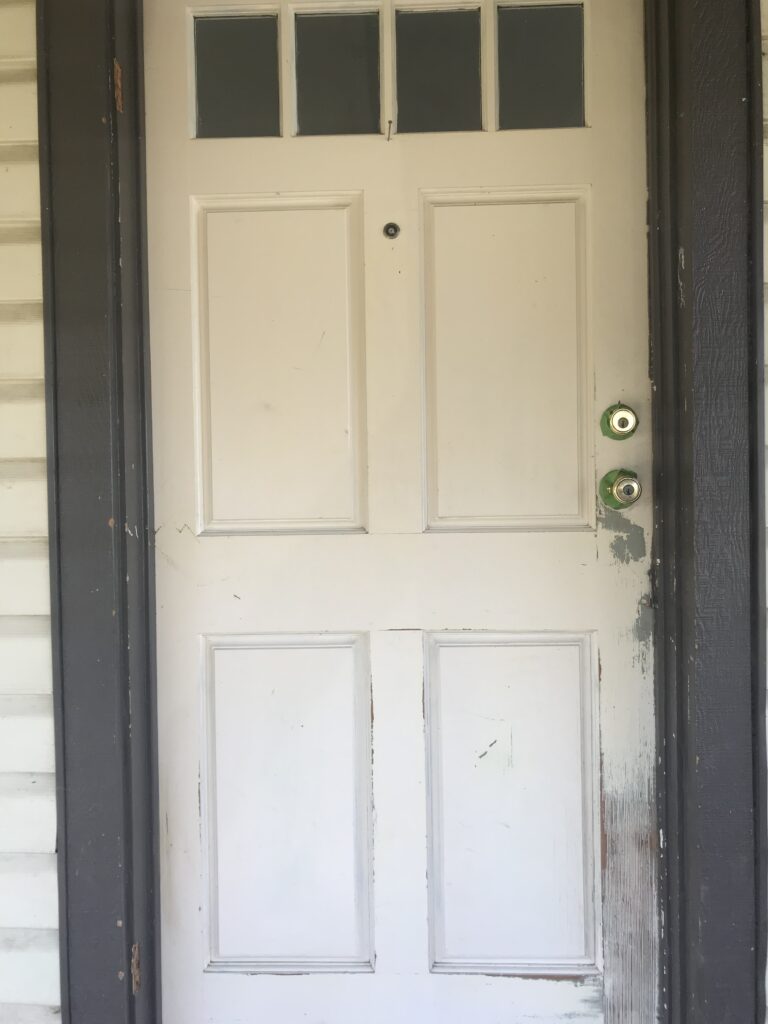
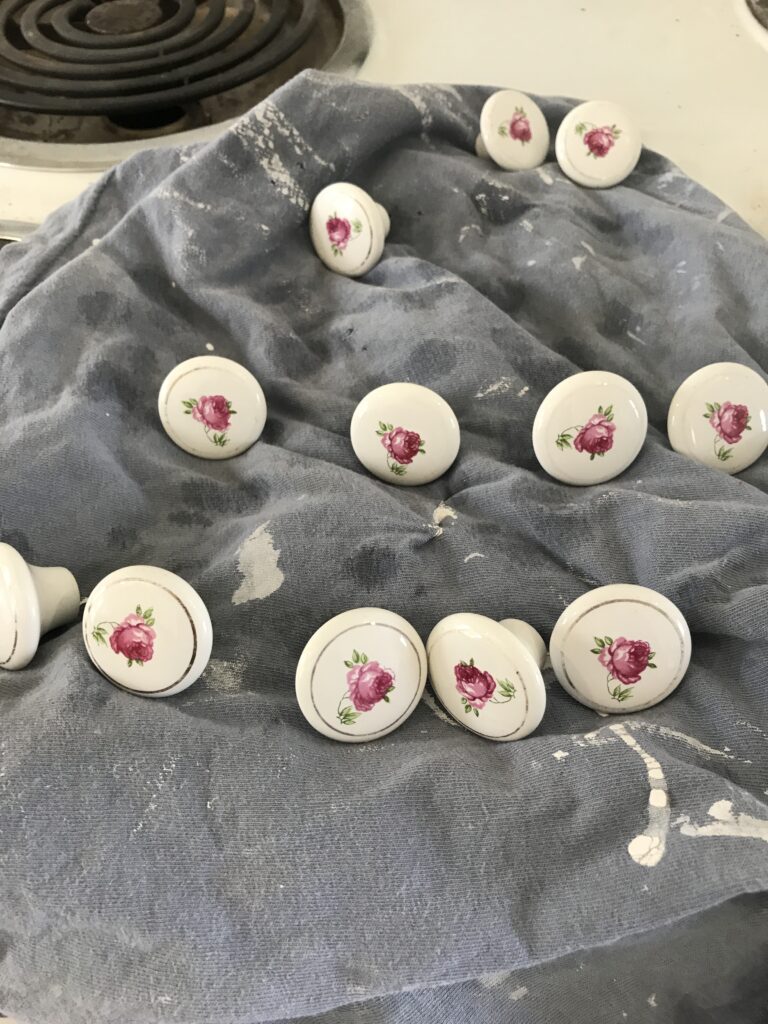
Door knobs

Some of the existing doors had knobs, some not, and most needed to be replaced. We found the cheapest knobs that could be locked at Van Dyke’s Restorers and they were $100 each. Our contractor friend (so many of them!) informed Ruben that either we spend $100 on the handles or $200 on all new doors that come with handles. It was a difficult job because I couldn’t do it, Ruben was back to work by the time we found these knobs, and we ultimately paid our contractor friend to finish all the things that weren’t done when Ruben went back to work and he was amazing. It took him minutes to do what we would have squabled about for hours. 

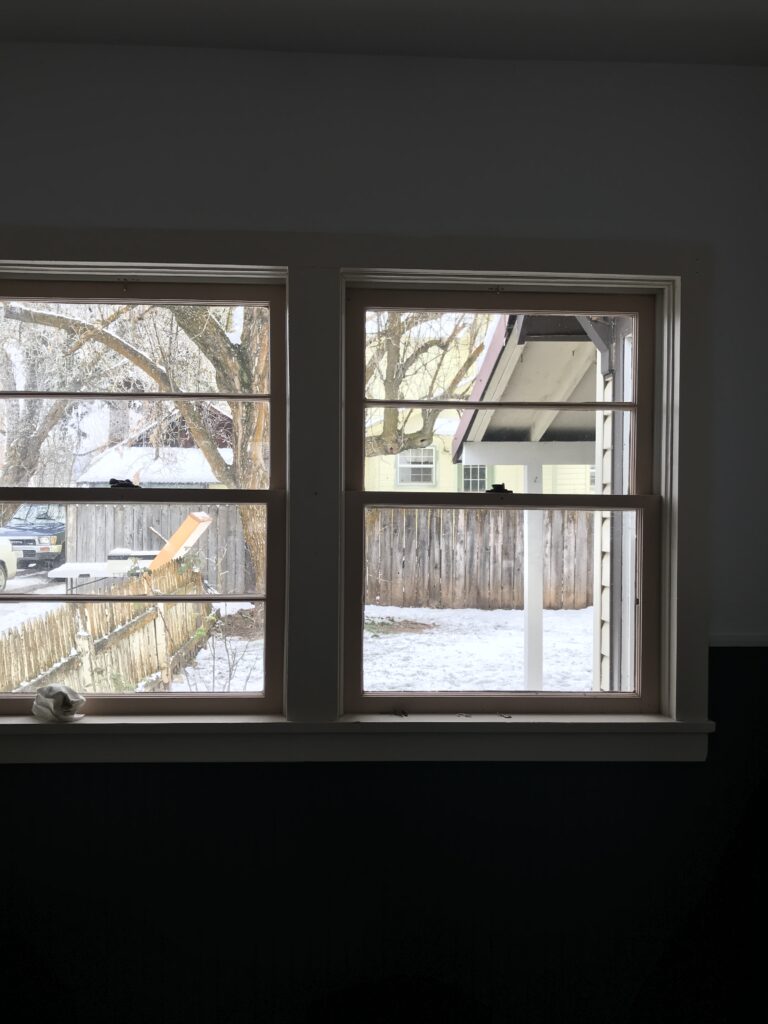
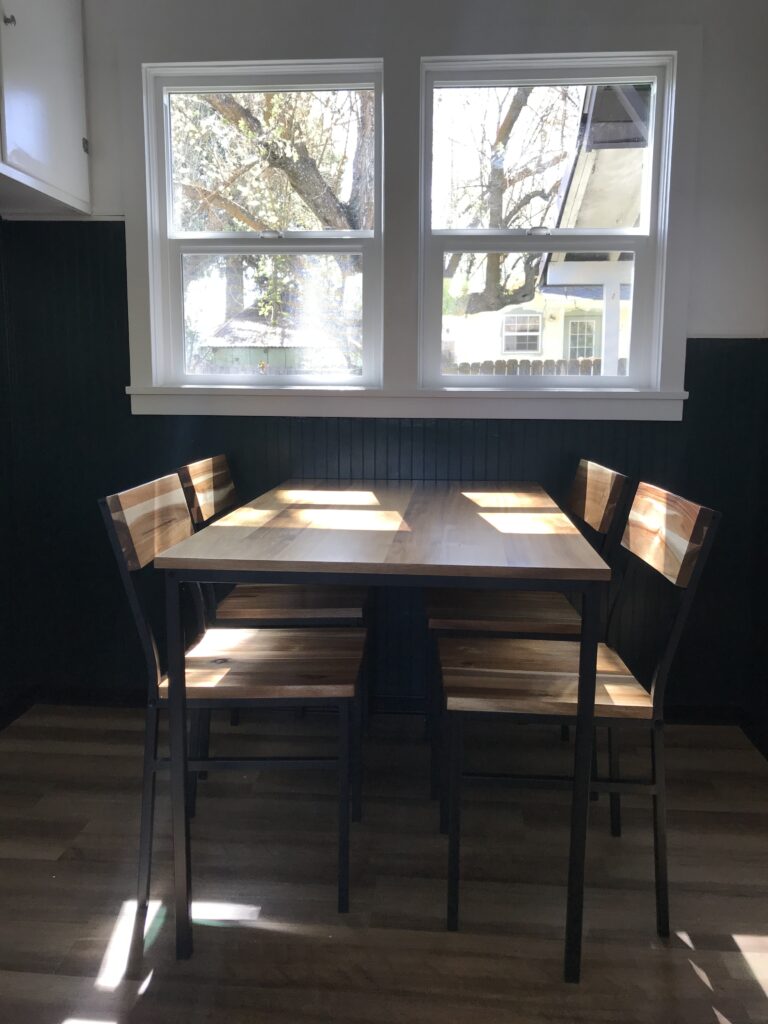
Windows – 16 windows- double pane vinyl 

Our window guy Craig Hubbard (you’re not going to find a window guy with a better sense of humor I can guarantee) said that replacing old windows is like getting your teeth whitened and straightened and I think that’s a fantastic metaphor. The windows in the house were single pane double hung windows that had no screens and many were upside down so they’d smash your finger when you tried to open them and some were painted shut. We love the new windows and were so glad it was an easy fix. The cost was about $6000 for the windows and installation and we would do this again in a heartbeat. 

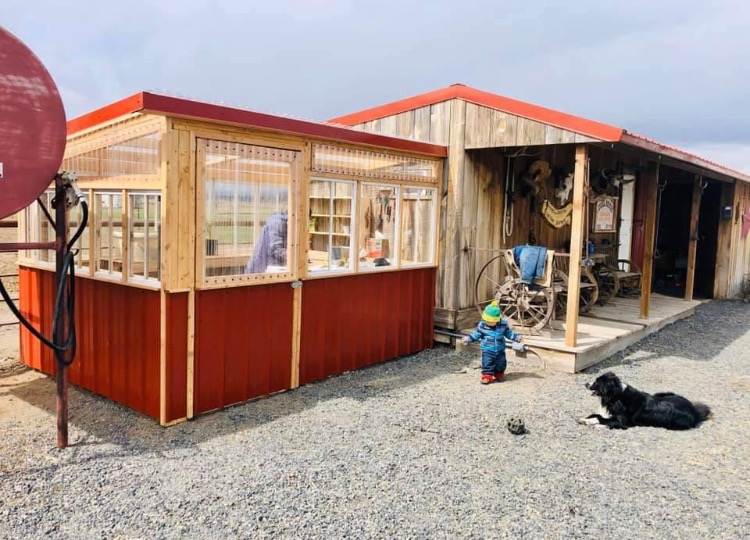
Want to see what happened to the 16 old windows? My brother in law built my sister a beautiful greenhouse with them. 

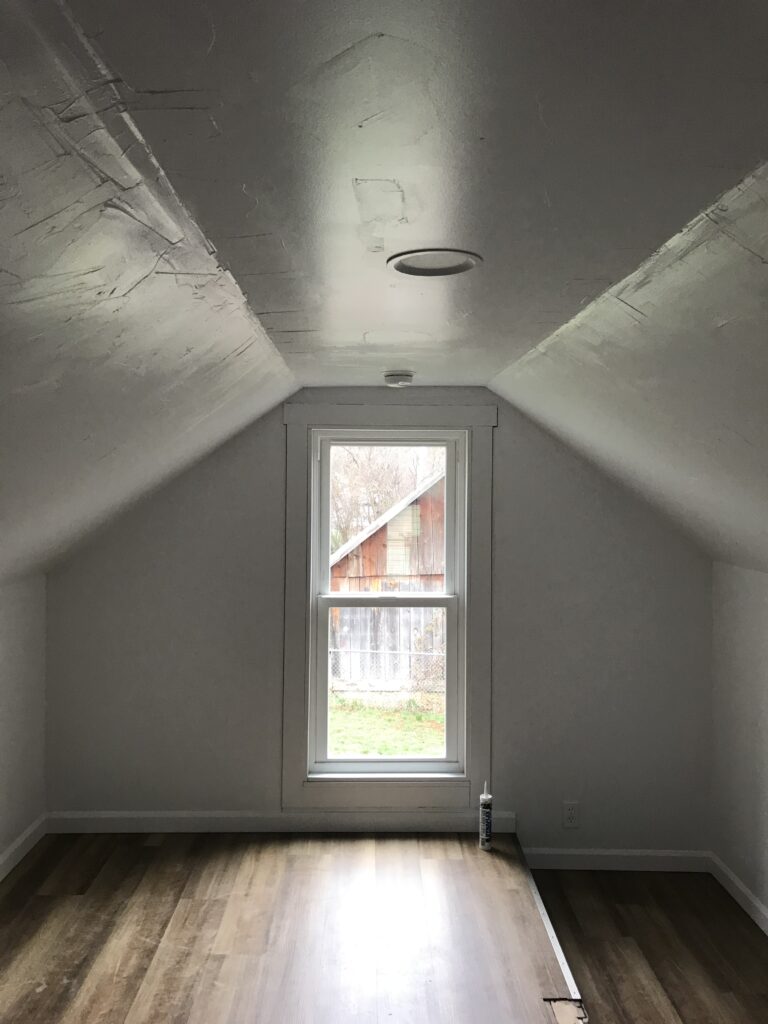
The Weird Upstairs Window

It extends 5 inches BELOW the floor line. I couldn’t tell you why it does, but our window guy explained the cheapest and best thing to do was to replace the window rather than try to build more wall. I think he was right. 
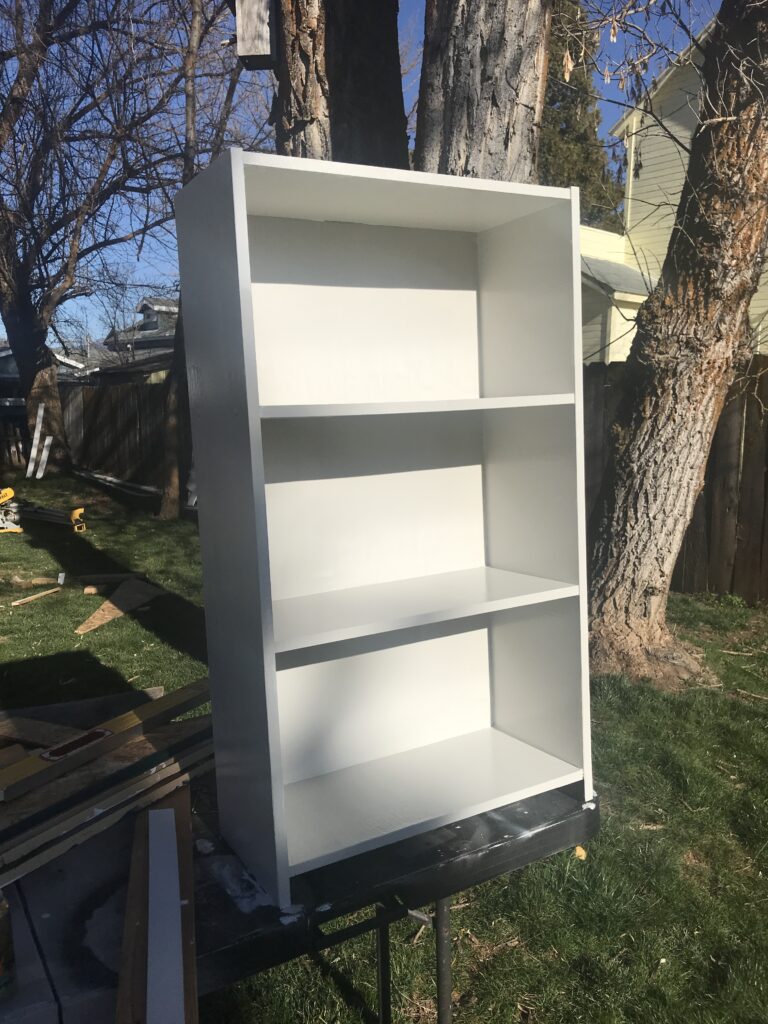
The Book Nook

This nook is probably 5 feet 6 inches at the peak and we kicked around lots of fun ideas for this space including putting a hammock in there. However, when my mother in law gifted me her used, tan leather loveseat and it fit like a glove in front of the weird window, making it safer and blocking the window trim that could only look moderately normal since the window goes BELOW the floor, it became the Book Nook. I got a shelf at the thrift store, painted it a light grey (it was a veneered Walmart style cheap bookshelf) and filled it with a rainbow of Reader’s Digests. There’s a throw blanket and pillows and it’s perfect now. 

Paint 

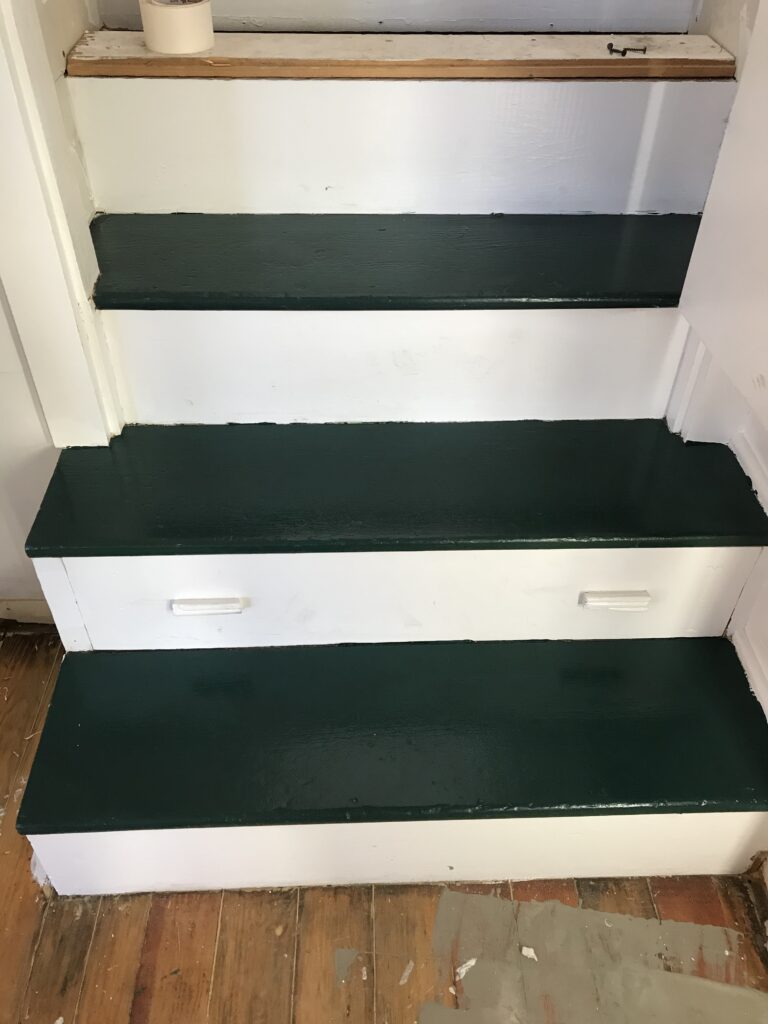
I bet we painted 10+ gallons of PNG Paint (our lumber yard brand) Snowbank White in this 1000 square foot house. I try to do projects in a way that feels less overwhelming and for some reason going one or two gallons at a time felt more achievable than getting giant 5 gallon buckets. I started in the linen closet room because it was the smallest and felt the least overwhelming. Deciding on the white was easy; it’s the color my dear friend Emily helped me choose for my living, bath, and kitchen in our home. It’s a bright white and we did semi-gloss so it is easy to clean. 

I agonized over the decision of the paint color of the beadboard paneling in the kitchen and tested several colors and decided on Nightwatch (a dark green) and I love it. It really fits the mountain feel of the house and used it on the stair tread, and in the linen closet room beadboard. When I showed my brother the stairs, he immediately said they looked like my godmother’s signature paint color and he was absolutely right. It’s a perfect Julie green 🙂 Each gallon of paint was interior semi gloss and was about $35. It was a part of the project that I could do by myself, fairly well, and it had a huge impact for not a ton of money. 

What they say is true: using good quality paint and brushes/rollers MATTERS. It makes a mediocre painter seem much better. My most important advice I could share is this: To paint faster, paint more slowly. This was a lesson it took me a long time to learn but it’s the Gospel truth. You get DONE much sooner by going slowly and doing a better job. I painted every surface- the inside of the closets (floor and ceiling, even) kitchen cupboards, and essentially every other surface you can think of. Painting the inside of the cabinets and drawers seemed silly at first but it makes them feel fresh and clean (and indeed, easier to clean later) and I feel like painting the inside of cupboards and cabinets is an often-skipped step. Paint them! For the kitchen cabinets my mother in law helped me (her whole family has so many really good painters, she and Ruben’s grandma helped!) and we left the doors on the cabinets- they are in good condition but my husband Ruben was worried about taking the doors off and on and how well they’d go back together as they fairly old and not the highest quality. I’m so glad we did this- I gave my mother in law a tiny brush and she painted around all the hinges and we did the whole set of cabinets in a few days. 

Front Door

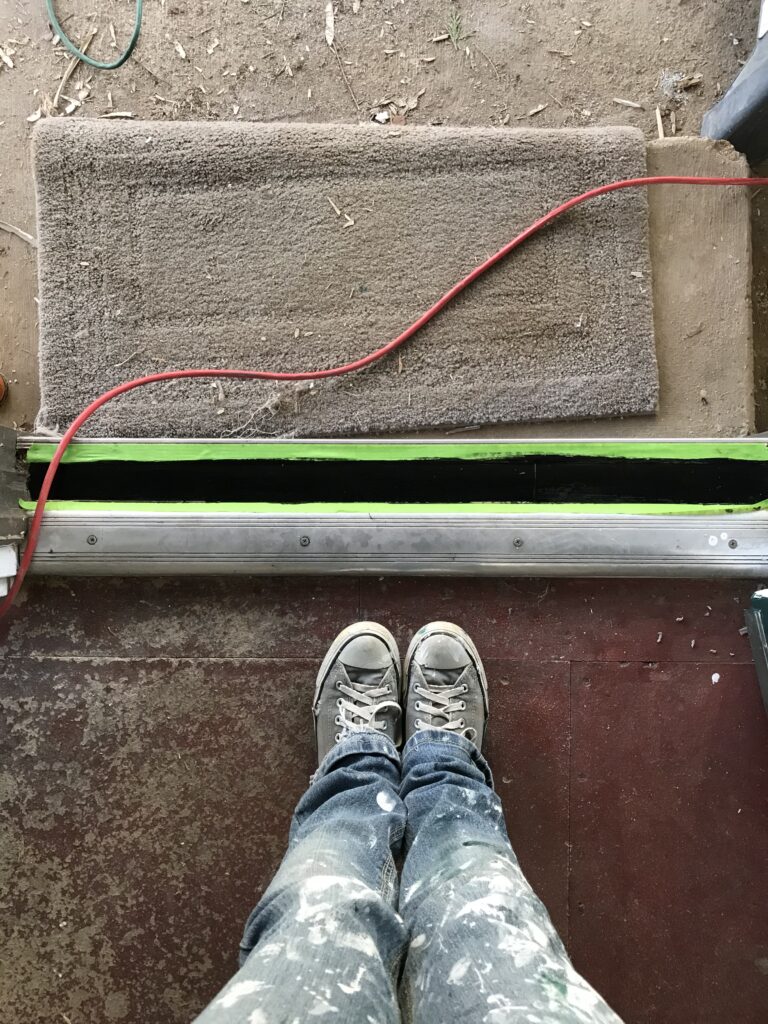
It was a standard white before and I wanted it to pop a little more. I painted it Nightwatch green and considered getting a copper kickplate for the bottom but felt like they were pretty expensive for something that’s only pretty. Maybe someday! 

I also painted the strip of linoleum left over in the door threshold with black enamel which I had leftover from some project. It’s super hard and shiny and it might look kinda funky but it definitely was better than the random linoleum strip that was there. I did this for the kitchen door threshold as well.

Light fixture painting

Several light fixtures were dated so we primed and painted them black. This was a cheap, easy fix that was something I could do while other paint was drying, while we were deciding on all the other “big” issues like flooring,  without much money at all being spent at all. I spray primed and painted several for probably $10. 

Magnetic stove shelf: I got this shelf from this Etsy shop and it was such a good buy. It’s perfectly sized for the tiny space and gives a space for a spoon and the salt and pepper when cooking. 

Garbage disposal 

This was a small thing but I was glad to add to the kitchen. We got a Waste King with a colossal capacity (I didn’t realize exactly how big it was until it arrived). 

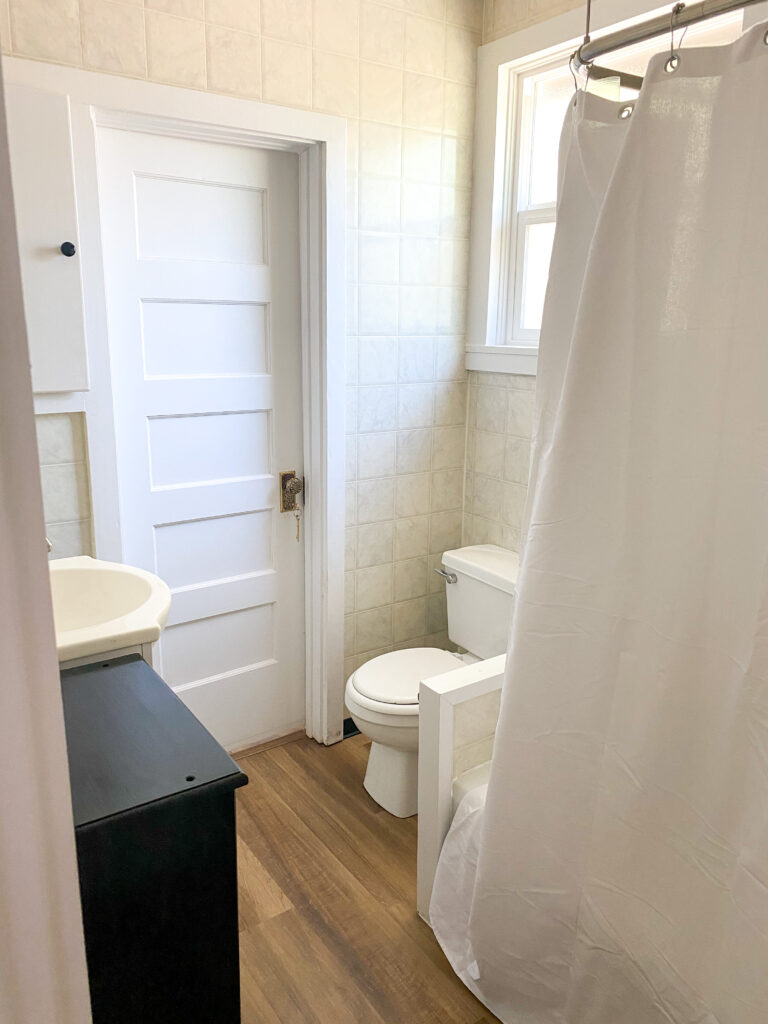
Bathroom sink and vanity: this was a little over $100 from The Home Depot. My husband picked it out on a whim and because of the tiny size it had to be, there wasn’t much to choose from. It’s a perfect size and the brushed nickel fixture matches the curtain rod. 

L shaped shower curtain rod

$100 from Build.com – excellent customer service and this was the correct size for our existing tub and shower. 

  • Rental House Before and After

Furnishings

I may write a separate post about how I’m listing this rental but the short version is it is a furnished rental. This is where I got the furnishings. 

Sheets: Costco

Mattresses: Linenspa brand- Amazon

Pillows: Costco 

Beds (upstairs and large bedroom) Wayfair

Light fixtures in kitchen, stairwell, small bedroom: Wayfair 

Small bedroom twin bed: Family bed painted by Pioneer Autobody 

Duvets, throw blankets, kitchen towels, shower curtains, blender, : all used from Poshmark. I set a limit of $15 on most items and didn’t spend over that. I love Poshmark because they have an offer feature that’s easy for the buyer and not annoying for the seller. I just offered (keeping in mind the fixed $7 shipping) and if the seller didn’t accept, I moved to the next item in the search. Search is super easy on Poshmark and made it so easy to find what I wanted. If you want to join Poshmark, sign up with my code JENNY_GOMES to get $10 off your first order. It’s my favorite way to get used things online.

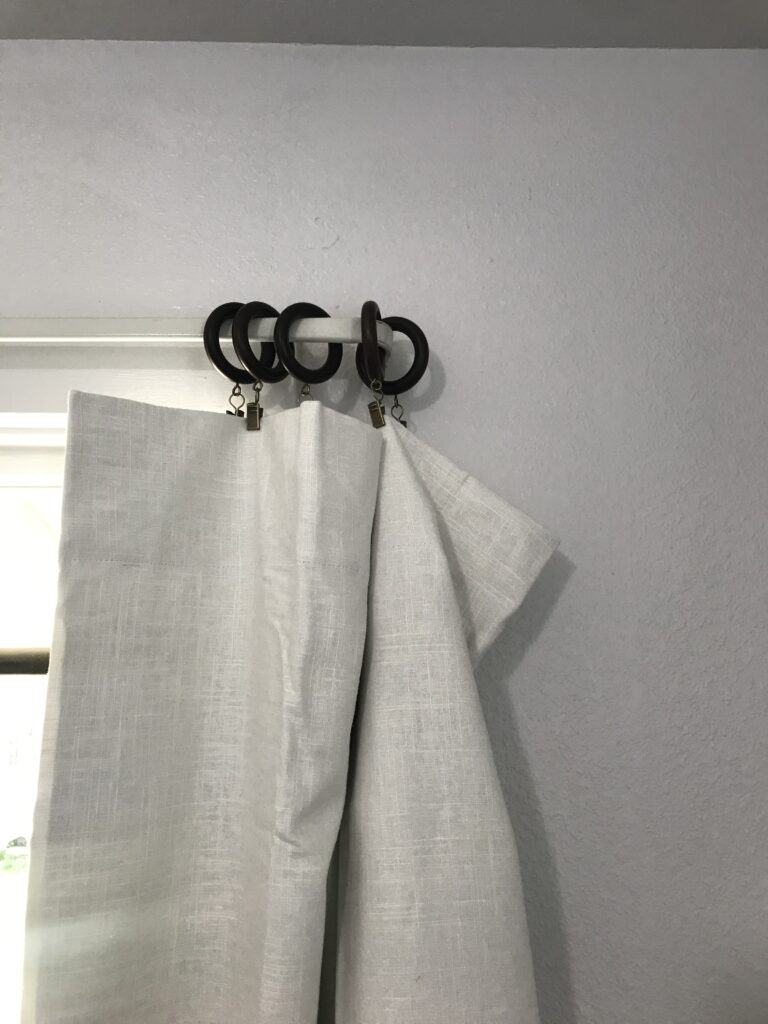
Curtains: JCPenney linen-look blackout – I have these in my living room and love them. 

Green leather loveseat: Yard sale $75 totally worth it 

Tan leather loveseat upstairs in the book nook: gifted from my MIL

Short dresser upstairs: thrifted and refinished $40 

Sheer curtains for living room: thrifted $2 a panel. Guys. My local thrift store is the BEST and I bet yours is too. SHOP THRIFT STORES. There’s GOOD stuff there. It was my FIRST place to go for any furnishing. It doesn’t hurt to ask if they have a light fixture of a specific size, or a table of X dimensions. I got so many things there and gave them new life with a thorough vacuuming and a little stain. I also got the curtain rings there too.

Dining table and chairs: Wayfair. I love their super specific search function. I could search for the exact size I wanted. It had to fit both under the window, or nestled into the wall, AND under the telephone nook. I searched our local thrift store and Facebook market and ended up spending $200 on the table plus the 4 chairs. Bonus, they look so sharp with the floors. They are really pretty I think. 

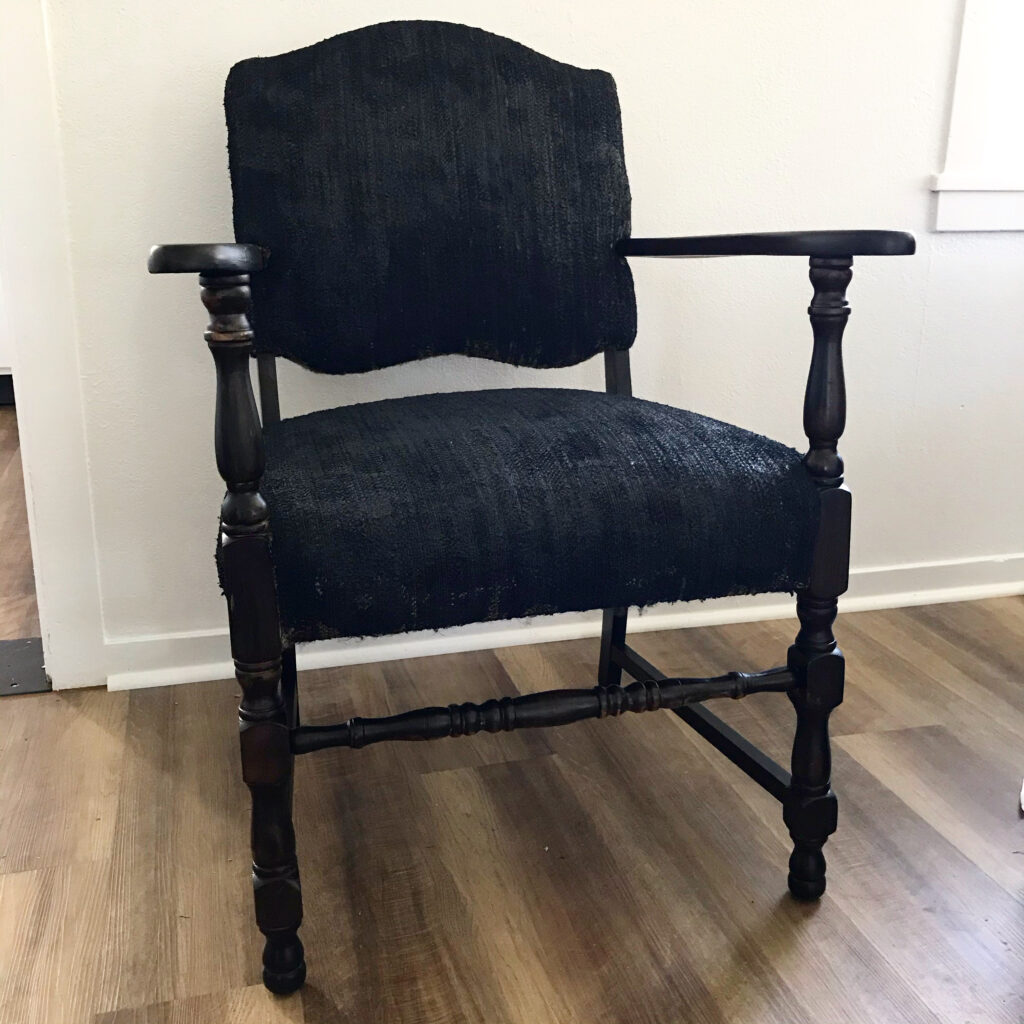
2 upholstered chairs: $40 total, painted with an exorbitant amount of fabric paint and wood stained with Varathane stain in Ebony. If I did this again, I’d search for another way to buy the paint than during a quarantine and via Amazon. I needed so much more paint than I realized. I think I needed nearly 10 bottles of 4 ounce paint. The result was not that soft, but fantastic looking black. It was less money and time than re-upholsterering and I love the way they look. 

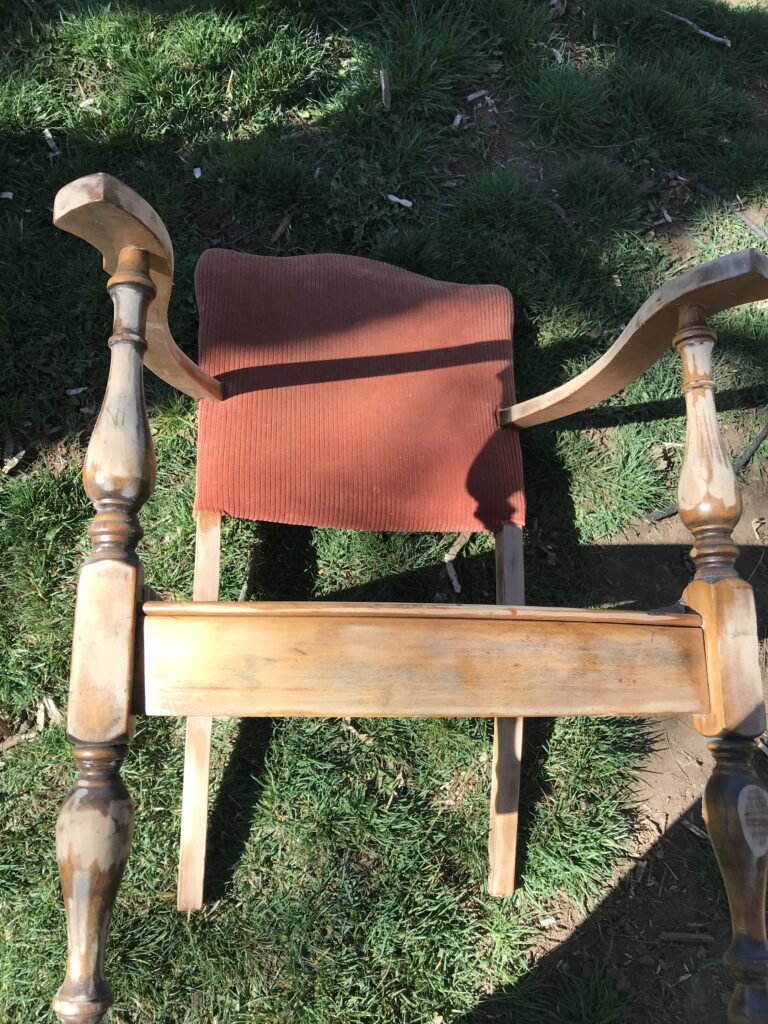
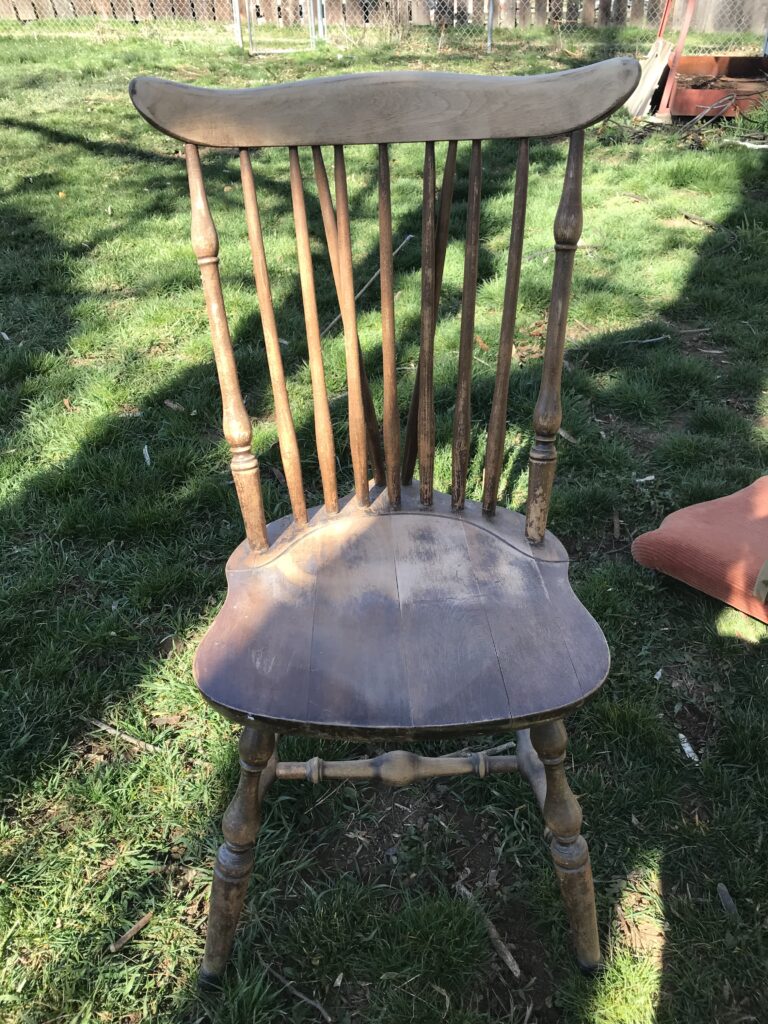
2 wooden chairs: thrifted – $20 total -Sanded both, stained one with the same single can of Varathane Ebony stain. 

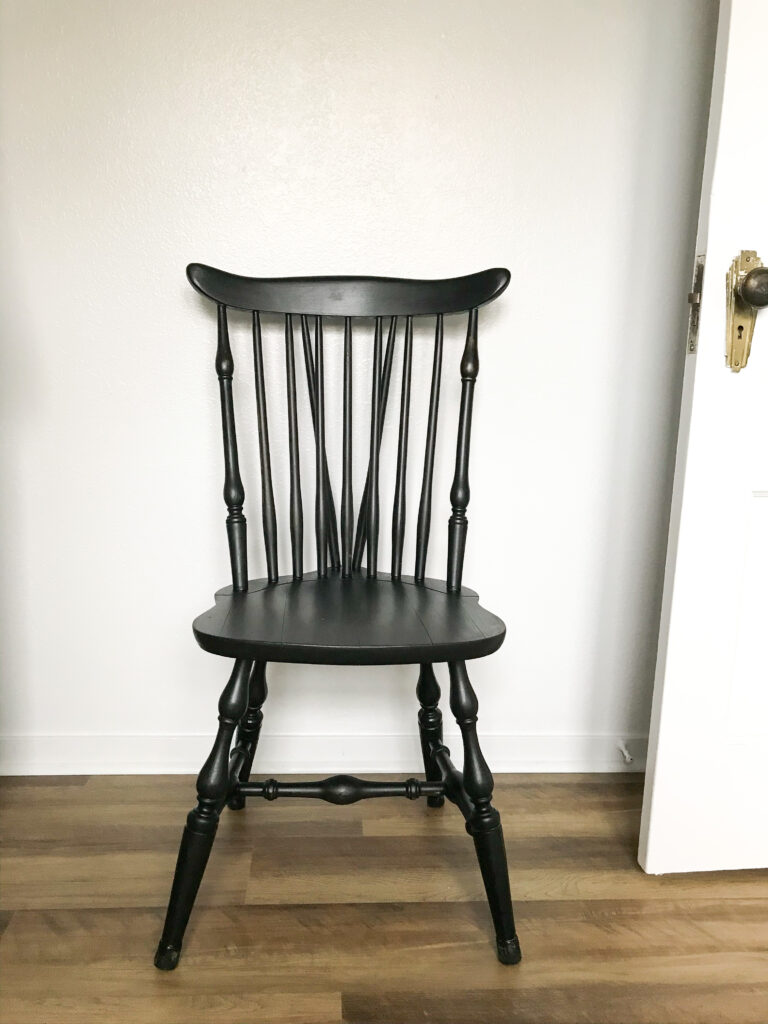
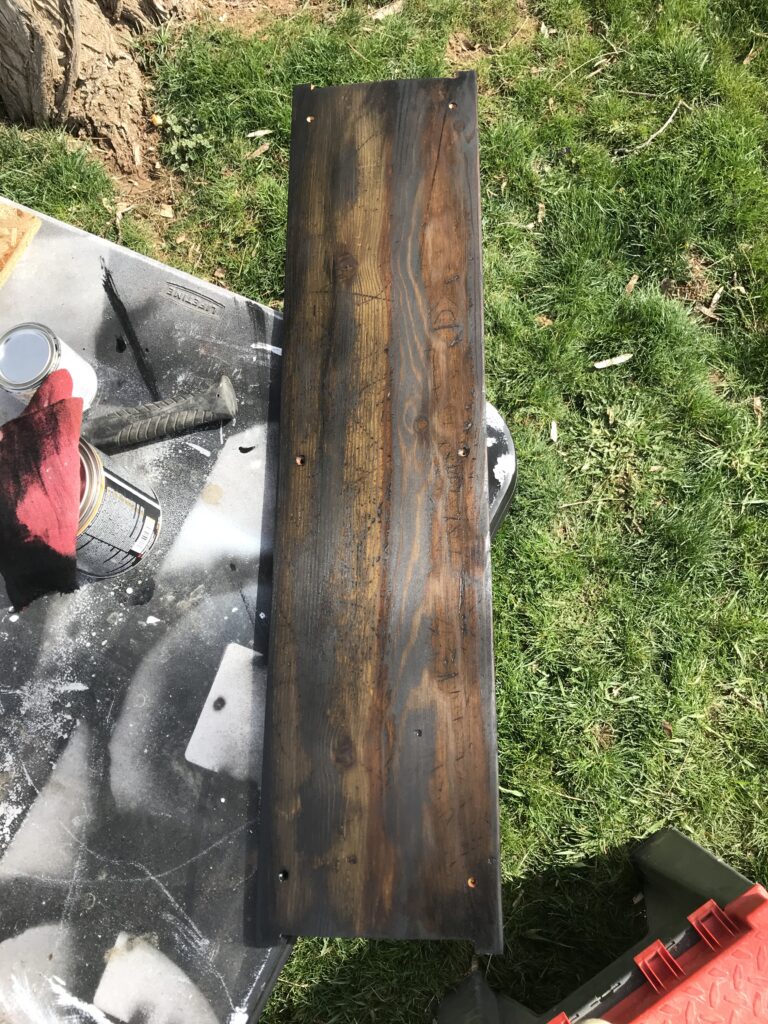
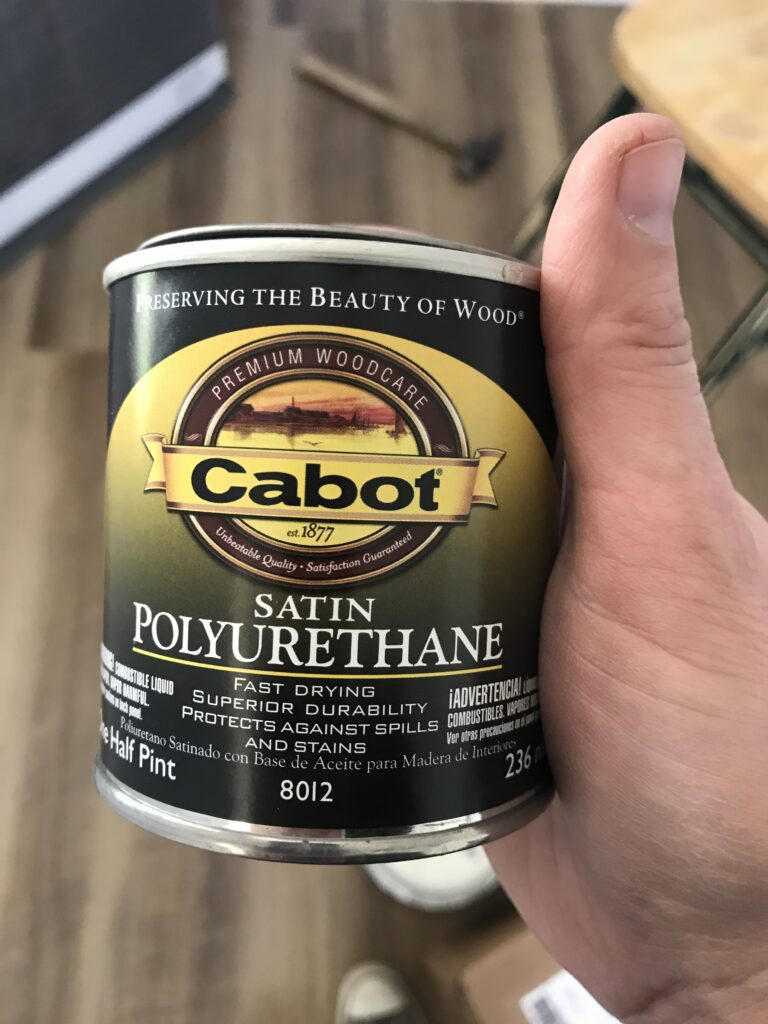
I can’t say enough about staining furniture rather than painting it. I’m a mediocre painter at best and I think that stain is SO much more forgiving than paint, has a dramatic effect easily, and is buildable (you can add or take away color as you go). I topped most of the things I stained black with clear polyurethane (I used a cheap foam brush) and just let it dry for several days. I especially loved how the black stain instantly made a ho-hum piece of furniture stand out. I also stained the threshold going from living to kitchen with the black to coordinate with the flooring better. 

Various end tables, bench by the doorway, the linen closet dresser: my good pal Hailey. She was moving and sold me a ton of things for next to nothing, God bless her. 

The sander I used for everything: a random orbital sander. Please note that I know nothing about wood working BUT I made $10 thrift store items look like $50 with this sander and $5 in stain. First use rough (80 grit) sandpaper, then fine (120) and stain. So easy! If you’re going to refinish great grandma’s priceless dining table, ask someone else. If you want to redo a yard sale score, do as I did. 

Cleaning supplies for the house including mop, kitchen and window cloths, etc: Norwex. It’s super high quality microfiber and I love it. 

The Side Yard

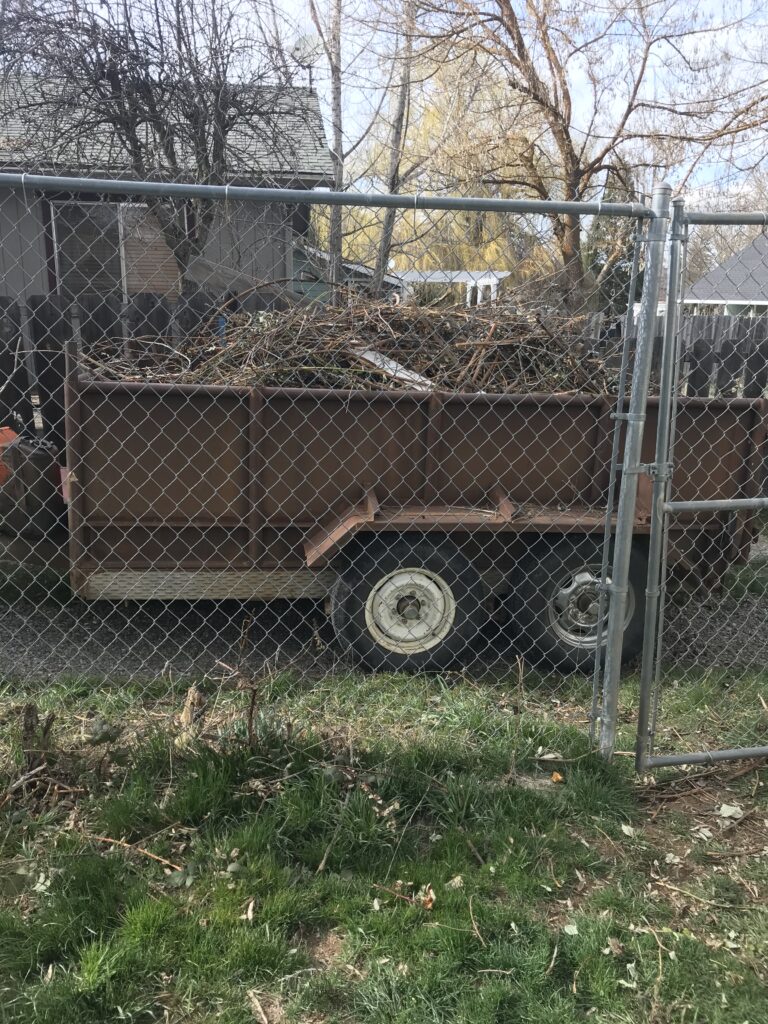
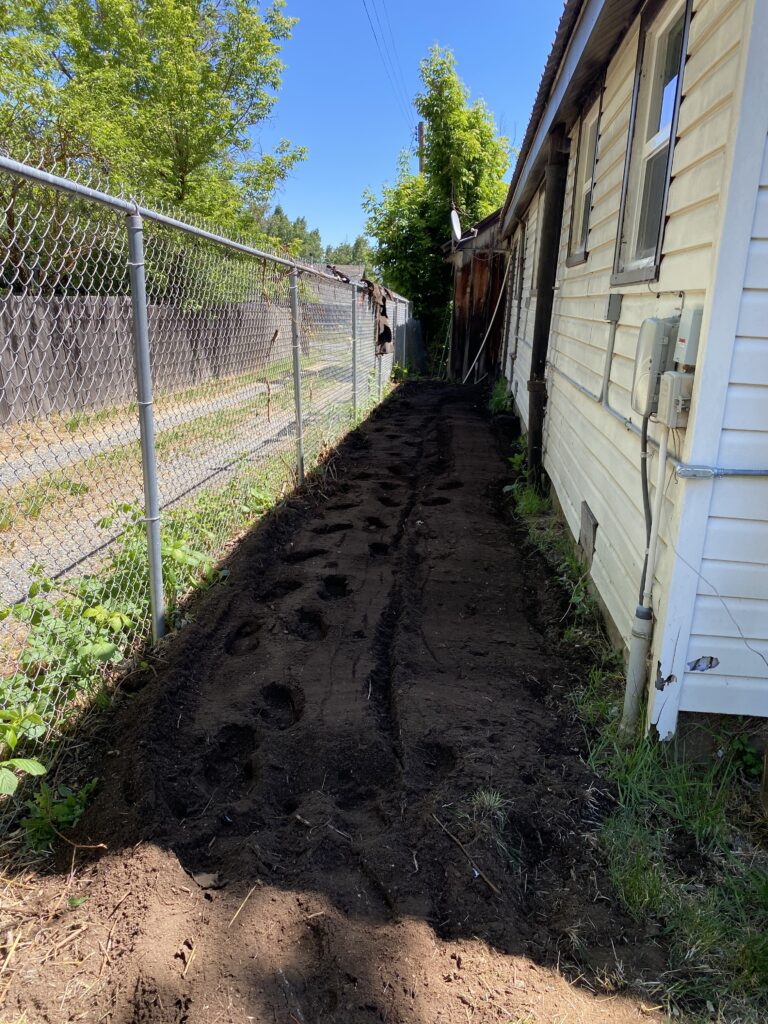
The front yard was in good shape and the back side yard was a total jungle. It was completely overgrown with blackberry vines. It felt vaguely creepy because you couldn’t see from one end to the other and and it was completely unusable. During my breaks from the drudgery that was drywall, I clipped every damn vine. I hauled them into piles and later, I asked a friend of my brother’s to rototill the side yard. The rototiller made it so smooth and perfect and deterred regrowth of the blackberry jungle for at least a bit. I really thought so long about a fantastic set of plants to include but in reality, the most sensible choice is grass. At this time, I haven’t planted any yet but hope to soon. 

As we don’t live right next door to the house nor do we have a yard of our own (lots of practical reasons why, but unusual I know!) we decided to hire a landscape pro to mow twice a month and I’m so, so glad we did. He does a great job, hasn’t been late or missed a day yet, and it takes a chore off my plate. 

Microwave cabinet

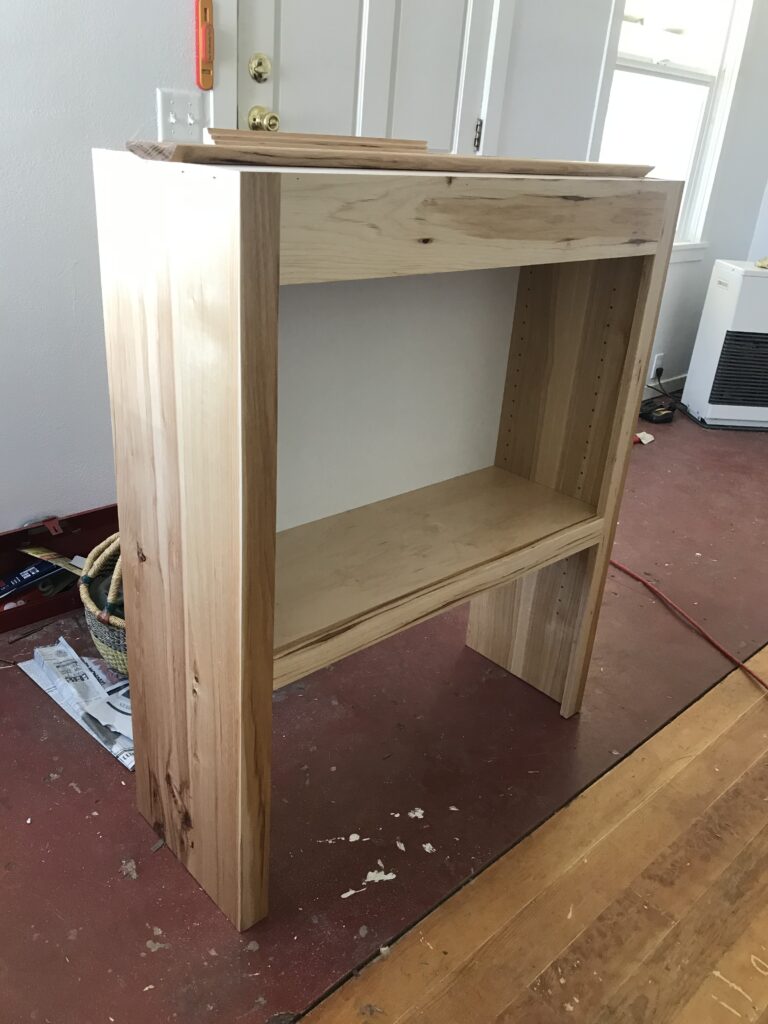
My husband’s cousin is an incredible custom cabinet builder and he built us a hickory microwave cabinet. This served as a beautiful addition to the kitchen, got the microwave off the counter, and serves as a hood over the cook stove. 

Linen Closet Room

There’s a weird little room adjacent to the master bedroom AND the bathroom that has a under-the-stairs cupboard in it (very Harry Potter) and we decided to use it as a linen closet. I put a great dresser (thanks, Hailey!) in there and I use it to store extra linens. If we had a huge budget/were going to live there ourselves, we would have removed the wall to the bathroom and made it one big bathroom or a Jack and Jill bathroom. But, we didn’t have a huge budget, and for now, it is just a linen closet. 

Linen Closet Floor

Days before the flooring was going to be installed, we discovered a soft spot in the linen closet floor. This was after the awful drywall and at the end of Ruben’s two month stint as a sometimes unwilling DIY guy and this small, not a big deal discovery almost sent the both of us over the edge. It took a day of work, some pressure treated wood, a handful of those small Snickers bars, and he fixed it. See, NOT a big deal! 🙂 

Conclusion

If you read this far, God bless you. This is easily the longest post I’ve ever written. I hope it was helpful in showing what we did ourselves, what we paid help to do, and how I did the parts I did myself. My lesson coming away from this 6 month project was to bite off what you can chew. Take small projects and do them first. Decide what you are willing to learn to do, and decide what’s way out of your comfort zone, but don’t be afraid to learn something new. Learning is how we grow and we often thing learning is just for kids. It isn’t. We need to learn too, whether we are 28 or 78. I’m naturally not a fan of risk, and buying an investment property was a risk, absolutely. Figuring out how to drywall was a risk. Spending money on furnishings was a risk. But now we have a gem of a house we are renting to great visitors, it’s doubled in value surely if not more (in part to Covid, and to our efforts), and if we wanted to live in it, we could! Drop your questions in the comments below, and let me know if there’s anything else I missed in this post!

Rental House Before and After

Filed Under: Clean, Craft, Living

How to Manage Housework When You are Busy

September 24, 2015 by Jenny Gomes 4 Comments

How to manage housework when you are busy is the question that every busy gal (and guy!) is asking and this post explains my strategy for staying ahead of it all. Read on for my best tips for how to manage housework when you are busy!

How to Manage Housework When You Are Busy! This post shares some great tips for getting control of your housework situation.


This post contains affiliate links.

I don’t have it all figured out. I don’t have it even ¼ of the way figured out. Being a mom is hard work and adding anything at all (a job, a rowdy pet, a messy, manly husband, a broken vacuum) and it starts to feel like you a struggle to keep your head above water. One strategy that I have found very helpful is described below and makes me feel as if, at the very least, that I am doing more than treading water and that I am in fact winning the daily war on chores. I’m inclined to think it actually does keep me a tiny bit ahead but the I’ll have to look back in 20 years and let hindsight make that determination.

How to Manage Housework

I feel like the appliances that we buy, borrow, rent, and bother to store and upkeep are like our little soldiers. They are our minions of service to help us battle laundry, dirt, and clutter. They should be working all the time. They shouldn’t get a break unless they are on fire. If I’m working, peeling potatoes or folding wash, those machines are going to be working too.

When I am driving up my bumpy dirt drive, I think through and decide on the appliances I’m going to put into immediate action when I walk through the door. Often it is the washing machine that is set into action first.

If you want to shop the items I suggest in this post, I have a rad little Amazon page that has them linked right here!

How to Manage Laundry

An aside on laundry: This is an area of housekeeping that I can say with confidence that I’m good. I’m solid on laundry. My kids don’t have TONS of clothes, and they aren’t often naked. I keep up on the cloth diaper laundry well, and have them ready for daycare almost always. My husband has very few work pants, shirts, and white tee shirts that he likes (*insert huge eye roll from me here) and he also goes to work clothed. I am weaker in the folding area, as my couch laundry pile demonstrates but I have the washing part down pat. It’s because I am in a fairly steady state of washing.

By rounding up the dirty laundry that is strewn from Hell to breakfast and depositing it into the washing machine (This is the one I love!), the floors are thus less cluttered and closer to a state of vacuum readiness. Turn that washing machine on, Wildflowers!

The laundry soap that I love is from Norwex. It is a no-filler soap which means it has no junk fillers that clog your machine, cost you money while not actually cleaning your clothes, and fade your clothing fibers. The soap lasts forever and ever and I highly recommend it.

I DO hang my laundry on the clothesline when it is warm enough and I wrote a really helpful blog post all about it here! 

How to Manage Dishes

The dishwasher needs to be running ASAP or the plates need to be soaking if you don’t have a dishwasher. Soaking before washing cuts scrubbing time significantly. If the dishwasher is running, then there are probably fewer dirty dishes on the counter tops, right? See how getting a few appliances turned on makes your home less cluttered, stat?

If you don’t have a dishwasher in your home or you rent, consider a portable, or even a compact portable dishwasher. This 18 inch washer was a total game changer for me. It rolls to the sink and connects via a hose in the back when it is full and rolls back over beside the countertop when it is done running. True, some days I run it twice but it was money well spent in my book. There are also countertop models you could explore.

How to Manage Picking Up the Floor

While you set those main machines into motion, your human minions may or may not be directed into putting toys away, bringing you said dirty laundry or dishes, or maybe just resting in a state of neutrality where there are neither dirtying nor cleaning. Insert fantasy of helpful, whistling children here.

I fantasized (and I mean that truly) about a robot vacuum for YEARS before I bought one. Years, I tell you! After a lot of research, and frankly after being sick of my floor NOT being clean, I chose one and ordered it.

My hesitation was, and rightfully so, that those robot vacuums would suck up any little Barbie shoe or Lego left on the floor. And that, my friend, is the beauty of it. Here’s what you do to manage picking up the floor. You can use the robot vacuum in just one room of the house so don’t freak out and think you have to pick up the whole house- you don’t. Go room by room. Start with the easiest room first- a spare bathroom even! Pick up the floor and make your children help you. Warn children that the robot will suck up stray toys (which removes YOU as the agent of toy loss and puts THEM in a position of responsibility, which I love) and turn the robot on. Close the door and move to another room and repeat if time allows. I block off an area with chairs if there’s no door available.

After some extensive YouTube research, the best budget robot vacuum I found and purchased was the Bobsweep Bobi Pet and I LOVE IT. It has a little microfiber cloth that mops while it vacuums, it comes with an extra beater bar, extra screws, a screw driver, extra microfiber mop, and more, and has a docking station with capabilities far beyond my interests.

I don’t let it “run wild” in the house when I’m gone because there are just too many chairs/edges that it might get hung up on and if I’m home it takes one second to scoot the robot back on course to vacuuming WHILE YOU DO SOMETHING ELSE and if you aren’t home to do that, then the magic is sort of lost.

My best tip if you get one of the robot vacuums is to keep up on the maintenance, which is true of any appliance really. Clean the beater bar, empty the receptacle, and follow the directions to keep that little soldier cleaning for you! If it gets a clog or somethings is the matter, it will display an error code, which is actually quite helpful. Refer to this YouTube Video and jot down what each error code means on a post it. Tape the post it to the top of the robot vacuum. Then, next time it says 03 Error, you’ll know to flip it over and check the beater bar. This robot vacuum has been such a great way to make my house a lot cleaner. It picks up a TON of pet hair, and forces the whole family to do a better job of picking up the floor. It’s amazing and is my favorite new appliance.

For when I want to vacuum my floor myself, I LOVE my Meile canister vacuum. It’s a high quality, easy to use, pet-hair sucking machine. I love that the hose is easy to take off the attachments and it honestly is the MOST valuable when I’m cutting my 4 year old son’s hair and he’s crying without end and I can vacuum the itchy hair on the low setting- it’s really such a nice vacuum. I think Dysons are garbage by comparison and I had 2 before the Meile. Can we still be friends if you are a Dyson fan? 😉

How to Manage Cooking

The crockpot and bread machine are other workhorses that, with a little planning, can set a homemaker ahead. The crockpot has gotten lots of press in recent years for good reason. For those of you new to the cooking game, here’s what they do: They cook food, slowly, likely with plenty of liquid but not necessarily, and can make cheaper, tougher pieces of meat tender and tasty. The feature that I depend on is that there’s no “done” time, with a bell ringing where you have to run, not walk, to remove the food. It’s like a “done” hour or two where you can shut the pot off. As long as there is water/beer/broth/can soup/other liquid in the pot, you’re not going to ruin supper. They’re awesome.

I will write a full length ode to the bread machine sometime soon but here’s the short of it. While I wouldn’t say you NEED a bread machine, I will assert that they are exceedingly helpful and if you can score a used one for free or cheap, they are a wonderfully useful addition. I even leave mine (handed down from my Gram) on the counter all the time and I have like 2.5 square feet of counter space in my whole microscopic kitchen. They are the unsung hero of the kitchen appliance world. The homemade bread you can crank out is top notch and it takes under 5 minutes to fill the compartment with ingredients. Many models have a timer that can be set so your bread is done at a certain time, so you could fill it in the morning and come home from work to the smell of baking bread. They are rad! If I really have it together, I can come home to baking bread and a simmering crockpot of stew. You can do it too, Dear Readers!

I also keep ahead of meal prep by canning. If you are thinking that canning takes a ton of time, I’ll challenge you by checking out some of my super fast canning recipes like my Raspberry Jam Recipe that’s completely done in under 30 minutes. If you are thinking that you don’t have all the gear it takes to can, you should check out my no-frills canning equipment checklist! Download it free right here!

If you want to learn more about how canning can save you time, dive into my FREE Canning Basics Course! It’s fun, easy, and I help you conquer the most common pitfalls beginning homemakers make when learning how to can.

Enroll Now!

So my strategy is a simple one. I get all appliances going that I can and then focus on more immediate concerns. That way, my little soldiers are cleaning and cooking for me while I complete tasks that can’t be automated or mechanized. Of course, my washing machine and dishwasher aren’t running all the time but by setting them into motion early, the likelihood of making time to put away dishes and clothing is increased and the surfaces of my home are clearer.

Shop this post on Amazon here!

Related Post: How to Clean Cloth Napkins

Filed Under: Clean

How to Hang Laundry On the Line the RIGHT Way + the BEST Detergent!

June 29, 2015 by Jenny Gomes Leave a Comment

How to Hang Laundry On the Line the RIGHT Way + the BEST Detergent!!  Read on for tips for drying your clothes on a clothesline plus read about my favorite laundry detergent!
How to Hang Laundry On the Line the RIGHT Way + the BEST Detergent!
This post contains affiliate links.
Not only is a clothesline full of wet laundry idyllic and romantic, it is frugal, sensible, and not much work at all. Hanging your clothes out to dry imparts them with a delicious fragrance that cannot be replicated nor poured from a bottle and it saves on the damage the high heat of a dryer causes (goodbye fried underwear elastic). Whether a washline conjures for you images of the country or of Mediterranean apartments high above the stone streets below, you can employ a few of these techniques to dry your clothes the old fashioned way.

When you pull a load of clothes out of the dryer, it is a jumbled mess. When you pull clothes from the clothesline, they can be pulled in an orderly fashion which saves the time of sorting tiny baby socks stuck to the inside of grownup pant legs and the like. You can do a lot of the sorting and folding work while putting the clothes out to dry rather than fighting a static-y mess from the dryer later. *Genius.*

Clothesline 101

Before you decide you can’t use a washline because you haven’t the space, let me share the virtues of the clothes rack. The ones I have used and loved have all been wood but I know some are made of metal also. I have one made by Robbins Home Goods out of Maine and it has served me well for over 8 years. Yeah, it is kind of a big awkward thing but it folds flat and can be stored behind a door or under a bed when I’m not using it, which is almost never. This is the one I have and love.

My sister uses the wooden rack that my Great Grandmother used and it is still as sturdy as can be. You can buy a really simple and surely flimsy one at a big box store for about ten bucks but I’d recommend making an investment in a sturdy one that you can hang more than one load of laundry on at a time. They are advertized based on the number of drying feet they feature. Mine has about 50 feet of drying space, for example, and I fit about a load and a half on it. I use it by the wood stove in the winter and on the deck in the summer. A rack also cannot be beat for drying sweaters and delicates.

If you do have the space, a clothesline can be terrific. My clothesline is cotton twine tied with a Munter hitch (a knot that isn’t as fancy as it sounds) between the beams on my deck and it works perfectly. When choosing the site for a clothesline consider that while you don’t need direct sun, it is best if air can move around. Remember also that tree pitch and other organic matter can fall from above onto your clean laundry so plan accordingly.

When choosing clothespins, I’d look for a strong spring over anything else. I prefer wood because plastic ends up breaking eventually but if you see some of any variety at a second hand store or in someone’s attic, use them. You can keep your clothespins on the line or you might find it useful to make a bag for them that hangs on the line and is never far away.

How to Hang Laundry On the Line the RIGHT Way

There’s a knack to pinning clothes on a line to limit the tell-tale dried-in pinch marks and I hope my photos demonstrate how to prevent that. The way you lay clothes on the rack or line is how they will dry. If the pant legs are wadded up, they will dry that way, and slowly too because wrinkles dry more slowly that smooth fabric.

When I look at my basket of wet laundry ready to be hung, I pick a category of clothes or a person they belong to and hang those up together so when they are dry, I can fold them on the spot and then put them directly into the correct drawer.

This means that I hang all my son’s tee shirts together, in a row, then my daughter’s shirts, then their pants respectively.

Yeah, sometimes I don’t see a little boy shirt till the end and it ends up next to my underwear but for the most part it works. All of my husband’s work tee shirts get hung together, upside down, in a row, for example. By doing a good job of smoothing the fabric as you hang it and by sorting as you go, you save a lot of time. If you have a warm day and the air is moving, you can bet the dry time can be much faster than in the dryer and the process is completely free.


How to Hang Laundry On the Line the RIGHT Way + the BEST Detergent!

How to Hang Laundry On the Line the RIGHT Way + the BEST Detergent!
Notice how the tee shirt isn’t folded over the line? I like to pin them so they aren’t folded over so they are completely flat like this so they don’t look “hung up”


How to Hang Laundry On the Line the RIGHT Way + the BEST Detergent!

Jeans and towels are the items that most people seem to insist upon drying in the dryer. Some jeans need to be shrunk up to maximize their fit and God knows I wouldn’t want anyone in saggy-bottom jeans. I grew up with super scratchy line dried towels and I like the feel of them but I get it; some of you want super soft towels. In these scenarios I’d suggest line drying till they are halfway dry and then tossing in the dryer. You’d probably be pleased.

How much money does using a clothes line save? There’s a lot of things to factor in, and math is not my strongest suit but I can say that in my family of 4, in the dead of winter, our electric bill is over $250 and in the summer it is often under $90. We have an electric water heater and wood heat. Also consider that in the summer I probably do fewer loads all together because shorts and tees take up less room in the laundry basket than do pants and sweatshirts, but overall, I know that it indeed saves money.

The Best Laundry Detergent

As for the laundry detergent I’ve been happiest with, I can’t say enough good things about Norwex. Their laundry detergent UPP is  free of fillers which can be anything from chalk, sheet rock ground peanut, whale bones, and other nonsense that doesn’t belong in your laundry. I learned about fillers at the end of my cloth diapering journey when I got my new, high efficiency washing machine. As nice as it is in some ways, it uses less water which means it simply doesn’t wash out those fillers as easily. Couple that with the hard water in my area and my cloth diapers weren’t absorbent, my whites weren’t bright white anymore, and my clothes felt…you know that feeling when you don’t wash the conditioner in your hair out all the way? My clothes felt like that. The Norwex Ultra Power Plus laundry detergent is free of fillers so my clothes are clean AND I appreciate that every dollar I spend on detergent is actually purchasing soap…not chalk that I have to fight to remove from my clothes on the next load. If you want to check out this wonderful detergent, talk to my friend Cassie. She’s a mom who sells this really high quality laundry soap, along with other family friendly cleaning products. I’m also in love with their mop… but that’s a topic for another blog post 🙂

If I haven’t convinced you to hang your clothes on the line and get vastly better laundry detergent yet, check out this lovely infographic. It outlines all the ways you can save money during the laundry process.


How to Hang Laundry On the Line the RIGHT Way + the BEST Detergent!

Source: Fix.com

You might love to read my post about how to make your own dryer balls right here next!
What do you think, Wildflowers? Share your washline tips in the comment section below! Happy washing!
How to Hang Laundry On the Line the RIGHT Way + the BEST Detergent!


SaveSave

SaveSave

Filed Under: Clean

How to Clean Cloth Napkins

April 25, 2015 by Jenny Gomes 1 Comment

Cleaning Cloth Napkins: How to Take the Funk Out of Kitchen Linens

Cloth napkins, potholders, aprons, and other kitchen linens eventually require a thorough cleaning to rid them of the rancid grease smell that lingers after many months of use. After switching to a high-efficiency washing machine that uses much less water but sometimes leaves a tiny bit of grease behind, I realized that I had to defunk my linens a bit more regularly than if I used a less efficient machine.

How To Clean Cloth Napkins

This post may contain affiliate links.

The most difficult part of this very simple process is accepting that you will have to repeat the process of boiling several times because one apron and a couple potholders (for example) is about all that will fit in a large stockpot.

Make sure the washing machine is empty (to soon receive piping hot linens), then fill a large stock pot with hot water, add a squirt of dish soap (I use plant-based soaps like Seventh Generation or Method) and add a generous ¼ cup of baking soda. Add a few cloth items at a time and be sure that water can flow all around the cloth. This is not the time to stuff the pot full- you want to be able to stir your cloth napkin soup easily to prevent scorching.

Bring the pot to a boil over high heat and stir occasionally. I found that boiling while I was cutting up the fixings for tacos was the perfect time to keep an eye on the pot while I was already tied to the cutting board nearby.

How to Clean Cloth Napkins

It is helpful for the first batch or two if you choose to add one particularly dirty, stained, or discolored item. This can help you determine if the batch needs to boil a bit longer or not. I had a discolored oven mitt that I kept my eye on and when it’s stain lifted significantly, I knew I was done. With this particular mitt, I poured vinegar directly on the mitt while it was still in the pot and vinegar did what vinegar does when it meets baking soda- it foamed and fizzed and helped release the stain so much so that this particular mitt is now part of the regular lineup rather than in the bottom of the drawer.

Turn the heat off and let the pot cool enough to safely pour much of the water out and then dump the very hot and wet contents into the washing machine.

Repeat this process until all your items have been boiled from 20-30 minutes. At this point, I ran my washing machine on a hot cycle with an extra rinse, a regular amount of laundry soap and vinegar in the fabric softener dispenser. Of course, most of those specifics were optional. Proceed with confidence if you happen to be out of vinegar or if you don’t have a super hot setting on your machine.

This post is really about a lot more than a good way to clean cloth napkins. By using cloth in the home (rather than disposable goods) you save money, time buying them, time from hauling out the trash, and it surely is better for Ol’ Mother Earth. Cloth napkins, aprons, and the like are a way to add class and sophistication to the table. I use cloth napkins every day, even if I am serving burgers purchased from the corner place in town and I never miss paper towels or napkins. More on that in another post, Wildflowers.

How to Clean Cloth Napkins

What disposables have you replaced in your home? Share in the comment section below, Wildflowers!

Filed Under: Clean

Primary Sidebar

Categories

Follow me here, there, & everywhere!

  • Email
  • Facebook
  • Instagram
  • Pinterest
  • RSS
  • Twitter
  • YouTube

Search

Get 10 Free Recipes Now!

Best Chicken Coop

Footer

Start Canning Course

Start Canning Course | The Domestic Wildflower click to read this super helpful list of resources, tools, and gift ideas for the homemade and handmade enthusiast in your life!
This video course will invite you into my kitchen to watch me can a wide variety of recipes and use several beginner friendly techniques. It is the perfect course if you want to learn but have no idea where to start; even if you've never boiled a pot of water! Learn how you will know you are doing it right, safety best practices, simple recipes that are foolproof and guaranteed to impress, and skills to apply to any recipe.

Shrubology Ebook

Shrubology: Refreshing Homemade Fruit and Vinegar Syrups for Cocktails
Make easy, no-cook fruit & vinegar syrups for cocktails & mocktails! This ebook shares crowd pleasing recipes and simple to understand ratios so you can make a shrub on your countertop any time- without a recipe. Dive into these Prohibition Era drinks today!

Copyright

Copyright 2019
The Domestic Wildflower
www.thedomesticwildflower.com.
All content created by Jennifer Gomes unless otherwise noted.

Copyright © 2023 · Lifestyle Pro on Genesis Framework · WordPress · Log in