Best Chicken Coop: Easy to Clean, Easy to Move!
This post will share the absolute best chicken coop that is easy to clean and easy to move.
This post contains affiliate links. This is NOT a sponsored post. I just love this coop!
I started shopping for a chicken coop a few months ago and quickly realized that what I was looking for almost didn’t exist. I wanted a coop that was:
- Easy to clean
- Easy to move
And it appeared, initially, there was no such thing.
I wanted these attributes because I’d slowly, over the course of the school year, been around a friend’s coop and realized what she had was a CLEAN coop. A clean coop doesn’t stink. A clean coop has happy chickens. A clean coop is a place where you can enjoy watching chickens be funny and charming and where you can collect eggs. My whole life I had thought that chickens were gross and I was completely wrong.
What is gross is poor animal husbandry practices, often practiced in coops that never move and are hard or impossible to clean.
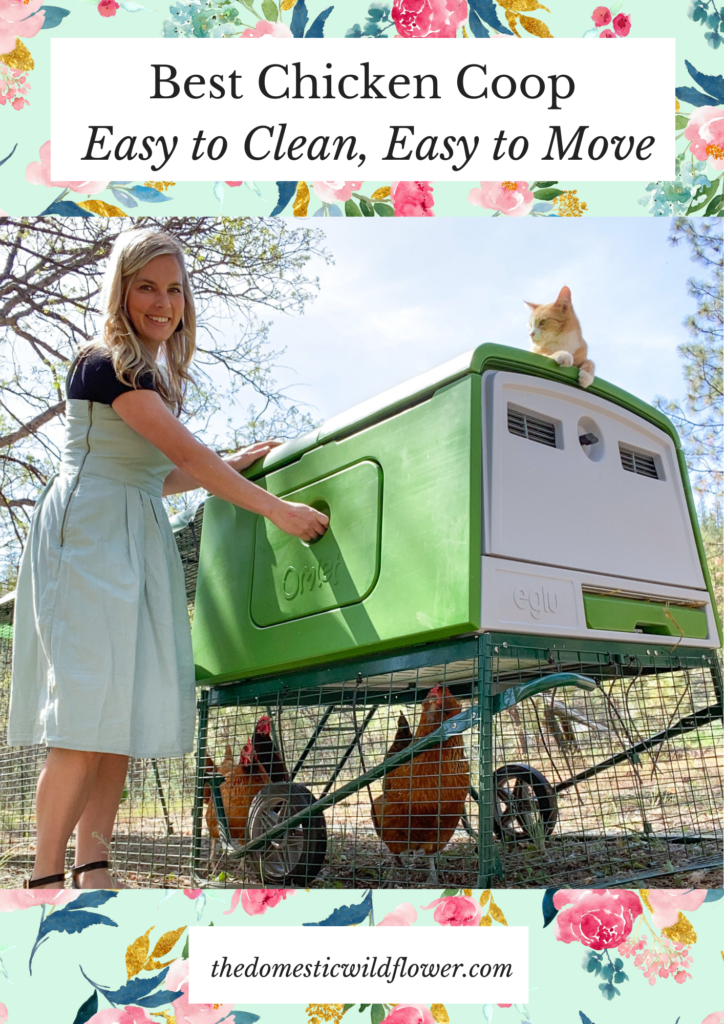
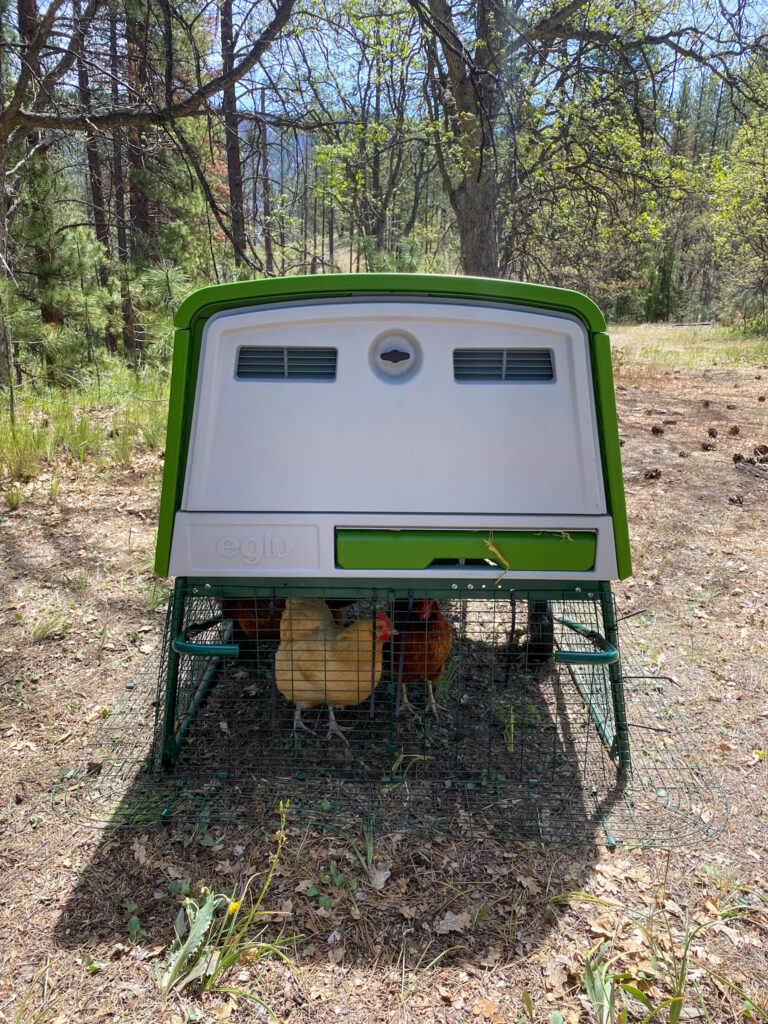
I found the Omlet Eglu Coop and realized that while totally unusual-looking (it is kind of modern, and plastic!) it met every criteria I had in mind.
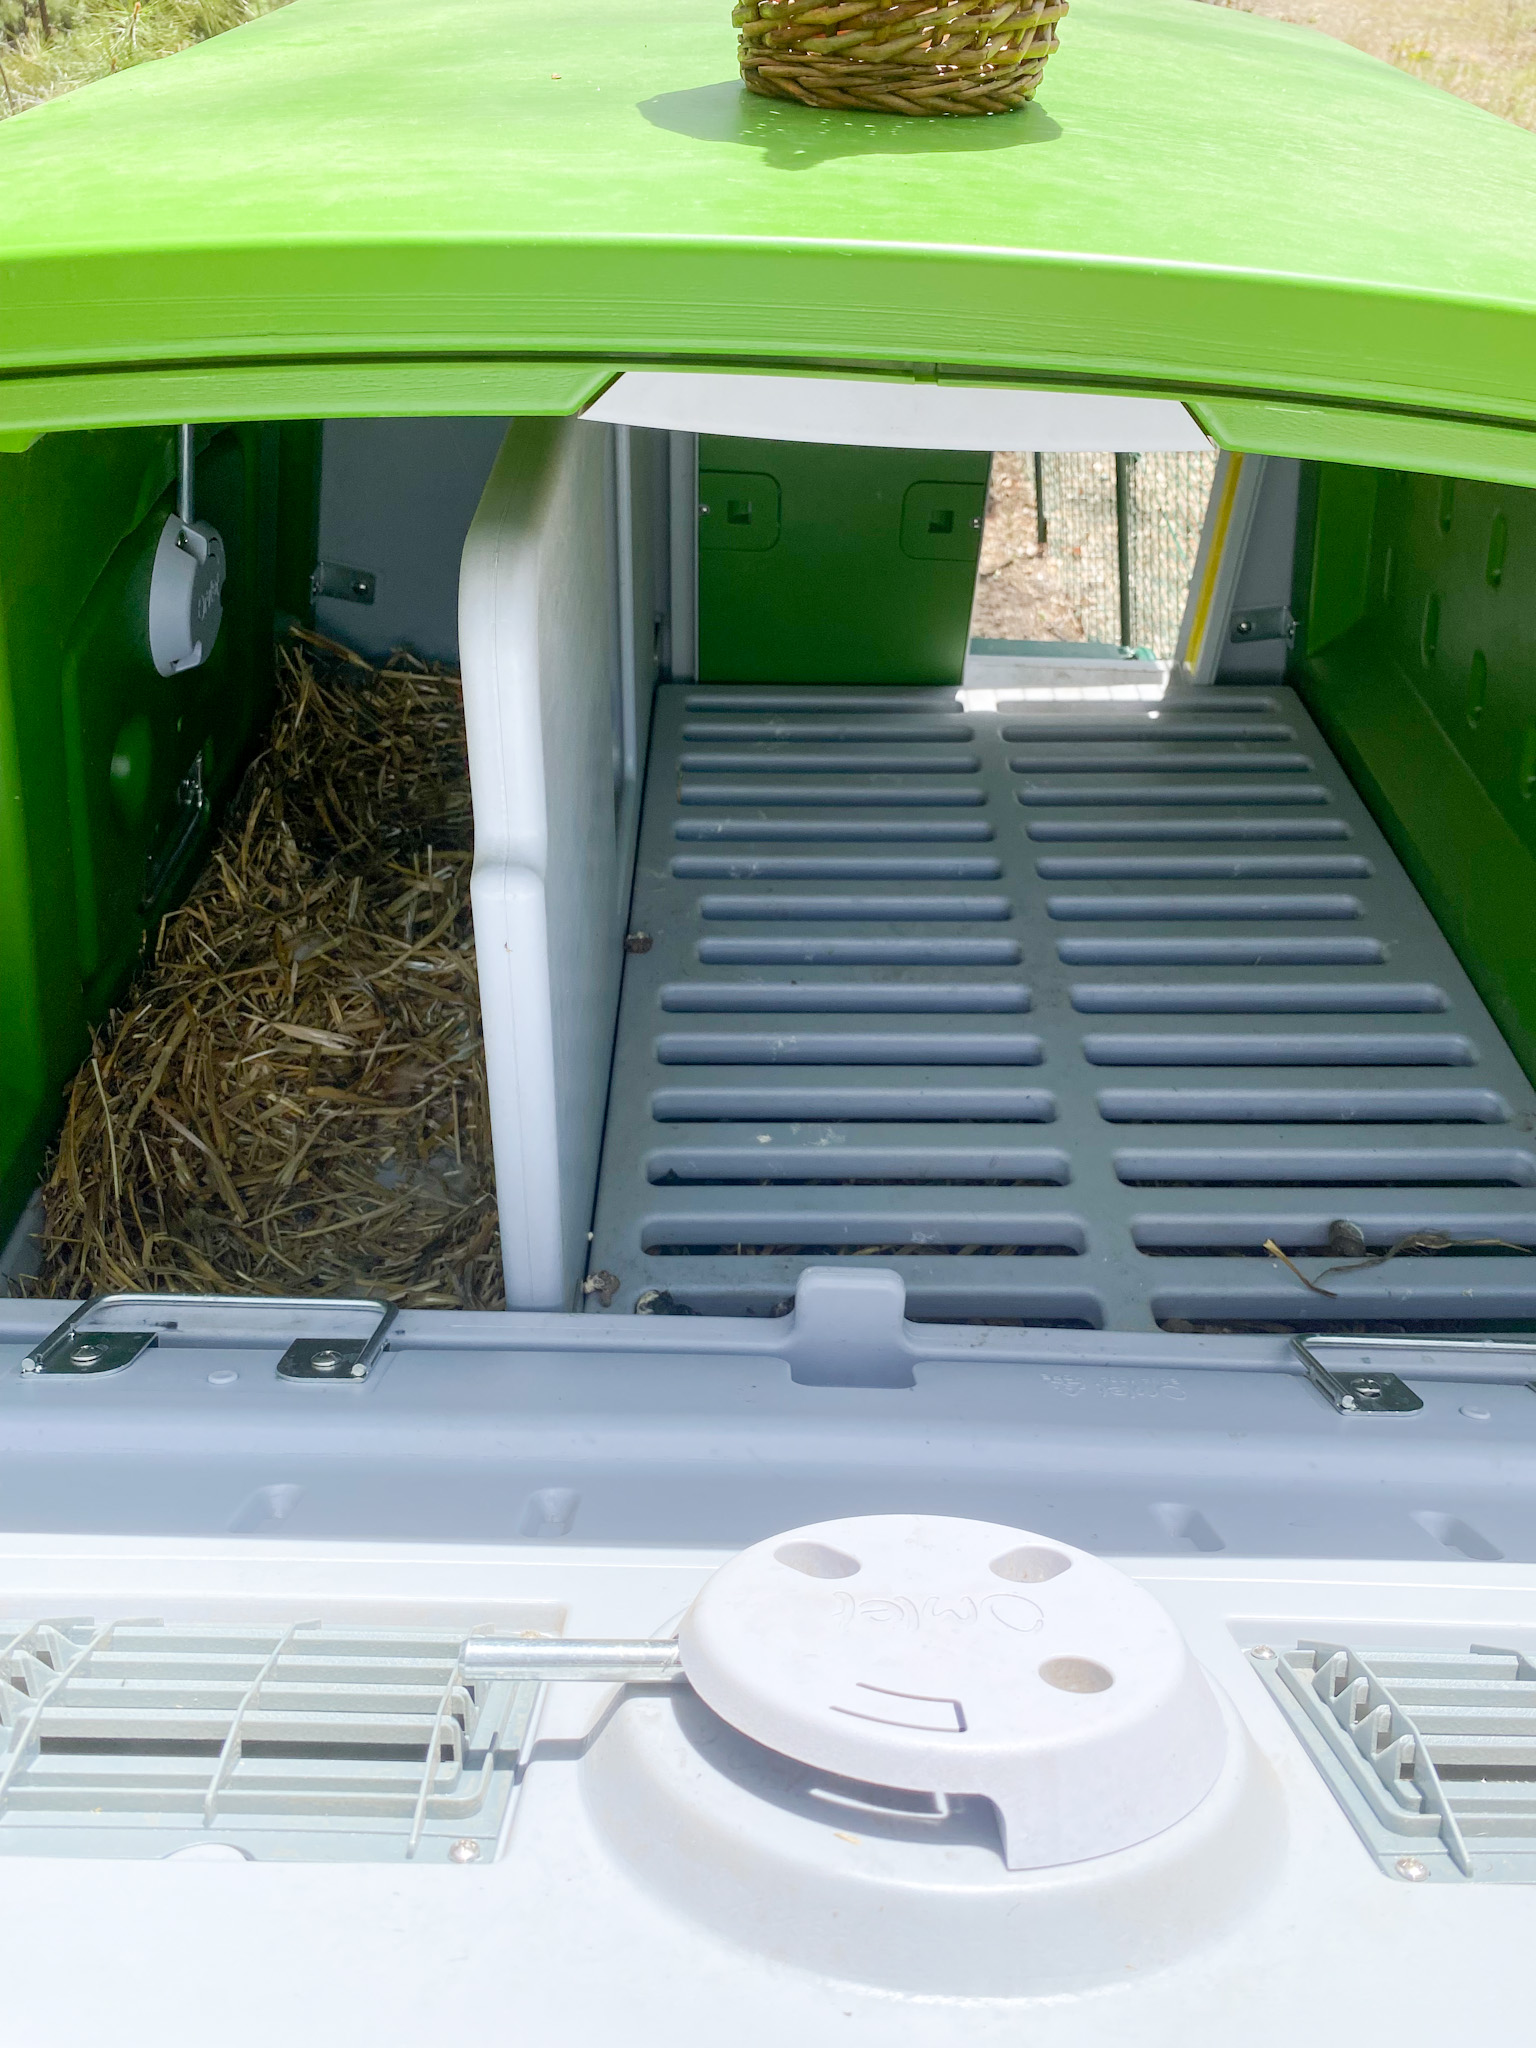
The coop itself (where the hens sleep at night and where they lay their eggs) is elevated off the ground which meets a chicken’s desire to find safety up high. Inside the coop, the back door easily opens and a tray slides out to allow for simple cleaning. The tray is where you’d place moisture-absorbing pine shavings, straw, etc and when you dump it in your compost pile, everything slides right off. It is easy to hose off or wipe clean with cleanser because the plastic is heavy duty and NON POROUS. This is hugely helpful. It is visibly, obviously better than wood because it can be easily cleaned. The smooth plastic is easily cleaned!
The roosting bars are removable (one-handed, even!) and easy to hose off as well. I’ll often remove them, give them a hose off, and let them dry just while I’m feeding the hens during the day.
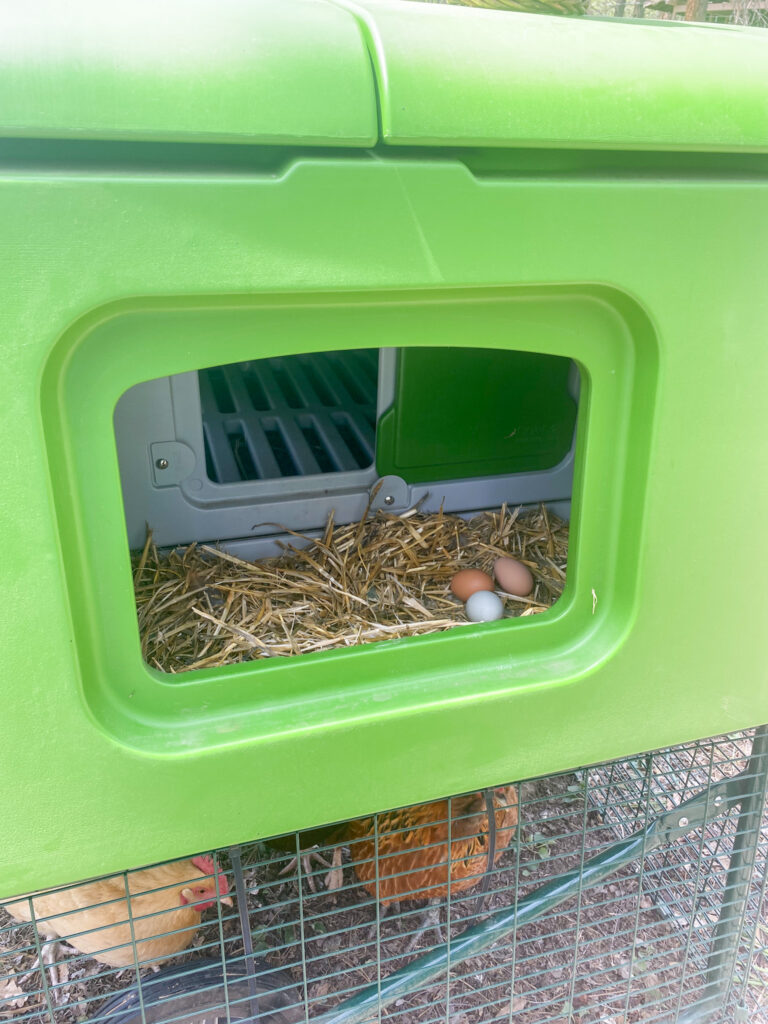
The coop has a separate door to open to check for eggs in the nesting box. This area has a little sliding door you could shut to prevent hens from sleeping where they lay (you don’t want that, and my hens in this coop don’t have that issue so far).
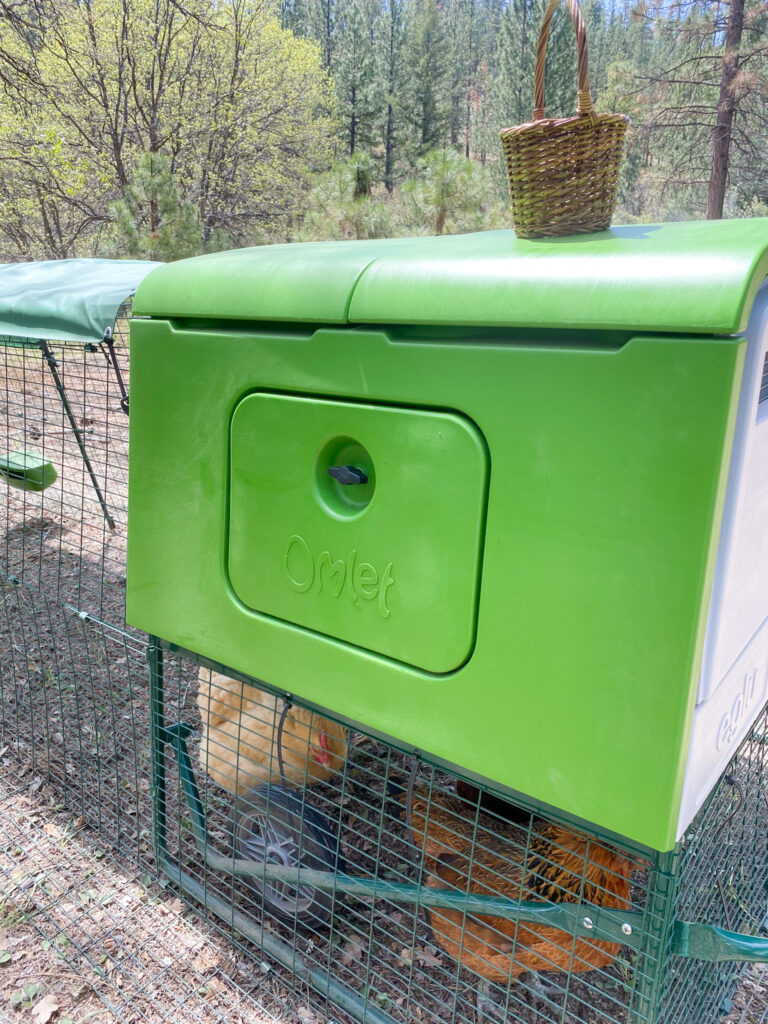
The nesting box door is easy enough for kids to open but secure and weather tight.
We bought the automatic door which was a splurge that I’m grateful we chose. It closes automatically based on the light in the sky, or on the time of day (my 10 year old programmed it). It eliminates the rush to get home after sports practice or supper at friend’s to shut it. The door is also easy to affix to other coops – consider it if you have an existing coop! We love it.
The wheels beneath the coop allow for the run to be lifted a few inches for moving. My kids can move the wheels so the run is “up” and they are 8 and 10 years old.
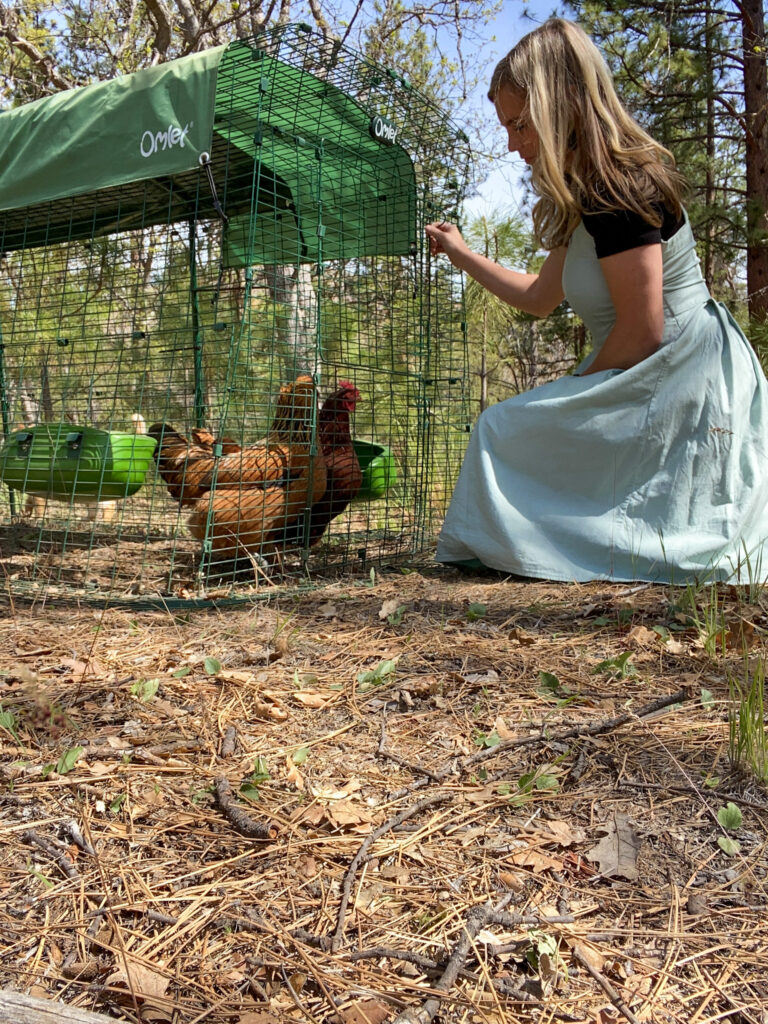
The attached run is strong (much stronger than chicken wire) and assembled without power tools. It did take me and the kids all day to assemble the run and the second half of the coop (my husband only had time to assemble the base of the coop, the wheels, and the front coop wall before the work week began). The run clips together with strong clips and it was easy for the kids and I to see how it was supposed to go together.
I do wish the instruction manual had WORDS. It has clear illustrations, but I’m a reader and would have appreciated some written instructions. Their YouTube video was actually the best help, especially in assembling the coop. The kids would play it, we’d figure out exactly what we needed, and pause it for me when I was doing the next step.
There’s a door to the run that opens like a Dutch door and is easy to operate.
The smart feature on the run that I don’t see on other runs/coops is the wire ‘skirt’ that lays flat on the ground about 8 inches out. A predator doesn’t know to start digging in back away from the run wall; they want to start digging right where the skirt and run wall meet, which is impossible. It is really a smart design. When I move the coop (daily, or even twice daily) I have to kick the pinecones out of the way because they prevent that skirt from laying flat on the ground- you want it flat to prevent digging by predators.
UPDATE: Bear Resistance: 3 months after getting this coop, we suffered a bear attack. A younger black bear of under 200 pounds (not a huge bear at all for our area, but a bear nonetheless) pulled the whole coop plus the run onto it’s side with a crash (the point where I woke and my husband and I ran outside), and the crash plus the bear’s force ripped the top, back section of the roof of the coop off. In those fateful 90 or so seconds, he ate 2 of the 4 hens. 1 escaped by being hidden in the coop rubble (it really looked like a car wreck rollover- the roosting bars were on top of our Rhode Island Red) and our cute Orpington managed to flee in the dark and she returned in the morning unscathed, clucking hello by our cars.
This type of attack is what I would suspect any coop would struggle to defend against and the Omlet was no match. Bears are incredibly strong, they are fast, and they are persistent.
We moved the remaining hens into a dog crate for the night, and for a week or so while we got our bearings we kept them in a horse trailer, which makes an excellent, in a pinch option. Horse trailers are strong, and surely the most bear-resistant option most people could access quickly.
NOW: We put up an electric fence (a trapper told us to drizzle honey or syrup on the wires as a shock through bear fur, as you can imagine, isn’t as strong. A tongue shock is more instructive.). My husband and his father put the coop back together and wrapped ratchet straps all the way around the coop. Ratchet straps are what we use locally to keep bears out of dumpsters. The run was bent back to shape (it was a little cattywhompus) but moving it isn’t very easy because the base the Omlet sits on was pretty seriously bent in the attack. It works, but before I was moving it a couple times a day sometimes, over fairly uneven ground, and now, I don’t think I’ll be doing that. It very much feels like the coop is like a car that’s been in a car wreck. There’s a lot of little things out of wack as a result. We continue to see fox poop around our property and I think it is impossible for him to get into the run. I have concluded that the only other predator that could get it would be possibly a snake. We’ve not tested that yet, thank goodness.
GOING FORWARD: I plan to get a very large, welded wire and metal post run built (I’m dreaming of a 40×80 foot pen, where I can have a garden inside as well) that will have an electric fence around it, and will have 2 omlet coops inside it. It will have a metal roof/wire top to prevent aerial predators as well. The Omlet still has so many excellent qualities and even though it isn’t bear resistant I’m still a convert. I will keep the one I have with the run attached as it creates a really great secondary run space. I plan to get pullets in the fall and they can be in the main Fort Knox style pen but IN an Omlet + run so they are safe to grow without bossy hens bothering them but where they can be safe from bears, too. I want the gate of this new pen to be wide enough for me to wheel the Omlet + run out for daytime use, too.
MORE GREAT OMLET ELEMENTS: The included feeder and waterer are really simple but really smart (like the rest of the coop). They keep food dry, water in, and are easy for my kids to manage.
There’s a variety of cool add-ons you could get like a walk in run attachement, perches and swings, and peck toys.
I think the only inherent drawback to the Omlet Eglu Coop is the size. The coop is large enough to house 6 hens comfortably (more if you have bantams). The run would be snug, I think, with that many. You want the chickens to have plenty of space to themselves to dig, dust bathe, eat, etc. I have 4 and I’d consider adding just one more as I keep them in the run nearly all the time. So, Omlet would need to maybe add one more run extension, I think, for me to feel good about having 6 hens in that space. Of course, another extension to the run would make it heavier and more unwieldy to move so I’m sure that’s why that isn’t an option currently.
My family of 4 is loving the eggs that 6 hens are giving us this spring (I have two other hens in a wooden coop- check out my Instagram highlight to see the difference- the wooden coop pales in comparison). They are robust layers (2 Rhode Island Reds, 2 Ameracaunas, 1 Buff Orpington, and one Welsummer) and I have enough to give my Gram a dozen every week or so. We eat a lot of eggs (one of the many reasons we decided to get chickens) and this amount is working well for us.
My final recommendation is to warmly recommend the Omlet Eglu Coop to anyone who wants to keep 6 or fewer full size chickens safely contained and tractored around. It is easy to clean, easy to move, and is clearly the best chicken coop for this size of flock.
<iframe scrolling="no" style="width: 728px; height: 90px; margin: 0 auto; overflow: hidden; border: none;" src="https://www.omlet.us/banner/display?cid=89&type=1&baid=WWWTHEDO"></iframe>