• Skip to secondary menu
  • Skip to main content
  • Skip to primary sidebar
  • Skip to footer
  • The Pressure Canning Cookbook
  • Blog
    • Subscribe
    • Welcome!
  • Perfectly Preserved Podcast
  • About
    • ADW Manifesto
    • Work With Me
      • Read
  • Shop
    • My Account
    • Cart
    • Checkout

The Domestic Wildflower

Handmade Food & Craft Tutorials for Beginners

  • Courses
    • Free Canning Basics
    • Everything Canning Course
    • Steam Canning Workshop
    • Free Homemade Cocktail Mixers
    • Wildflower Mixology
    • Crochet Basket Workshop
  • Can & Preserve
    • Never Canned?
    • Steam Canner Equipment Bundle
    • Shrubs Course
  • Sew
  • Cook
  • Craft
    • Crochet Step-by-Step Guides
      • Crochet Basket
      • Giant Yarn Throw
      • Thick & Thin Throw
  • Living
    • Creativity Challenge
    • Clean
    • Kids
  • Rentals

Blog

Strawberry Champagne Jam Recipe

May 30, 2018 by Jenny Gomes 4 Comments

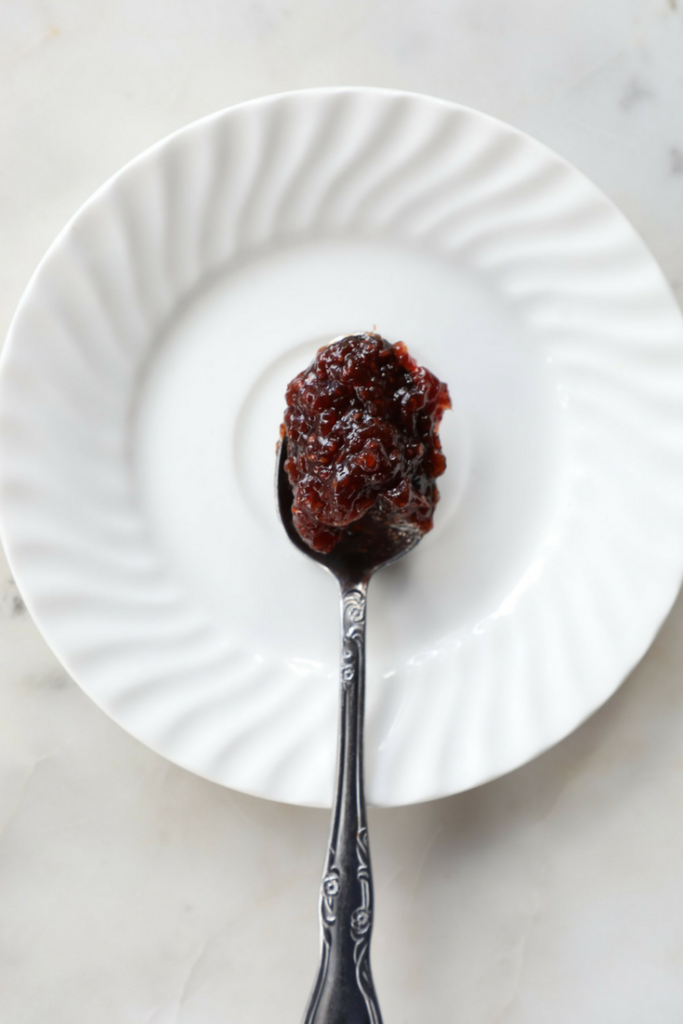
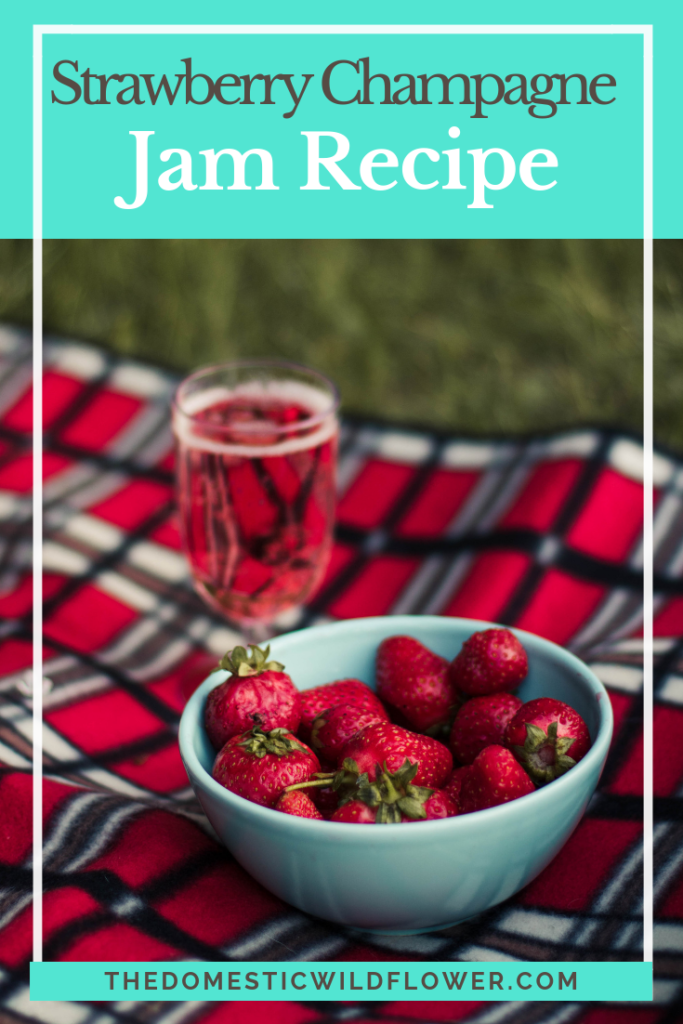
Strawberry Champagne Jam is THE jam to make to celebrate, to give as a gift, and to savor the flavor of spring. This post will explain how to make the Strawberry Champagne Jam so you can eat it fresh, it will give clear, beginner friendly canning directions for how to preserve it in canning jars (even if you never have before!) so you can enjoy it later, and will link to the best jars for gifting this super special jam! Read on for the recipe- it is much easier than you think and there are a few simple pro tips for keeping that champagne flavor in the jar!

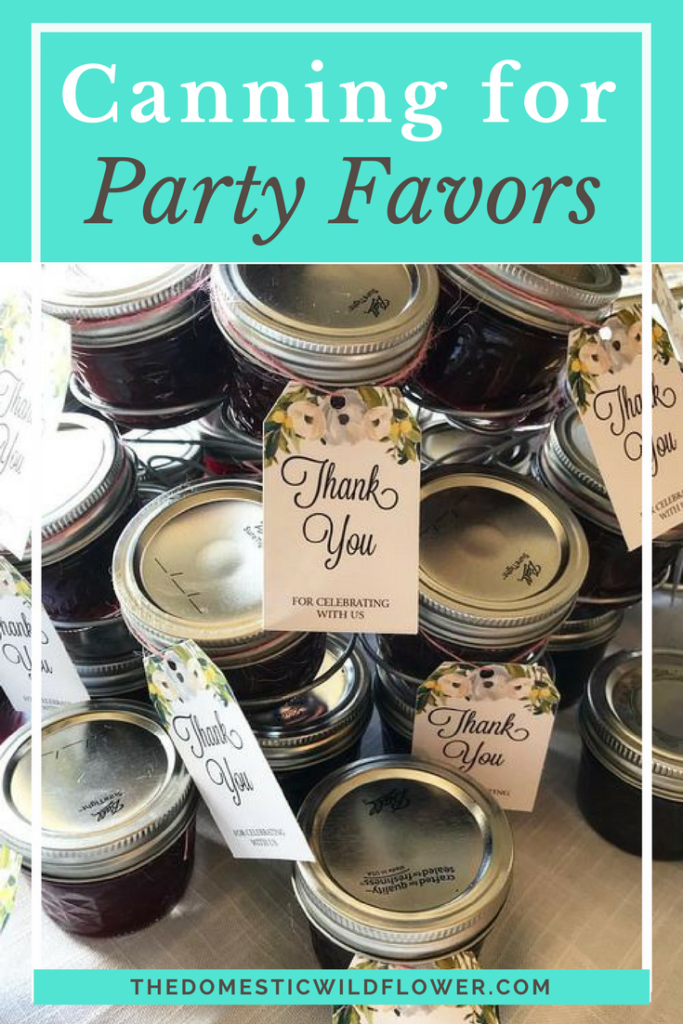
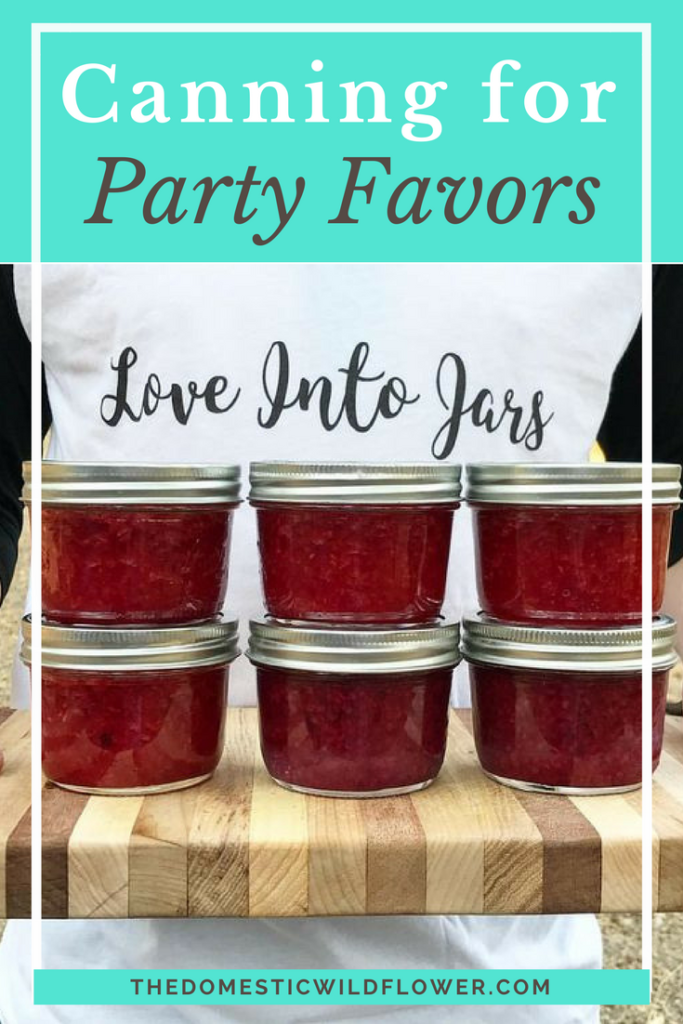
I wrote a post about how to can for party favors where I shared making raspberry champagne jam for my dear friend’s bridal shower, and I got a lot of questions about how I made that jam.

Canning For Party Favors | Read how you can preserve jam, salsa, and other delicious treats easily for the guests at your next bridal shower, baby shower, or other party! Canning for party favors is genius- it saves time and money and is beautiful!

Including champagne is fun because it adds a layer of celebration and festivity to your preserve but it is a little tricky because the flavor cooks off really quickly so I had to make several batches to figure out the best, most reliable way of including the champagne at the last minute without making the jam too thin. The result is my family has tons of this jam on the shelf (yay us!) and the following recipe.

I use the extra big bottles of Cook’s champagne because it is frequently on sale for $10 at my local grocer and I usually am making many batches. YOU can use whatever champagne you’d like. You only need 1 cup, and it doesn’t have to be fizzy anymore so flat champagne or flat sparkling white wine or rose is fine. Leave red wine for a beef bourguignon recipe.

If you’ve clicked over to this recipe, but aren’t sure how to can, don’t worry! I have a completely free Canning Basics email course you can sign up for that will teach you exactly what to do!

Enroll: Canning Basics

Free course canning basics square image instagram size for ck landing page

Enroll in this FREE Canning Basics Course and learn from an expert the 3 areas that are the most difficult for newbies!

Success! Now check your email to confirm your subscription and get your first lesson!

There was an error submitting your subscription. Please try again.

I’d like to receive the free canning basics email course; that way I can learn from my inbox too!

Pro Tip: Be completely ready to put the preserve into the canning jars when you add the champagne + pectin mixture into the berries. You want to pour it in, give a quick stir, and start ladling it into jars. BEFORE you add it, the jars should be hot (or warm if you are using a steam canner), you should have your ladle, canning funnel, jar lifter, and jars already.

Which Canning Jars Should You Use? 

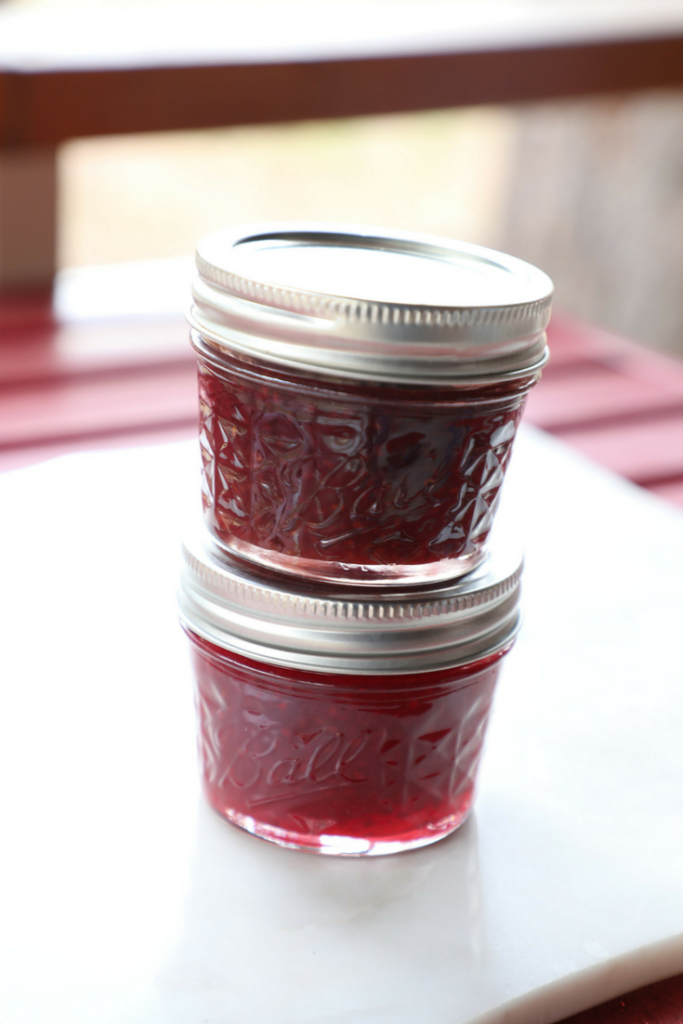
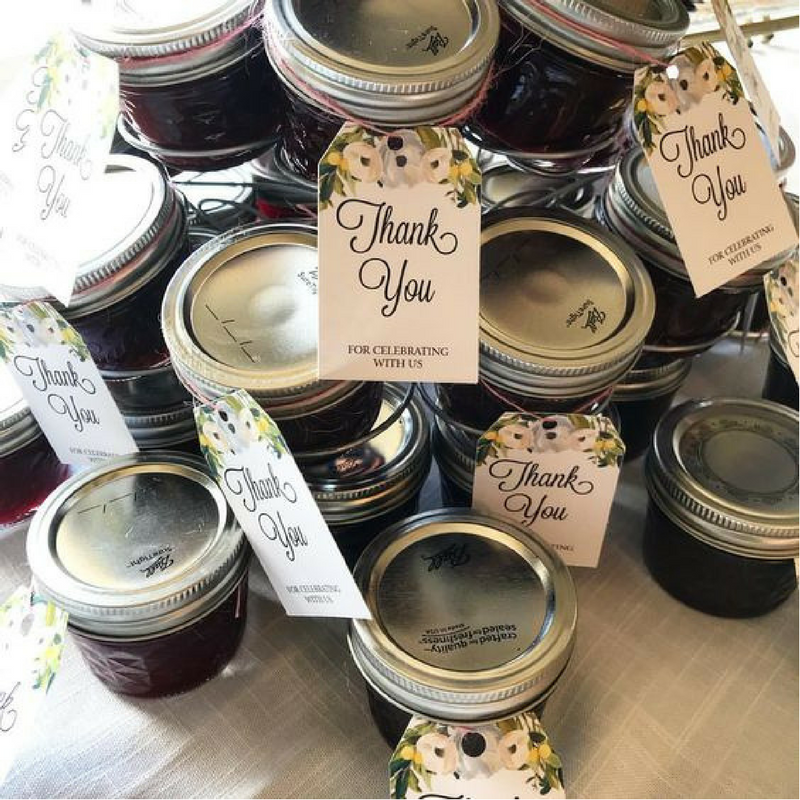
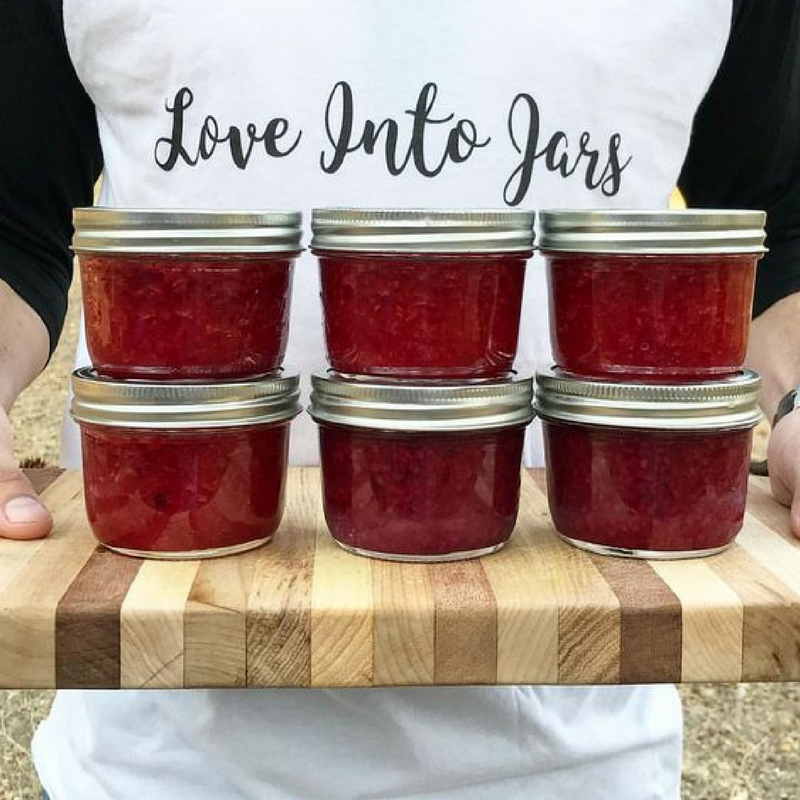
This recipe, in particular, is very giftable, full of spring flavor, and is a pretty red-pink color. I would encourage you to can it in small half pints like these, which hold one measuring cup of a jam if you intend to keep it yourself.

I find those to be infinitely useful in my kitchen, and very easy to clean. I also buy them very often from Amazon and

I’ve yet to have any arrive broken. Winning!

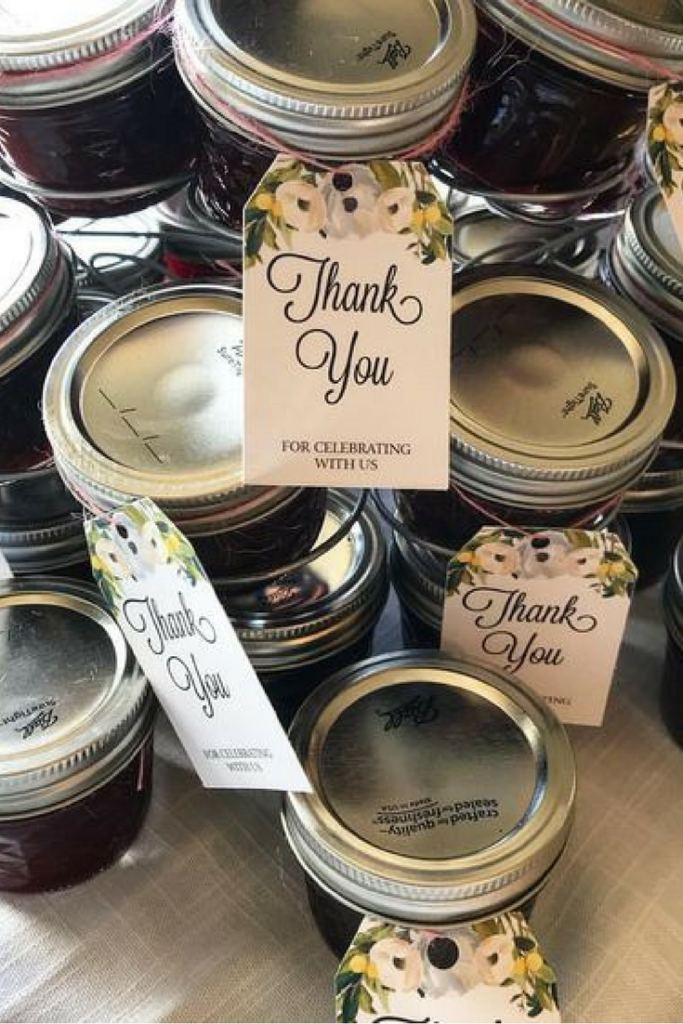
If you are giving these as shower favors, I would suggest these awesome options for jars.

These Elite Collection jars are different looking, still hold one measuring cup of jam, and aren’t as readily found in stores. I LOVE them and you will too.

These are a more classic, quilted style jar, with a regular size lid, as opposed to the wide mouth of the above styles. They are also a half pint, holding 1 measuring cup of jam, and are easy to clean. My kids drink out of this daily, too 🙂

These are a classic, rounded side, jam-style jar, that takes a regular mouth lid as well. They really say, “jam” and are beautiful of course. They hold 8 ounces, which is 1 measuring cup, which is 1 half pint. 🙂

The BEST Jars:

Finally, the smallest jars of all. These 4-ounce canning jars are amazing because they take a regular size lid (so handy!) and are perfect for things like hot sauce, salsa, or other rich or spicy recipes. They make it practical to gift a home-canned item at a large gathering because it’s about 1-2 serving sizes (my husband and I use probably 3 of the four ounces of jam total on our French toast, for example).

A Note About Liquid Pectin:

In most of my jam recipes, I use powdered pectin simply because it is inexpensive and I’ve never had any trouble using it or whisking it smoothly into my jam to thicken it. That said, I chose to use the slightly more expensive (hardly so– it’s just a few dollars a package) liquid pectin to thicken the champagne BEFORE incorporating into the berries. This technique works well and I think you’ll find it to be very easy indeed.

Strawberry Champagne Jam Recipe

You will need 
8 cups strawberries, washed and chopped
1 1/2 cups water
6 cups sugar
1 cup champagne, poured into 4 cup bowl, foam and fizz allowed to settle
1  3 oz pouch liquid pectin

1. Prepare your water bath canning pot or your steam canner. Fill the water bath canning pot with water, add 8 half pint jars, or 14 tiny 4-ounce jars and bring to a boil OR fill the steam canner to fill line and turn on low with the 8-pint jars nearby on a towel-covered countertop.

2. Combine strawberries and water and simmer together in a preserving pan (a heavy-bottomed, wide pan) and stir occasionally for 15 minutes. Mash with a wooden spoon or potato masher when berries are soft.

3. Optional: Remove from heat and ladle into a food mill fitted with a medium plate. Process jam through for a super smooth jam.

4. Return strawberries to a boil, add sugar and cook on low while you complete the next step.

5. Whisk pectin into champagne
, noticing as you whisk that the pectin will thicken the champagne to the consistency of thin pancake syrup. Add champagne mixture to strawberries, reduce heat to very low, and immediately proceed to the next step.

5. Ladle into jars one at a time, apply lids and rings, and either submerge into the boiling water of the boiling water bath with a jar lifter  OR set gently on the rack of the steam canner.

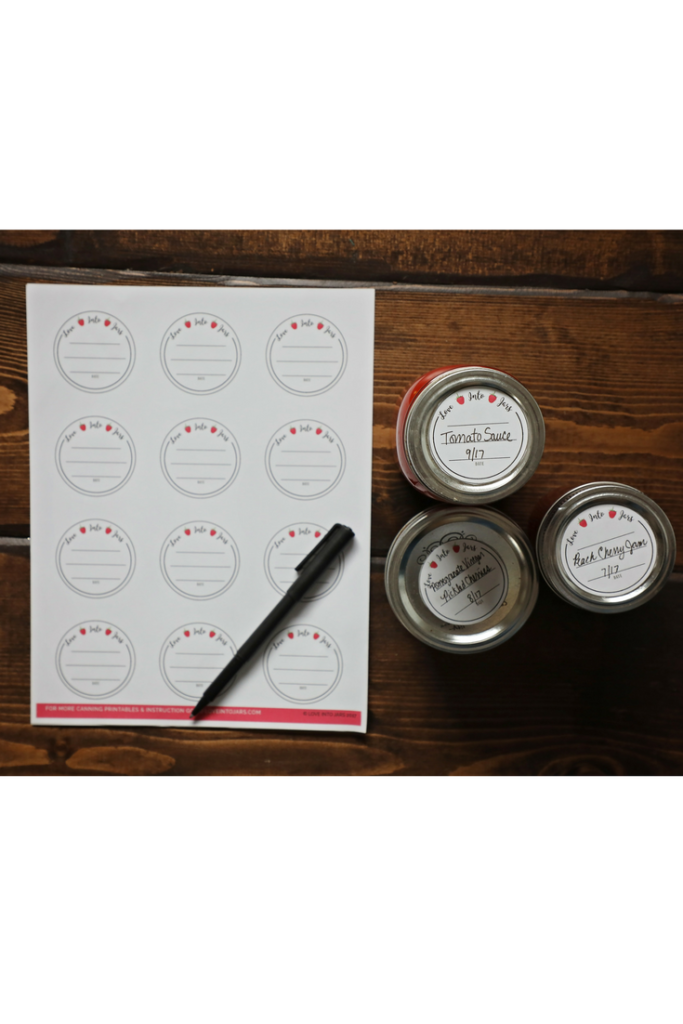
6. Process for 10 minutes PLUS 5 minutes for every 1000 ft above sea level. Remove from heat, rest jars carefully on the towel-covered countertop. Label cooled jars and store for up to 1 year.

Yields 8 cups Strawberry Champagne Jam

Helpful Strawberry Champagne Jam Resources:

Print the free version of this Strawberry Champagne Jam Recipe right here!

Success! Now check your email to confirm your subscription and download your PDF of the Strawberry Champagne Jam recipe!

There was an error submitting your subscription. Please try again.

Need the No-Frills Canning Equipment List? Download it for free right here:

Canning Equipment List

Canning pot and lifter jars instagram Download the completely free Canning Equipment Checklist!

You’re in! Check your email for the PDF that you can download and print for free!

There was an error submitting your subscription. Please try again.

I’d like to receive the free canning basics email course too!

Have you put that handy dandy Canning Equipment Checklist to good use yet? Want to take your canning education to the next level? Head to www.startcanning.com and enroll in the E course for busy beginners!

Wondering about the steam canner I refer to? Read this post here to learn about the fastest way to can.

Want to know more about the food mill I reference above in the recipe? I have a post all about how they are one of my favorite tools for the smoothest jam around! 

More Strawberry Recipes:

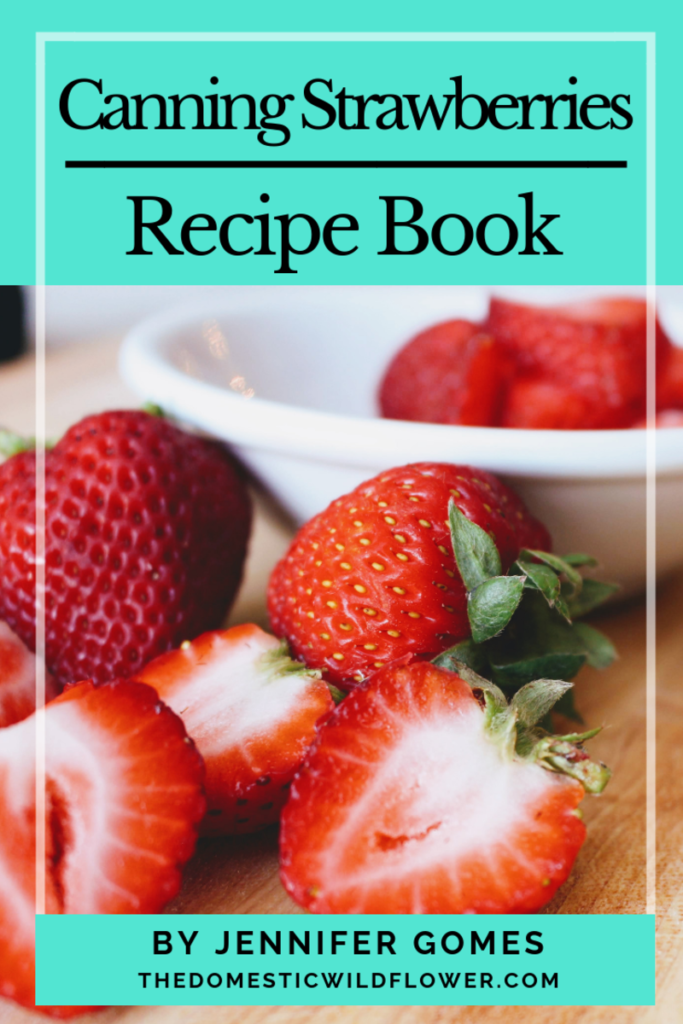
If you love strawberries, you’ll love my Canning Strawberries Recipe Book!

Canning Strawberries Recipe Book

Check it out here!

SaveSave

SaveSave

Filed Under: Can

What Is a Food Mill?

May 5, 2018 by Jenny Gomes 2 Comments

A food mill is an incredibly versatile kitchen tool that I use all the time in canning applications. This post will explain how to use one, the types of recipes you can use to make the most of a food mill, and why you will love a food mill! 

What is a Food Mill: How to Use One to Preserve Super Smooth Preserves Quickly and Easily!

This post contains affiliate links.

I’m not a gadget girl at all, and in my tiny kitchen, I’m very selective about the types of gear I allow into my space. A food mill would make the cut, again and again, because of how useful it is, in and out of the canning space.

A food mill basically presses food- fresh or cooked- against a plate with holes in it- so that what falls through is perfectly seed, skin, and tough-stuff-free puree and what remains up top in the hopper is refuse. They are amazing, and you need one.

I use my food mill to make super smooth, almost seedless jam (that’s right-nearly seedless!) really easy, perfect applesauce (the easy part is not having to peel (yawn!) every apple first), and any recipe -canning or otherwise- where you want a fast, smooth result. 

I also LOVE that the food mill is NOT an electric appliance. This food mill is simply 3 metal pieces that fit together and I feel confident that they will continue to work (read: not suddenly quit working like a blender might) forever.

Cleaning Your Food Mill

The refuse in the top hopper is compost gold, and I usually scoop it out with my hands. To be fair, I’m a mom of small children, one of whom is a boy, so very little grosses me out. The peels and seeds can be wet and slimy so you could use a spatula if you still have some kitchen dignity. I have none when it comes to wet and slimy peels so I remove them with my hands and then unclip the top blade (I am calling this a blade very loosely. It isn’t sharp- it presses the food into the holes of the plate, like a presser foot of a sewing machine presses. It’s kind of like a snow plow blade.) and then remove the rest of the peels, seeds, etc from the blade and hopper. The plate easily pops out with a little pressure from below and I recommend removing as much as you can manually (which won’t take long) before using the faucet to rinse the rest away.

PRO TIP: Of all the things you clean in a canning project, let this be the first. Dried on food on a food mill is a real bear. The preserving pan can soak clean, as can the funnel and ladle, but the food mill is a pain to clean the day after.

Which Food Mill Should I Choose?

I have this food mill. It’s lime green accents tell you it is part of the baby food making kit from Oxo. This simply means it is slightly smaller than the black-accented one. I LOVE that the legs have the grips- it is part of the Oxo “Good Grips” line (this is not a sponsored post, by the way) because having the legs firmly stationary on the bowl is very helpful. It comes with 3 plates (the same way a box grater has different sizes to yield different size slices of cheese) which I think is really important. I would recommend this food mill again and again.

The only other style of mill I would suggest, based on ease of cleaning, ease of use, and quality of puree, would be this stainless steel model by Weston that also has 3 plates. It is dishwasher safe (I put my Oxo on the top rack of mine sometimes but I probably shouldn’t) and being all metal means it probably will last FOREVER. It interestingly has no legs- this means you’d have to set it directly into a bowl or saucepan that fit nicely around the mill and that potentially could be very nice from the ease of work standpoint. It is also affordable (as is the Oxo) and works the same way.

What about the old-style Squeezo Strainers?

Invariably, an experienced canner in your life will suggest to you (or even give to you- for free maybe!) an older style Squeezo Strainer (or similar brand). They look like this.

The cone-shaped part on the counter does the same job as the plates in the Oxo or Weston mills except they are harder to clean. The Squeezo Strainer is more expensive- new $200- and you have to clip it to a countertop or table. They are indeed high quality, have been trusted for many years by canners, and are all metal (except for that little bit of plastic on the handle).

Which Should You Use?

I prefer a food mill because they are easier to clean and the capacity is the same or greater- the hopper on the Squeezo above is 2.5 quarts and the Oxo food mill is 3 quarts. It IS nice to have a very firm and stable base onto which you are milling, and the Squeezo style definitely good for that, especially if you clamp it to a countertop. To me, the Oxo food mill wins because it is so easy to clean and is less expensive.

Now, if you are given a free or cheap Squeezo – style strainer then use it! Understand that they do the same thing. They work in the same way and I’d encourage anyone to use a tool that was available affordably first.

What Other Canning Equipment Do I Need?

I have a rad little no-frills Canning Equipment Checklist you can download and print off (or just view from your computer or phone!) for free right here!

Are You a Canning Newbie?

If you are still learning the canning ropes, I want to invite you to my completely FREE Canning Basics Course! I’ll pop into your email inbox with little lessons so you can put jars on your shelf!

Other Helpful Posts

I wrote a pair of posts I think you will find really valuable: Best Home Canning Equipment for a Beginner and Canning Equipment for an Experienced Canner. Choose your own adventure, Wildflowers!

Filed Under: Can

Canning for Party Favors

April 23, 2018 by Jenny Gomes Leave a Comment

This post will share how to can favors for a bridal shower, wedding, baby shower, or other parties where you want to put love into jars and give the gift of something delicious.

Canning For Party Favors | Read how you can preserve jam, salsa, and other delicious treats easily for the guests at your next bridal shower, baby shower, or other party! Canning for party favors is genius- it saves time and money and is beautiful!

This post contains affiliate links.

Canning for a party can be a cost-effective, fun, impressive way of thanking guests for coming to your event. Before you think, “I don’t have time to make 40 jars of jam” hear me out.

Canning favors for a party is genius for several reasons.

You can preserve jam, hot sauce, salsa, or some other preserve that fits with your color or party theme which doubles as an element of decor and label it with a sentiment that fits the host or event perfectly.

Imagine: Pear butter preserved and the line, “A Perfect Pear | Allie & Taylor”  … adorable, right?

Thanking your housewarming party guests with teeny-but-terrific jars of hot salsa; “From one warm heart to another!” …so cute!

Because of these 4 ounce jars or this variety of 8-ounce jars, the quantity of preserve you are sharing is actually small, you can keep the cost and time commitment down.

I particularly love the 4-ounce jars because they are displayed easily on a cupcake tower (they have the same size base as a standard cupcake).

Canning For Party Favors | Read how you can preserve jam, salsa, and other delicious treats easily for the guests at your next bridal shower, baby shower, or other party! Canning for party favors is genius- it saves time and money and is beautiful!

If you have a smaller guest list (and don’t mind canning a bit more preserve), using these wide mouth half pint jars makes stacking a tower easy- the 4-ounce jars don’t stack as well atop one another.

I recently made jam for my good friend’s bridal shower and it took me a few afternoons and it was so fun to contribute something that people could enjoy and consume rather than stick on a shelf and never use. The jam was easy too because I stuck it in my trunk and headed down the road- no ice chest needed on the way to the out- of-town party. Another super talented bridesmaid created the labels so when I got to the host’s home, I tied them on and ta-da!

Canning For Party Favors | Read how you can preserve jam, salsa, and other delicious treats easily for the guests at your next bridal shower, baby shower, or other party! Canning for party favors is genius- it saves time and money and is beautiful!

And, of course, I was able to share with my good friend (the beauty in the pink top!) that I love her and I’m happy to be included in her wedding!

Canning For Party Favors | Read how you can preserve jam, salsa, and other delicious treats easily for the guests at your next bridal shower, baby shower, or other party! Canning for party favors is genius- it saves time and money and is beautiful!

How to Can Favors for a Party

Firm up the Guest List

The first step to canning for a party is to firm up the guest list. Get a head count and plan to make a few jars over that. You might consider making a bit extra for people who help with the shower. In my experience, this usually means doubling a canning recipe OR simply making a batch 2 or 3 times. Canning a triple batch (all in one fell swoop, in one pot, all at once) can be somewhat overwhelming. It can take a long time, and the preserve may not cook evenly and I would consider this to a be a more advanced activity. OR, the worst case scenario is you get it all in the pot and it boils over. I’ve tried to cook more than I should in one pot and not been happy with my results the way I am with a regular sized batch, done over an afternoon or so. One problem can be that the bottom can burn and burn jam isn’t delicious.

I’d advise 1. Determining the number of jars you need

2. Deciding if this means 2 or 3 or more batches and then

3. Cooking no more than a double batch at once.

Next, think about a preserve that you’d possibly like to gift. This is probably not the project for a preserve that takes a really long cook or prep time- unless of course, you desire a more lengthy project. Fast Raspberry Jam is one I’ve done several times for showers with great success. You can get frozen grocery store raspberries pretty readily and they are fairly inexpensive when they are in season or from a U-Pick. They are bright pink, which often times is a win thematically. Other recipe suggestions are strawberry jam or syrup, pickled pearl onions (these pearly beauties would be rad to give for a less-traditional shower as they are great cocktail garnishes), plum jam (dark purple), or  tomato jam (a savory ‘jam’ that’s amazing on top of pasta with goat cheese or on a meat sandwich **insert all the heart eyes here**).

Then, you’ll select your recipe and do the math. Determine how many jars (4 or 8-ounce jars) you’d yield from your selected recipe and decide how many batches you’d need to preserve. For example, if you know you are expecting 35 guests, and want to make 5 extra jars, you need 40 jars total. If I’m making the Fast Raspberry Jam, it yields 16, 4-ounce jars. That would mean I’d plan to make 3 batches, over 3 different afternoons, way before the shower. Weeks before. No one needs the stress of canning the night before- that’s not fun, Wildflowers. 3 batches would yield 48 tiny jars so I’d have plenty in case a guest asked to take an extra jar home (that will probably happen!).

Pro Tools for Canning for Party Favors:

Large preserving pan 

Potato masher for raspberry jam

Food Mill (so helpful for making a smooth jam or puree!):

4 ounce jars:

8 ounce jars (several cute options here!):


Pro Tip: Don’t be afraid to buy frozen fruit. You can can frozen fruit- don’t feel limited by the seasonality of produce to give the gift of love in jars

Steam canning is a great choice for canning for party favors because you’ll be getting preserving 2- 3 or more batches and steam canning is a huge time saver. You can read my post here about steam canners, or download this fact sheet all about them! I love them and rarely use my regular water bath pot now that I have a steam canner.

Decorating the lids: You could go crazy with decorating the lids. I’m not a decor-crazy girl, and paper crafts are not my specialty, so I’ll first remind you to let the preserve shine. The jars are clear, the preserve will be beautiful, and your effort and labor of love will be stunning. You don’t have to go overboard. That said, here are a few ideas for decorating and display.

My Love Into Jars labels can be printed at home on an Avery label template or printed on plain paper and cut out and are neutral but really cute.

Etsy is a terrific resource for affordable, editable, and beautiful labels and tags of all kinds. These round ones are adorable as are all these!

This batch of fast raspberry jam canned in 4-ounce jars and was arranged on a cupcake tower – the advantage here was the tags could be BIG (the jars are little, Wildflowers!) and it created quite a centerpiece. A cupcake tower or cake stand is a great way to display your jars. These are some cute options!


That one’s not a cupcake tower exactly, but so cute with jars stacked on top!

Canning For Party Favors | Read how you can preserve jam, salsa, and other delicious treats easily for the guests at your next bridal shower, baby shower, or other party! Canning for party favors is genius- it saves time and money and is beautiful!

You can totally do it! Even if you’ve never canned, I can teach you how! Sign up for my FREE Canning Basics course and you’ll be putting Love Into Jars in no time!

Filed Under: Can

How to Identify Wildflowers In Your Area

April 23, 2018 by Jenny Gomes 2 Comments

This post will share some of our favorite resources for identifying wildflowers in your area and includes both helpful apps and books that are sure to educate and inspire.

How to Identify Wildflowers

This post contains affiliate links. All opinions remain my own.

I called upon my friend Emily who is a flower enthusiast and budding flower entrepreneur (follow her lovely Instagram here!) to help me write this post. These are the tools she and other flower lovers like her use to identify flowers both while out and about and at home after a hike.

How to Identify Wildflowers with Apps

That Garden App is the go-to app on Emily’s phone. It is simple to use. Take a photo plant or butterfly, and the app brings up a list of possibilities. You confirm your matches, and the app saves all your photos so you can look back to see what you identified last week or month. And, this app opens a search page for the plant where you can learn more. This app is free and is endlessly helpful for quickly identifying the plant in front of you.

Garden Answers is another helpful app. Similar to That Garden App, it creates a photo album with results of your plant searches and helps you identify quickly the plant or flower you are seeing.

There are lots of flowers or plant ID apps out there and they all do about the same thing. Get a free one as an app is a preliminary stage in plant ID and the real investigation happens at home, with a good book. A beverage to enjoy while reading is optional but encouraged.

How to Identify Wildflowers in Your Area | The Domestic Wildflower click to read this helpful post listing the apps and books you need to refer to on the hike or at home to identify wildflowers in your area!

TIP: If you have a general idea of the flower you are trying to identify (based on an app or your own previous knowledge) you can use the books mentioned to refine your definition. In one sense, the app can be used “in the field” and the book (heavier and not as portable perhaps) can be used to narrow down your results after your trek.

How to Identify Wildflowers in Your Area | The Domestic Wildflower click to read this helpful post listing the apps and books you need to refer to on the hike or at home to identify wildflowers in your area!

How to Identify Wildflowers with Books

One book that is very helpful is the “Field Book of Western Wildflowers” It is organized by family (like rose, peony, dogwood, etc) and it has detailed illustrations and a thorough description to help you decide the family and name of flower you are enjoying.

 How to Identify Wildflowers in Your Area | The Domestic Wildflower click to read this helpful post listing the apps and books you need to refer to on the hike or at home to identify wildflowers in your area!

How to Identify Wildflowers in Your Area | The Domestic Wildflower click to read this helpful post listing the apps and books you need to refer to on the hike or at home to identify wildflowers in your area!

“Western Garden Book” by Sunset is not only for identifying wildflowers but is a very in depth resource covering cultivation, flower identification, planting zones, growing information, water & sun information, and more. It discusses wildflowers, trees, plants, shrubs, fertilizer, lawn information, planting instructions, weed advice, etc. This is the book for a Dear Reader who has a green thumb and wants to learn more about gardening as well as plant identification. It is weighty, has beautiful photographs, and is a wealth of information.
How to Identify Wildflowers in Your Area | The Domestic Wildflower click to read this helpful post listing the apps and books you need to refer to on the hike or at home to identify wildflowers in your area!


How to Identify Wildflowers in Your Area | The Domestic Wildflower click to read this helpful post listing the apps and books you need to refer to on the hike or at home to identify wildflowers in your area!

The National Geographic Pocket Guide to Wildflowers is easy to take along on your hike or picnic, has beautiful photos, and is very thorough as well. This would make a great gift for a friend and is the way you could identify a flower if you have no cell service, no storage with which to take a photo (me, 90% of the time), or a dead phone (me, 50% of the time). Sometimes technology fails us, but this little book won’t.

 How to Identify Wildflowers in Your Area | The Domestic Wildflower click to read this helpful post listing the apps and books you need to refer to on the hike or at home to identify wildflowers in your area!

How to Identify Wildflowers in Your Area | The Domestic Wildflower click to read this helpful post listing the apps and books you need to refer to on the hike or at home to identify wildflowers in your area!

California Foraging is for the Wildflower reader who is interested in nibbling on the edibles afield. This resource is indispensable for identifying plants that are safe to eat. If you aren’t in California, get a book that is specific to your area.

 How to Identify Wildflowers in Your Area | The Domestic Wildflower click to read this helpful post listing the apps and books you need to refer to on the hike or at home to identify wildflowers in your area!

Before you pick some wildflowers to arrange and enjoy at home, check to see if they are protected. Sometimes wildflowers are better left to grow undisturbed and in any case, snap a photo and share it on Instagram using the hashtag #thedomesticwildflower so we can see it!

If the flowers on your jaunt are more likely to be planted by man rather than the man upstairs, The Little Guides: Flowers is my favorite resource. It was given to me by my dear friend Abby years ago. She’s the one who said to me a little over a year ago, “let me build you a blog!” and I said yes and here we are. How funny it is that she gave me this way, way before I ever dreamed of having a blog called The Domestic Wildflower, back when she and I shared membership in a scholarship program, several Chico apartments, a trip to Europe, and years of friendship. She’s also a great book chooser 🙂 Grab yours by clicking the link below!

 How to Identify Wildflowers in Your Area | The Domestic Wildflower click to read this helpful post listing the apps and books you need to refer to on the hike or at home to identify wildflowers in your area!

For bouquets of wild plants that you are sure are safe and legal to collect, find what you think is beautiful and arrange it however you would like. I wrote a post here about wiring wild plants to wreaths and arranging them in metal buckets that I think you’d enjoy. Check it out!

How to Plant Your Own Grasses

If you are interested in diving into planting grasses, check out this gorgeous infographic shared from https://agreenhand.com/how-to-grow-grass-fast/ !

Please share in the comments below which resources you love for identifying plants in your area!

If you loved this post, you should read how I made homemade lilac syrup here.

Filed Under: Living

Raspberry Jam Recipe

April 12, 2018 by Jenny Gomes 1 Comment

Raspberry jam is one of the fastest preserves a person could make. Canning has a terrible reputation as being time-consuming- this recipe proves that canning can be quick, easy, and is a simple extension of the cooking process. Raspberry jam is a delight to give as gifts, easy to pick at U-pick farms, and delicious preserved in mason jars. 

If you’ve happened upon this recipe, and realize it is a canning recipe, don’t click away. You can make the recipe below and eat it fresh, or better yet, let me teach you how to can- it’s so fun and easy! I have a free Canning Basics Course you can join right here!

I’ve timed myself several times making this recipe, as we have a gorgeous U-Pick very near my home, and I can go from berries in a basket to the stove OFF, jars sealed, and me walking out the door in 20 minutes (Read my post about the 5 Reasons to Visit a U-Pick here!). I’m not exaggerating. Once you start this recipe, be ready: It goes quickly!

True, I don’t have to search for my canning equipment (I know that can be a time suck for any activity) and this isn’t my first rodeo, but a newbie could easily complete this recipe in 30 minutes (Read my post on the Best Canning Equipment for a Beginner here or download the free equipment checklist below to get started!).

Not only is raspberry jam really fast in a water bath process, but it is also 15 minutes faster in a steam canner. Read more about these terrific, time savers here.

Raspberry Jam is Ideal for Beginners

because raspberries are naturally high in the acid that prohibits the growth of spoilers inside the jar after the jar is sealed.

Watch this video for more about why this is the fastest canning recipe to make!

The worst thing that could happen when making this jam is that it turns out a little thin. Thin jam is syrup, Wildflowers, and that is still a success in my book.

How To Make Fast Raspberry Jam Canning Recipe - Perfect for beginners, this recipe can be done in under 20 minutes! You can download the free equipment checklist if you are a newbie, or skip canning it entirely! Such a great recipe for the fastest raspberry jam!

A note about pectin: Pectin is the plant version of cartilage in animals. It gives shape and stiffness to your jam and jelly (and we use the animal version as gelatin to make Jell-O, etc). I like to use store bought pectin to thicken my jams, and I typically use the powdered 1.75-ounce boxes because they are easy to halve (the liquid packs are hard to use just part of and are a bit messy) and they are inexpensive and found readily in grocery stores. Liquid pectin is nice because it mixes up nicely with your jam and there’s no threat of lumps but I’ve never had my powdered pectin lump up- when you sprinkle it in, be ready to whisk with vigor, as you mean it, for a few minutes.

If you’d like to skip the store-bought pectin (powdered or liquid) this might be a good jam to try it with because pectin hasn’t any bearing on the canned good’s safety (safety first, Wildflowers!) and raspberry seeds have a significant amount of natural pectin in them. The longer the raspberry jam is cooked (probably on lower heat and more slowly than the following Fast Raspberry Jam directions indicate), the more jam-stiffening natural pectin will be released from the seeds and the stiffer your jam will naturally be. As a comparison, strawberry jam won’t ever stiffen up quite the way raspberry will, naturally anyway, partially because raspberries have more seeds.

Fast Raspberry Jam Recipe

Download the free recipe printable here! 

Yields 4 cups jam– you’ll need 16 tiny 4-ounce jars (so great for gifting or for a bridal shower!) 8 half-pint jars

Prepare your steam canner (I use this kind and love it)

3.5 pounds Raspberries (about 7 cups)

2/3 cup bottled lemon juice

1 1/2 cup sugar

Combine ingredients above in a preserving pan on medium heat while mashing with a potato masher or wooden spoon and bring to a boil. Be mindful that this is FAST raspberry jam- I’m not just saying that. This recipe can go from start to finish in under 20 minutes so be ready! 

Whisk in a 1.75-ounce box of powdered pectin with vigor, and boil 1-2 minutes longer.

Jam can be eaten once it is cooled at this point, but to preserve it in canning jars, follow the following steps and if you’d like to learn more about canning, sign up for the FREE Canning Basics course beneath the recipe!

Ladle into hot jars (from the rack of your steam canner or from the boiling water pot) one at a time, leaving 1/2 inch headspace.

Apply lids and rings and process for 10 minutes at sea level, and add 5 minutes for every 1000 feet you live above sea level.

Learn how to can with me in my FREE Canning Basics Course here in a few easy email lessons!

How To Make Fast Raspberry Jam Canning Recipe - Perfect for beginners, this recipe can be done in under 20 minutes! You can download the free equipment checklist if you are a newbie, or skip canning it entirely! Such a great recipe for the fastest raspberry jam!

This jam is a great one for gifting or sharing at a shower (bridal or baby). I made a tower of raspberry jam for a friend’s bridal shower and we arranged them in a cupcake tower. ADORABLE, right?! Grab these tags from Etsy and you are set!

How To Make Fast Raspberry Jam Canning Recipe - Perfect for beginners, this recipe can be done in under 20 minutes! You can download the free equipment checklist if you are a newbie, or skip canning it entirely! Such a great recipe for the fastest raspberry jam!

Share your Love Into Jars, Wildflowers and grab the adorable Love Into Jars Baseball Tees right here!

Filed Under: Can

  • « Go to Previous Page
  • Page 1
  • Interim pages omitted …
  • Page 27
  • Page 28
  • Page 29
  • Page 30
  • Page 31
  • Interim pages omitted …
  • Page 66
  • Go to Next Page »

Primary Sidebar

Categories

Follow me here, there, & everywhere!

  • Email
  • Facebook
  • Instagram
  • Pinterest
  • RSS
  • Twitter
  • YouTube

Search

Get The Pressure Canning Cookbook

Get 10 Free Recipes Now!

Best Chicken Coop

Footer

Get Started Pressure Canning

Shrubology Ebook

Shrubology: Refreshing Homemade Fruit and Vinegar Syrups for Cocktails
Make easy, no-cook fruit & vinegar syrups for cocktails & mocktails! This ebook shares crowd pleasing recipes and simple to understand ratios so you can make a shrub on your countertop any time- without a recipe. Dive into these Prohibition Era drinks today!

Copyright

Copyright 2019
The Domestic Wildflower
www.thedomesticwildflower.com.
All content created by Jennifer Gomes unless otherwise noted.

Copyright © 2025 · Lifestyle Pro on Genesis Framework · WordPress · Log in