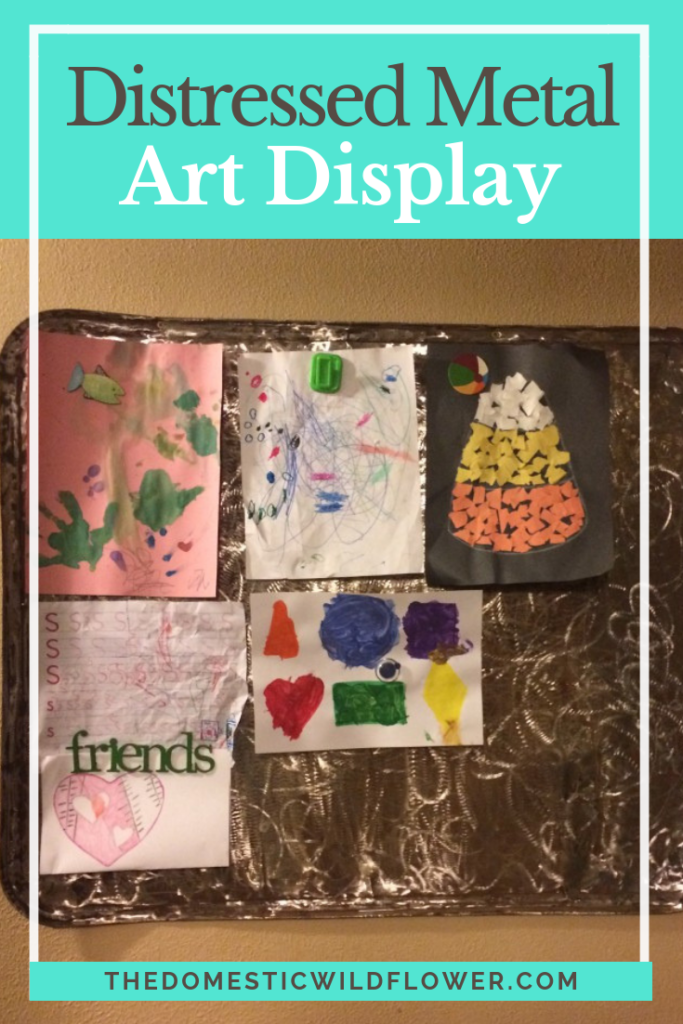
If you need a great way to display kid’s artwork or other papers that are not the standard cute but done chalkboard, this is a super cute, nearly free, and rustic DIY alternative. I’ll show you how to distress a piece of metal (salvaged, thrifted, repurposed) to transform it into a rustic and functional display.
Now that I have a 4-year-old, the art creation and content level in our home have skyrocketed. My little darlings are creating more awesome construction paper gems than I ever thought possible and I want to display them for at least a little while before storing them to cry over in years to come.
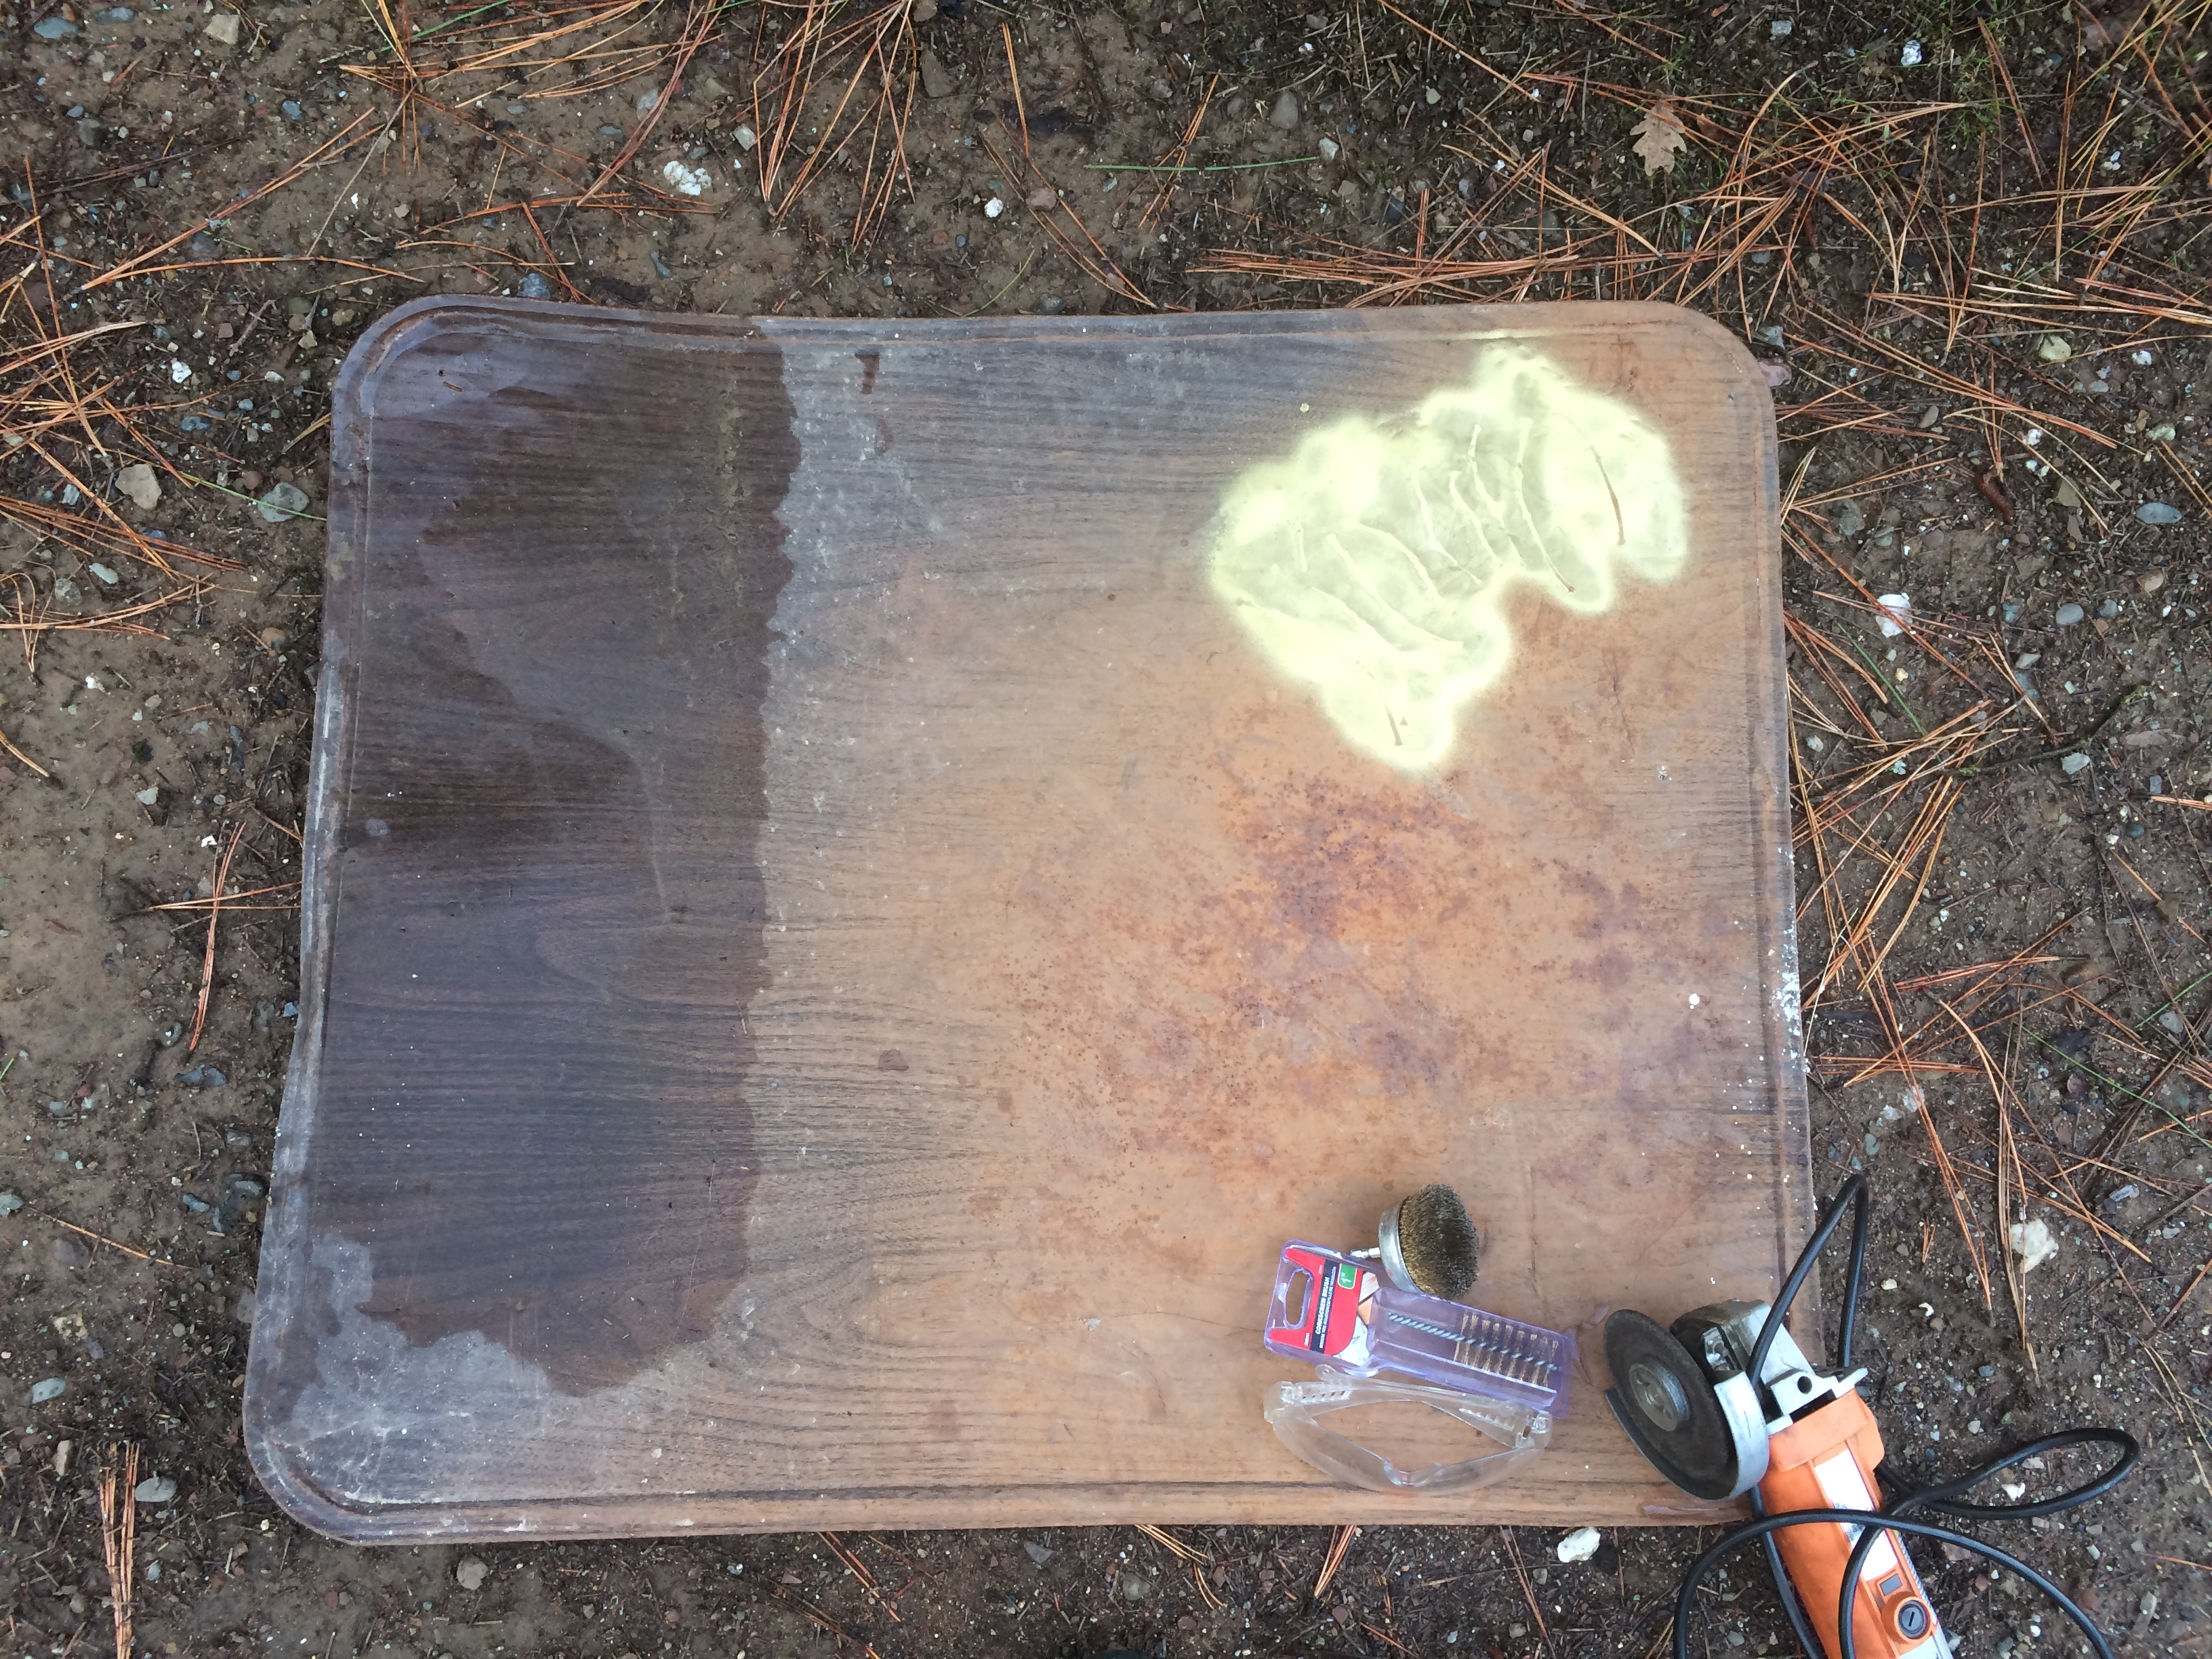
I found this weird metal sheet in the garage and I wish I could tell you what it came from. You can use a lot of different kinds of metal and the easiest way for you to know if it is magnetic is to bring a magnet with you when you are in the thrift store/garage sale/barn/home supply store. My next project will be on beating up impossibly ugly cookie sheets. Maybe you’ll beat me to it, Wildflowers, and I can’t wait to see if you do.
The metal I found had an ugly brown faux bois print on it that was surprisingly hard to grind off but by using a few tools and about 30 minutes, it was transformed into a useful and unique gem.
Tools: I used a 4-inch angle grinder (use safety glasses and a strong grip with this one, Dear Readers) and a wire wheel brush on a power drill. Other tools that can be super useful (depending on the metal you rustle up and the look you are going for) include a ball peen hammer, a wire cup brush, and plain old steel wool (medium down to extra fine).
You can also distress copper and brass metal with a mixture of salt and vinegar. I haven’t done it yet myself but the results I have seen in person are gorgeous and I’d highly recommend learning more if it interests you. It is definitely on my to-do list 🙂
I donned my safety glasses and earplugs and started with the grinder. The weird, wobbly line of crescent moons it makes when drug across the sheet of metal is beautiful and I love it. Because ideally, you are working with a salvaged or inexpensive find, you can give yourself permission to experiment to a large degree and just enjoy the distressing process.
I drug the grinder across, from top to bottom, left to right, and decided that because it was satisfactorily removing the faded and ugly brown faux bois layer, to keep grinding. And grinding, and grinding. I moved all the way from top to bottom and side to side very methodically. I made the mistake of moving only half way down and realized it looked haphazard in a bad way. Let there be a method to the madness.

I paused and tried out the drill attachments and for my particular piece, there wasn’t any result that I Iiked as much as the grinder. Experiment, and know that because the end result is a result of layers, not one single action.
After moving left to right, many dozen times, I turned the sheet of metal a quarter turn and repeated the process. The more I did, the better it got.
I went through the same process for another turn.
Because my edge had a ridge running all the way around, making it kind of like a large platter or cookie sheet. I deviated from the top to bottom, left to right plan to run the grinder inside the edge, all the way around. I used only a light pressure because you should consider a bend or crease as a weaker point in the metal than on flat places. On the places that I pressed a bit too hard, the outside edge began to warp.
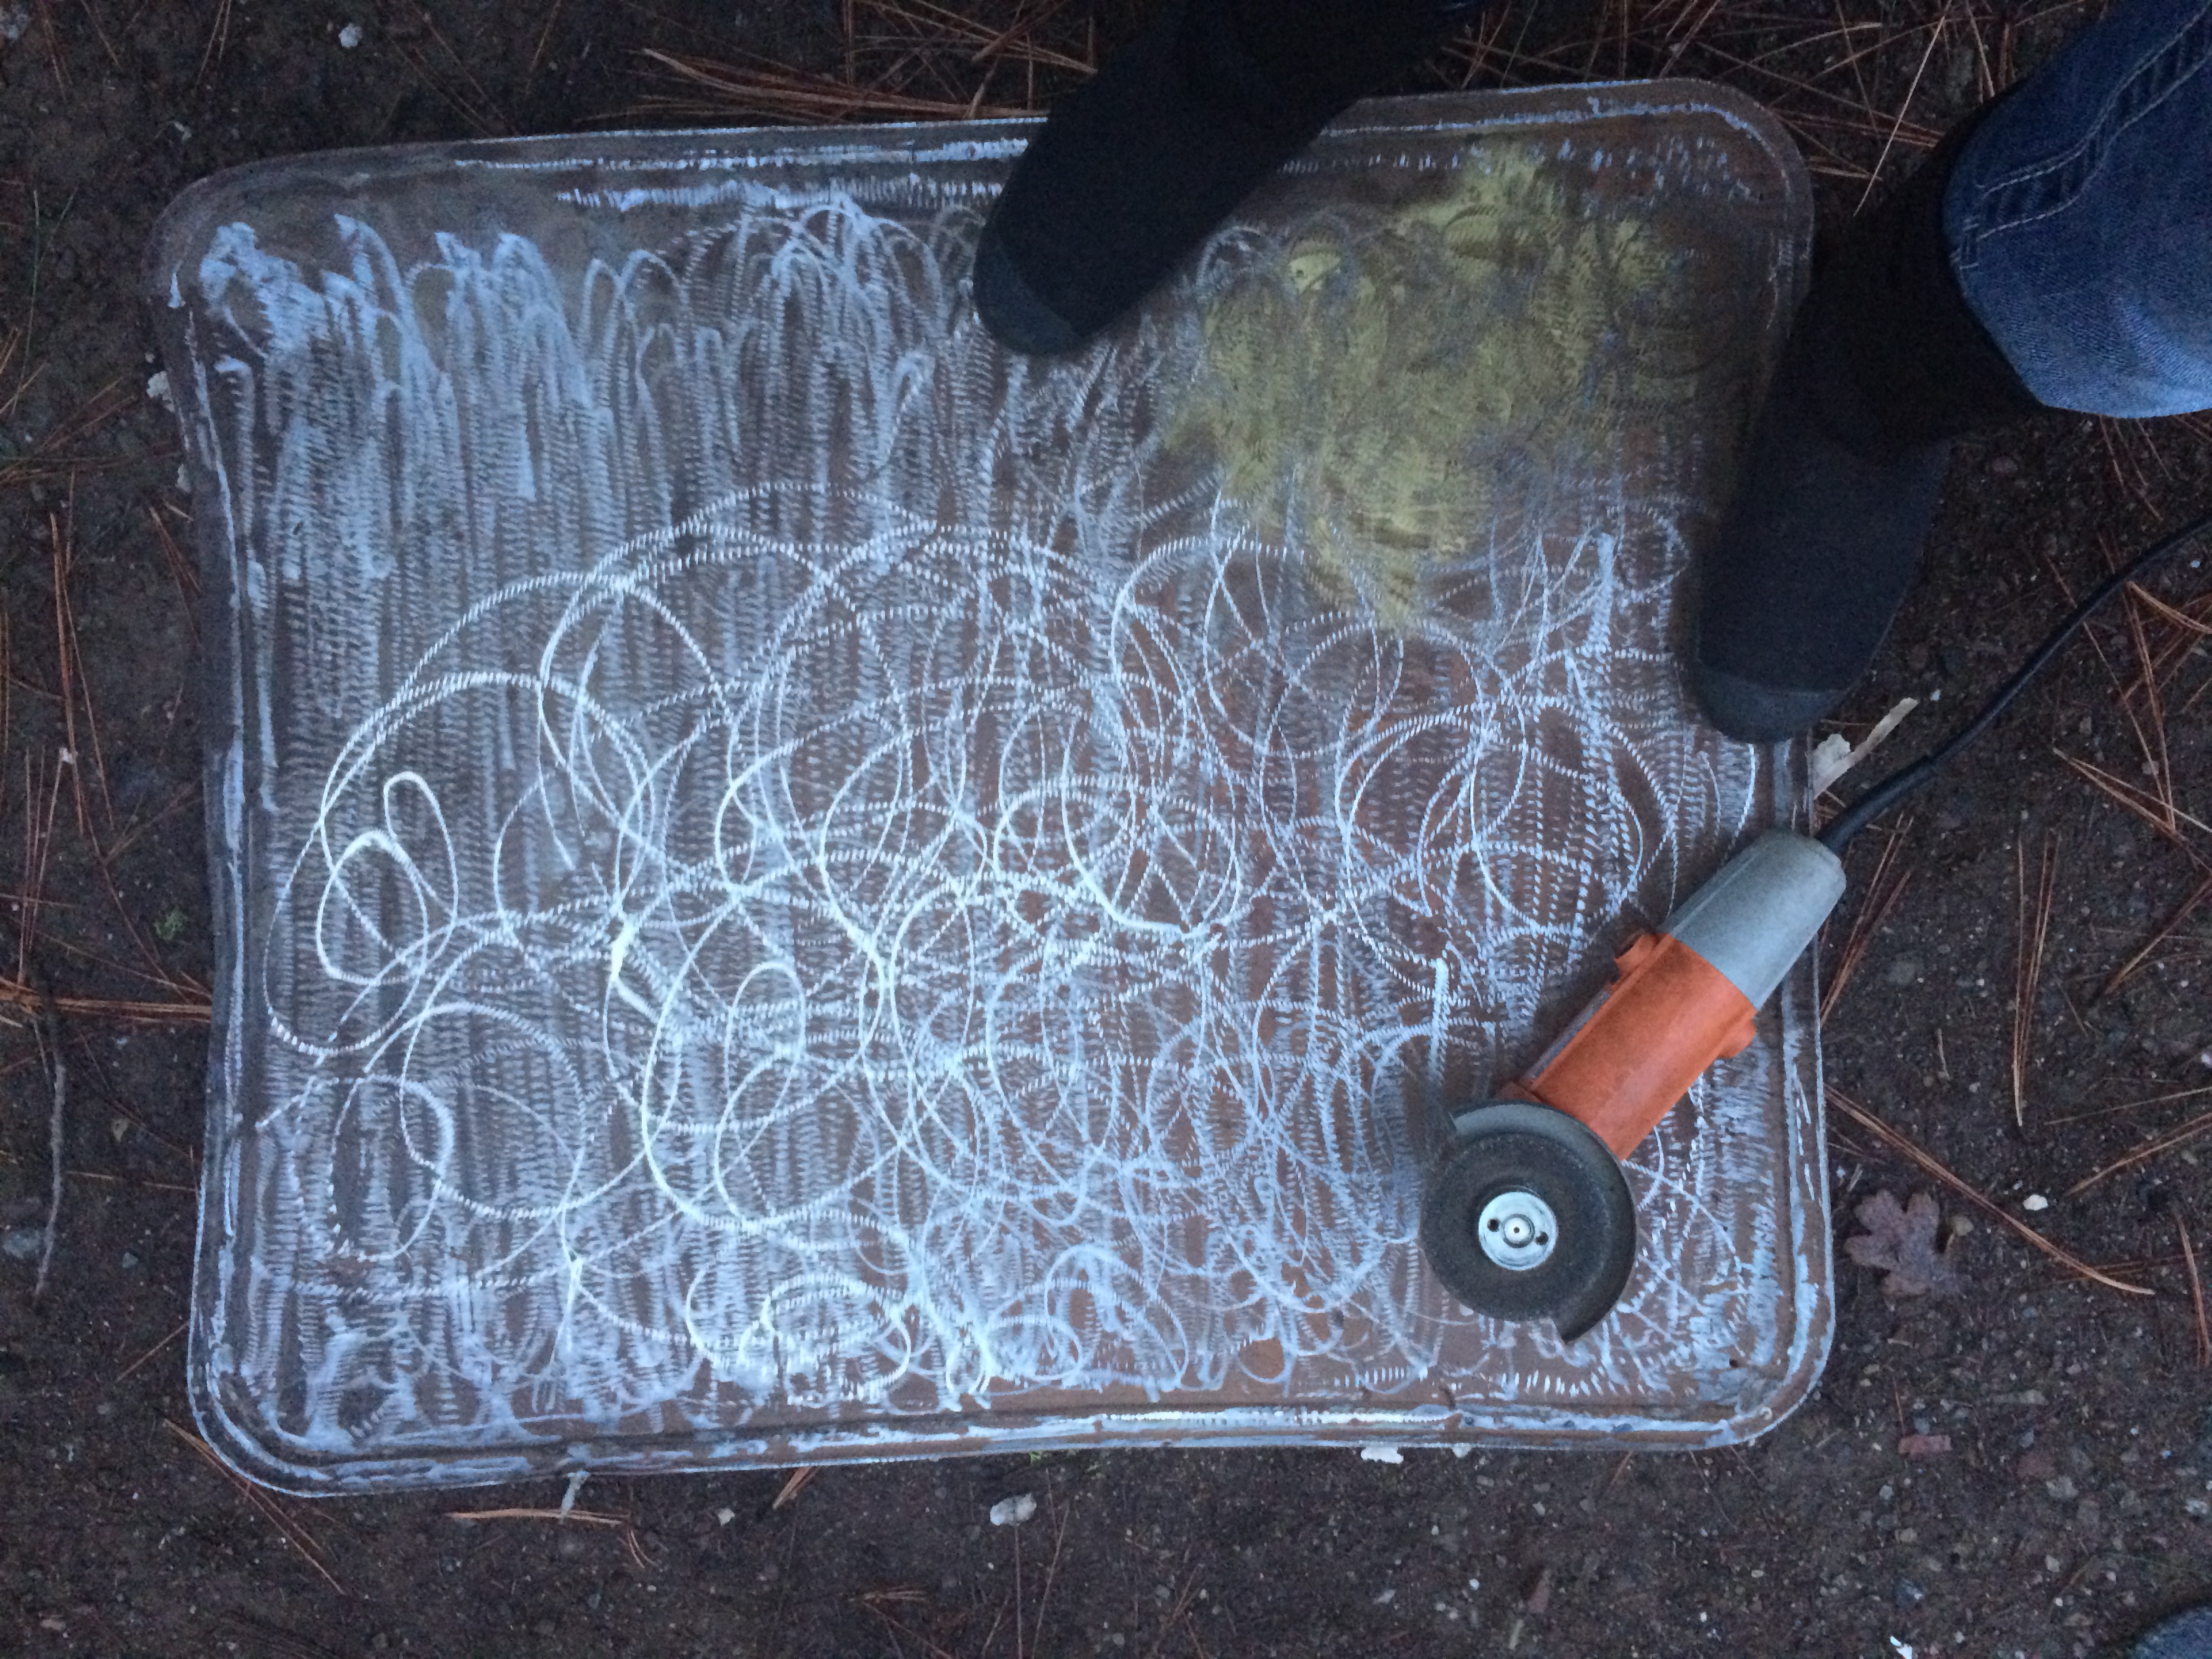
After I ground the edges, I did looping circles, as if I were practicing my cursive writing, methodically in the same way as I moved in straight lines. This was magic and made the overall surface shine literally and metaphorically.
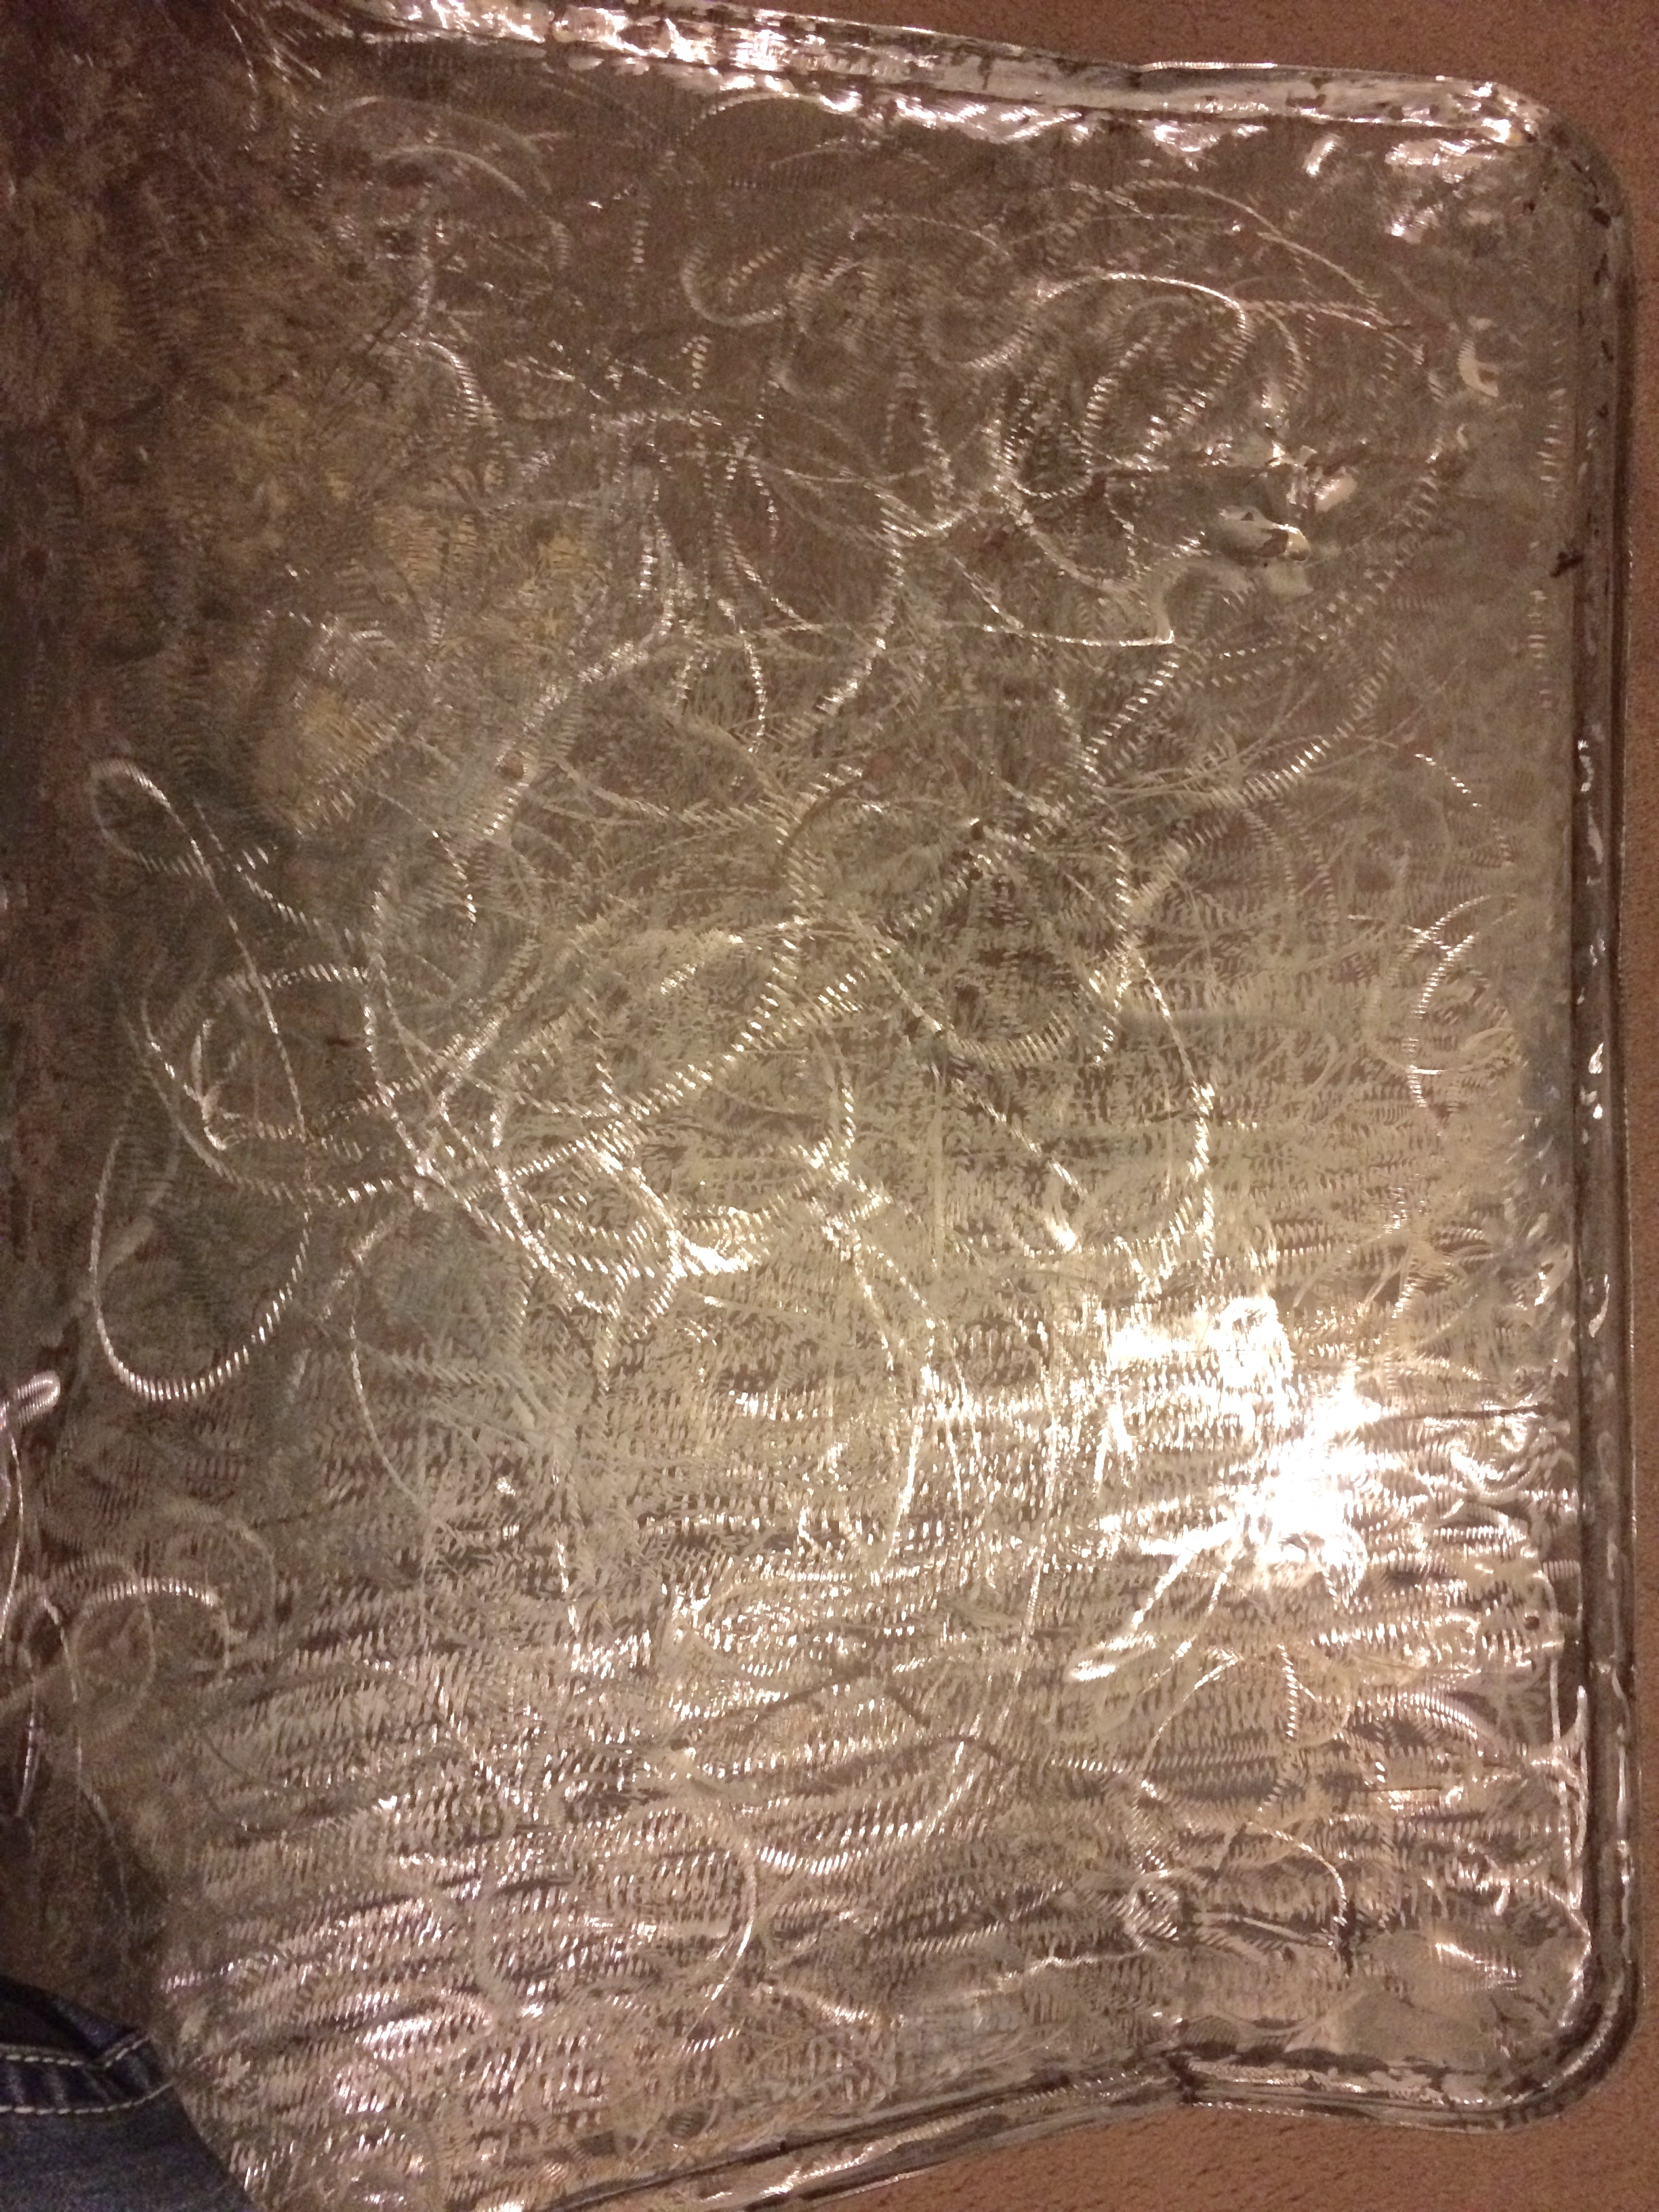
I wish there was a more fancy technique to be shared, but there isn’t. I truly just used the grinder until the silvery semi circles covered the surface and no ugly remained.
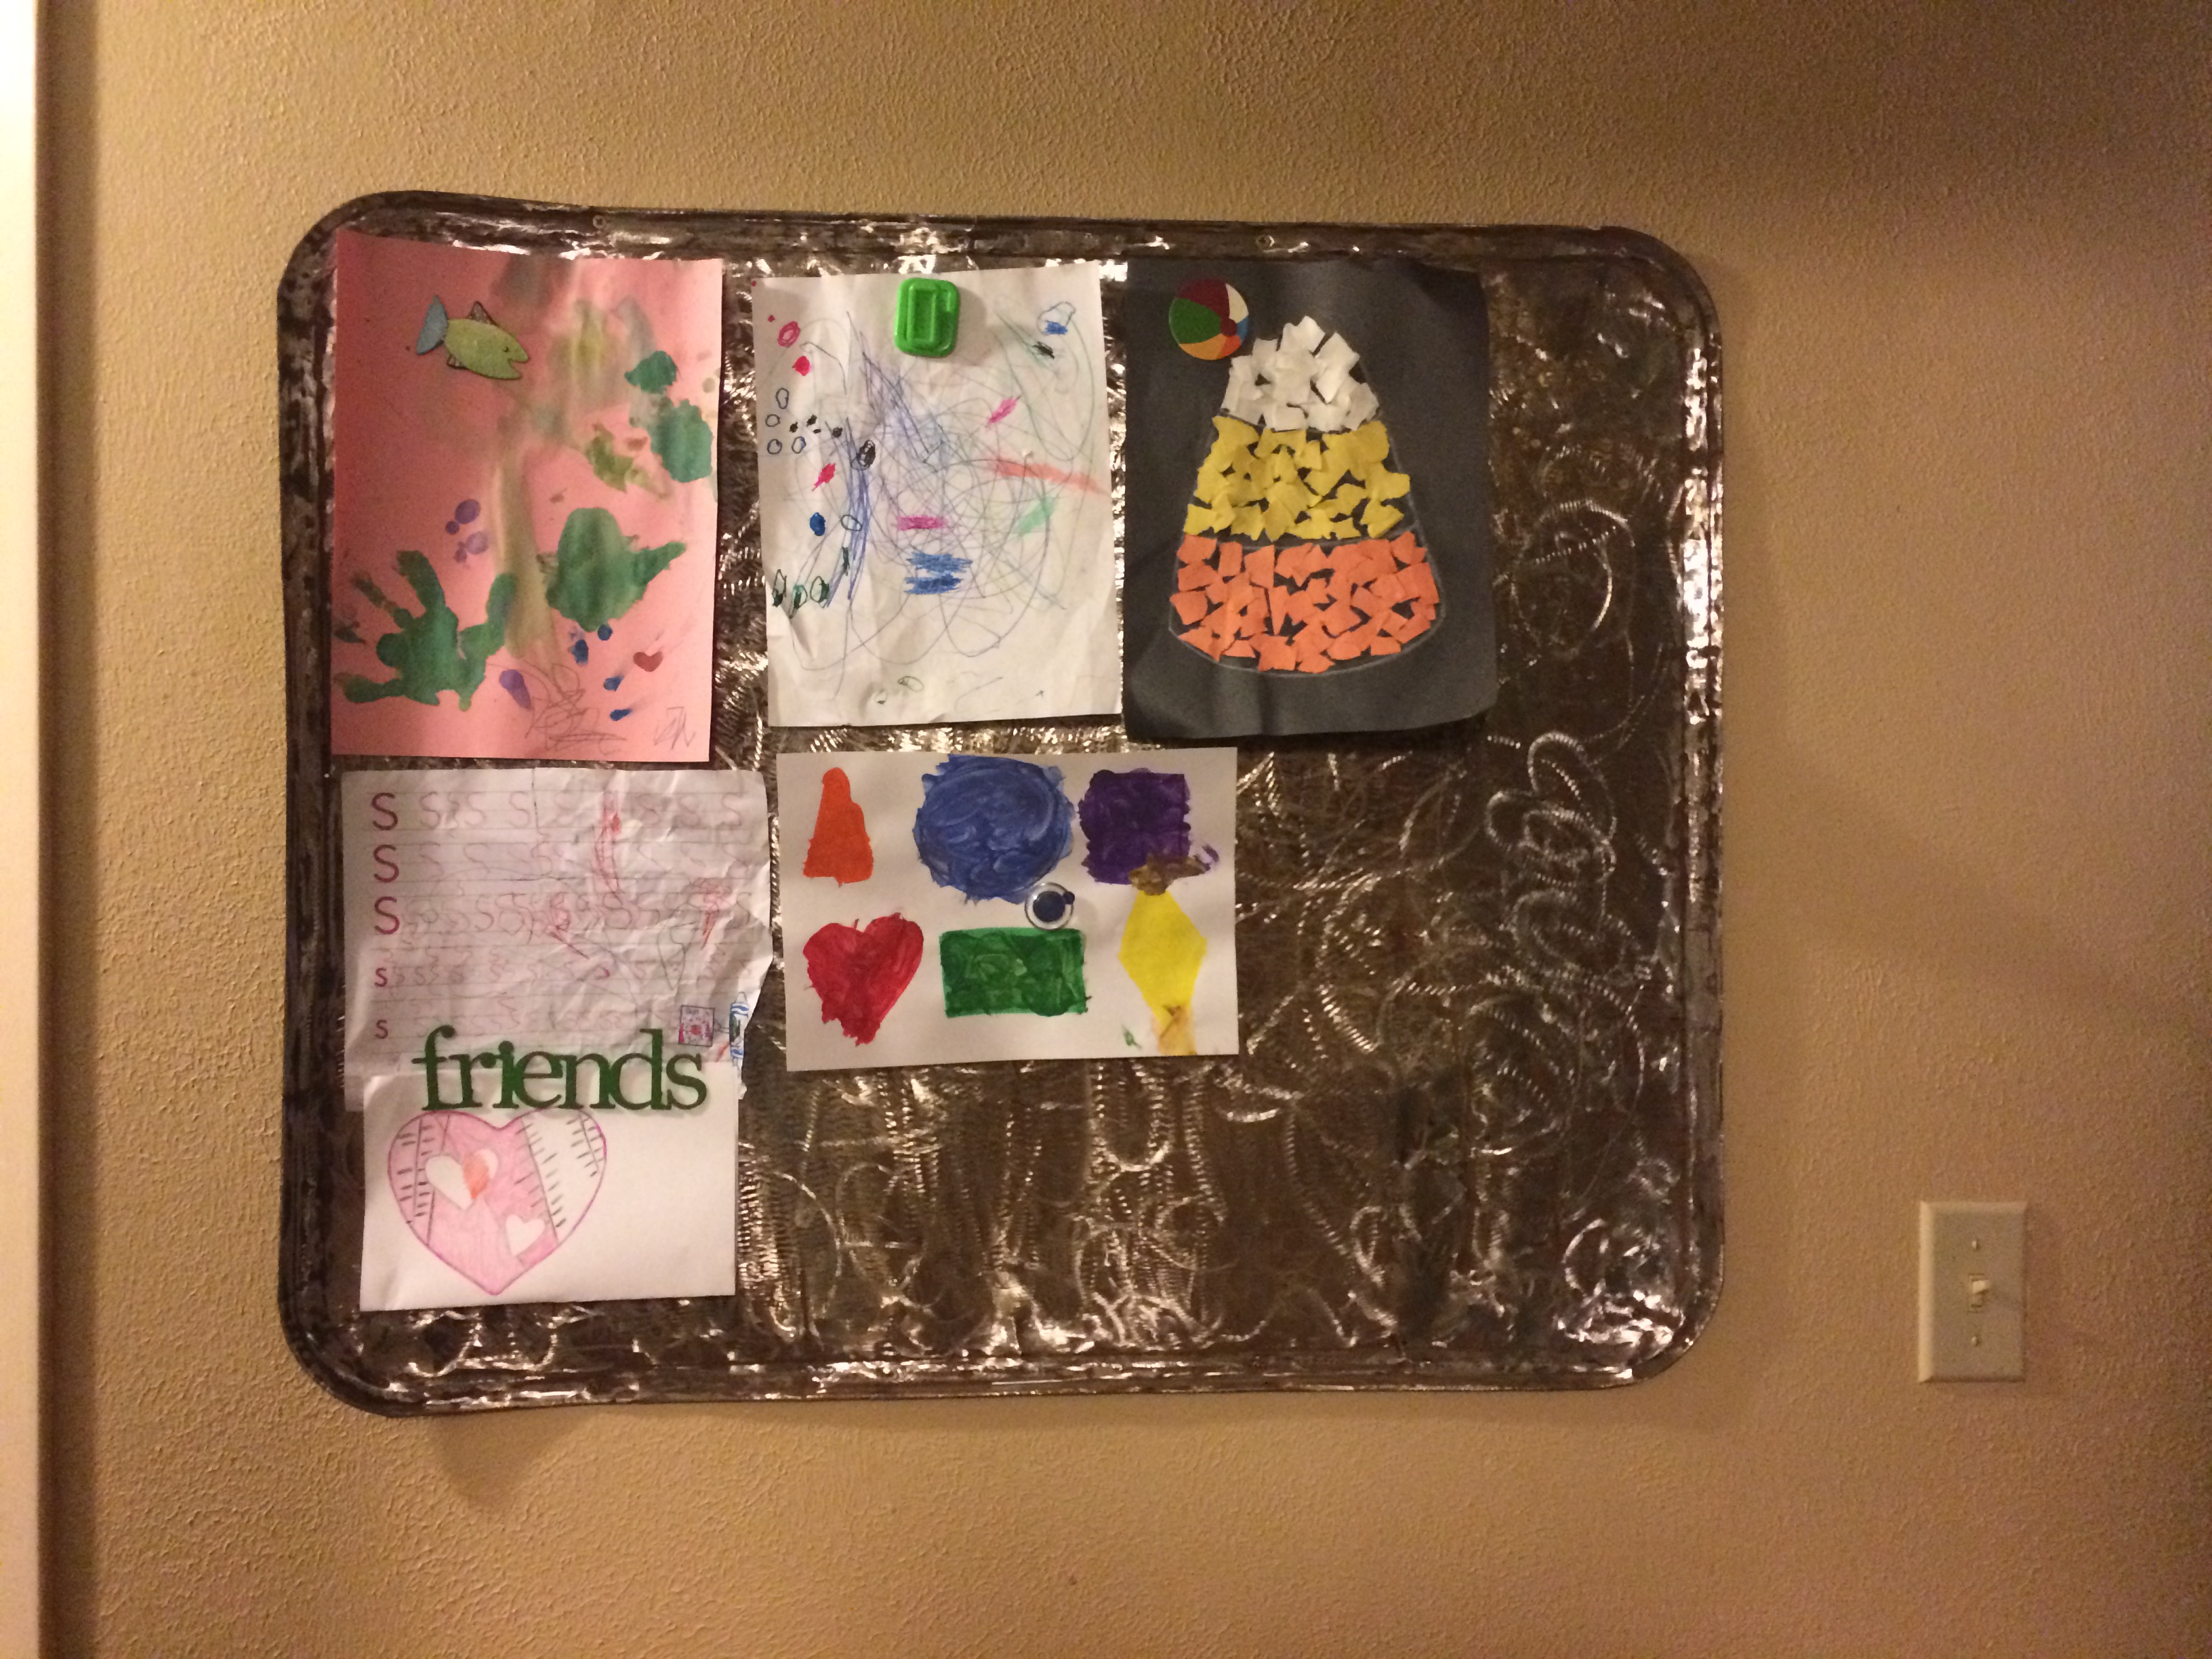
My husband used a couple screws to mount the board in the hallway, positioning over studs AND on a few places where my edge grinding made the edge curl up a bit.
And now I have a super pretty place to display all the artwork my kids make and it doesn’t require chalk or an eraser.
What metal have you distressed, Wildflowers? Share in the comments below!

Leave a Reply