• Skip to secondary menu
  • Skip to main content
  • Skip to primary sidebar
  • Skip to footer
  • The Pressure Canning Cookbook
  • Blog
    • Subscribe
    • Welcome!
  • Perfectly Preserved Podcast
  • About
    • ADW Manifesto
    • Work With Me
      • Read
  • Shop
    • My Account
    • Cart
    • Checkout

The Domestic Wildflower

Handmade Food & Craft Tutorials for Beginners

  • Courses
    • Free Canning Basics
    • Everything Canning Course
    • Steam Canning Workshop
    • Free Homemade Cocktail Mixers
    • Wildflower Mixology
    • Crochet Basket Workshop
  • Can & Preserve
    • Never Canned?
    • Steam Canner Equipment Bundle
    • Shrubs Course
  • Sew
  • Cook
  • Craft
    • Crochet Step-by-Step Guides
      • Crochet Basket
      • Giant Yarn Throw
      • Thick & Thin Throw
  • Living
    • Creativity Challenge
    • Clean
    • Kids
  • Rentals

Jenny Gomes

Ranch Style Salsa Recipe

August 21, 2017 by Jenny Gomes Leave a Comment

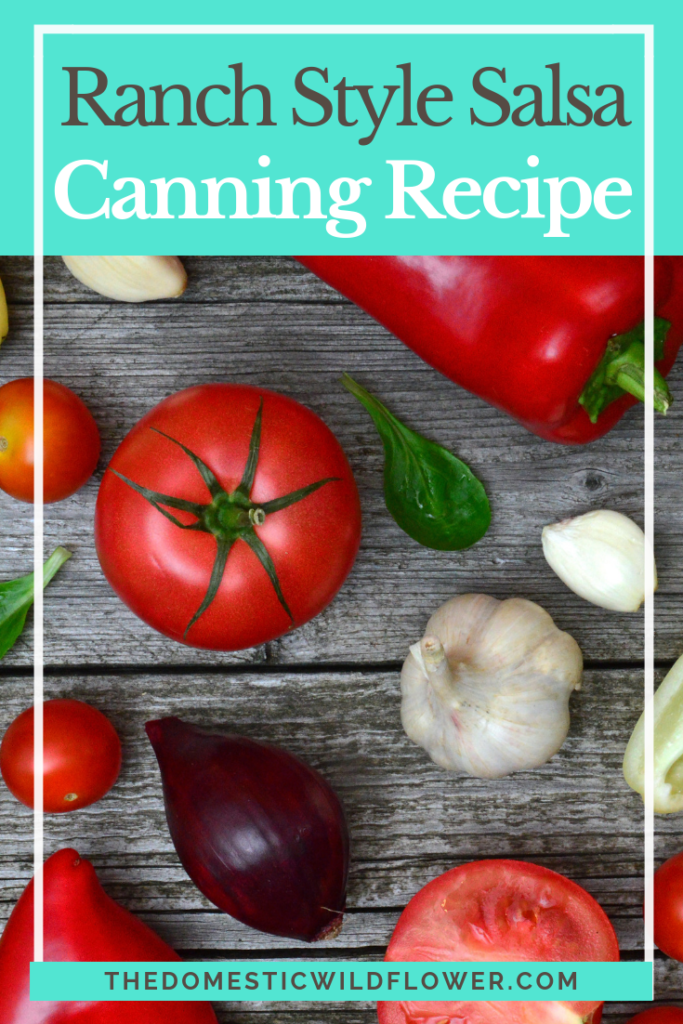
This ranch style salsa recipe is perfect for brand new beginners because it cooks up quickly, is giftable, is delicious, and is relatively fast. Read on for the recipe!

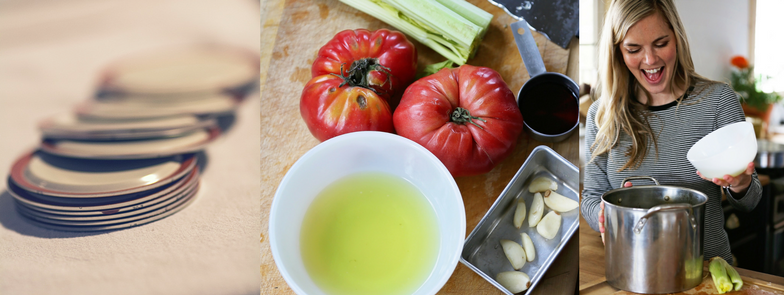
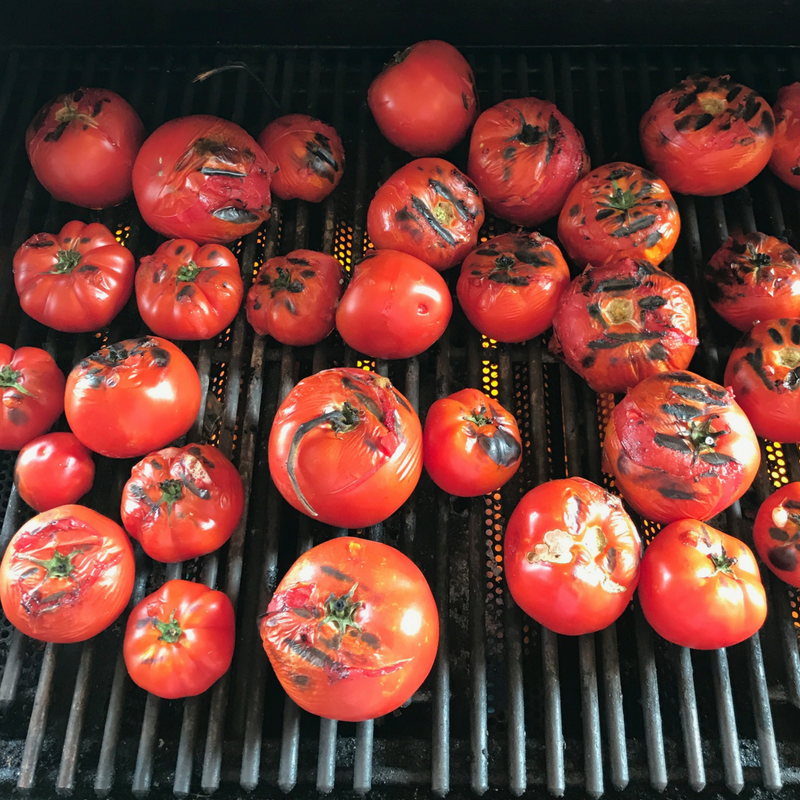
This salsa recipe is ranch-style because the onions, tomatoes, and peppers are roasted either under a broiler or on a grill until charred (blackened). The tomato skins and pepper skins slip right off after being charred, and the flavors are amazing with this added step. Peeling the tomatoes this way avoids dropping them in boiling water (I explain how to peel tomatoes a couple ways in this tomato sauce post here) and thus saves time and mess.

This is how the tomatoes (for a very large batch, which I’ll explain in a moment) look when charred. It takes just a few minutes (about 5), and you should start with the stem side down, and turn with tongs.

Ranch Style Salsa Canning Recipe- get the recipe for easy ranch style salsa with water bath canning and steam canning instructions!

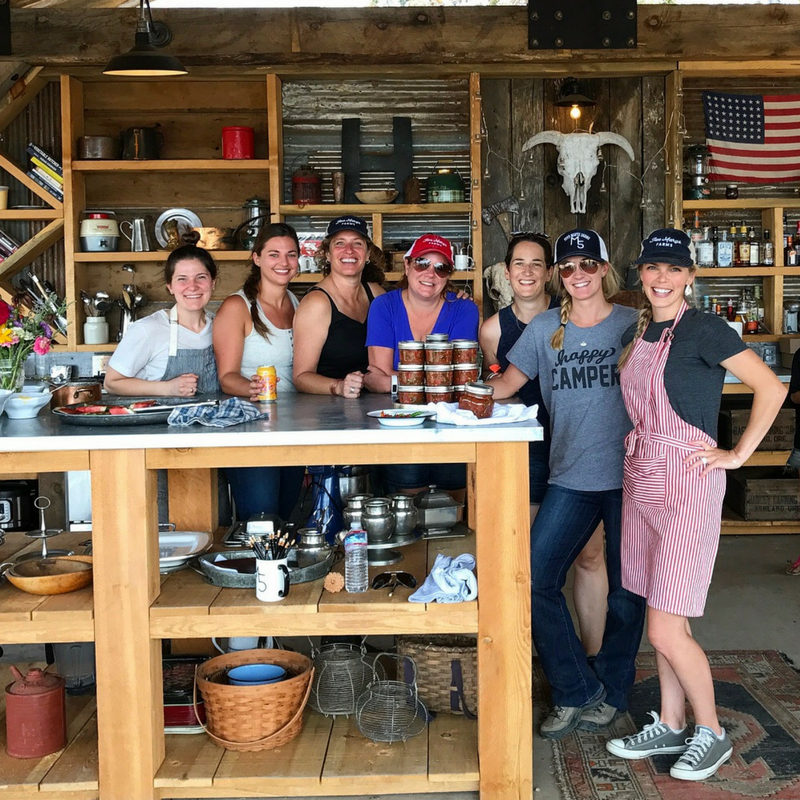
I made a 4x batch of this salsa most recently when I demonstrated canning at Five Mary’s Farms, a great ranch in my area, where my friend Mary hosted a group of campers. Every time I teach canning in person it helps me grow as a teacher and it is such a blast. Be sure to check Mary out on Instagram @fivemarysfarms – she’s a pastured-everything rancher and hosts great events.

Ranch Style Salsa Canning Recipe- get the recipe for easy ranch style salsa with water bath canning and steam canning instructions!

Here’s the recipe, Wildflowers! You can download the PDF for free here!

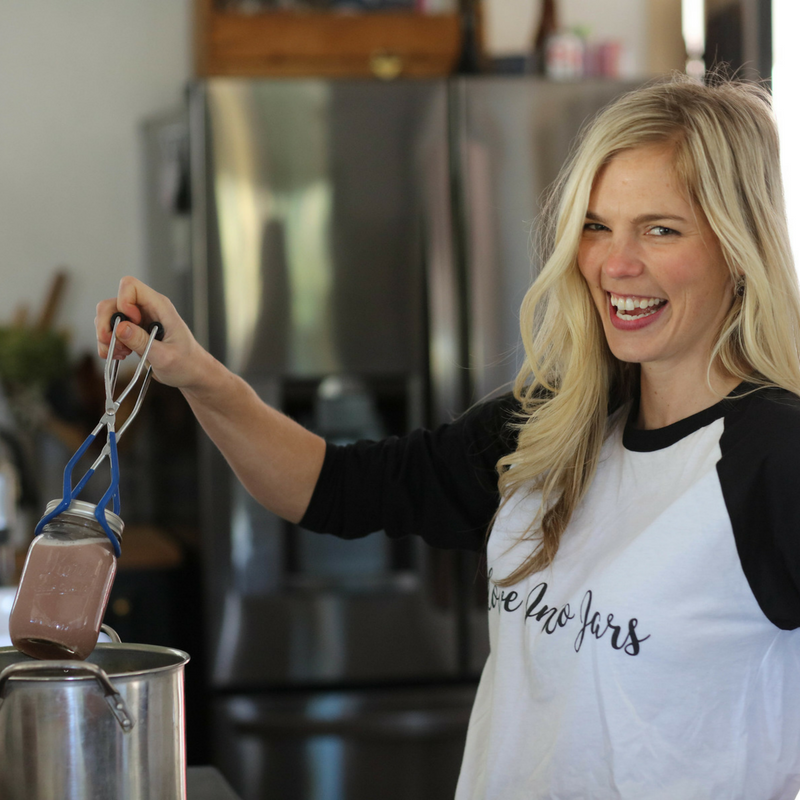
At the demonstration, I showed the campers how to water bath can, how to steam can, and how to get started with both. They got to SEE, STEP BY STEP what happened at the stove, and we talked about acid and safe recipe substitutions.

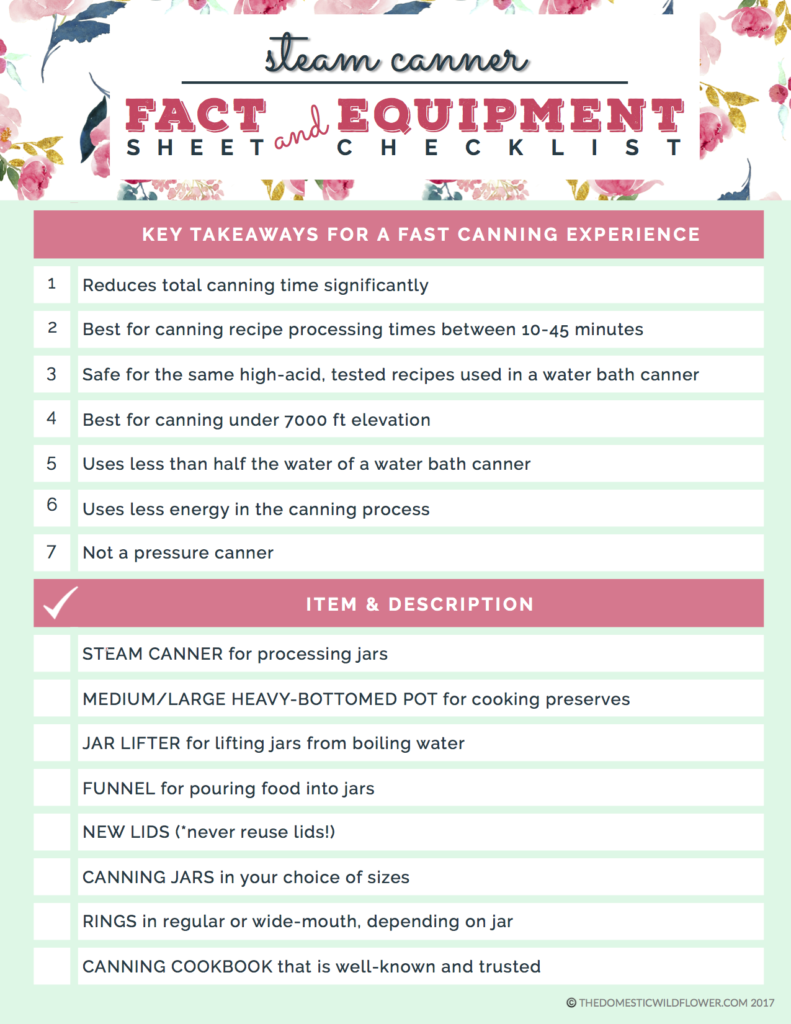
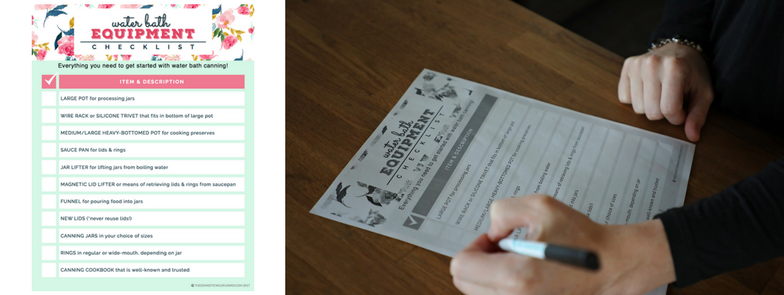
Because not everyone can see a canning demonstration live and in person, I created a great little workbook that you can grab for an affordable price that will help you decide between steam and water bath canning, help you determine which recipes to plan to can in which season, how to adjust for altitude, and more.

You need a list of the equipment to get started canning. You don’t want to pick out a great recipe and not have the gear you need!

You need a pantry checklist so you have the new lids, the right kind of salt, etc ready to go!

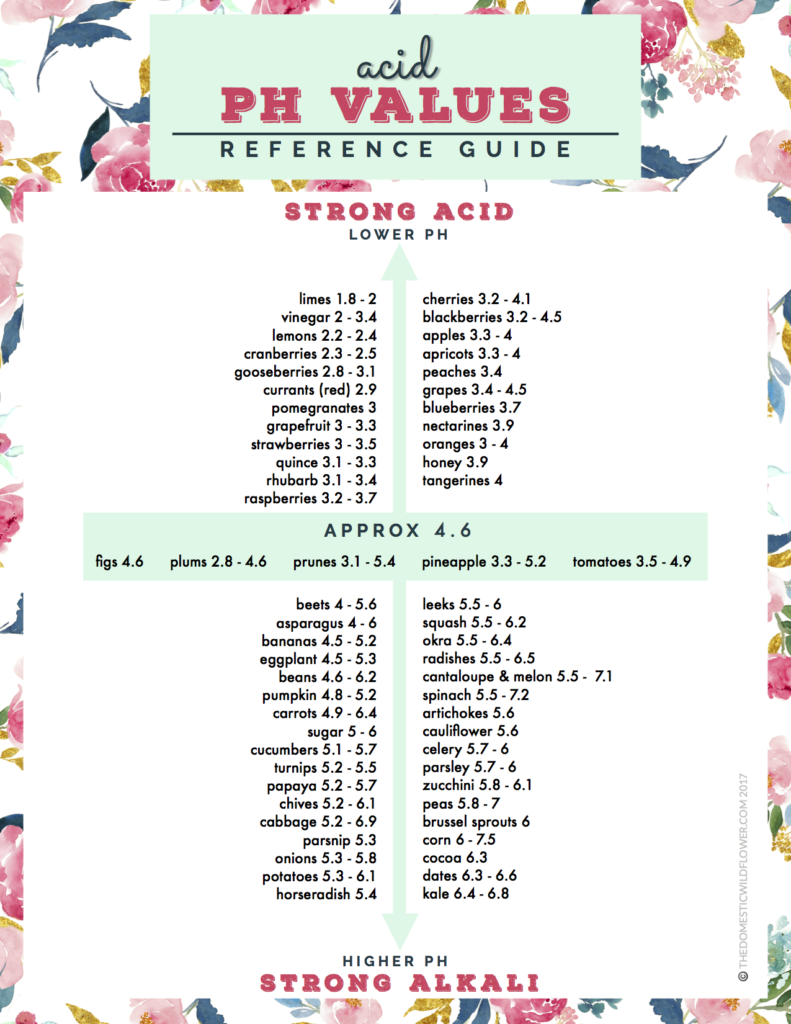
You need an acid guide to tell you if it is safe to swap out lemon juice for lime (yes!) or tangerine juice for lemon (nope!).

You need a guide to remind you to adjust the processing time based on your elevation.

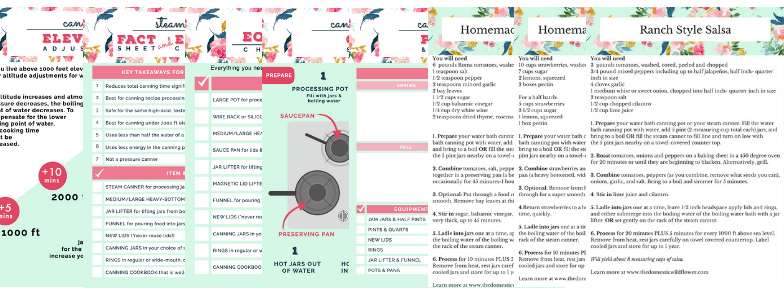
You need the Canning Jumpstart Guide

The Canning Jumpstart Guide is just $5, and is 12 pages of super valuable visual guides and checklists to get you started canning today!

Here’s a video that walks you through every single page!

Buy Now!

SaveSave

Filed Under: Can

Canning Essentials Workbook

July 24, 2017 by Jenny Gomes 1 Comment

This post will share the workbook that will help a beginning canner plan, prepare and preserve with confidence this canning season!

I was thinking the other morning, while I was at my local U-Pick berry patch with my kids, that you beginning canners, or those who have never canned at all but who are interested in learning, might not be ready to dive into a canning course. You might have read a blog post or two of mine, remember Grandma canning years ago, and what you REALLY might want is a helpful workbook that you could read on your phone, print off and keep in a cookbook or binder, at a low-commitment, super affordable price point so you could see if canning was right for you.

So I hustled home from the berry patch, and made Canning Essentials Workbook, just for you Wildflowers. It’s just $5, you can print it, or not, look at it on your phone or desktop computer, and use it to help you get started canning THIS SEASON. No more putting it off, Wildflowers. You totally can do this!

Canning Jumpstart Guide

Here’s a peek inside!

In The Canning Essentials Workbook, there’s no warm and fuzzy stuff; it’s all super helpful guides that I created with the help of my printable-tastic friend Elisa of www.mealplanningblueprints.com (if you need help making printables for your online biz-hit her up. That’s why the Workbook isn’t a plain old doc. She’s amazing!).

The Canning Essentials Workbook is just 12 pages of straight value, written by an English teacher, designed to help you get started canning this season! 

In The Canning Essentials Workbook, you will get the canning equipment checklists for BOTH water bath AND steam canning – how helpful will it be to have that checklist on your phone when you are at the store or shopping online? Very! You’re welcome, Wildflowers!

Get the Steam Canning Mini Resource Guide for free here! This part equipment list, part fact sheet will have you canning the fastest, lightest way yet! Grab your free PDF here!

You’ll be able to refer to the season planner and pantry checklist so grab necessities like citric acid and 5% vinegar when you’re at the market- and not have to make a special trip later.

The Canning Essentials Workbook, also shares a great visual guide to the stove top- it SHOWS you where each pot should go, so you can SEE what your stove should look like. You’ll be set up for success the first time you can, and every time afterward! You DON’T want to be reaching over the water bath processing pot to stir your preserves if you don’t have to, right? This diagram will help!

Perhaps the most valuable page of all is the Acid & Canning guide that lists the pH values of all the fruits and veggies that you’d consider canning so you can make safe substitutions. Canning works partially because of acid. Foods inside of jars that we water bath or steam can are high in acid. That means you need to know if strawberries are just as acidic as cherries if you intend to swap them out, or if you can use lime juice instead of lemon. It also lists the pH of ingredients like honey, cocoa, and vinegar.

Download the acid & canning pH guide for free here! This amazing chart will help you understand the critical role of acid in water bath canning and steam canning AND how to make safe substitutions! Download this free PDF here!

Have you heard about adjusting for elevation? There’s a great visual guide in The Canning Essentials Workbook that SHOWS you how to adjust your canning processing time for your elevation- wherever in the world you are canning!

I created a beautiful canning log that new and experienced canners alike will love. Because canning is a seasonal activity, it can be a whole year in between batches of salsa or applesauce. It can be really hard to remember which recipe you tried and loved, or didn’t love, how many jars the recipe yielded, and if you want to make that recipe again. This is the problem that the canning log will solve for you. Write away, Wildflowers, and keep track of canning from season to season!

Wildflowers, if you have been wondering about canning and wanted a way to get your feet wet, this is the way to learn! Get the Canning Essentials Workbook here!

Buy Now!

Canning Personalities Quiz

Not sure what kind of canner you are or will become? Take the Canning Personalities Quiz! 

Filed Under: Can

The Best Canning Tools

July 16, 2017 by Jenny Gomes 2 Comments

This post will share the canning tools that I use every time I can, recommend to you, and love for water bath canning and steam canning. 

The Best Canning Tools | Learn which canning tools will save you time and money! These tips and tricks are so helpful!

This post contains affiliate links.

I use these wide mouth pints all the time and are the jar I recommend for a beginner. They are the most versatile because they are small enough to fit into a pasta pot water bath set up, the double as a drinking glass and two cups of anything is a sizeable portion. It isn’t that often that I need 4 measuring cups of jam at once. I like them especially for tomato sauce.

The other jars that I really like are for giving as gifts. These tiny 4 ounce jars are perfect for sharing a rich spread like tomato jam, a spicy hot sauce, or shipping preserves in the mail. Jars are heavy, and especially when shipping internationally they are expensive to mail, so tiny jars are essential in these situations. I made sunny Meyer Lemon jam for my cousins in Switzerland in these jars; talk about California in a jar! They use the regular size lids too, which I love. 

Want to watch the video version of this post?

Want the equipment checklist to get started? Download it for free here!


I recommend this jar lifter and funnel set. Normally, I’m in favor of recyclable items but this funnel is see-through which makes eye-balling the headspace really easy as opposed to impossible with an opaque funnel. A jar lifter is mandatory; you gotta have one to water bath can and really should have one for steam canning. If you skip the jar lifter because you are steam canning, you can get by with a hot pad, but be very careful. A jar lifter is still a must. 

You always need brand new lids. Used lids can be reused to store dry goods but CANNOT be used for canning. A used lid that is used for canning might give you  false seal which means it will seam sealed but on the shelf in a month or two, it will become unsealed. That’s a waste of your effort! Spend the few dollars and get new lids. Get new lids like these.

I LOVE this steam canner. If you already have a water bath canning set up and like it, that’s fine and dandy but if you don’t have a canning process OR if you find your traditional canning process slow and cumbersome, listen up: STEAM CANNING IS FAST. It is ready in 5 minutes, while a traditional water bath takes about 30 minutes to be ready. I’m not a math teacher, but that seems like a big difference, right? You can read my post about steam canners here but you’ll definitely want to get your own steam canner after reading. I love this one.

This YouTube video will explain what a steam canner does and show you how it will cut your canning time in half even if you have never canned before!

A food mill is not necessary to can, exactly, but I use mine in nearly every recipe. I use so often because it is so effective in creating a super smooth puree, it is easy to clean, it is not an appliance that is going to break and be expensive to replace, they are all or mostly metal (read: durable) and I love that mine has 3 plates that can be swapped out. You know the 4 sides to a box grater? That’s what the interchangeable plates do; you can have a super fine puree, or just a medium one. The best example of it’s utility is making applesauce. I can cut a whole apple- core, seeds, skins, stems, everything- into quarters, add water, and boil till the quarters are really soft, I can plop the quarters into the food mill and all the cores, seeds, skins, and stems stay on the top and all that falls through is smooth applesauce.

Here’s a video of it in action to show you exactly what it does!

A silicone trivet is a really versatile way of turning any old pot you already have into a water bath canning pot. You have to have a rack or buffer on the bottom of the pot to prevent the jars from breaking and the silicone trivet is an affordable and useful amendment. You can use it as a trivet, of course, when you aren’t canning, and when you are, it simply sits in the bottom of a stock or pasta pot.

You can get a traditional water bath canning pot like this but I’d only recommend it if you want to can really large batches of quart jars and you have lots of time to wait for it to boil.

Do you have what you need to start canning? Get the equipment checklist!

The Best Canning Equipment for a Beginner - Get this must have home canning kit list for beginners if you are shopping for gifts or for yourself, this lists the gear you need, and tells you how to skip that giant pot!

Filed Under: Can

Beginner Canning Tutorial for Busy Moms

July 10, 2017 by Jenny Gomes Leave a Comment

This post will share the details of canning specifically as they apply to busy moms. Get ready for a super simple, easy to understand beginner canning tutorial, Wildflowers!

Beginner Canning Tutorial for Busy Moms | Read this post if you'd love to make more homemade food for your family but think you don't have the time.

Psst! Scroll down if you want to watch the YouTube version of this post! 

I know what you are probably thinking. Canning has a terrible reputation as being something that takes a ton of time, that might make you sick, that is super difficult, and that is way too complicated for a modern mom to tackle. I hear ya- I have NO interest in any of those things. Time-sucking activities have gone the way of the dinosaur in my house ever since I had kids.

I taught myself to can when I was pregnant with my first child. I grew up watching my mom and grandma can but as a teenager I had way cooler things to do then to can peaches. As an adult, I really was interested in learning so I could feed my baby homemade baby food and not worry about the junk like added sugar, preservatives, and allergens inside store-bought food. I learned how, and have been canning like crazy ever since. It has become THE tool I rely on to have healthy, homemade foods COOKED IN ADVANCE and it helps me save money and time.

I’m going to share with you today why canning can be fast, easy, and simple even if you’re an overwhelmed mom.

Canning is a way of preserving healthy fruit or veggies in glass jars using heat to sterilize the jar and to create a vacuum seal. That seal makes the jar shelf stable (on the pantry shelf, not in the fridge!) for up to a year.

The basic idea is that you put food (the preserve, such as applesauce, jam, whole fruit slices, pickles, salsa, tomato sauce, etc) into a glass canning jar, you put on the lid, and either submerge it into a boiling water bath OR set it on the rack of a steam canner (which I’ll explain in detail below and I have a whole blog post about here). You’ll set the timer for a set amount of time (dictated by a canning recipe, not your imagination) and then remove the jars from heat. The heat will seal the jar, and when the jars are cool you can store them to eat any time. It’s a science, not an art, which should be comforting to those of you who are more of type A, rule following, conscientious mom. If you’re the type B, easy going doesn’t ever follow recipes type of mom, hear me say this: You MUST follow a canning recipe because canning works because of several principles. One of these is that the contents of the jar have to be HIGH ACID. Canning recipes are all at a 4.6 acid level or greater. The inside of the jar will be too acidic for spoilers to grow. Canning creates an atmosphere inside the jar that I joke is like Mars. It gets really hot, there’s no oxygen, and it is really high in acid so nothing can live. By following a canning-specific recipe, you can be sure that the process will “work”, the jars will be safe, and your food will be delicious!

You might remember Great Aunt Nadine canning for hours and hours, working up mountains of peaches or bushels of apples. You don’t have to can huge batches, and after a batch or two, you’ll be able to can 5 or 6 jars of jam and have the dishes cleaned up in about an hour. I’m all about fast and I have many tips that will help you can quickly so you can get it all done during naptime.

Canning doesn’t take a ton of equipment. In fact, you probably have almost everything you need already! Here’s you can download a free equipment list for traditional water bath canning.

There’s a new kind of canning that you can try that I want to share with you also. The traditional boiling water bath is absolutely safe and effective so you do NOT have to try steam canning. But, steam canning saves a ton of time because you don’t have to wait for that huge pot of water to come to a boil. You also won’t need a jar lifter (one of the items on the list) and it is ideal if you are living on a sailboat, an RV, a tiny house, a yurt, cooking on propane or with solar heat, or any situation where you are short on time and heating resources. Here are the equipment list and fact sheet about steam canning that you can download for free.

Once you decide if you’ll try canning with a steam canner or a traditional water bath pot then you are ready to try canning on your own!

I know you are a busy mom and I totally get it. My kids are now 5 and 3 and I don’t have time to spend hours and hours in the kitchen. I want to help you learn how to can so you can have delicious and healthy tomato sauce preserved in jars for way less than it costs in the store. That tomato sauce can become countless dinners, and it is cooked way in advance! Imagine pasta sauce that is ready in five minutes that you MADE YOURSELF. Canning is the amazing means to do just that, Wildflowers!

Jenn from Home By Jenn and I have teamed up to put our collective genius together to bring you a super-affordable mini-course full of premium video instruction that will SHOW you, in a way a cookbook cannot, STEP BY STEP, exactly what to do when so you can can with success!

I’d like to introduce You Can Can!

Beginner Canning Tutorial for Busy Moms | Read this post if you'd love to make more homemade food for your family but think you don't have the time.

Inside You Can Can you’ll find a 5 videos of me teaching you about the equipment you need, the way to set your stove up for success (What pot goes where?! Let me show you!), and the WHOLE process of canning. I’ll also show you how to set up a steam canner so you can preserve using that time-saving tool as well!

Enroll Now!

For the amazing price of just $25 bucks, you can get these videos, PLUS-

  • A PDF of the equipment checklists
  • A canning log
  • A canning season planner
  • A notes section for while you’re watching, and more!

Wildflowers, you are not going to believe the BONUS SECTION that Jenn from Home By Jenn put together for you all too! She’s sharing 7 of her BEST 20 Minute Meals and all of them are linked to canning recipes that are easy, beginner friendly that you can try out TODAY.

Enroll Now!

Get it now- for just $25 bucks, how could you afford not to?!

SaveSave

SaveSave

SaveSave

SaveSave

Filed Under: Can

Felted Wool Dryer Balls

July 5, 2017 by Jenny Gomes 3 Comments

This post, featuring a guest post from my friend Amika will teach you how to make felted wool dryer balls at home and have you fighting static, wrinkles, and toxic dryer sheets like a superhero. Read on for the full tutorial!

How to Make Felted Wool Dryer Balls for Homemade, Chemical Free Laundry! Read the post for the super clear tutorial!

Hey y’all! I’m Amika from DIY Sheep Crafts (shepherdlikeagirl.com), guest posting, How to Make Felted Wool Dryer Balls, for Jenny here at The Domestic Wildflower(thedomesticwildflower.com)!

How to Make Felted Wool Dryer Balls for Homemade, Chemical Free Laundry! Read the post for the super clear tutorial!

When I first started making felted wool dryer balls for my peeps, a lot of my friends and family would say, “Weird! What are dryer balls, anyway?” My response was typically, “They are what folks like me use instead of dryer sheets to green-up their laundry game.” If you would like to have a more edified answer to THAT question (optional, but highly recommended) when your peeps ask you, then keep reading!

Queue heroes of eco-friendly laundry, static-fighting champions!

The chemicals, including synthetic fragrances, found in conventional dryer sheets are downright dangerous to your health and the environment! I could list all the toxic chemicals, but why scare the kids (and you can read more about it on my blog post, 4 Tips for Safer Laundry (shepherdlikeagirl.com/4-tips-for-safer-laundry/).

What Are Felted Wool Dreyer Balls?

Felted wool dryer ball are made, typically, from clean sheep fleece. The fleece is carded into roving. Then, all good shepherds and crafters hand wind the roving into 4 oz sized balls. These balls are then matted into a solid structure with a hot soap and water process, called felting. Dryer balls are completely chemical-free and reusable. They will even last up to 5 years!

What Are They For?

Feted wool dryer balls help keep the clothes soft, wrinkle-free and reduce static. Whaaat? Where have you been all my life?

How Do They Work?

The highly-absorbent wool soaks up moisture in your laundry as it dries and then evenly distributes that moisture back into the air as your clothes are drying. This helps the air in your dryer stay humid longer, which reduces static. In addition, this “soaking and releasing” action makes your clothes dry faster. And, all of these things, plus the balls rolling around in your dryer, caressing your sweet, sweet clothes, means fewer wrinkles. Can I get a “heck-ya”?

Ready to Make Your Own Dryer Balls?

Keep on reading and I will teach you how to make your very own felted wool dryer balls from sheep roving in 5 easy steps.

Now, let’s get started.

Supplies

• Roving (www.copiacove.com/product-category/fiber/roving/) I recommend 16 oz of roving to make 4 dryer balls
• Stockings aka nylons, pantyhose, tights, hosiery, hose
• Scissors
• Washer & Dryer
• Scale (optional)

5 Steps to Making Felted Wool Dryer Balls  

1. Weight Out Your Roving

This step is optional. You can totally just wing it! Your roving ball should be about the size of a softball (maximum). I weight my roving in a plastic baggie, using a hanging scale (the same one that I use to weight lambs), into 4 oz “handfuls”. If you don’t have your own roving, you can get some from my sheep at Copia Cove Icelandic Sheep in Montana, HERE (www.copiacove.com/product-category/fiber/roving/)!

Expert Tip:  Weighing out the roving you use for a set of dryer balls will help you to determine an appropriate price to set if you wish to sell them, because a good shepherd/crafter knows the cost of her materials, in this case, per ounce.

2. Make Your Roving Ball

Roll your roving into a tight ball, like a ball of yarn. Start by doing a few revolutions around your first two fingers to get the ball rolling faster (haha, get it?). Keep winding until you reach a desired size, or use up all 4 ounces or roving.

Expert Tip:  I start with three strands of roving and working my way down to two, and then just one strand, before I reach the end of my roving ball shaping. This makes the winding, rocking, and rolling phase go a whole lot faster! Be careful, because this can make your ball lopsided… unless you’re into that, of course. I like my balls nice and round, which is the reason for the three, two, one breakdown.

3. Load Up Your Roving Balls

Grab your stockings, ladies! Carefully squeeze a ball of roving all the way down into a stocking until it’s packed tight. Tie a knot in the stocking after each ball in order to separate the balls from one another and prevent them from felting to each other or loosing their shape. Keep loading balls until the stocking is full.

Expert Tip: Turn the stocking inside-out. Wool will felt to the toe seam, so it’s best to have it facing out.

How to Make Felted Wool Dryer Balls for Homemade, Chemical Free Laundry! Read the post for the super clear tutorial!

4. To The Washing Machine

Load Your caterpillar-looking-roving-ball-stockings into the washing machine. Wash with detergent and hot water.

Expert Tip: You will probably need to run them through the wash at least two more times to get them to felt well. Felted well is indicative of a firmness when squeezed. My washing machine is a front loader, and I always do two washes. My machine is also… temperamental. Sometime it won’t go through a spin cycle, I assume, because of the unbalanced weight. To fix that issue, just throw big towel in with the caterpillars.

5. Extract And Dry

You should have sightly damp felted wool dryer balls. Extract those little pretties by using scissors to cut an escape hole for each ball. Sometimes the wool will felt to the stocking- just keep peeling back that hosiery. Once they have all escaped, you can throw them in the dryer. One hot cycle in the dryer should be enough.

Expert Tip:  Prevent audio-induced headaches! Throw that big towel in there (the one from step 4), along with your dryer balls, to keep them from banging around in the dryer.

 How to Make Felted Wool Dryer Balls for Homemade, Chemical Free Laundry! Read the post for the super clear tutorial!
How to Make Felted Wool Dryer Balls for Homemade, Chemical Free Laundry! Read the post for the super clear tutorial!

Easy, right? I like to package mine in groups of four with a cute little tag and a snippet about what they are and how to use them, or I just throw them in my own dryer! Happy felting and remember, Shepherd Like A Girl!

Amika has a sheep farm, Copia Cove Icelandic Sheep (CopiaCove.com) in Montana, and teaches online courses and workshops for sheep enthusiasts and crafters who want to utilize all of the raw materials that sheep so thoughtfully provide; milk, fiber, pelts. You can check out the fun craft community on DIY Sheep Crafts(shepherdlikeagirl.com), which is where wonderful sheep craft lovers come together to grow ideas and learn to make awesome crafts. She believes sheep are the ultimate homestead animal and that each moment is a chance to make happiness possible!

amika@shepherdlikeagirl.com
Thank you SO MUCH, Amika! Share in the comments, Wildflowers, how it goes making you first dryer balls! Wool is such an amazing fiber; I have a post about how to crochet with it here!

SaveSave

SaveSave

Filed Under: Craft

  • « Go to Previous Page
  • Page 1
  • Interim pages omitted …
  • Page 32
  • Page 33
  • Page 34
  • Page 35
  • Page 36
  • Interim pages omitted …
  • Page 66
  • Go to Next Page »

Primary Sidebar

Categories

Follow me here, there, & everywhere!

  • Email
  • Facebook
  • Instagram
  • Pinterest
  • RSS
  • Twitter
  • YouTube

Search

Get The Pressure Canning Cookbook

Get 10 Free Recipes Now!

Best Chicken Coop

Footer

Get Started Pressure Canning

Shrubology Ebook

Shrubology: Refreshing Homemade Fruit and Vinegar Syrups for Cocktails
Make easy, no-cook fruit & vinegar syrups for cocktails & mocktails! This ebook shares crowd pleasing recipes and simple to understand ratios so you can make a shrub on your countertop any time- without a recipe. Dive into these Prohibition Era drinks today!

Copyright

Copyright 2019
The Domestic Wildflower
www.thedomesticwildflower.com.
All content created by Jennifer Gomes unless otherwise noted.

Copyright © 2025 · Lifestyle Pro on Genesis Framework · WordPress · Log in