• Skip to secondary menu
  • Skip to main content
  • Skip to primary sidebar
  • Skip to footer
  • The Pressure Canning Cookbook
  • Blog
    • Subscribe
    • Welcome!
  • Perfectly Preserved Podcast
  • About
    • ADW Manifesto
    • Work With Me
      • Read
  • Shop
    • My Account
    • Cart
    • Checkout

The Domestic Wildflower

Handmade Food & Craft Tutorials for Beginners

  • Courses
    • Free Canning Basics
    • Everything Canning Course
    • Steam Canning Workshop
    • Free Homemade Cocktail Mixers
    • Wildflower Mixology
    • Crochet Basket Workshop
  • Can & Preserve
    • Never Canned?
    • Steam Canner Equipment Bundle
    • Shrubs Course
  • Sew
  • Cook
  • Craft
    • Crochet Step-by-Step Guides
      • Crochet Basket
      • Giant Yarn Throw
      • Thick & Thin Throw
  • Living
    • Creativity Challenge
    • Clean
    • Kids
  • Rentals

Jenny Gomes

Seed Sack Pillows

April 28, 2017 by Jenny Gomes Leave a Comment

This post will show you how to create simple, homemade seed sack pillows from real seed sacks.

Real Seed Sack Pillows Easy DIY This post explains exactly how to sew with just one seam these rustic pillows from real seed sacks! The post has links to the cutest seed sacks too!

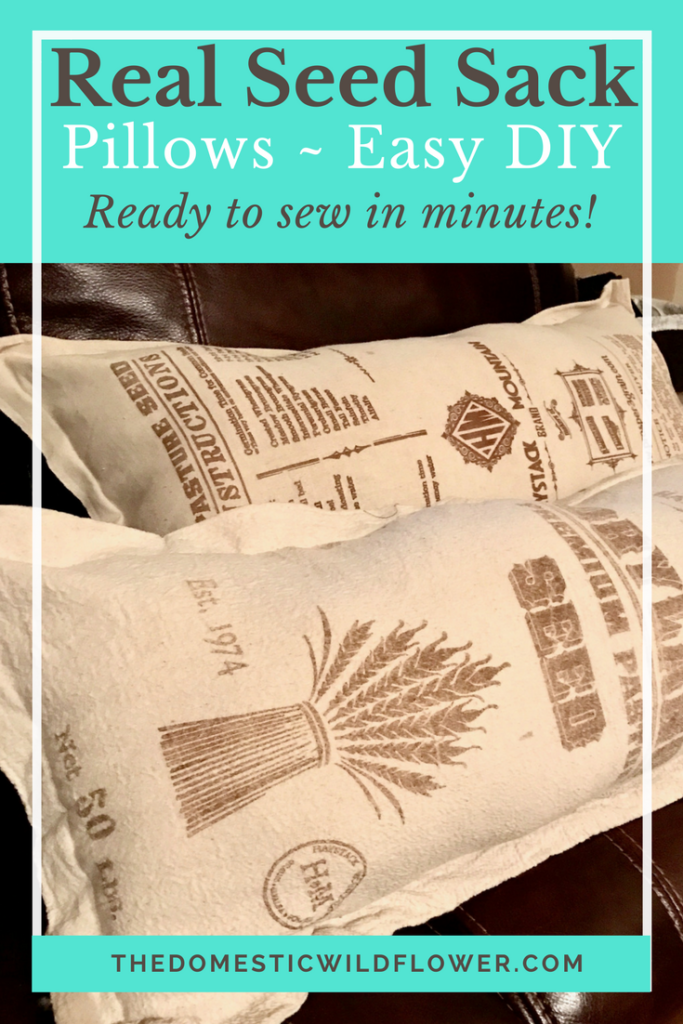
My dear friend saved these seed sacks from a garden project and asked me to make them into pillows for their living area. I waited for months and months because I wanted to find pillow forms for the project; pillow forms are like a plain, muslin covered pillow that remains in pillow shape so you can remove the cover and wash it easily. They are handy, but they don’t come in every shape and size imaginable, and they don’t come in real seed sack size.
These seed sacks are from Great Basin Seed and you can find them on Amazon, through this and the following affiliate links, and you should definitely check out these high quality seed options that come in ADORABLE seed sacks:

Click over to buy the right seeds for your area but they all come in adorable sacks. Win win, Wildflowers 🙂

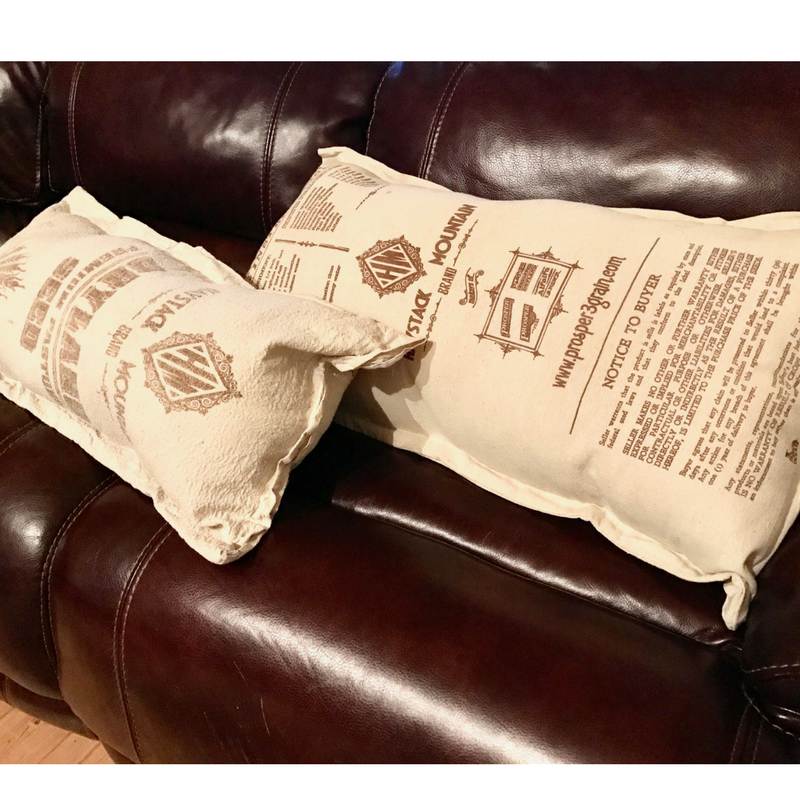
To make the pillows, I simply stuffed each of the two sacks with this polyester stuffing.

And I sewed up the ends using my trusty Janome machine (mine is a bit older than this one but it is similar)

And I used these standard machine needles to complete the sewing project

And this oatmeal-y, eggshell Guttermann thread was a perfect match.

Be sure to stuff the pillows very full- they will de-poof with regular use.

Before I sewed, I washed and dried these seed sacks on warm to preshrink and now, they are machine washable. Which is pretty important, as she has two very handsome sons that just might dirty them from time to time.

Real Seed Sack Pillows Easy DIY This post explains exactly how to sew with just one seam these rustic pillows from real seed sacks! The post has links to the cutest seed sacks too!

Real Seed Sack Pillows Easy DIY This post explains exactly how to sew with just one seam these rustic pillows from real seed sacks! The post has links to the cutest seed sacks too!

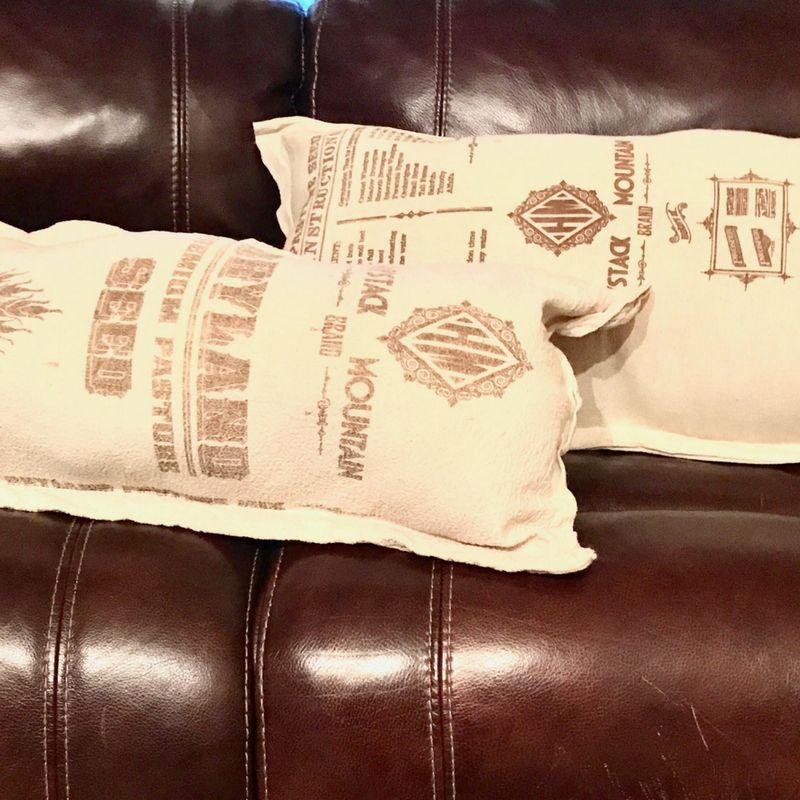
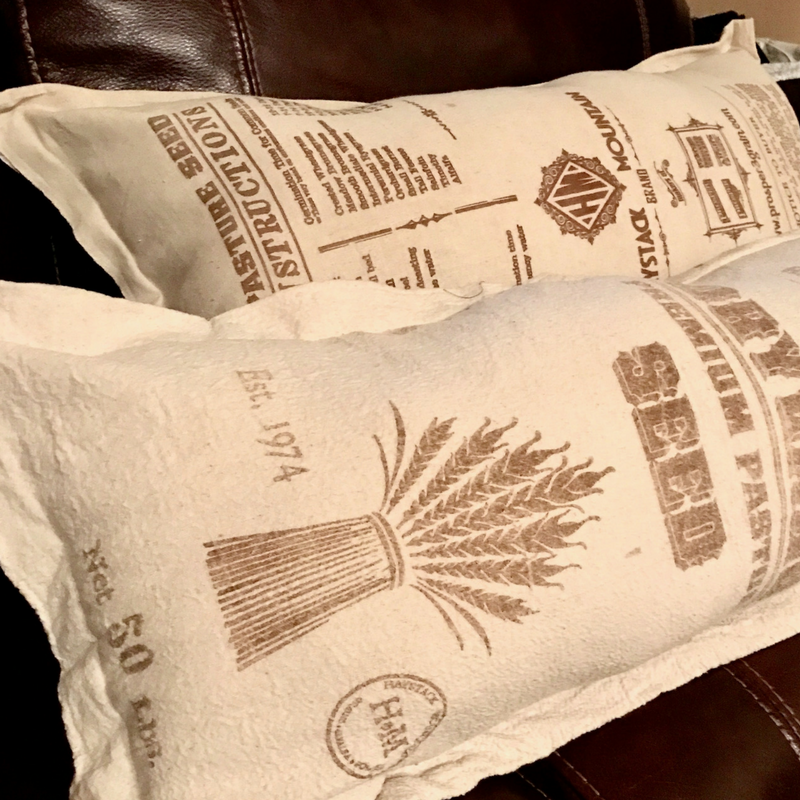
I sewed a flange of 1 inch all the way around, which was super simple and made for a really cute look and prevented a floppy, underfilled corner look which sometimes happens with homemade pillows- especially the ones made without a pillow form. These corners are sharp!

Real Seed Sack Pillows Easy DIY This post explains exactly how to sew with just one seam these rustic pillows from real seed sacks! The post has links to the cutest seed sacks too!

These seed sacks are very soft too!

What do you think, Wildflowers? Super cute, right? I’d love to hear what other adorable things you can do with a seed sack in the comments below and be sure to pin this project to Pinterest!

If you want to learn how to sew, check out the courses HERE!

xo Jenny

Filed Under: Sew

Cranberry Lemon Jam in a Steam Canner

April 28, 2017 by Jenny Gomes Leave a Comment

This cranberry lemon jam is super smooth, perfect for Thanksgiving, even better on a sandwich the day after Thanksgiving with turkey slices, great on bagels with cream cheese, and the lemon makes it seem bright and summery too. It’s a perfect jam. You definitely can make this cranberry lemon jam and preserve it in a water bath process- you do not have to use a steam canner. Or you can make it and eat it fresh. Store it in the refrigerator if you do.

If you are reading this recipe thinking that you’d love to make the jam, but don’t know anything about steam canning, don’t worry. You can make the jam without knowing anything about steam canning. Read on for the recipe or read this post about steam canning!

This post contains affiliate links. 

This sweet-tart jam recipe is summer flavor divinity but combined with the two different ways of processing the lemons AND the steam canner saving so much time in the canning time, this tutorial will be on your regular rotation in no time. Click through for the beginner friendly recipe and steam canner tutorial!

Cranberry Lemon jam calls for

3 pounds Meyer lemons, washed well

1 bag or 1 ½ cup cranberries (okay if frozen from Thanksgiving time)

1 ½ cup sugar

Simmer WHOLE Meyer lemons in a large saucepan of water for about 20 minutes or until a fork slides into them easily.

Cool lemons until you can handle them easily, either by resting on a cutting board (slow) or submerging in an ice bath (much faster)

While the lemons cool, add the cranberries and sugar to a smaller saucepan and turn on low to medium-low. They will very slowly cook, bursting, and the sugar will dissolve. Stir occasionally.

Working over a bowl, with a knife and a grapefruit spoon or other semi pointy spoon, cut them in half, scoop out the visible seeds, and put the lemon halves into a food processor like this one

You can also use a blender to puree the lemon into a smooth mixture as well.

Or a food mill like this one-

just slice the lemons into quarters or even a bit smaller to lessen the effort required to work them up.

Once the lemons are super smooth, combine the lemon puree and the cranberry all together. Turn on medium-low to bring to a simmer. You want the mixture to be hissing, bubbling, and the bubbles bursting at the surface. This should be happening in about 10 minutes.

Prepare the steam canner.

Add the water to the steam canner, assemble the jars, new lids, funnel, ladle, and turn steam canner burner on low.

If steam canning is new to you, you can get the Steam Canning Mini Resource Guide- It’s a PDF equipment checklist + fact sheet about how to get started with steam canning!

One at a time, fill the jars with the simmering jam, leave a quarter inch headspace, apply a new lid and ring, and set on the rack of the steam canner. Repeat with remaining jars.

Put the lid on the steam canner and turn the heat up to medium-high. When the dial on the steam canner indicates you are in the “zone” start the timer for 10 minutes, remembering to adjust for altitude (5 minutes of processing time added for every 1000 feet elevation). When the time is up, turn the burner off and wait till the lid of the steam canner has cooled significantly. Lift the lid away from you, and be aware that steam will come pouring out from the canner.

If you are processing your jars in a traditional water bath canning process, just process for 10 minutes, of course adjusting for altitude.

Lids will seal immediately or as long as 12 hours after you remove them from the canner. Label sealed lids and store.

That’s it, Wildflowers! It is delicious with cream cheese on a bagel, stirred into a sunny whiskey cocktail, or on a meat and cheese sandwich.

I have a little secret, though.

The whole process of making this jam is part of my Steam Canning Workshop video course. That’s right… you can watch me make this jam, step-by-step, in the course, along with a bunch of other recipes chosen for which time-saving, Steam Canner techniques they’d teach you- learn more here!

Yes, PLEASE!

This sweet-tart jam recipe is summer flavor divinity but combined with the two different ways of processing the lemons AND the steam canner saving so much time in the canning time, this tutorial will be on your regular rotation in no time. Click through for the beginner friendly recipe and steam canner tutorial!

Filed Under: Can

Beginner Canning Tutorial: Canning Safety

April 23, 2017 by Jenny Gomes Leave a Comment

This post will bust some bogus canning advice I read on a fairly popular-but totally wrong- blog. Watch the video for some good advice for beginning canning!

Beginner Canning Tutorial: Canning Safety | Watch This video blog post as I bust some really bad canning advice I read online and for some good advice for new canners!

This video will explain a blog post I read online (no, I won’t tell you where, or on what blog) that gave some downright terrible advice that I think would really derail a new canner. It also might make a seasoned, knowledgable canner furious; so if you like getting heated, enjoy!

There’s so much info out there for a newbie to sift through- good info, not so good info- that I took my full-fledged canning course and sliced off the very base, the foundation, and made it available for a bargain price of just $19.

Yes! I Want Instant Access!

I’m so excited to introduce Canning Foundations!

Canning Foundations is the course that teaches the foundations of both water bath and steam canning methods in clear, in depth, short video lessons.

If you are a brand new, never done it before canner, you have TONS of resources out there to choose from- some of it is the garbage I read and refuted in my video above.

In Canning Foundations, one whole video walks you through the USDA website (that website is admittedly dated and confusing) to show you where to go to get SCIENTIFIC and UP TO DATE info….not nonsense from some well meaning blog or friend.

Another video is devoted to explaining the importance of using NEW lids; it seems like a small thing but there are people- bloggers, casual canners- out there who say you can use used lids- and in that video I explain and SHOW you why you cannot.

Here’s the Canning Foundations mini-course curriculum

Canning Foundations is the course that teaches the foundations of both water bath and steam canning methods in clear, in depth, short video lessons.

That’s a TON of information in short, high value lessons.

In the Prepping Pots video, I show you HOW to get started at the stove- what pot goes where, what to start boiling when, so that the canning process goes smoothly.

The info in Canning Foundations applies to both water bath canning and steam canning, AND would have you well on your way to pressure canning as well.

An online course is like a digital book of information you get to access any time- it has videos, printable PDFs, no homework, no deadlines, and no start or end date. If you’re not sure about what an online course would LOOK like, here’s a preview:

This bargain price won’t last for long, Wildflowers. I want you to grab it now while it is still early in the season! It is just $19!

Yes! Get Instant Access!

This mini course is the answer to several of the problems you’ve been having: 

– Wishing you knew how to start canning but feeling overwhelmed by the whole process

-Wanting to make more homemade food for yourself but the fact that you’re not exactly Suzy Homemaker has posed a bit of a problem

-Thinking canning might be cool…but you have no idea how to get started!

There’s a 30 day money back guarantee, and here’s what some of my sweet students have to say! 

Canning Foundations is the course that teaches the foundations of both water bath and steam canning methods in clear, in depth, short video lessons.

Canning Foundations is the mini course answer- bite sized lessons, itty-bitty price; Enroll Now!

Yes, Please!

Filed Under: Can

5 Ways to Add Homemade Food to Nearly Every Meal

April 19, 2017 by Jenny Gomes 2 Comments

This post will share the 5 ways you can incorporate healthy, homemade food into nearly every meal.

5 Ways to Add Homemade Food into Nearly Every Meal | This post explains how you can add healthy, organic food into almost every meal with these 5 simple steps!

This isn’t a goal that can be achieved overnight, nor should it be. It is something that you can work steadily toward, one 20-30 minute batch at a time, and the satisfaction of incorporating more homemade foods into your diet will be tenfold.


Eating homemade doesn’t have to feel daunting, but I know it does to most people. Dinnertime is at an 11/10 on many mom’s stress level meters. The notion that homemade will take longer is a false one; homemade can save time AND it can save time, and we all know time is money, right?


  1. Can savory foods. Canning crispy carrot pickles, kid-friendly relish for hot dogs, peppers for adding to enchiladas, veggies to fortify your meals, condiments, and snacks. These savory foods fill in the blanks when the kids- and you- need something to snack on and you want to skip a pre-packaged and expensive faux-food.
  2. Can sweet foods. Jam is the quintessential canned food because it is foolproof for a beginner. Many fruits are naturally high in acid, making them super-safe, they cook up quickly, and let’s be honest: jam is delicious. Homemade jam is miles more nutritious than store bought and when you make jam you are incorporating all or much more of the actual fruit than just the juice when making jelly. Canning sweet foods can also allow you to explore those canning recipes that use natural sweeteners so when you make your kids a PB&J the J is far more healthful than a jar from the grocery store shelf. Jam isn’t the only sweet thing you can preserve, of course. Strawberry syrup makes the BEST strawberry margaritas, maple whiskey peaches can top plain yogurt or a cheesecake, and the world of fruit butters – super smooth fruit puree cooked low and slow with minimal sugar- is one that will amaze the uninitiated and elevate your morning toast to delicious heights. Sweet preserves can be used to smother ham, to accompany a turkey sandwich, to marinade a cut of meat, to stir into a cocktail…they are infinitely useful far beyond breakfast.  
  3. Can hors d’oeuvres or appetizers. Pickled pearl onions, dilly beans, skewers of spicy, herbed veggies, sweet and sour fruit (think cherries in pomegranate vinegar), homemade salsa and more fill in the spaces when an occasion calls you to bring something to the table that’s not quite a meal. Whether you are dressing a platter or a drink, this category isn’t to be overlooked as it is often filled in with a bag of chips and store bought, flavorless salsa. Replaced with homemade, the garden fresh flavors and colors shine and you’ll instantly feel satisfied and proud of your offering instead of unsure.
  4. Can super versatile, main dish, eat all the time necessity items like tomato sauce or apple juice. Whatever is in your grocery cart week in and week out, learn to preserve it. Think about what you buy in bulk, what you try to buy on sale, what you always run out of. For my family, these items are tomato sauce and fruit juice. There’s only been one year since I’ve been canning that I didn’t preserve enough tomato sauce to last all year and I’ll never make that mistake again. There’s NOTHING that improved my cooking or my eating as markedly as canning my own staples. Decide to can just one of your basics and you’ll quickly see how easily your meals are improved.
  5. Can a super special preserve. A hostess gift, or treasure for a bridal shower favor, or a thank you gift or the like is made even more special when it is a beautiful jar of marmalade or champagne jelly or a hot sauce from the hottest peppers in all the land. Sharing a jar of cherries preserved in wine, or other unusual, special treat is the final way I suggest you add homemade to every occasion; these occasions might be the least frequent but they are the most special and leave the biggest impression. 

I want to teach you all HOW to add more homemade to YOUR pantry shelves. I want you to sign up here & get instant access to the workshop!


In the hour, I’ll teach you the 4 steps to filling your pantry shelves with homemade food that you can reach for quickly- when life is bananas- and know it is healthy, wholesome, and delicious. I can’t wait to see you there!

Filed Under: Can

How To Make Lilac Syrup

April 10, 2017 by Jenny Gomes 15 Comments

Lilacs are arguably the most lovely, fragrant, and iconic springtime flowers. This post will share how to make a simple syrup to add fragrance and flavor to the tea, cocktails, and more in short order. I will also explain why the syrup is NOT a pretty purple color. Here’s how to make Lilac Syrup!

How To Make Lilac Syrup

This spring, I was determined to do several things with flowers that I hadn’t done in the past. One item on my floral to-do list was to make lilac syrup. As soon as the very, very old lilacs on the family ranch started blooming, I headed over with a pint jar and in about 10 minutes of picking, I had enough to make syrup.

Before picking, I did a little research. Many photos online of lilac syrup were of a vibrantly hued purple liquid. I thought that perhaps the flowers would hold their color when simmered, but I was skeptical.

I am guessing that those photos I saw, and that you may have seen, have been edited to maintain a vibrant purple hue. I could have fiddled with adding blueberries or food coloring but I didn’t fool with it. It wasn’t an unappetizing color and I’d argue that many of us should get used to a more naturally colored plate.

I also would guess that are some crafty folks out there who chose purple lilac flowers over their white or pink cousins because, consciously or unconsciously, they had seen the bright purple color and thought purple was the go-to bloom. I chose purple because they bloom first but now I know, as I’ll explain below, the color matters not.

I picked the flowers not one at a time, but by the pinch-full, and found that to be a quick method.

I picked what I guessed to be an overflowing cup full and headed home.

Lilac Syrup: A Simple Syrup For Floral Flavor | A Domestic Wildflower click to read how to make homemade lilac syrup. Use it in tea, cocktails, cake frosting, and more! Such a simple tutorial!

The flowers spent the night in the fridge without any ill effect.

How to Make Lilac Syrup

Give flowers a once over for stems and rinse if appropriate.

Measure your flowers. Don’t pack tightly into a cup, but smoosh down a bit. Let’s say you picked 1 cup of flowers for this ratio.

Combine equal parts water and sugar (1 cup + 1 cup) in a saucepan and bring to a simmer. Whisk and heat until sugar dissolves. Do not bring to a rolling boil.

Add lilac flowers. Simmer gently for 10 minutes. The flowers will wilt within minutes, your kitchen will smell heavenly, and you will notice that the syrup is a greenish brown color. That is appropriate.

Remove from heat and strain. I used a mesh strainer like this one.

Decant into a clean glass jar and store in the refrigerator.

Add syrup to:

Tea (I found it delicious in peppermint)

Cake frosting

Cocktails (vodka or gin)

Sparkling water

One way I discovered how to use this floral syrup is in cocktails.

I have found this syrup to be a delightful addition to any cocktail, even in a mixture as simple as 1 part syrup, 1 part libation, and 3 sparkling water. You won’t want to choose really strong-flavored alcohol, as the floral taste will be lost. Think vodka, or with juices like white grape or pear.

I absolutely love helping you think of ways to add more handmade and homemade into your life, and when it is your turn to host guests I want you to feel ready! I created a FREE Shrub Making Email Course where I pop into your email inbox with lessons about how to make homemade cocktails with fruit and vinegar syrups called shrubs.

Shrubology: Refreshing homemade fruit & vinegar syrups for cocktails | The Domestic Wildflower This ebook explains how to make these old fashioned fruit and vinegar syrups that are easy to make, versatile in cocktails where you can add or skip the alcohol and make homemade cocktails perfectly attainable, even if you don't cook! Grab the ebook now and learn how to make these sweet tart gems! Did I mention they are "no cook"?

I want to help you become the hostess you have always dreamed of being in the FREE Shrub Course. Sign up here!

What else could you add this lovely syrup too, Dear Readers? Share in the comments below! If you loved this flower-theme, hold on to your shorts. I have big plans for honeysuckle, more lilacs, roses, and more. Stay tuned 🙂

Filed Under: Cook

  • « Go to Previous Page
  • Page 1
  • Interim pages omitted …
  • Page 34
  • Page 35
  • Page 36
  • Page 37
  • Page 38
  • Interim pages omitted …
  • Page 66
  • Go to Next Page »

Primary Sidebar

Categories

Follow me here, there, & everywhere!

  • Email
  • Facebook
  • Instagram
  • Pinterest
  • RSS
  • Twitter
  • YouTube

Search

Get The Pressure Canning Cookbook

Get 10 Free Recipes Now!

Best Chicken Coop

Footer

Get Started Pressure Canning

Shrubology Ebook

Shrubology: Refreshing Homemade Fruit and Vinegar Syrups for Cocktails
Make easy, no-cook fruit & vinegar syrups for cocktails & mocktails! This ebook shares crowd pleasing recipes and simple to understand ratios so you can make a shrub on your countertop any time- without a recipe. Dive into these Prohibition Era drinks today!

Copyright

Copyright 2019
The Domestic Wildflower
www.thedomesticwildflower.com.
All content created by Jennifer Gomes unless otherwise noted.

Copyright © 2025 · Lifestyle Pro on Genesis Framework · WordPress · Log in