• Skip to secondary menu
  • Skip to main content
  • Skip to primary sidebar
  • Skip to footer
  • The Pressure Canning Cookbook
  • Blog
    • Subscribe
    • Welcome!
  • Perfectly Preserved Podcast
  • About
    • ADW Manifesto
    • Work With Me
      • Read
  • Shop
    • My Account
    • Cart
    • Checkout

The Domestic Wildflower

Handmade Food & Craft Tutorials for Beginners

  • Courses
    • Free Canning Basics
    • Everything Canning Course
    • Steam Canning Workshop
    • Free Homemade Cocktail Mixers
    • Wildflower Mixology
    • Crochet Basket Workshop
  • Can & Preserve
    • Never Canned?
    • Steam Canner Equipment Bundle
    • Shrubs Course
  • Sew
  • Cook
  • Craft
    • Crochet Step-by-Step Guides
      • Crochet Basket
      • Giant Yarn Throw
      • Thick & Thin Throw
  • Living
    • Creativity Challenge
    • Clean
    • Kids
  • Rentals

Jenny Gomes

How to Avoid BPA

March 7, 2017 by Jenny Gomes Leave a Comment

This post will explain how to avoid the endocrine disruptor bisphenol A, or more commonly known as BPA, which is a dangerous substance. Avoiding it is pretty simple; read on for the how-to! How to Avoid BPA: What it is and why it is harmful: A great read! BPA is a cancer causing substance that lines most of grocery store cans and this article explains how to avoid it! 
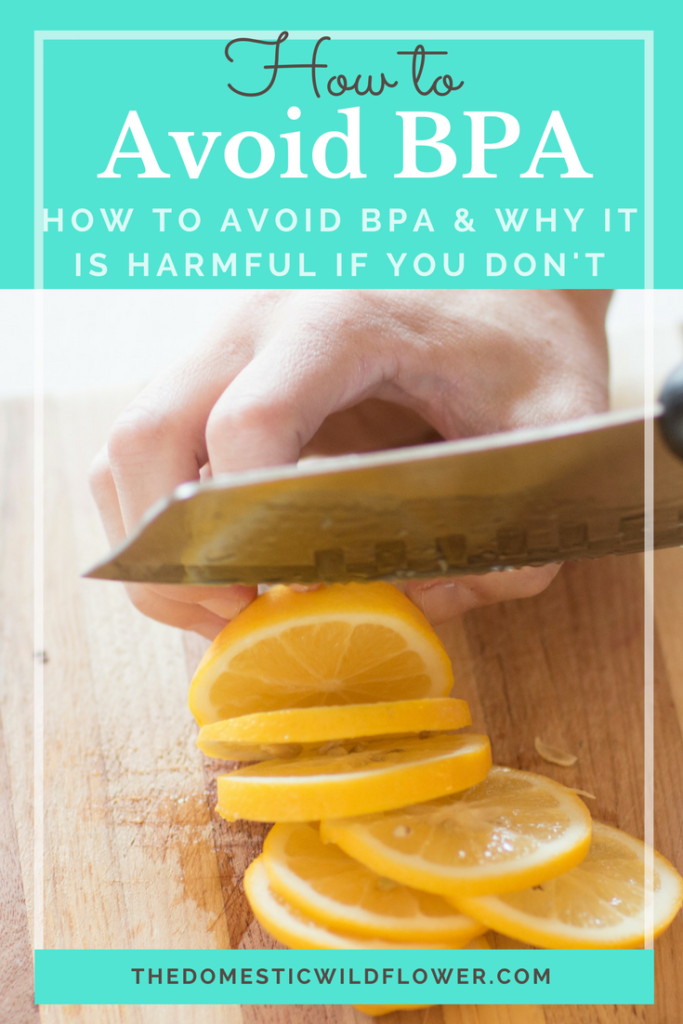
Ever since I was pregnant with my first child, I started to worry about health, whereas before, I couldn’t have been less interested.   As I read and learned, and grew larger and larger with my baby on board, I realized that since I hold no science degree, have just limited time, and really am not qualified to read and genuinely understand lengthy scientific journal articles and thus make solid conclusions, I was in a tight spot. In order to avoid some of the scary, or at least uncertain ingredients you buy with the prepacked everything at the grocery store, a person would have to spend a TON of time reading, researching, vetting, and otherwise fretting to determine if what they or their children were about to consume was dangerous or not.

For me, the solution was deciding that I would do my best to just buy and consume fewer prepackaged foods.

I’ll pause right there and fully, wholeheartedly admit that I am far from packaged-food free. There are a great many foodstuffs that I buy in a package- I haven’t the desire or time to make EVERYTHING we eat at home from scratch. I wouldn’t expect you or anyone else to either, but my goal with this post is to show you one way to reduce one avenue of BPA consumption. I’m not an all-or-nothing girl. Rather, I am a one-step-at- a-time mama. Step with me!

I came across a great article from Mother Earth News that was fairly easy to understand and outlined one major issue that I knew I could address, and help you address also.   The article explained that BPA (bisphenol A), an endocrine disruptor which is linked to several cancers, obesity, ADHD, infertility, and type-2 diabetes, is commonly used in the plastics used to package foods.   You probably already knew that, or had a rough idea anyway, that BPA is bad, and it is used in plastics that often are in contact with food.   You also probably have noticed that there are a great number of grocers and companies claiming they carry foods in packages that are “BPA-Free” which sounds really nice.

The trouble is, that as Mother Earth News explains, BPA-Free doesn’t actually mean it is safe, or that it is actually free from BPA.   The findings of the study were “alarming” and explain that, “67 percent of the cans tested (129 out of 192) contained BPA-based epoxy in the body and/or the lid.” Furthermore, “BPA was found in private-label cans sold at both Target and Walmart, the largest grocery retailer in the United States. In their private-label products, 100% of Target cans (5 out of 5), and 88% of Walmart cans (7 out of 8) tested positive for BPA-based epoxy resins. Our survey revealed that neither of these two major retailers has policies in place to eliminate BPA in canned food, unlike competing grocery retailers.” 
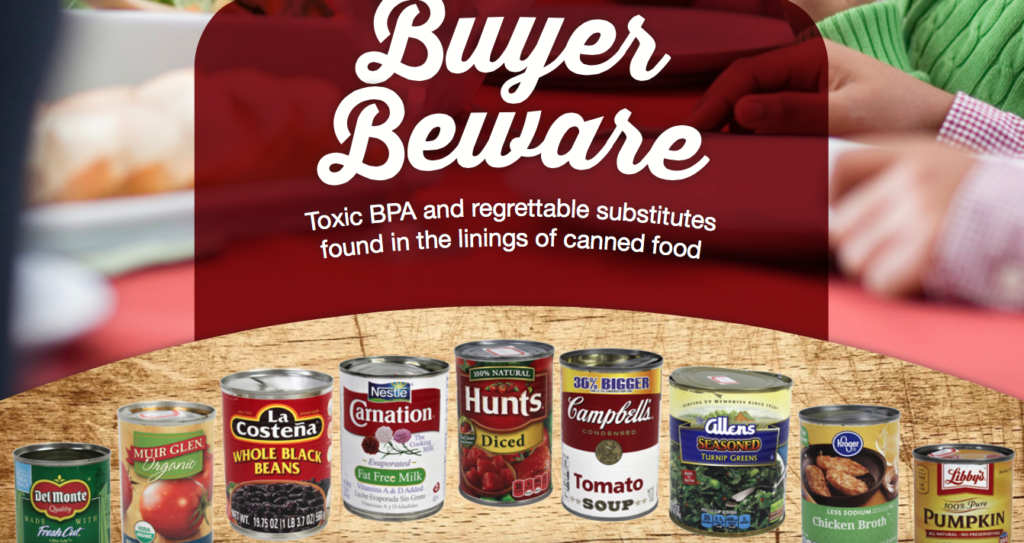
“Discount retailers (commonly known as ‘dollar stores’) were among the laggards in transitioning away from BPA in can linings. Our testing revealed that 83 percent of Dollar Tree and Family Dollar private-label cans (5 out of 6) and 64 percent of Dollar General private-label cans (9 out of 14) were coated with BPA-based epoxy resins. This is espe- cially a problem because discount retailers are often the major retail outlet in low-income communities—which already face the highest levels of BPA exposure.” That’s pretty darn alarming, right? The study did find some bright points, as “Amy’s Kitchen, Annie’s Homegrown (recently acquired by General Mills), Hain Celestial Group and ConAgra have fully transitioned away from the use of BPA and have disclosed the BPA alternatives they’re using. No BPA-based epoxy resins were detected in any of the cans tested from these brands.”

Unfortunately, that’s about all the good news from the study.

The types of linings of cans in the store are numerous, and I’ll directly quote the words of the study from www.toxicfoodcans.org to explain. “Five major coating types were identified among the 192 cans tested: acrylic resins, BPA-based epoxy, oleoresin, polyester resins, and polyvinyl chloride (PVC) copolymers. We know very little about the additives used in these compounds to give them the properties that make them stable and effective can linings. Our research does demonstrate that there are multiple formulations of most of these compounds, but there is no way to determine the specific chemicals used or how they are produced.”   Currently, there is NO WAY TO DETERMINE the specific chemicals. The study goes on to say “18% of retailers’ private-label foods and 36% of national brands were lined with a PVC-based copolymer. This is clearly a regrettable substitute, because PVC is a polymer made from vinyl chloride, a known carcinogen.”

The other take away that I think is the most powerful for you, busy reader, is that, “93 percent of Americans tested have detectable levels of BPA in their urine, suggesting that people are consistently exposed and re-exposed to BPA through the chemical’s presence in foods and from other sources.”

If you’ve just skimmed so far here’s the Wildflower’s Digest version: BPA is bad because it is linked to some pretty scary things like cancer. BPA is a plastic (though hard to see) liner inside cans of store-bought food. There are other BPA-like substances (also linked to causing cancer) that are called “BPA-Free” that also line many food cans. Eating foods packaged in cans lined with BPA or BPA-like substances leads to the consumption of BPA.

Here’s how I do my best to avoid this problem.

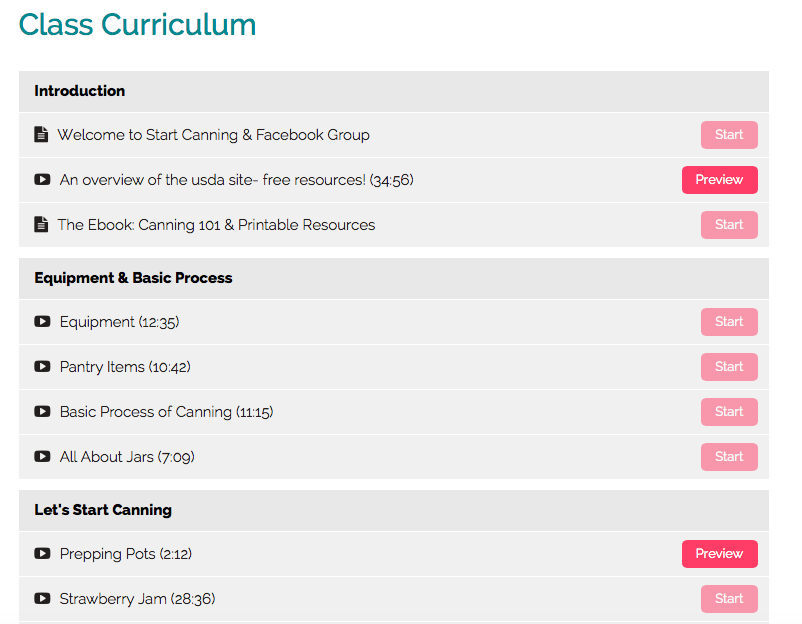
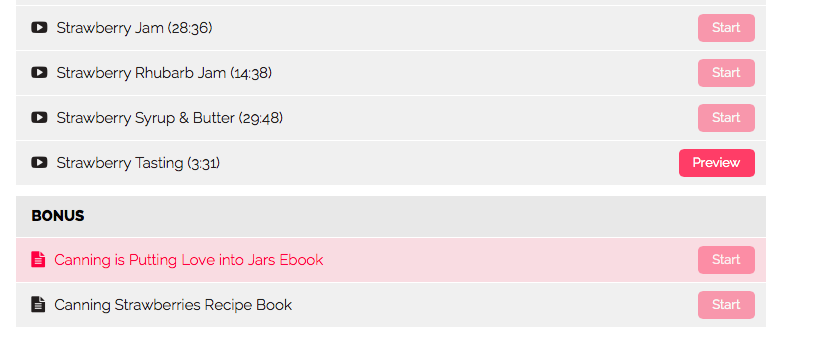
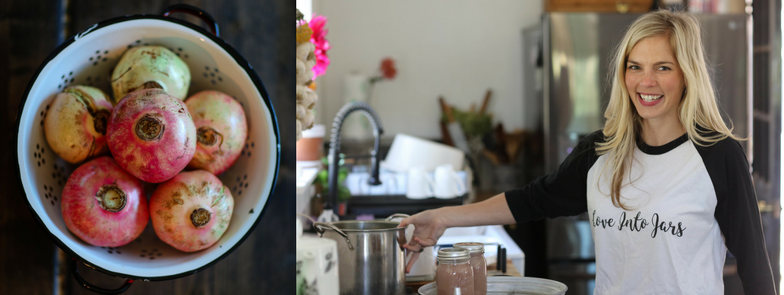
I learned how to can. Not very glamorous but 100% true. Canning has a really lame reputation as being old-fashioned (it is so cool!), dangerous (definitely not & absolutely not as dangerous as BPA!) time consuming (I’ll all about efficient & fast) and difficult (easy!). On my blog, I share a wide variety of tutorials about all manner of handmade & homemade food & craft education but canning is the one thing that benefits me day after day.

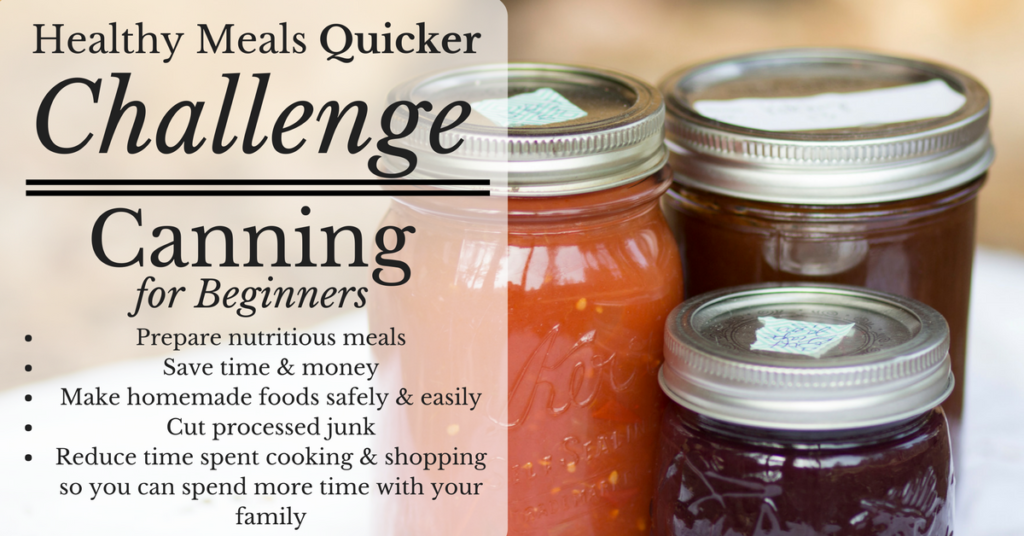
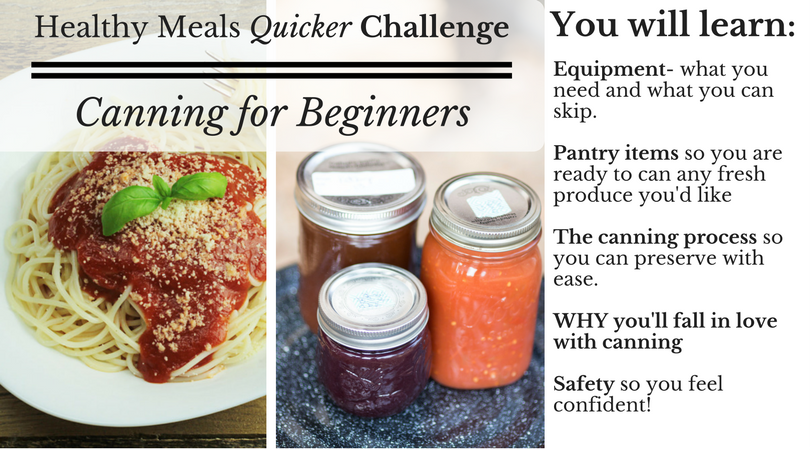
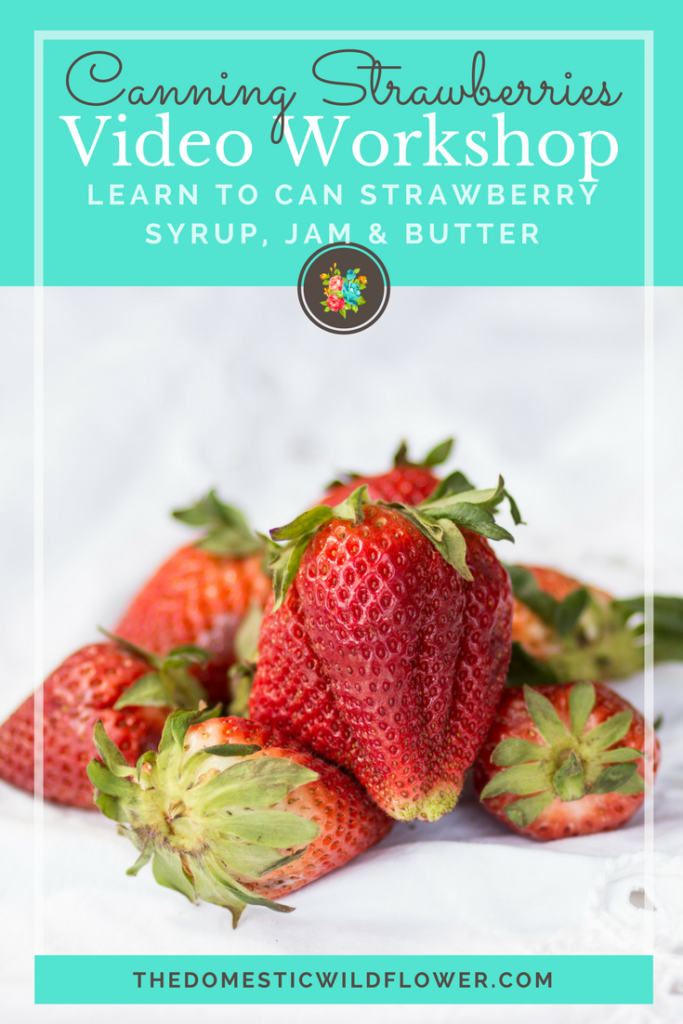
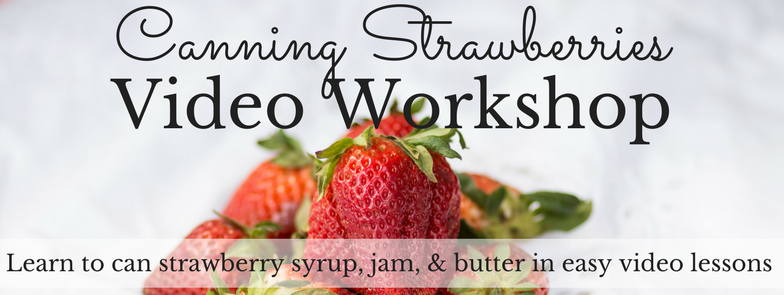
I’d like to invite you to jump start your desire to eat more healthy foods. Join the Healthy Meals Quicker Challenge and in 3 days you will be ready to start canning and avoid BPA!

Healthy Meals Quicker Challenge | Canning for Beginners from The Domestic Wildflower sign up to learn how to cook healthier meals in less time, cut the processed junk, prepare wholesome produce into jars of food to be enjoyed months later and be able to spend more time with your family.


It might be easy for some to stop by the farmer’s market every few evenings to grab the fresh produce you plan to eat but let’s be realistic, shall we?

Our meals aren’t always planned.

We rarely have time to shop- sometimes I don’t have time to Amazon Prime!

You are super busy.

Most of us don’t live in the salad bowl of the nation where produce is growing and fresh in stores 10 months of the year. Lots of us have pretty slim pickings at the grocery store October through March, if not longer.

The produce that is available in the store might have traveled a REALLY long ways to get there and might not taste that awesome as a result.

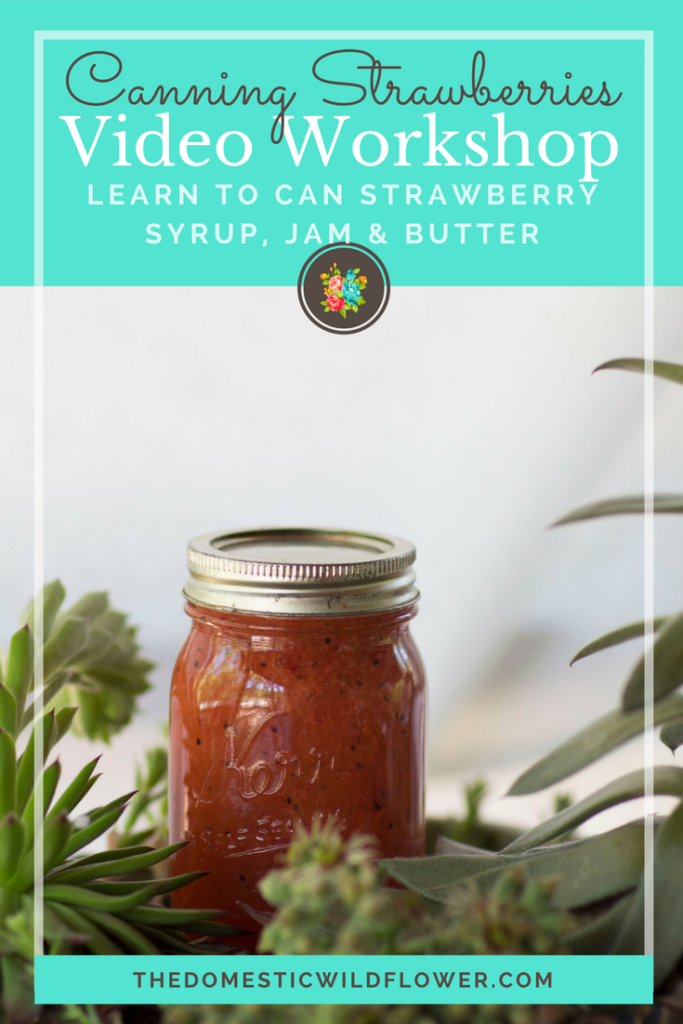
Canning is THE tool I use to preserve fresh fruits and veggies when they are fresh, inexpensive, and plentiful.

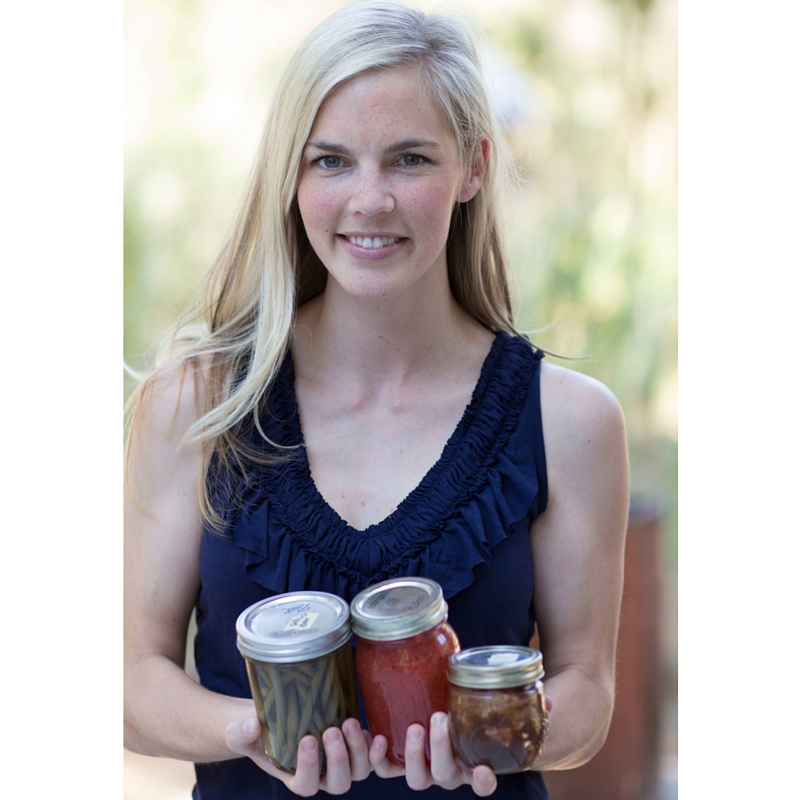
If the idea of preserving your own foods into clear glass jars (that are TRULY BPA free) has your interest, let me tell you a few things.

Canning can be fast– many batches of a dozen jars or more can be done in under an hour.

Canning is safe– we can only high acid recipes and techniques that are tested and proven by the USDA.

Canning is easy- Many recipes are just a few ingredients, and the process is SIMPLE once you’ve watched it a few times. I always say that I’d rather can every day of the year than cook a Thanksgiving dinner once.

Canning saves money– Imagine how much you’d save when you consider cutting food waste AND eating homemade. Canning doesn’t take a ton of equipment- you probably have almost every item you’d need already!

Canning saves time. An hour or two invested now means night after night of ready-made pasta sauce or wholesome salsa that is COOKED IN ADVANCE.

Canning makes it easy to eat healthy– there’s no added sugar in tomato sauce, or artificial ingredients, or imitation-fruit pieces. The foods you can still count as food.

Canning makes it easy to avoid allergens. I like to say that canning jars are clear both literally and metaphorically. You get to decide what goes in the jar and what stays out.

The satisfaction of opening a can of store bought canned food is that it is convenient. It seems cheap and easy. The flavor isn’t amazing, the quality is dubious, and after it is eaten it is probably forgotten.

The satisfaction of opening a jar of homemade pasta sauce you made yourself is enormous. The sauce is wholesome, flavorful, fragrant, and delicious. Imagine if you canned your own jam. Would you forget about those jars of goodness on the shelf and waste them? Toss the jar out with a spoonful left inside? No way! Every bite is savored and enjoyed.

Giving canned foods is the ultimate way to show your appreciation for a loved one. It bypasses the materialistic trap that most hostess gifts present and truly represents your gratitude.

I could go on and on about how canning is the ticket out stress city but I want to SHOW you.

I want to help you avoid BPA, eat healthier foods faster, and gain enormous satisfaction from canning your own produce. Join me in the 3 Day Healthy Meals Quicker Challenge!

Healthy Meals Quicker Challenge | Canning for Beginners from The Domestic Wildflower sign up to learn how to cook healthier meals in less time, cut the processed junk, prepare wholesome produce into jars of food to be enjoyed months later and be able to spend more time with your family.

 Still not convinced you should can? Take the quiz to find out!

Filed Under: Cook

How to Make a Shower Curtain with a Vintage Tablecloth

March 6, 2017 by Jenny Gomes 3 Comments

This post will share how you can transform a vintage tablecloth with a few simple sewing steps into a farmhouse style, completely unique shower curtain.

How to Sew a Shower Curtain with a Vintage Tablecloth | This farmhouse style DIY sewing hack shows you exactly how to craft a unique shower curtain from a vintage tablecloth. This is a super simple, easy sew tutorial and it is super clear! Click through to read it now!

This post may contain affiliate links, which means that purchasing through those links is a way for you to help support your favorite blogger with no impact on your checkout price. I’d never recommended a product I didn’t use and love myself. 

The thing that you have to know about vintage tablecloths is that they are often roughly showered curtain size. You also need to know that because you’ll be sewing the tabs (those fabric loops that connect to the rod) at whatever interval you want, you can make a tablecloth fit a shower.

You may have to hem, and that is ok.

The advantage of using a vintage tablecloth is that they are pre-washed and thus preshrunk, they are often inexpensive (though I have passed up many a gem printed with giant roses that were just a bit too much for my budget), and they are probably not being used as a tablecloth. Also, a tablecloth is already hemmed, most likely, which means your sewing project will be completed in no time.

In addition to a vintage tablecloth, you need double fold bias tape (which you probably can score for not that much at a second-hand store, or new via Amazon. This is a long strip of fabric that is folded hot-dog style twice, and the edges are treated so they won’t fray. It is a small price to pay for a really easy tab solution. You could absolutely use something like a hemp rope, gingham ribbon (melt the cut edges with a lighter carefully, just a touch) or you could make your own fabric tabs.

You will need:

Vintage tablecloth (that links to new and used ones on Amazon)

bias tape

universal sewing needles

all-purpose sewing thread

Use a shower curtain as a simple guide for marking where you will sew your tabs. If your table cloth is really wide, you might mark your marks 9 inches apart while the standard, store-bought shower curtain is probably spaced 6 inches. IT IS OKAY IF THIS HAPPENS. Your curtain will just be a bit more “ruffle-y” than standard. Who wants to be standard, anyway? Not me.

Use a pen or pencil to mark where you will sew your tabs.

How to Sew a Shower Curtain with a Vintage Tablecloth | This farmhouse style DIY sewing hack shows you exactly how to craft a unique shower curtain from a vintage tablecloth. This is a super simple, easy sew tutorial and it is super clear! Click through to read it now!

My shower curtain was actually a bit narrow, as compared to standard, but I have a clear plastic shower curtain on the inside and it doesn’t make any difference.

How to Sew a Shower Curtain with a Vintage Tablecloth | This farmhouse style DIY sewing hack shows you exactly how to craft a unique shower curtain from a vintage tablecloth. This is a super simple, easy sew tutorial and it is super clear! Click through to read it now!

The length of the tabs you cut from the double fold bias tape will be determined by how long you want/need the shower curtain to be, which of course is determined by the size of your tablecloth. I cut my tabs 8 inches, which made a 4-inch space between the shower rod and the hooks to the top the shower curtain. You could do twice that or more- think cafe curtain but in shower curtain form- and if you have a great tablecloth to use, I bet it would look amazing!

How to Sew a Shower Curtain with a Vintage Tablecloth | This farmhouse style DIY sewing hack shows you exactly how to craft a unique shower curtain from a vintage tablecloth. This is a super simple, easy sew tutorial and it is super clear! Click through to read it now!

Use matching thread and a universal needle and remember to back stitch. Sew tabs along the top of your vintage shower curtain. Hang and admire!

How to Sew a Shower Curtain with a Vintage Tablecloth | This farmhouse style DIY sewing hack shows you exactly how to craft a unique shower curtain from a vintage tablecloth. This is a super simple, easy sew tutorial and it is super clear! Click through to read it now!

See how mine is a touch narrow? Also, see how it doesn’t matter at all? Easy peasy, right?

Happy sewing, Wildflowers!

I know lots of you might be new to me; I’m Jenny and I am a huge fan of saving time and money by creating things at home for yourself.

Jenny of The Domestic Wildflower

I wanted to show you another super cute, lightening fast home decor project I created recently! How adorable is this burlap garland?

How to Make a Burlap Garland | This DIY tutorial is so farmhouse adorable, and so easy to sew! Perfect for rustic DIY decor for the home, this fixer upper style banner is right at home in a kitchen or for Valentine's Day

Read that post here!

If you want to learn how to sew, check out the courses HERE!

How to Sew a Shower Curtain with a Vintage Tablecloth | This farmhouse style DIY sewing hack shows you exactly how to craft a unique shower curtain from a vintage tablecloth. This is a super simple, easy sew tutorial and it is super clear! Click through to read it now!

Filed Under: Sew

Canning Strawberries Video Workshop

March 1, 2017 by Jenny Gomes Leave a Comment

This post will share the new video workshop that will teach a brand new beginner how to can strawberries into jam, syrup, and butter quickly and easily, without stress or worry. 

Canning Strawberries Beginner Video Workshop | This video workshop with show a brand new beginner exactly how to preserve the easiest fruit of all- strawberries- into jam, syrup, and fruit butter. Strawberries are the perfect fruit for a novice because they are so high in acid. The recipe is simple. The tutorial is designed to feel like you are in the kitchen cooking with me. You'll also get PDF checklists, a stove diagram, and more. Sign up for this super affordable workshop today!

Strawberry season is upon us, my friends! Strawberries kick off the start of canning season, in my mind at least, and I created a small, quick, affordable workshop that is perfect for a beginner who has never canned a thing in their life.

Strawberries are the perfect fruit for canning on your first few batches because they are high in acid.

Water bath canning relies on a trio of elements to “work” (preserve foods safely and effectively) and one of those is acid. Foods that are either naturally high in acid or ones that we acidify with the addition of foods like lemon juice or vinegar are safe for canning because germs or spoilers that might make us sick can’t live in an acidic environment. Canning basically makes the inside of a canning jar kind of like Mars…no oxygen, really hot (when we boil the jars of jam), too acidic (I have no idea if Mars the planet is actually acidic…just go with me on the metaphor 🙂 and inhospitable to living things.

Strawberries naturally are quite acidic which makes it next to impossible for you to make a mistake when canning them. Truly, the worst thing that could happen when canning strawberry jam is that it turns out a little thin and you use it as syrup. As far as worst case scenarios go, that’s not that bad of a situation!

Strawberries can be canned in small batches or large, can be spruced up with the addition of citrus or rhubarb, and are pretty for gifting.

The Canning Strawberries Video Workshop shows a brand new canner EVERYTHING they need to know.

It teaches the equipment, pantry items, jars, process, safety, and there are in depth videos of me canning strawberry jam, strawberry & rhubarb jam (using a pretty nifty technique), and strawberry syrup AND strawberry jam at the same time- same stovetop, two different pots, & two different recipes.

I am ALL about teaching you how to make the most of your time at the stove canning, and this video is devoted specifically to that.

The workshop is designed to feel like I have invited you over to my kitchen to watch me can. You could buy a stack of canning cookbooks but none of them are going to show you exactly what to do when. This workshop will show you what to do, every single step of the way.

This video workshop shows you every tip and trick to ensure you get it right. Once you work your way through the lessons, you’ll be a steady canner ready for summer canning season. It truly teaches you all the canning process and tons of applicable techniques; once you make strawberry jam, you will be ready to try plum jam next.

Strawberries are also ideal for a beginner because they cook up quickly and a whole batch can be done in about an hour, if not less!

Imagine how PROUD you’d feel serving your loved ones homemade jam.

Think about how amazing it would be to not have to agonize over the labels of foods you buy at the grocery store…or at least beat yourself up for NOT agonizing about it (so me!).

Canning makes it easy to know what you are feeding your family. I like to say that the jars are clear both literally and metaphorically; there’s no mystery ingredients in canning.

I am in LOVE with canning because it is so satisfying, useful, efficient, and healthy. It makes it so much easier for me to feed my kids foods I am happy about rather than stressed about.

I want you to feel this amazing sense of accomplishment and learn to can your own foods this season!

Not sure about an online “course”? Does that sound like homework? I made a little video to walk you through what it looks like inside the course. There’s definitely no homework 🙂

Here’s some screenshots of inside the course of the curriculum.

Canning Strawberries Beginner Video Workshop | The Domestic Wildflower This video workshop with show a brand new beginner exactly how to preserve the easiest fruit of all- strawberries- into jam, syrup, and fruit butter. Strawberries are the perfect fruit for a novice because they are so high in acid and are so high in acid. Sign up for this super affordable workshop today!

Canning Strawberries Beginner Video Workshop | The Domestic Wildflower This video workshop with show a brand new beginner exactly how to preserve the easiest fruit of all- strawberries- into jam, syrup, and fruit butter. Strawberries are the perfect fruit for a novice because they are so high in acid and are so high in acid. Sign up for this super affordable workshop today!

This is THE workshop for a newbie. Truly, beginners can’t go wrong with strawberries. And, I wanted to be sure it was affordable to everyone so you can grab it now for either one payment $39 or 2 payments of $21.

Yes! Get Instant Access!

Enroll in the course now and enjoy forever access of video lessons, download the ebooks, print off the stove diagrams and cheat sheets, and be ready to can this season!

Think about how satisfying it will be to preserve your own jam, syrup, and fruit butter.

Imagine bringing THAT to brunch instead of something store bought.

Think how awesome it will be to know EXACTLY what’s inside your food. That is such a powerful feeling, my friend!

Canning Strawberries Beginner Video Workshop | The Domestic Wildflower This video workshop with show a brand new beginner exactly how to preserve the easiest fruit of all- strawberries- into jam, syrup, and fruit butter. Strawberries are the perfect fruit for a novice because they are so high in acid and are so high in acid. Sign up for this super affordable workshop today!

I can’t wait to see you inside the course!  

Enroll Now!

PS- Interested in canning but not a strawberry fan? Stay tuned because I have another workshop I’m releasing very soon!
Happy Canning, Wildflowers! Do you know someone who should learn canning too? Share this post with them via Facebook, Pinterest, Twitter, or by emailing them the link.

If you love strawberries, you’ll love my Canning Strawberries Recipe Book!

Filed Under: Can

How to Save Time Cooking

February 28, 2017 by Jenny Gomes Leave a Comment

This posts will share my favorite tips for saving time on the never-ending task of cooking.

How to Save Time Cooking | The Domestic Wildflower read the #1 time saving tip for cooking. This article is so good- it's perfect for busy moms! Start saving time now Mamas!

College was amazing for several reasons. I lived where the weather was terrific, my dear friends were always around, my jobs were a blast, our apartment had a pool, and I didn’t have to cook if I didn’t want to. I would eat a can of pineapple out of the can as a meal and not think twice about it. And maybe I might have a side of popcorn. Ah, college. Let’s all just take a moment to remember that wonderful phase of life that involved late nights, cold drinks, few obligations, tons of laughter, and NO required cooking.

There are a few affiliate links in this post. That means that if you click over to Amazon and buy that item, I get a tiny, minuscule commission. It doesn’t change your final total at all; it’s just a great way to support your favorite blogger. I’d never suggested any item I don’t use and love myself. 

I like to cook, don’t get me wrong, but I HATE that I have to. I really hate that it forces me to plan, which is something I’m not naturally good at, and I hate how much time it takes. If I can remove some of those negative aspects, then I’m a much happier girl. Wife. Mom. Cook. Whatever.

It wasn’t far into my wife live that I realized I REALLY needed to start making the cooking experience for me better since I wasn’t going to get a cooking break anytime soon. And no, my husband doesn’t cook. He can fry eggs and that. Is. it.

At about the same time I started realizing I needed to improve my cooking game, I was pregnant with my first child. When before I’d feed myself the supremely unbalanced meal of popcorn + canned pineapple, I was suddenly very focused on healthy eating.

I was really in a tight spot. I dreamed, simultaneously, about cooking less but also dreamed about feeding my unborn babe homemade everything. I wasn’t going to feed my little darling prepackaged junk, no sir-ee, I was going to feed Baby homemade applesauce.

Does any Wildflower out there feel that way? Pregnancy makes you think some pretty difficult things so no worries if that’s you. This too shall pass 🙂

We cook what we cook because of our mothers, usually, and my mom and grandmother had gardens and canned. With the idea of standing at the kitchen stove for an hour a day, three times a day, looking like an imminent domestic hangover, I decided to resolve this desire to cook less AND to make more homemade food with canning.

Well, I resolved to try. I had watched Mom and Gram can as a kid but as soon as I could drive I was focused on life outside the home; working, school, friends, and cute guys. I hadn’t watched canning actually happen in a long time (I was pregnant for the first time at age 28) and while I thought I could do it, I had no idea of what it was actually like to can alone.

Well, can alone I did. I got a good canning book, which actually steps number one in saving time cooking. Flying by the seat of your pants works in the movies (and in cooking shows I guess) but in real life, following directions actually speeds things up. I got this book, and read it like a suspense novel. I devoured it, and read it again. I got lucky because that was actually a really dang good canning book and taught me a lot.

I borrowed a huge pot from my Gram, a jar lifter from my Mom, and rustled up used jars from various family pantry shelves.

I got all set up at the kitchen stove, now with my tummy large enough that I had to stand sideways, and was stressed to the max. I didn’t know how long each step would take, what to do when, what could be done simultaneously if I was doing it right, and of course the heat combined with the pregnancy made me certain I was going to make my whole family deathly ill. It wasn’t fun. I’m not exaggerating; canning sucked. I broke more than one jar IN the processing pot, which is pretty much the worst mess (boiling applesauce + shards of glass) I’d had (I hadn’t enjoyed a diaper blow out yet) in my life. I burned my fingertips, I had jars that didn’t seal (bummer) and didn’t know what to do about it (even bigger bummer). And I wasn’t even clueless! I actually had helped do this many times but the years in between clearly blurred my memory significantly. I actually didn’t know about adjusting for altitude (I must have skipped that paragraph…whoopsie) and then later read after the fact how important it is to do that (shoot!). In short, I had no idea what I was doing, despite life experience and a great book. It was awful.

As you gals who have had a baby know, that metaphorical clock while pregnant is ticking ever louder for you to accomplish whatever it is you want to accomplish. Some women nest by painting baby rooms, I nested by making applesauce. I kept standing sideways at the stove, sweating bullets because my kitchen is the tiniest room in the house, no joke, with a window the size of a chicklet (almost). I kept reading, kept calling my Gram and Mom, kept making stressful mistakes but by the time Baby S was born, I had applesauce in jars, sealed, on the shelf.

I continued to self-educate and read while I was glued to my breastfeeding chair and by the time summer was around, I was ready to tackle canning tomatoes. Because I had to eat too, I realized. And, my infant hadn’t eaten her applesauce, because babies don’t eat that much other than milk. Fancy that 🙂 

I called my dear friend Anna to come over one exceptionally hot summer day and she and I canned flat after flat of tomatoes. We had to work fast because naptime only lasts so long and I wanted to be done by the time Baby woke. We successfully canned well over 2 dozen jars of tomato sauce and while we were canning, we talked, drank cold beers, and had a great time. We didn’t break any jars, we didn’t have a single no-seal, and the end product was delicious. I’m not kidding you, that tomato sauce was FRESH TASTING if you can imagine that, rich, and versatile. In one afternoon, we had successfully reached several significant canning milestones and made enough tomato sauce to last us months.

And just like that, I didn’t have to spend as much time cooking. Learning to can means you have COOKED IN ADVANCE. Canning is the homemade version of a prepackaged meal.  Tomato sauce, for example, IS ALREADY COOKED when you open the jar. Not only is it cooked, but it is also a blank slate onto which you can add anything you want and nothing you want. Tomato sauce can be transformed rather quickly into tomato soup, or enchilada sauce, or the filling in stromboli, or as any iteration of pasta sauce or a base for the beef stew…the list is endless.

Not only is it already cooked, but it is also HOMEMADE. Homemade food is less expensive, tastes a million times better (okay, well at least twice as good), AND HAS NO MYSTERY INGREDIENTS. How much time do you want to spend reading labels? Oh, none? ME EITHER. Whether you are worried about cutting artificial ingredients, colorings, toxic chemicals, or just eating less sugar or have specific dietary concerns like you are eating gluten-free, or maybe you just don’t like a surprise onion flavor. Canning lets you control ALL of that, for less money, in less time.

I want to invite you to the Start Canning Course.

How To Save Time Cooking by learning how to Start Canning!
In the Start Canning Course you and I will tackle together the pantry items (what’s the difference between pickling salt and regular salt? Can I use these canning lids that my grandma used? I’ll explain all that in the course videos!), the safety concerns (important temperatures to keep in mind, WHY canning works (hello acid + boiling water + vacuum seals!), and how to know you are doing it right. You’ll determine which pots & pans you already own that will work perfectly (probably lots!) and which you need to borrow or buy, and I’ll explain what gear you definitely can skip (no giant pot for you!). You will feel like you are learning from a new best friend, hanging out in my kitchen with me. 

Sign up now at this special price and finally have more time to spend doing what you LOVE instead of standing in the kitchen!

Guys I cannot WAIT to see you there. In my “day job,” I’m an English teacher and it is my favorite thing ever to explain what people think is complicated to show how simple that “complicated” thing is, and how capable YOU are.

How to Save Time Cooking | The Domestic Wildflower read the #1 time saving tip for cooking. This article is so good- it's perfect for busy moms! Start saving time now Mamas!

This blog and this course, in particular, is devoted to helping you see how achievable, easy, and time-saving old-fashioned things like canning are and how they can work FOR you to help make your life better.
So sign up, bring a friend, and see you in the course!

Filed Under: Can, Cook

How to Crochet a Thick and Thin Wool Throw Blanket

February 27, 2017 by Jenny Gomes 10 Comments

This tutorial will explain how thick and thin yarn is different from other yarns and why the resulting look can result in a beautifully textured throw blanket that far exceeds those of lower quality sold for far more in stores.

How to Crochet a Thick and Thin Wool Throw Blanket

While scrolling through Instagram, about 8 weeks ago, I found a more urban, more chic, but definitely equally money-savvy blogger, Reichel Broussard of Copy Cat Chic. We connected over a common love of textured textiles, swapped a few emails, and hatched a plan for me to figure out a way to mimic the look of a throw she loved but was sold for an obscene $1,000. Her focus is on finding less expensive but fabulous ways to furnish one’s home and my focus is on making less expensive but beautiful things resulted in a positively dreamy throw. Check out her Wildflower-approved site www.copycatchic.com here, and her swoon worthy Instagram here.

The first problem with her desired throw was that it appears to be woven (I never saw said blanket in person) from a very thin, to very thick yarn.

[Read more…] about How to Crochet a Thick and Thin Wool Throw Blanket

Filed Under: Craft

  • « Go to Previous Page
  • Page 1
  • Interim pages omitted …
  • Page 37
  • Page 38
  • Page 39
  • Page 40
  • Page 41
  • Interim pages omitted …
  • Page 66
  • Go to Next Page »

Primary Sidebar

Categories

Follow me here, there, & everywhere!

  • Email
  • Facebook
  • Instagram
  • Pinterest
  • RSS
  • Twitter
  • YouTube

Search

Get The Pressure Canning Cookbook

Get 10 Free Recipes Now!

Best Chicken Coop

Footer

Get Started Pressure Canning

Shrubology Ebook

Shrubology: Refreshing Homemade Fruit and Vinegar Syrups for Cocktails
Make easy, no-cook fruit & vinegar syrups for cocktails & mocktails! This ebook shares crowd pleasing recipes and simple to understand ratios so you can make a shrub on your countertop any time- without a recipe. Dive into these Prohibition Era drinks today!

Copyright

Copyright 2019
The Domestic Wildflower
www.thedomesticwildflower.com.
All content created by Jennifer Gomes unless otherwise noted.

Copyright © 2025 · Lifestyle Pro on Genesis Framework · WordPress · Log in