• Skip to secondary menu
  • Skip to main content
  • Skip to primary sidebar
  • Skip to footer
  • The Pressure Canning Cookbook
  • Blog
    • Subscribe
    • Welcome!
  • Perfectly Preserved Podcast
  • About
    • ADW Manifesto
    • Work With Me
      • Read
  • Shop
    • My Account
    • Cart
    • Checkout

The Domestic Wildflower

Handmade Food & Craft Tutorials for Beginners

  • Courses
    • Free Canning Basics
    • Everything Canning Course
    • Steam Canning Workshop
    • Free Homemade Cocktail Mixers
    • Wildflower Mixology
    • Crochet Basket Workshop
  • Can & Preserve
    • Never Canned?
    • Steam Canner Equipment Bundle
    • Shrubs Course
  • Sew
  • Cook
  • Craft
    • Crochet Step-by-Step Guides
      • Crochet Basket
      • Giant Yarn Throw
      • Thick & Thin Throw
  • Living
    • Creativity Challenge
    • Clean
    • Kids
  • Rentals

Jenny Gomes

How To Darn Socks

July 14, 2016 by Jenny Gomes 2 Comments

One mantra that guides my life is “make do and mend”. Darning socks used to be a common activity and now, it is much more common to toss a pair of socks out or at best, use holey socks as a rag. I’d like to show you how to darn and help you extend the life of your socks.

How To Darn Socks

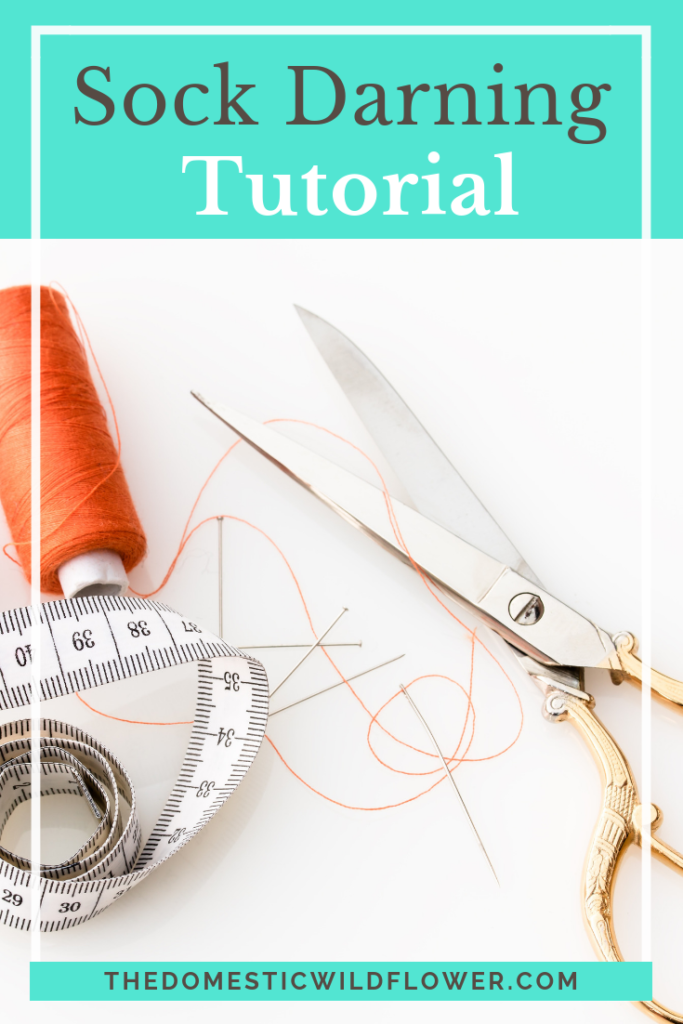
You don’t need a sock darner but if you come across one either in Grandmother’s sewing basket or in a thrift shop, snap it up. They are very handy indeed. If you don’t have a darner, you can use your hand (which is what I usually do) or a tennis ball. You need a darning needle or any needle that has an eye large enough to fit your chosen yarn through.

I purchased one skein of sock yarn from my local thrift shop and it has met all my darning needs. You might feel tempted to find a yarn that matches your worn socks but that’s something I don’t worry about. Sock yarn is skinnier than many other yarns and most importantly it has a lot of spring and stretch, which you obviously want in a sock.

Thread your needle and knot your end. I then stitch a running stitch (up, down, up, down) in columns (top to bottom of the worn area) and then rows (horizontal) attempting to keep stitches relatively even. I usually make stitches that are a quarter of an inch in length or shorter, and each row and column between a quarter and an eighth of an inch apart. Bear in mind that your sock will be stretch over your foot and the stitches will be stretched accordingly. The goal is to add integrity to the work area with the sock yarn and to bring together any hole edges that may exist. Because you are simply mending (rather than painting the Sistine Chapel) you should allow yourself room for imperfections and feel okay going back to add one more small row if your original rows were a bit too far apart, for example.

Darning may require you to try your sock on a time or two during the darning process, and that’s okay too. Sometimes sewists and crafters get hung up on perfection and this activity is a good exercise in accepting imperfection.

If you want to learn how to sew, check out the courses HERE!

Here’s a video of me doing the above process. Enjoy, Wildflowers!

Happy darning!

Filed Under: Sew

Strawberry Kiwi Lemonade Concentrate

July 11, 2016 by Jenny Gomes 7 Comments

This is a kid-friendly strawberry kiwi lemonade concentrate canning recipe that is just as beautiful on the shelf as it is for gifting. It helps kids and moms alike get out of the sugary soda drink trap and cooks up quickly. Read on for the strawberry kiwi lemonade concentrate recipe!

Strawberry Kiwi Lemonade Concentrate

This recipe is for Strawberry Kiwi Lemonade concentrate and that is the best part. You can pour a spoonful or two into a glass and fill it with water (or sparkling water if you want to trick them even further!) and stir it up and it is suddenly a natural soda that you made yourself. If I want to add a shot of grown-up libation to it, I can, and if my youngest wants to have some I can make his weaker still.

The concentrate also takes up less room on the shelf to store which is another advantage. Here’s how you can easily make your own. I tried to tweak the recipe to require quantities of fruit you could actually quickly purchase in the market too.

Strawberry Kiwi Lemonade Concentrate Recipe

You need:

3 cups strawberries with stems and leaves removed, rough chopped

3 cups kiwi fruit, peeled

4 cups bottled lemon juice

6 cups of sugar

Note: If you haven’t kiwi, you can just double the number of strawberries and skip the kiwi entirely. I think the kiwi is a great addition, however. 

Prepare your processing pot with about 5-pint jars and bring to a gentle boil. If you are new to canning and want to learn how to make awesome stuff like this recipe, head to www.startcanning.com to learn how. That’s my e-course that is perfect for the busy beginner. Check it out, Wildflowers!

Blend the fruit together in a blender, food processor, with an immersion blender, or food mill (a baby food mill would work fine!). If you haven’t one of these appliances, just chop the fruit into small pieces and don’t worry. It will cook down readily. If you have terribly picky children, you could choose to strain the mixture through a sieve at this point to remove the pretty black kiwi seeds, but luckily, my kids don’t mind them.

Strawberry Kiwi Lemonade Concentrate | The Domestic Wildflower click to read this kid and beginner friendly recipe and tutorial! The turns out so pretty for storing or gifting!
Put the pureed fruit into the preserving pan. Add the lemon juice and sugar and stir to combine.

A note about lemon juice: I fresh squeezed every lemon in my crisper and only got a single cup of juice. There’s no shame in using bottled juice and I definitely had to. Frankly, because you are cooking and canning it, the fresh lemon juice might be better saved for use where it isn’t cooked at all. Use fresh if you have it and want to squeeze them, or bottled if not.  

Strawberry Kiwi Lemonade Concentrate | The Domestic Wildflower click to read this kid and beginner friendly recipe and tutorial! The turns out so pretty for storing or gifting!

Bring fruit, lemon juice, and sugar to a gentle simmer. You want the sugar to dissolve but you don’t want the fruit to come to a rapid boil lest the fresh fruit flavor disappear. If it comes to a full boil, that is okay, but the flavor is a bit better if you can avoid a rolling boil.

Strawberry Kiwi Lemonade Concentrate | The Domestic Wildflower click to read this kid and beginner friendly recipe and tutorial! The turns out so pretty for storing or gifting!

Using the jar lifter, pull one jar from the boiling water and pour the hot water back into the pot. Set it carefully on the towel-covered countertop. Using your funnel and a ladle, fill the hot jar with hot fruit puree.

Leave ½ an inch between the top of the fruit and the top of the jar.

Put the lid and ring on the jar. Tighten only as tight as you might a faucet in the bathroom. You don’t need or want it super tight. Use the jar lifter to put the hot jar full of hot fruit back into the hot water.

You will repeat this process until you run out of fruit or out of jars. With whatever little bit you have left that isn’t a full jar, pour into a drinking glass and get ready to reward yourself with a cold drink.

Set the timer for 5 minutes. For every 1000 feet of elevation you live above sea level, add 5 minutes. For example, I live at 3000 feet above sea level so I set my timer for 20 minutes total. During this time, the water in the largest pot should be at a rolling boil, with at least an inch of water covering the lids. I know it is difficult to tell how much water is over the jars when it is really boiling but add from a teakettle if you aren’t sure.

Adjusting for Altitude: Start Canning from The Domestic Wildflower click for canning tutorials and recipes!

When the time is up, use your jar lifter to remove the jars one at a time to carefully rest on the towel covered countertop. Let them cool undisturbed for up to 12 hours. Notice how the lids will seal; they will become concave and firm to the touch and you will probably hear a loud “ping” or clicking noise when the heat forces all the air from the jar which causes the lid to suck down, creating that air-tight seal you are looking for. If you have a jar that doesn’t seal after 12 hours, and the lid pops up and down when pressed, then just store the jar in the refrigerator and eat it up within a month. Label sealed jars and store in a cool, dry place.

Strawberry Kiwi Lemonade Concentrate | The Domestic Wildflower click to read this kid and beginner friendly recipe and tutorial! The turns out so pretty for storing or gifting!

To serve, mix 1 part concentrate with 2-4 parts cold water and stir to combine. Feel free to get fancy and use sparkling water, ice, and perhaps one shot of your favorite adult beverage. I like tequila on a hot afternoon with this mix in particular but then again I like it with most everything 🙂 

I want to hear in the comments: what are YOUR favorite kid-friendly canning recipes? Share in the comments below and be sure to share this recipe with your friends. Those Pinterest buttons aren’t going to click themselves 😉

Related:

I wrote a blog post about the 5 Perfect Recipes for Kids right here 🙂 

If you love strawberries, you’ll love my Canning Strawberries Recipe Book!

SaveSave

Filed Under: Can

Praise for the New Pint and a Half Mason Jar

July 7, 2016 by Jenny Gomes 1 Comment

Mason jars are hot, hot, hot on Pinterest, in stores, and it uses never dreamed of by their inventors. If you are interested in learning the history of Ball, Kerr, and Mason jars, here is a short but clear description http://www.pickyourown.org/canningjars.htm but the long and short of it is they are all very much the same jars now, but invented and popularized around the turn of the 1900s.
 Praise for the New Pint and a Half Mason Jar

This post may contain affiliate links. All opinions are my own.

A new thing in the canning jar world is the pint-and-a-half Mason jar. Here’s a refresher on your P’s and Q’s. A half pint is one measuring cup, a pint is two cups, and a pint and a half are 3 cups. In years past, a canner had no three cup option, nor did they have an option that sits so nicely in a cup holder of a car.

I love the pint-and-a-half for several reasons. First, they are, like all real canning jars, safe for water bath canning and pressure canning, heavy glass, and of high quality for daily use and general food storage.

The wide mouth and taller shape mean you could use them for preserving spears of asparagus, pickled carrots, tall dilly beans, etc. The shape lends itself to use as a vase for cut flowers and storage of a pound of ground coffee beans, for example.

The quantity of three cups is ideal for drinking water as any more seems to get warm before I can drink it all and replaces costly and wasteful plastic water bottles. It is perfect for the amount of coffee I drink in the morning.

The jars are made in America (as displayed on the side) which is awesome. The fact that this jar fits so nicely in a cup holder cannot be ignored. Sure, some of us would love four cups of coffee to-go but a quart jar simply doesn’t fit. Don’t try it, as it’s a mess waiting to happen- I’ve done it.

If you want to see what the actual canning process looks like, where you preserve food in these awesome jars (think tall dilly beans or pickled asparagus spears) download my free canning cheatsheet!

Yes! Download Now!

The jars are printed with both cups and metric measurements on the side for easy ratios. Sure, I can eye-ball a cup in a quart jar, but the curved sides at the top of a quart (as opposed to the wide mouth and straight sides of the pint-and-a-half) makes eye-balling tricky towards the top.

It may seem silly to be so totally enthused about a canning jar but I assure you this is a good one to get. I encourage you, Wildflowers, to score some next time you are out. I bought a flat and split it with a friend and I use mine DAILY. While you are shopping, grab some of Ball’s drinking lids and straws. I got a pack of four for wide mouth and four for narrow and also use those daily.

Comment below and tell me what do you put in your pint-and-a-half, Dear Reader? Click the photo link below to grab your own!

Filed Under: Can, Living

5 Reasons to Visit a U-Pick Berry Patch

July 4, 2016 by Jenny Gomes Leave a Comment

This post will share 5 reasons you should visit a U-pick berry patch, 6 ways to prepare for picking success, and explain why you’ll get way more than just a bucket of sweet fruit by visiting one.

5 Reasons to Visit a U-Pick Berry Patch

A U-Pick, You-Pick, Pick Your Own, or PYO is a place where rows upon rows of a wide variety of fruit if waiting to be picked and sold usually by weight. They absolutely should be on your summer to-visit list and I will tell you why.


  1. Fresh fruit. Delicious fruit with old-fashioned and homegrown flavor is something we all should be eating more of for the sake of our waistlines and our general food sense and ideas of what fresh fruit should taste like. If you haven’t had a homegrown strawberry lately, you are seriously missing out. They taste nothing like the large, bright and utterly flavorless fruit in the major grocery chains. Same for berries. A store bought blackberry is a travesty. They taste nothing like a fresh berry and you know who is to blame? Us consumers. We keep buying the seedy giants that are colorful but devoid of any flavor and so producers keep growing them. Let’s head to a patch and support some really good fruit growers, shall we? And really, in order to be transported zillions of miles, store-bought berries, which are naturally pretty darn fragile, have to be picked before they are ripe and they have to be bred for color since shoppers buy with their eyes rather than their brains most of the time.
  2. Outdoor time. There are few of us out there thinking, “gee, I really need some time in front of the computer screen!” Rather, our postures, our fitness levels, our eyeballs, and our hearts and souls are really overdue for some fresh air and sunshine.
  3. Awesome variety. Berry patches very often have many, many varieties each of blackberries, raspberries, blueberries, marionberries, strawberries, and more. This means that while some rows will be bare, or not ripe yet, others will and that also means you will have a ton of varieties to choose from. There are red raspberries, dark, dark red raspberries, and golden yellow raspberries, and potentially they will all be present at the patch you visit. When I pick wild blackberries, the only fruit I will come home with is wild blackberries. At a patch, you can pick enough to eat, can, or otherwise preserve a bunch of different types of fruit all in an hour or so of picking.
  4. Family friendly or nice alone time. It is easy to keep children corralled as the rows provide a visible and clear boundary. I have gone picking with a good friend and we picked at opposite ends of the rows and had the kids in between us, and that arrangement worked nicely. If you bring small kids, a toy truck might be of good use on the dirt pathways. Older kids can have their own bucket and nibble as they pick.  Conversely, picking fruit can be a meditative experience and going alone can be quite nice. Leave technology in the car and lose track of time; it’s lovely.
  5. You can eat! You can enjoy the fruits of your labor fresh, serve them with ice cream, and my favorite it canning them to enjoy later. Fresh berries, picked yourself, usually last about 4 days in the fridge, if stored properly. I usually pick pretty quickly and take home more than I can eat fresh. If you want to learn how to can fresh fruit and vegetables, I’m your girl. I created a canning course for busy beginners and you can check it out right here at www.startcanning.com I am super excited to share it with you; even if you have never canned before I can SHOW you in a way a cookbook cannot how to preserve. It is satisfying, delicious, and easier than you think. Head to www.startcanning.com to learn more!

Enter to WIN the Fall into Canning Giveaway: The Start Canning Course + Beginner Tools! The winner is drawn October 26!

How to prepare:

  1. Dress in layers. Think a lightweight long sleeve, tank, hat and/or sunglasses.  Pants are obviously hotter but sometimes it is nice to have jeans on for picking strawberries, which are a low-growing plant where you might be on your knees. I usually wear shorts with pockets. Wear sunblock and don’t forget your ears and your part. You might appreciate a pair of lightweight, gardening style gloves if you plan on picking blackberries. The ones with thorns typically have more flavor than the ones that are thornless, but many patches have few if any varieties are particularly wicked.
  2. Bring cash. Plenty of places accept checks and cards, but cash is easy and many places only accept cash.
  3. Bring several smallish buckets. The buckets that we love used to hold ice cream in the ’80s and are white plastic with metal handles. You don’t want a really large or deep receptacle because the fragile berries at the bottom are easily smashed. You will need more than one because some places charge a different price per pound for each type of berry, so you’ll want to keep them separated.
  4. Plan for an hour or two outdoors. That might mean bug spray, a bathroom trip before you go, and a bottle of water.
  5. Be ready to reach high and crouch low. Strawberries are grown in low little bushes, so you can bend at the waist or come into a yoga-esque squat to pick them. My gram (the smartest lady I know) brings a little stool (like one your little kids might use to reach the sink) to sit on for berry picking and it is really much more comfortable. I try to hit those low plants first in a berry picking day because I get tired of them the quickest. Berries like raspberries and marionberries grow on long vines called ‘canes’ that will probably be wound along wires in rows kind of like in a grape vineyard pictured on a wine bottle. You may or may not be able to see over the rows and you can pick from the ground up. The canes of various berries range from smooth to scratchy- like a rasp, as in raspberry. Blueberries are grown on bushes that look the most like a quintessential bush or hedge rather than in a row of vines.
  6. Keep your eyes open. You should watch for irrigation pipes, hoses, etc, bees that might sting (though they will likely be around to pollinate the flowers, rather than be around the ripe berries), and other small critters that might startle you.  


5 Reasons to Visit a Berry Patch | The Domestic Wildflower click to read this fun post about 5 reasons why you should head to the nearest U-pick berry patch, 6 ways to prepare for picking success, and why you will leave with more than just a basket of fruit by doing so.
This is my grandmother helping my daughter learn how to tell if a berry is ripe or not. Hint: a ripe berry will almost fall off the vine into your hand.
5 Reasons to Visit a Berry Patch | The Domestic Wildflower click to read this fun post about 5 reasons why you should head to the nearest U-pick berry patch, 6 ways to prepare for picking success, and why you will leave with more than just a basket of fruit by doing so.
I kept my son occupied at our local and totally wonderful U-Pick by asking him to build a rock tower. Quite a view, right? 🙂

Not everyone has the luxury of being able to forage for wild berries or grow their own. While I think both are experiences are valuable on their own, a pick your own is an awesome, practical, and easy way to reconnect with where your food comes from and you should absolutely seek one out this season.

I hope you Wildflowers are feeling free, where ever you are on this Independence Day, and I hope that together we can create a little more independence in our homes in regards to what we eat, drink, wear, do, and enjoy. Three cheers for freedom, Wildflowers!

If you want to learn what to do with the fruits of your U-pick labor, head to www.startcanning.com to learn how to can. In this e-course, I SHOW busy beginners in a way a cookbook cannot the canning process and I teach techniques that you can use to can whatever your heart desires. Let’s Start Canning!

Filed Under: Living

Start Canning Course

June 27, 2016 by Jenny Gomes 2 Comments

In this post, I will explain all about the canning course for busy beginners, Start Canning, and I will give you all the details for how to join in the fun this canning season.

Start Canning Course


I am so proud and excited to share that the Start Canning e-course is ready to rock and roll. If you are chomping at the bit and want to sign up now, head here! www.startcanning.com

Enroll Now!

I created a canning course for the busy beginner. Let me explain a little about what that means. By busy, I mean that I don’t teach every dang recipe ever because no one has time for that. I do teach TECHNIQUES that I think you can apply to many other recipes after you take the course. Once you learn how to process foods in a food mill in one recipe, you can easily do it in another. Once you learn how to make strawberry jam, you can try apricot jam on your own. I know you don’t have all kinds of free time to watch hours upon hours of video and eat bonbons. You could watch the videos and read 10 minutes at a time over a few weeks, or you could devour the whole course in a weekend.

By beginner, I mean really a brand new, never boiled a pot of water before beginner. I explain and show everything, clearly, more than once, so you can SEE how the process works. A good cookbook will tell you what to do but a video course that you can access any time you want, pause and rewind, and that has helpful cheat sheets and just for fun quizzes to check your learning will SHOW you how to can. All the in-person workshops I have attended really assumed that attendees cooked often and well upon attendance and I wanted to be sure that even true newbies could learn from this course.


The biggest obstacles people tell me to stand between them and canning nirvana are the equipment, the seemingly complicated process, and safety. All three issues are addressed in the course so you will be ready to can your first batch right away. I have several videos where I go over which equipment you need, why you need it, and offer alternatives where appropriate. We follow USDA approved canning guidelines and I even walk you through their website that is the final word on canning safety. You will get to see how to can a variety of recipes that I chose very purposefully so you can learn a range of skills you can apply to whatever you want to preserve this season.


I am working on some really fun bonuses to include to the course that I can’t reveal just yet but they just might have something to do with making homemade bread. Stay tuned on that one, Wildflowers. I have a few other irons in the fire that will make the experience even more fun but I have to keep my lips sealed a while longer. You’ll be the first to know, Dear Readers.

Those who join the course get to have access to a private Facebook group where we get to troubleshoot, swap recipes, learn from one another, and where I can help you however you need it.


I really hope that if you are considering purchasing the course that you give yourself permission to do so. The value of learning a fun new skill that will improve your cooking and eating experiences immeasurably will far surpass any concerns you have over whether or not you can do it (you totally can!), if you will get sick (no way; we will use trusted recipes and procedures! I will help you every step of the process!) or if you will understand how (canning is way easier than cooking a holiday dinner, folks). Let’s Start Canning!

Enroll Now!

You can see all the lessons inside the course right here! 

Filed Under: Can

  • « Go to Previous Page
  • Page 1
  • Interim pages omitted …
  • Page 45
  • Page 46
  • Page 47
  • Page 48
  • Page 49
  • Interim pages omitted …
  • Page 66
  • Go to Next Page »

Primary Sidebar

Categories

Follow me here, there, & everywhere!

  • Email
  • Facebook
  • Instagram
  • Pinterest
  • RSS
  • Twitter
  • YouTube

Search

Get The Pressure Canning Cookbook

Get 10 Free Recipes Now!

Best Chicken Coop

Footer

Get Started Pressure Canning

Shrubology Ebook

Shrubology: Refreshing Homemade Fruit and Vinegar Syrups for Cocktails
Make easy, no-cook fruit & vinegar syrups for cocktails & mocktails! This ebook shares crowd pleasing recipes and simple to understand ratios so you can make a shrub on your countertop any time- without a recipe. Dive into these Prohibition Era drinks today!

Copyright

Copyright 2019
The Domestic Wildflower
www.thedomesticwildflower.com.
All content created by Jennifer Gomes unless otherwise noted.

Copyright © 2025 · Lifestyle Pro on Genesis Framework · WordPress · Log in