• Skip to secondary menu
  • Skip to main content
  • Skip to primary sidebar
  • Skip to footer
  • The Pressure Canning Cookbook
  • Blog
    • Subscribe
    • Welcome!
  • Perfectly Preserved Podcast
  • About
    • ADW Manifesto
    • Work With Me
      • Read
  • Shop
    • My Account
    • Cart
    • Checkout

The Domestic Wildflower

Handmade Food & Craft Tutorials for Beginners

  • Courses
    • Free Canning Basics
    • Everything Canning Course
    • Steam Canning Workshop
    • Free Homemade Cocktail Mixers
    • Wildflower Mixology
    • Crochet Basket Workshop
  • Can & Preserve
    • Never Canned?
    • Steam Canner Equipment Bundle
    • Shrubs Course
  • Sew
  • Cook
  • Craft
    • Crochet Step-by-Step Guides
      • Crochet Basket
      • Giant Yarn Throw
      • Thick & Thin Throw
  • Living
    • Creativity Challenge
    • Clean
    • Kids
  • Rentals

Blog

Canning Jump Start Guide

February 9, 2018 by Jenny Gomes Leave a Comment

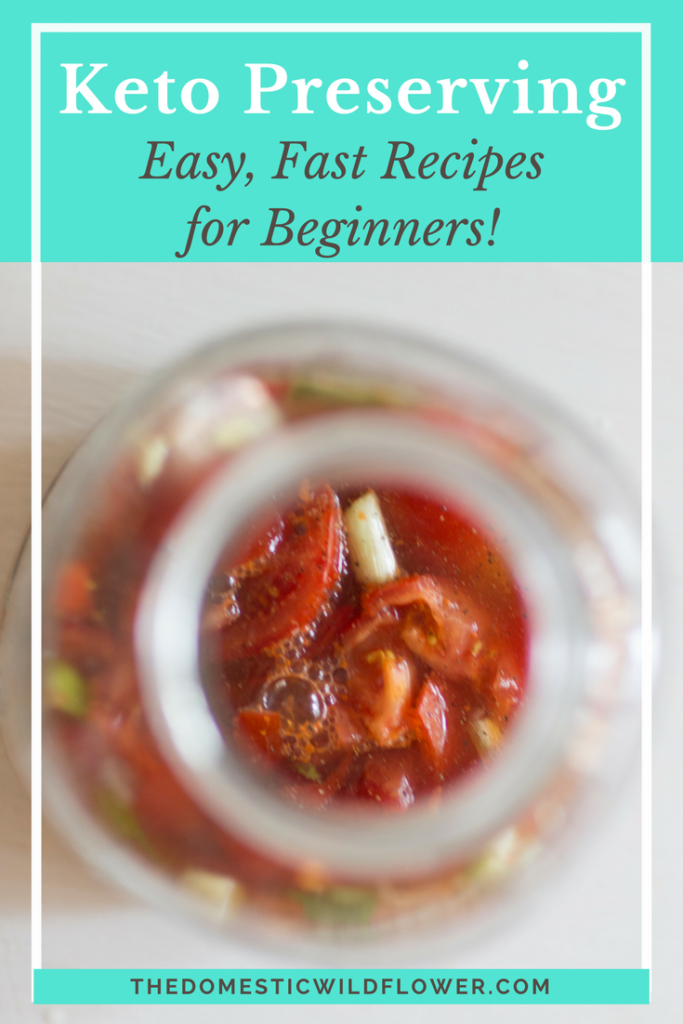
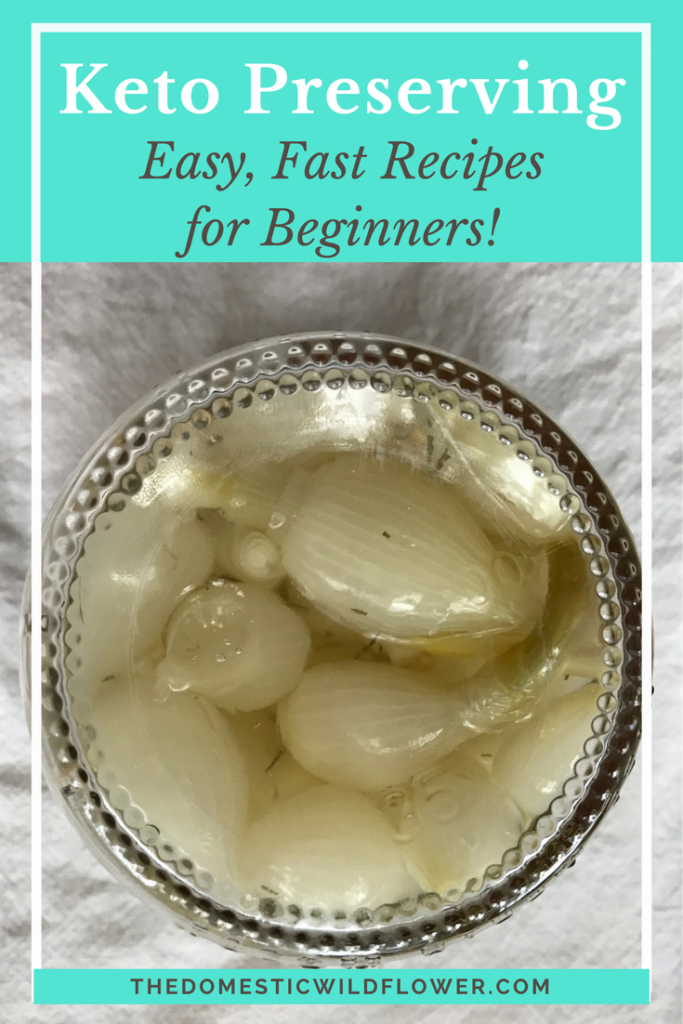
Wish you knew how to can like Grandma did, but think it is too hard or you don’t have the time to learn? This post is for you! I can help you dive into canning with a modern spin with the Canning Jump Start Guide- read on for the guide that will help you get started canning!

Canning Jump Start Guide | Wish you could learn to can like Grandma did? This guide makes canning easy and fun for a modern, busy home! Get started preserving healthy, fresh produce today!

I know you are super busy. But, you are reading this blog post because you WANT to learn how to can and you think maybe, just maybe, you can fit another thing into your schedule. I promise, I can make it work for a modern life, a busy lifestyle, into nap times and in a way that can save you time and money instead of costing much of either.


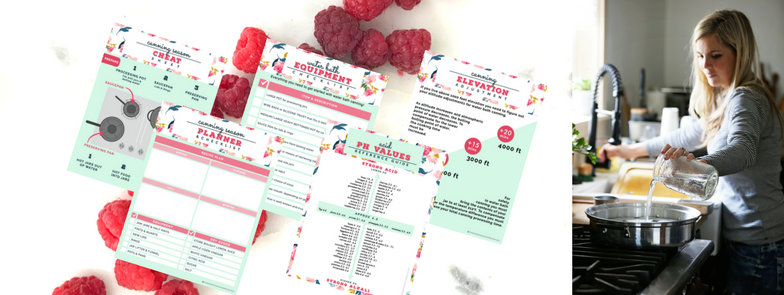
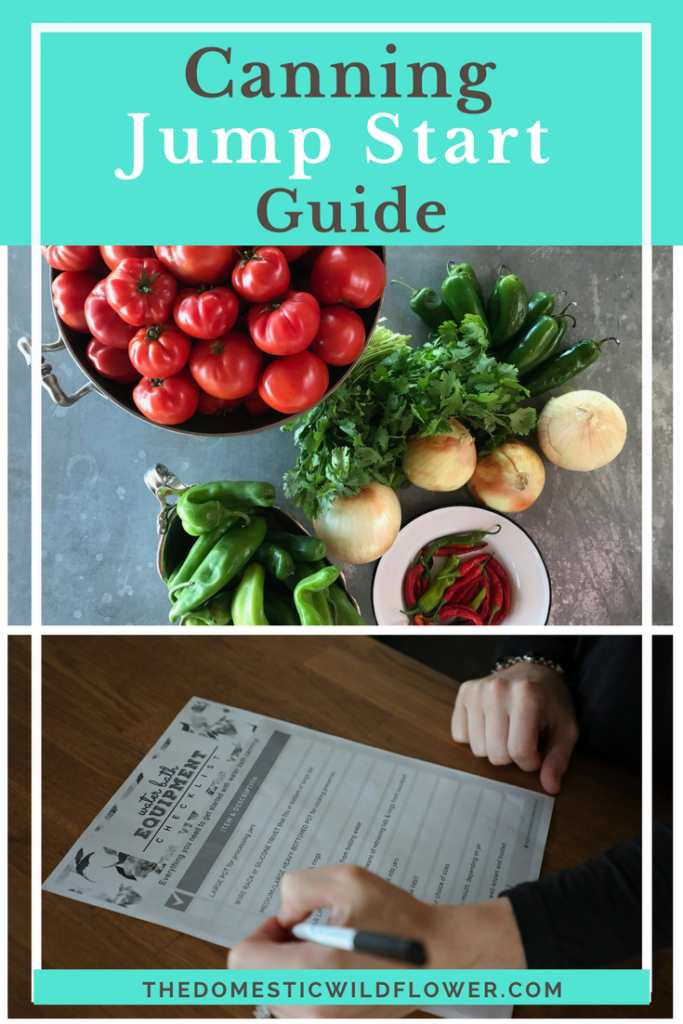
The Canning Jump Start Guide shares the no-frills Canning Equipment Checklist that will surprise you- no giant, black-and-white speckled pot that Granny used required!- and only a few items that you will need to purchase before diving in. Truly, there’s probably just ONE item that you need for water bath canning that you likely don’t own already- and you’ll learn why inside the Canning Jump Start Guide!

Watch the YouTube Video version of this post below!

Some people are hesitant to start canning for fear that they will mess up the recipe. Inside the Canning Jump Start Guide I include 4 of the easiest, fool-proof beginner friendly recipes that are perfect to get started with.

Think

  • spiced applesauce

  • tomato jam (savory, not sweet)

  • ranch style salsa,

  • and strawberry jam!

This is the best easy applesauce recipe ever. This girl cans it in little convenience sized jars that are perfect for lunch boxes- genius! What a time saver! And applesauce is so healthy and delicious. Totally making this.

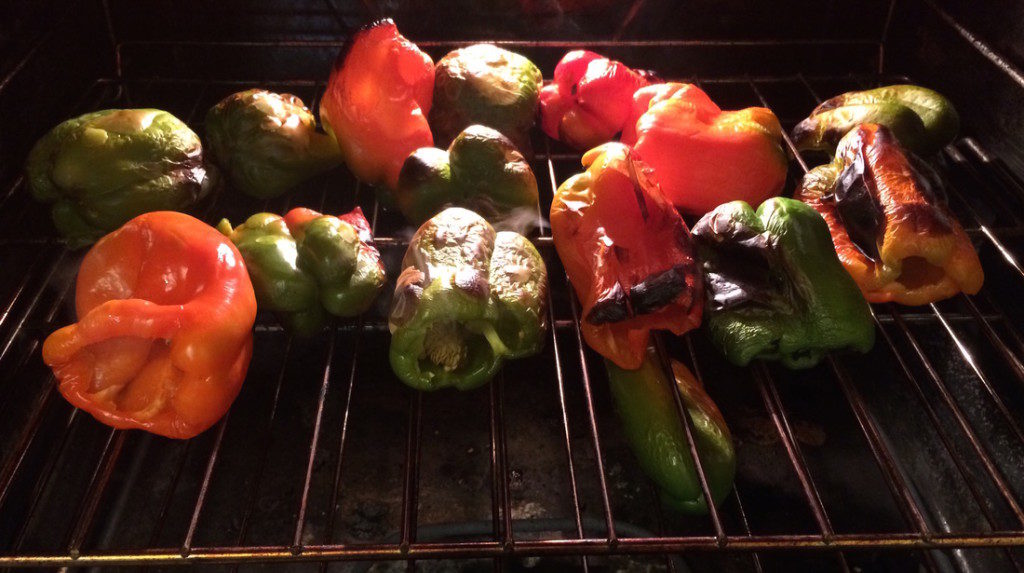
The Guide also includes a Canning Season Planner so you can look ahead and plan out which other recipes you’d like to try; there’s nothing worse than missing strawberry season, or hoping to preserve roasted bell peppers and completely forgetting about them until it’s too late!


One step in canning that is critical, and someone foreign is adjusting for altitude. The Canning Jump Start Guide includes a visual guide for knowing exactly how many minutes to add to your processing time based on your elevation.

The pantry checklist inside the Canning Jump Start Guide makes sure you will have what you need when you come home from the grocery store or farmer’s market with fresh produce ready to be preserved.


This super helpful guide is printable, or you can simply view it on your phone or laptop. You can access it as many times as you need, over and over, on all the devices you own.


By purchasing the Canning Jump Start Guide, you’ll be able to pin to the Canning Basics Pinterest Board where beginners like you will share recipes from all over Pinterest. It’s a fun bonus that I think you will love!


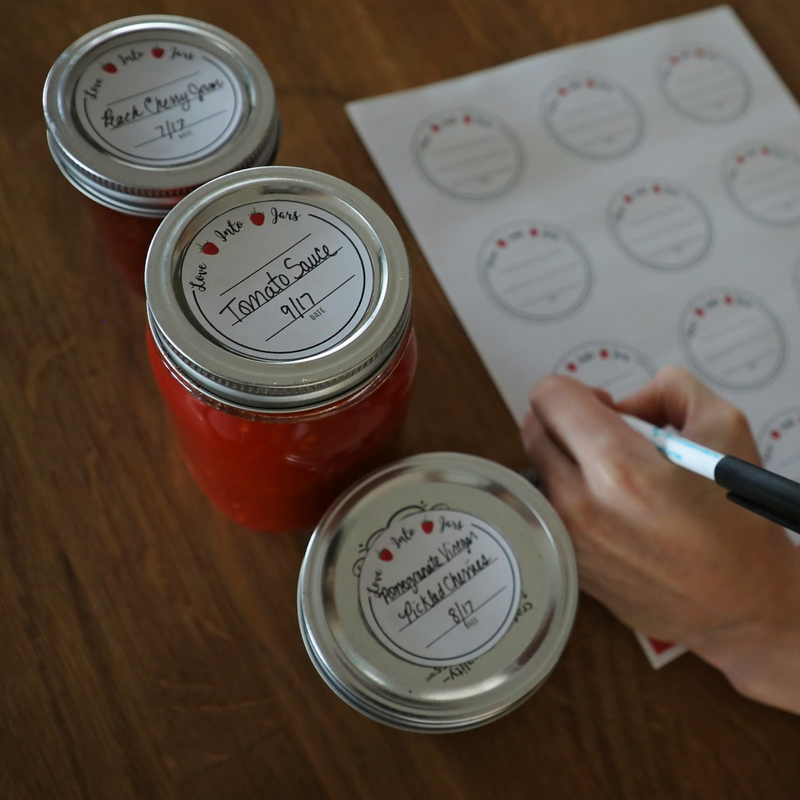
Canning saves me time every. Single. Day. When I’m rushed making dinner, I can open a jar of tomato sauce that’s already cooked and has no added sugar, load my kid’s lunch box with healthy pickled carrot sticks, and make my husband a peanut butter and jam sandwich that has a lot more food value than store bought jam.

The Best Part? The Canning Jump Start Guide is just $5. That’s right- It’s time to jump in, Wildflowers! 

I can’t wait for you to dive into the Canning Jump Start Guide!

Buy Now!

Best Home Canning Equipment For A Beginner Join the Start Canning Course to learn how to preserve healthy, homemade food in jars!

SaveSave

SaveSave

Filed Under: Can

How To Create a Minimalist Pantry

January 26, 2018 by Jenny Gomes 2 Comments

I want to share with you one way we can minimize stress in our kitchens, how to create a minimalist pantry, and that is in minimalism through canning. This post will help you create a minimalist pantry plus there’s a bonus, super versatile tomato sauce recipe included. Read on for the full post! 

How to Create a Minimalist Pantry

This post may contain affiliate links.

Hear me out: I know you probably are remembering canning from when you were a kid, and are thinking that canning took a ton of stuff. I’ve minimized the canning equipment list to reduce the amount of gear you need so you can use what you already have. My favorite pro tip to share is that you don’t need those huge, black and white pots; you can use a large stock pot (the one you use make stew or soup or boil artichokes) and a silicone trivet. Wide mouth pint jars are my go-to canning jar because they double as inexpensive and classic drinking glasses. Whenever I empty a jar that held jam or applesauce, it is washed and reused as a drinking glass or storage container. Bye bye messy and wasteful plastic containers! 

I am a total canning nerd, and I share beginner tutorials and recipes all season long because I love canning and I think you will too. Before I share with you the “how” I want to give you the “why” behind canning.

I have found, as a working mom of 2, that canning gives you CHOICE. It sounds contrary to what you think you are getting when you grab groceries off the store shelves. You seem to have tons of choices in the market, right? There are so many choices that the kids in the cart can’t decide on what flavor they want, which color box to get, or which processed food you really don’t want to buy them anyway gets brought home. If you are part of a tribe of strong, purpose-driven women, you want to make smarter choices to make your lives easier and better. How we think about cooking can be one way that is contributing to mental clutter that canning can help you cut.

How to Create a Minimalist Pantry

Canning can simplify our pantry shelves: Tomato sauce preserved in jars can be used as spaghetti sauce, spread on stromboli, spiced up and used in enchiladas, pureed with a little cream for tomato soup, thinned out in a Bloody Mary, or added to beef stew. A store-bought can of faux Italian, super-processed, and full of added sugar spaghetti sauce is probably destined to only be spaghetti sauce. That doesn’t help when your littles are asking for enchiladas, right? Canning gives you choice.

In addition to adding great flexibility to your pantry, canning gives you control in a very real way. As moms, we cannot control everything in our children’s lives, nor should we. Yet, controlling what they eat to a certain extent is an important job from day one, to the “don’t eat the dog food!” stage, through the “don’t eat your cookies on the bus to school!” and beyond. I’d never tell you to try to manage every bite that passes your baby’s lips but I can tell you that it feels pretty darn good to know that when I open a jar of peaches when my kids are starving that I preserved them myself. I know that I chose each particular peach, washed it, decided which recipe to use based on how much sugar I wanted to include, and I don’t have to worry about what the jar or lid is lined with or if it was clean. That control is a really empowering thing.

I encourage you to try canning as a powerful way of simplifying your pantry and meal preparation. And that versatile tomato sauce recipe I mentioned above? Here it is and don’t worry; I explain in detail exactly what to do. You can totally do this!

Here’s the recipe that I use to work up 12-pound batches of Roma tomatoes, that usually yields 4-5 pints (1 pint =2 measuring cups).

12 pounds peeled tomatoes

1 tablespoon olive oil

12 ounces onion, diced (about 2 small or 1 large)

2 large cloves of garlic

2 teaspoons salt, or to taste

about 2 teaspoons citric acid (a white powder sold in stores, usually near the new canning lids)

Prepare your largest cooking pot with either a metal canning rack or a silicone trivet inside, on the bottom of the pot. Put the canning jars inside (I like largemouth pints for tomato sauce personally), fill the jars with hot water, then the rest of the pot with hot tap water. Bring to a boil.

In a wide preserving pan, heat the oil and saute the onions on medium high for about five minutes. Add the garlic and saute for another five. Combine the peeled tomatoes with the garlic and onions and cook on medium high for about 45 minutes, until the sauce has thickened and darkened in color. Add salt to taste. Stir occasionally and beware of the sauce boiling over the edge or burning on the bottom.

Use a jar lifter (often sold in a kit with a funnel & lid lifter, and readily available at thrift stores and community tool libraries) to remove one canning jar from the boiling water bath at a time. Pour the hot water within back into the pot or into the sink. Set the hot jar gently on a towel-covered countertop.

Add 1/2 teaspoon citric acid (a white powder you get from the grocery store) to each hot jar that is removed from the water bath. Ladle boiling sauce into sterilized jars. Add lids and rings, tightened about as tight as you’d like a bathroom faucet, and return the jars to the boiling water bath. Bring the water back up to boil if need be, and add water from the tap to cover the tops of the jars with 3 inches of water if necessary. Process in a water bath for 35 minutes, adding 5 additional minutes of processing time for every 1000 feet you live above sea level.

When the time is up, you can carefully remove the jars one by one, using the jar lifter, to the towel covered countertop. You will likely hear the lids seal with their tell-tale “ping” sound. The lid will become concave and firm to the touch. If you have a lid fail to seal, never fear. That means there was probably a tiny bit of sauce on the edge of the jar and you should refrigerate that jar and eat it within a week. Label sealed jars with a marker and store.

That’s it! I have a rad little canning basics course that will walk you through the primary lessons in canning so you can complete the recipe above and countless other recipes to minimize your cooking routine. You can enroll right here, for free, in the course that will help you create a minimalist pantry one jar at a time.

Enroll Now!

Best Home Canning Equipment For A Beginner Join the Start Canning Course to learn how to preserve healthy, homemade food in jars!

I hope that canning helps you streamline and de-stress your mealtimes so you can really focus on what’s important so you are living the purposeful life you are destined to live.

Filed Under: Can, Cook

5 Giant Yarn Crochet Projects

January 21, 2018 by Jenny Gomes Leave a Comment

This post will share the 5 giant yarn crochet projects that you can make quickly and easily with the patterns in my new ebook. Get ready for beautiful texture and fast results!

5 Giant Yarn Crochet Projects Ebook | Get these 5 easy to read patterns written in plain English to make these dreamy projects in a single afternoon!

If you haven’t joined the giant yarn party, you need to. I’m a busy mom of 2 and I don’t have time to crochet much anymore. I usually have one naptime every once in a while to devote to a fun project to give as a gift or keep for myself. That means I needed a material that would work up faster than regular old Red Heart (no offense Red Heart- we all still love you!) and giant yarn is the answer to my pressed-for-time woes.

Giant yarn is super popular for good reason. It’s gorgeous, warm, and makes a statement whether it is a scarf, a baby blanket, a throw, or a basket.

It’s easy to work with, no teeny-tiny tangles that are impossible to unravel, and lots of projects can be made with NO HOOK. Hello, convenience crochet!

You also get a lot of impact for your dollar. Sure a giant ball of yarn may feel expensive at first- until you lift it up. You are getting a far better value, typically, when investing in high quality fiber in greater quantity.

Since diving hooks first into giant yarn, I have written several patterns in easy to understand plain English and I compiled them into an ebook.

In the 5 Giant Yarn Crochet Projects Ebook, you will learn how to make:

The felted yarn basket that you can crochet in under 2 hours. The yarn I recommend comes in TONS of dreamy colors and is sturdy and won’t pill. It is the definition of fashionable and functionable.

Felted Wool Basket | The Domestic Wildflower click through to read the full tutorial for how to crochet a felted wool basket in giant yarn in under 2 hours!

A giant yarn baby blanket. Imagine gifting the newest little one in your life a cozy blanket that didn’t take you forever to make!

Giant Yarn Baby Blanket | The Domestic Wildflower click to read this simple crochet tutorial for making a washable, handmade baby blanket!

A giant yarn scarf with the absolute best giant yarn for a blanket or scarf or anything that will touch your skin. This stuff is dreamy, Wildlfowers.

Practical Giant Yarn: Extreme Yarn for Everyday Use | The Domestic Wildflower click through to read which giant yarn is the very best for a durability as well as beauty.

The extreme size end-of bed throw that you’ve seen all over Pinterest plus pro tips for working with the fiber.

Giant Yarn Throw Tutorial | A Domestic Wildflower click to read the full tutorial for how to make your own knitted or crocheted giant yarn throw including a pattern and sources for beautiful wool yarn!

A super textural, luxury blanket copycat in thick and thin yarn that is grownup and gorgeous. It looks hard to work with and that’s the best part; it’s super simple.

How to Crochet a Thick and Thin Giant Yarn Blanket | A Domestic Wildflower click through to read the tutorial for creating your own chunky knit or crochet blanket. This post includes a free pattern too!

The 5 Giant Yarn Crochet Projects ebook is a steal at just $8 and you get all the easy to understand, printable patterns, photos, diagrams, and links to products I recommend. Get the 5 Giant Yarn Projects for Wildflowers Ebook here!

Buy Now!

Filed Under: Craft

Keto Preserving: 4 of the Best Recipes for Beginners

January 15, 2018 by Jenny Gomes 2 Comments

Keto Preserving: 4 of the Best Recipes for Beginners: If you follow a keto diet or a low carb diet, preserving low carb veggies is a technique that can help you access minimally processed vegetables when they are out of season or when you are simply not able to run to the store. This post will share 4 of the best keto preserving recipes for beginners plus a great keto meal planning tool that will save you a ton of time. 

If you follow a keto diet or a low carb diet, preserving low carb veggies is technique that can help you access minimally processed vegetables when they are out of season or when you are simply not able to run to the store. This post shares 4 of the best keto and low carb preserving recipes for beginners!

Canning is a simple way of preserving food in BPA-free glass jars so they are shelf-stable for a year or longer. You might think of canning as a way of making jam and jelly, and it is, but reimagine it instead as a method to help you attain your low carb diet goals.

Once you can some or all the following recipes, you can use my friend Elisa’s Keto Meal Planning Resource to use theme nights to plan out a whole week -or more!- of keto meals- and use these keto friendly canning recipes as ingredients. It’s a genius pairing, really.

Canning in a modern home is fast and fun. If you haven’t tried it, you can take my quick, FREE Canning Basics Course to teach you how to preserve these recipes (and any canning recipe!) in jars. You can sign up right here!

Let’s get you excited about keto preserving with these beginner-friendly recipes!

Keto Preserving

If you follow a keto diet or a low carb diet, preserving low carb veggies is technique that can help you access minimally processed vegetables when they are out of season or when you are simply not able to run to the store. This post shares 4 of the best keto and low carb preserving recipes for beginners!

Pickled pearl onions are delicious on a pile of shredded beef topped with melted cheese, skewered on a toothpick garnishing a cocktail, or straight out of the jar. Grab the recipe here!

Roasted bell peppers are versatile in Mediterranean or Mexican dishes, and are right at home mixed with white or red meat. They add a ton of flavor to any dish- especially in the dead of winter when delicious veggies are harder to find. Get the recipe right here!

If you follow a keto diet or a low carb diet, preserving low carb veggies is technique that can help you access minimally processed vegetables when they are out of season or when you are simply not able to run to the store. This post shares 4 of the best kept and low carb canning recipes for beginners!

Pickled carrots are a super simple preserve that satisfies the craving for a salty snack. Where you used to grab a bag of chips, now you’ll grab a jar of pickled carrots. Aside from snacking straight out of the jar, they are great adding color and flavor to salads. Read the easy recipe now!

Keep reading for more keto preserving goodness!

If you follow a keto diet or a low carb diet, preserving low carb veggies is technique that can help you access minimally processed vegetables when they are out of season or when you are simply not able to run to the store. This post shares 4 of the best kept and low carb canning recipes for beginners!

I always tell people if I had to can one recipe for the rest of my life, it would be this sugar-free tomato sauce recipe. As a busy mom, I NEED a sauce that still counts as a wholesome vegetable that can be used as a blank slate for whatever I’m cooking for supper. It tastes like summer, is rich and flavorful, and I can use it for any number of recipes. Head to the best tomato sauce recipe right here, my friends!

If you follow a keto diet or a low carb diet, preserving low carb veggies is technique that can help you access minimally processed vegetables when they are out of season or when you are simply not able to run to the store. This post shares 4 of the best kept and low carb canning recipes for beginners!

If you have read this far and are thinking that canning seemed really hard and complicated when Grandma did it, I assure you that adopting a diet like Keto or Paleo is far more complex. Canning is easy! If you would like simple, step by step canning lessons, sign up for my FREE Canning Basics Course!

Canning Essentials Workbook Keto Preserving

Keto Meal Planning

If you came to this post and are still hungry for more keto resources, I have an awesome resource to share with you. My friend Elisa is a meal planning wizard (and by wizard I mean she makes meal planning FUN and EASY even for a Type B person like me!) and she’s created the Simple Keto Meal Planning Guide where you use theme nights (think One-Pot Wednesdays, Slow Saturday, Mexican Monday, etc) to meal plan. The guide is under $10, and it allows you to plug in keto recipes that match! It’s a genius! Here’s how it works!

Check It Out!

Filed Under: Can

Felted Yarn Basket

November 12, 2017 by Jenny Gomes Leave a Comment

This felted yarn basket features an excellent choice for giant yarn and the techniques that can be used to create bowls, baskets, hampers, rugs, poofs, and more.

Felted Wool Crochet Basket | The Domestic Wildflower click to see how you can finger crochet this gorgeous wool basket in under 2 hours, with NO HOOK, even if you've never crocheted before. Read the post now!

You can also download a completely free crochet basket step by step guide here!

To say I am a fan of giant yarn is an understatement to be sure. I love the scale, the texture, the speed in which you can complete a project, the heft, the visual drama; I love all of it. I made a gorgeous, super soft piece in this post here with the amazing Knit 1 Share 1 yarn by Little Dandelion from Australia.

Beautiful as it may be, it was too soft to waste on a textile that wouldn’t be next to my skin and shipping from Australia is expensive and there’s no way around it. I have been looking for something made in the USA that would be suitable to make a basket and I struck giant yarn gold with Love Fest Fibers.

Aptly named, Love Fest Fibers is exactly that. They are a company you can feel good about supporting, the are here on the west coast, and they have terrific customer service. Their Instagram account is totally inspiring and you should check it out here. They also have a felted giant yarn that is really, really tough and it is also aptly named: Tough Love. This yarn comes in many colors, both neutral and rainbow, is not quite as big around as a quarter but close, is felted so it won’t pill, disolve, fall apart, or wear out, and is super easy to work with.

Get the chunky crochet basket mini masterclass here from The Domestic Wildflower!

After making 2 cream yarn items this year, I went with their hot pink, “Cherry Blossom”, and I am so glad I did.

Get the chunky crochet basket mini masterclass here from The Domestic Wildflower!

One large, 50 yard ball is an affordable price considering it’s weight and quality and is enough to make a basket that could hold, but not entirely envelope, a basketball. It works up so quickly I had the base of the basket done in the pickup while driving and I had to take it out because I remembered I needed to take photos of the process so you all could see it.

You need knitting needles size 50 or a crochet hook size U, but I used my fingers and made my basket in about 1 hour and 45 minutes. It really was so satisfying to start my kid’s naptime with a ball of yarn and end it with a super cute basket to hold my cloth diapers. Honestly, my forearms were tired by the end but had I slowed down a bit and taken a break I’m sure that could have been avoided.

How to Crochet in 15 Minutes

Read this blog post (complete with free video tutorial!) to learn the stitches I reference below!

How to make the Felted Yarn Basket

The process is similar to crocheting a beanie in that you chain 3 or 4 (depending on if you use your fingers or a hook, and how big your loops are if you use your fingers) and slip stitch to connect them into a circle. Then, crochet 2 single crochets in each loop, all the way around, creating a flat, round base. I went around 3 times and then started to create the sides of the basket.

Felted Wool Basket | The Domestic Wildflower click through to read the full tutorial for how to crochet a felted wool basket in giant yarn in under 2 hours!

Felted Wool Basket | The Domestic Wildflower click through to read the full tutorial for how to crochet a felted wool basket in giant yarn in under 2 hours!

When your base is wide enough, start to make only 1 single crochet in each stitch. The sides will begin to form almost immediately and because you are working with such big yarn, you will be able to see right away that you are indeed doing it right.

Felted Wool Basket | The Domestic Wildflower click through to read the full tutorial for how to crochet a felted wool basket in giant yarn in under 2 hours!
See at the top where I am only crocheting 1 single crochet in each stitch? The sides are coming up already!

Continue to crochet 1 single crochet in each stitch, all the way around.

Felted Wool Basket | The Domestic Wildflower click through to read the full tutorial for how to crochet a felted wool basket in giant yarn in under 2 hours!
Look at that texture! Swoon!

I decided I wanted handles on my basket and had to guess about how much yarn would remain in order for me to run out of yarn just as my handles were completed.

I went around the circle 4 times and skipped one stitch. I chained one (just one!) and then made a single crochet in the next stitch. I tried making the handles by skipping 2 stitches and chaining 2, and I didn’t like it as well. In the photo I think you can see well that by skipping just one stitch, your hand can slide right in the space. That also means that each stitch is about 3 inches long.

I want to walk you through every single stitch in my video workshop, the Unhooked Quick Crochet Basket Workshop.

In the Unhooked Quick Crochet Basket Workshop, you’ll get to watch me finger crochet this exact basket STEP BY STEP. You’ll have forever access to the video and the Plain-English printable PDF instructions. You’ll be able to make this basket again and again! You won’t believe the holiday-perfect price of the workshop – head over to grab it now! 

Love Fest Fibers has a TON of colors to choose from like these brights

Felted Yarn Basket

or these neutrals

Felted Yarn Basket

and this season they have these gorgeous variegated stripes! Felted Yarn Basket Love Fest Fibers Striped Tough Love Yarn

but back to the cherry blossom pink felted yarn basket I made!

Felted Wool Basket | The Domestic Wildflower click through to read the full tutorial for how to crochet a felted wool basket in giant yarn in under 2 hours!

I single crocheted around to the other side of the felted yarn basket, made my second handle (which is just skipping a stitch and chaining once).

In this casual felted yarn basket “pattern”, I ended the second handle and slip stitched until I had about 8 inches of yarn left and I finished by weaving the tail backwards into the slip stitches. This created a gradual conclusion or decrease to the row, rather than an abrupt stop.

Felted Wool Basket | The Domestic Wildflower click through to read the full tutorial for how to crochet a felted wool basket in giant yarn in under 2 hours!

Felted Wool Basket | The Domestic Wildflower click through to read the full tutorial for how to crochet a felted wool basket in giant yarn in under 2 hours!
See how the handles aren’t even really sticking up? They are just like little hand-sized spaces 🙂 You can’t even see them!

I think this felted yarn basket looks darling, if I say so myself 🙂
With 3 balls, I could make a rectangle base and sides to make a crocheted toy box, which would be so cute. I also made the cutest gift baskets in this post here. On the Love Fest Fibers site, they share lots of beautiful inspiration which you should check out to get your wheels turning to plan out what you  might make.

Get the step by step PDF guide to help you create this exact basket with ease! It is completely free, easy to understand, and clear…even if you’ve never crocheted before. 

Happy Hooking, Wildflowers!

Filed Under: Craft

  • « Go to Previous Page
  • Page 1
  • Interim pages omitted …
  • Page 29
  • Page 30
  • Page 31
  • Page 32
  • Page 33
  • Interim pages omitted …
  • Page 66
  • Go to Next Page »

Primary Sidebar

Categories

Follow me here, there, & everywhere!

  • Email
  • Facebook
  • Instagram
  • Pinterest
  • RSS
  • Twitter
  • YouTube

Search

Get The Pressure Canning Cookbook

Get 10 Free Recipes Now!

Best Chicken Coop

Footer

Get Started Pressure Canning

Shrubology Ebook

Shrubology: Refreshing Homemade Fruit and Vinegar Syrups for Cocktails
Make easy, no-cook fruit & vinegar syrups for cocktails & mocktails! This ebook shares crowd pleasing recipes and simple to understand ratios so you can make a shrub on your countertop any time- without a recipe. Dive into these Prohibition Era drinks today!

Copyright

Copyright 2019
The Domestic Wildflower
www.thedomesticwildflower.com.
All content created by Jennifer Gomes unless otherwise noted.

Copyright © 2025 · Lifestyle Pro on Genesis Framework · WordPress · Log in