• Skip to secondary menu
  • Skip to main content
  • Skip to primary sidebar
  • Skip to footer
  • The Pressure Canning Cookbook
  • Blog
    • Subscribe
    • Welcome!
  • Perfectly Preserved Podcast
  • About
    • ADW Manifesto
    • Work With Me
      • Read
  • Shop
    • My Account
    • Cart
    • Checkout

The Domestic Wildflower

Handmade Food & Craft Tutorials for Beginners

  • Courses
    • Free Canning Basics
    • Everything Canning Course
    • Steam Canning Workshop
    • Free Homemade Cocktail Mixers
    • Wildflower Mixology
    • Crochet Basket Workshop
  • Can & Preserve
    • Never Canned?
    • Steam Canner Equipment Bundle
    • Shrubs Course
  • Sew
  • Cook
  • Craft
    • Crochet Step-by-Step Guides
      • Crochet Basket
      • Giant Yarn Throw
      • Thick & Thin Throw
  • Living
    • Creativity Challenge
    • Clean
    • Kids
  • Rentals

Blog

Best Old Fashioned Banana Muffin Recipe

September 30, 2017 by Jenny Gomes 2 Comments

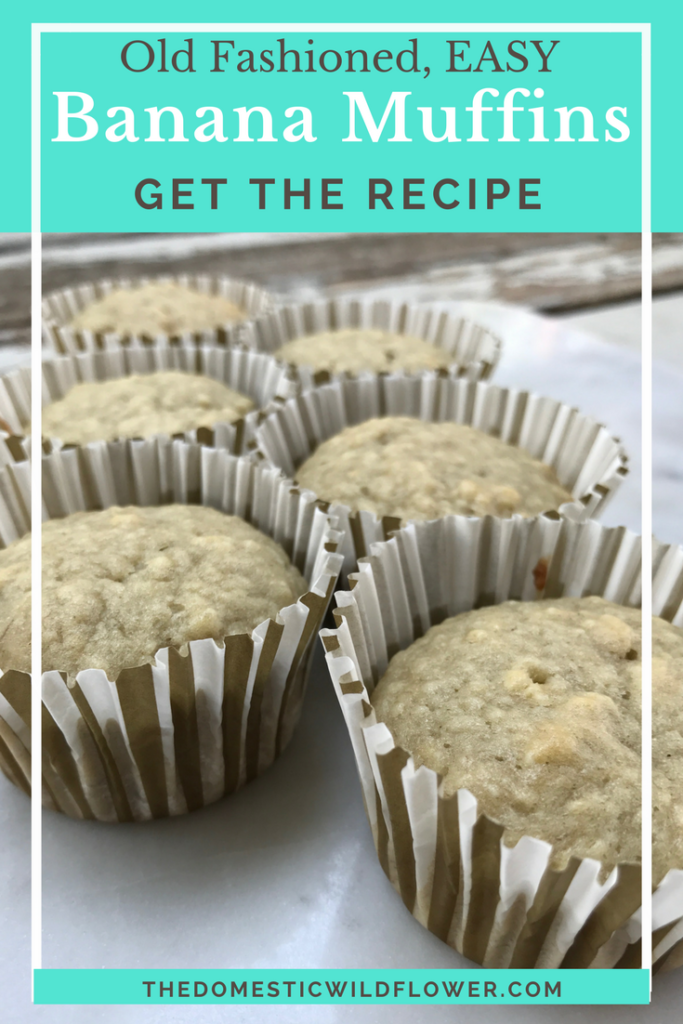
This Best Old Fashioned Banana Muffins Recipe will share an old fashioned recipe for easy, fast banana muffins.

Best Old Fashioned Banana Muffin Recipe | Get the free recipe download for this fast, easy, and healthy recipe! This girl explains how to use up those frozen bananas in your freezer- totally making these. So delish! #homemade

This recipe is based on one from the 1942 version of the Good Housekeeping Cook Book. It is originally titled, “Banana Tea Bread” but when I read the recipe, given to me by my Gram, I swapped out a few ingredients and decided muffins would serve my lunchbox-toting kindergartener better than bread that I would have to slice, wrap, etc. in the busy mornings before school.

This post contains affiliate links. That means that if you click through a link to purchase a product, I get at tiny commission that does NOT affect your purchase price. I would never link to products I wouldn’t recommend to a friend. 

This recipe also made GREAT use of the frozen bananas I have stashed in the freezer. I haven’t really gotten on the smoothie train the way the rest of the world has (maybe I need to ask Santa for a good blender for Christmas?) but we are still eating, and sometimes letting get too ripe, many bananas. Hence, lots of bananas in the freezer.

Pro Tip: If you use frozen bananas, take them out, set them atop the stove when you turn it to preheat, and by the time you are ready to add the bananas to the mixing bowl, the skins will have loosened appropriately.

Download the free recipe PDF here!

Best Old Fashioned Banana Muffins Recipe

1 ¾ cups all purpose flour

2 teaspoons baking powder

¼ teaspoon baking soda

½ teaspoon salt

⅓ cup butter

⅔ cup of sugar

2 eggs

2-3 ripe bananas

Add butter to the mixing bowl and add sugar. Beat until light and creamy. Add eggs one at a time, mixing well after each addition.

Add one of the bananas and mix.

Slowly mix in well the flour, baking powder, soda, and salt.

Add remaining bananas and mix well.

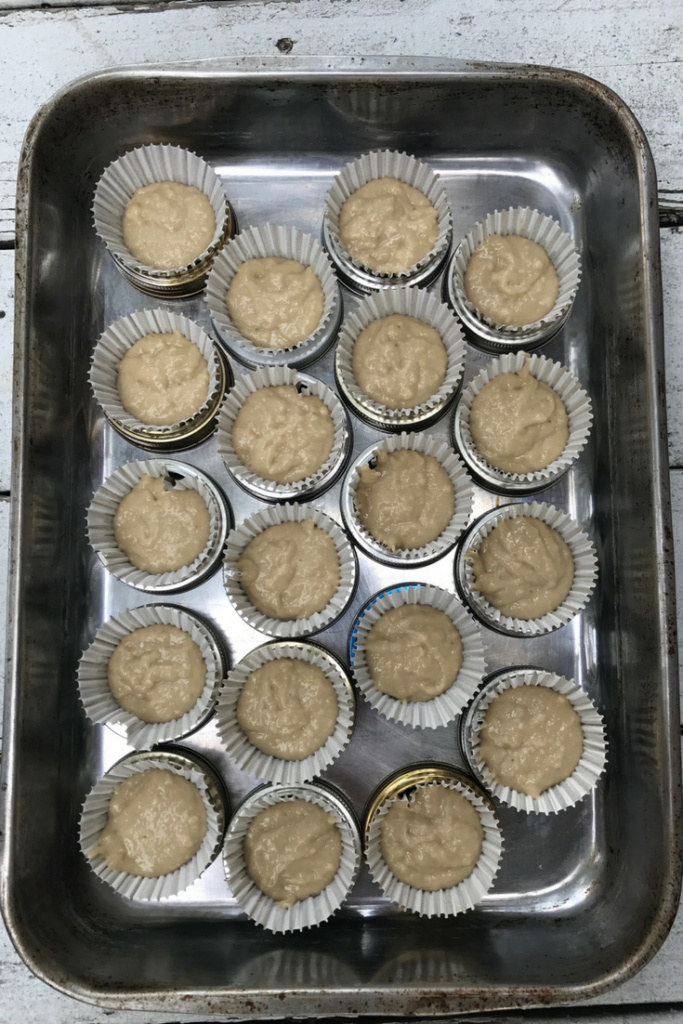
Pour batter into muffin papers (these are my favorite) in either a muffin tin OR if you are like me and strangely don’t own such a thing, place canning rings on a cookie sheet, and then set muffin papers inside the canning rings. It works perfectly. Fill muffin papers ⅔ full.

Best Old Fashioned Banana Muffin Recipe | Get the free recipe download for this fast, easy, and healthy recipe! This girl explains how to use up those frozen bananas in your freezer- totally making these. So delish! #homemade

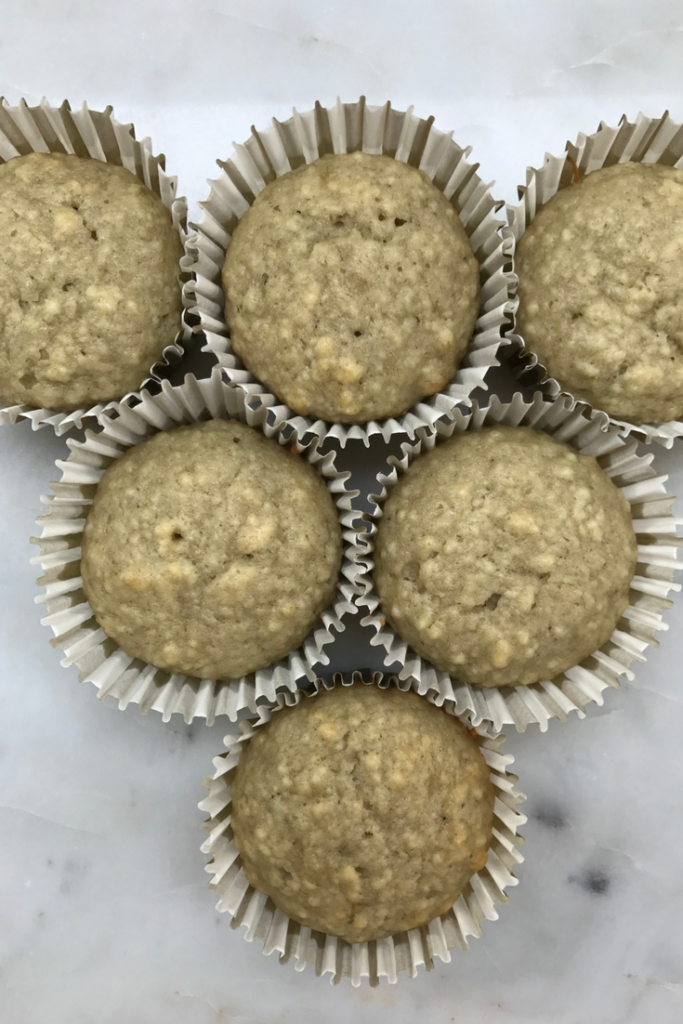
Bake at a 350-degree oven for 20 minutes or until a toothpick inserted comes out clean.

Best Old Fashioned Banana Muffin Recipe | Get the free recipe download for this fast, easy, and healthy recipe! This girl explains how to use up those frozen bananas in your freezer- totally making these. So delish! #homemade

Get the free PDF printable of the recipe right here!


Eager for my kid-friendly recipes? I just wrote a great post right here about the 5 Perfect Canning Recipes for Kids! Check it out, Wildflowers!

Filed Under: Cook

Applesauce Canning Recipe

September 23, 2017 by Jenny Gomes 14 Comments

This post will share an easy homemade applesauce recipe that you can preserve in jars with the traditional water bath instructions OR the steam canning directions. I’ll also share my favorite jars for lunch box size portions of this healthy snack!

This is the best easy applesauce recipe ever. This girl cans it in little convenience sized jars that are perfect for lunch boxes- genius! What a time saver! And applesauce is so healthy and delicious. Totally making this.

This post contains affiliate links. That means that if you click on a link and make a purchase, I get a tiny commission. That link doesn’t affect your purchase price at all, and I wouldn’t link to products that I wouldn’t recommend to my best friends. Click through and get those tiny jars I recommend; you’ll love them!

My daughter started kindergarten this year and about six months ago she had a terrible bout of dental cavities that meant that 1) she got her father’s teeth (I have ZERO cavities) and 2) I began my process to find foods that were not the normal highly processed lunch box fare like Goldfish crackers and graham crackers. Those fine flours stick in the crevices of little teeth and cause more carries so those items are never making it into my shopping cart, not even in a rush or special occasion.

Homemade applesauce is something that is easy to make, fast (only 10 minutes in the canning process and there’s an easy trick to skipping peeling and coring I’ll explain in a moment) and you can skip the sugar entirely especially if you have sweet apples on hand.

This is the best easy applesauce recipe ever. This girl cans it in little convenience sized jars that are perfect for lunch boxes- genius! What a time saver! And applesauce is so healthy and delicious. Totally making this.

Everyone always asks at this part of my applesauce story if the jar is hard to open for a kindergardener. The answer is that I crack the seal the night before when I put her lunch together, screw the ring back on, and put it in her backpack. She’s had no trouble– but she has had to ask for help opening her string cheese, tying her shoe, and remembering her jacket. The jars are easy 🙂

It bears mentioning that canning jar glass is really sturdy, free from BPA, and the small jars especially tend to hold up really well.  The only jars I ever break are the big ones 🙂

Download the PDF of the applesauce recipe with steam canning AND water bath directions for free here!

Gather your canning equipment, if you plan to can it (I promise its such a quick step) and you can grab my canning equipment checklists right here!

Jars that are perfect for applesauce: 

Okay, so my mother would have never canned these tiny jars because in her mind, it might have taken longer. I’m not my mother 😉 This step of canning in smaller jars saves me SO much time when I’m really rushed packing lunch that it is TOTALLY worth it.

I canned in these half-pint jars, which are 8 ounces, and my kindergartener can eat one easily if she’s hungry.

I also canned in these little 4 ounce jars which I love for when I have a variety of things in the lunchbox and the applesauce isn’t a main part of the meal.

Here’s how you skip peeling and coring the apples. Chop them, remove worms or bad spots, and cook until soft as the directions explain. Use this food mill (my all time favorite tool) to puree them. The mill keeps the skins and seeds and cores up top in the hopper and the sauce just falls through in minutes below. They are super easy to use and clean and are a fun way to include kids in the process. I love love love the food mill.

Here’s how to make healthy homemade applesauce

You will need 
8 cups apples, washed and chopped, stems, cores, and seeds may remain
water to cover- at least 8 cups
1 cup sugar
2 tablespoons real maple syrup
2 teaspoons vanilla
1 teaspoon cinnamon
**for baby food, omit all but apples and water and use 4-ounce jelly jars.

1. Prepare your water bath canning pot or your steam canner. Fill the water bath canning pot with water, add 8 half pints (1 measuring cup total) jars, and bring to a boil OR fill the steam canner to fill line and turn on low with 10-11 pint jars nearby on a towel-covered countertop.

2. Combine apples and water and simmer together in a preserving pan (a heavy-bottomed, wide pan) and stir occasionally for 30 minutes or until apples are very soft.

3. Puree: Remove from heat and ladle into a food mill. OR apples could be peeled and cored prior, and mashed with a potato masher.

4. Return apples to a boil, add sugar, maple syrup, vanilla, and cinnamon.
Cook for 5 minutes.

5. Ladle into jars one at a time, apply lids and rings, and either submerge into the boiling water of the boiling water bath with a jar lifter  OR set gently on the rack of the steam canner.

6. Process for 10 minutes PLUS 5 minutes for every 1000 ft above sea level. Remove from heat, rest jars carefully on a towel-covered countertop. Label cooled jars and store for up to 1 year.

Yields about 10 cups of applesauce.

Download the free recipe PDF here!

This little recipe has been so valuable- now, I have a healthy, homemade go-to for lunches that won’t get stuck in her teeth and cause dreaded cavities.

I wrote a blog post last week about the 5 Recipes Perfect for Kids and I think you’ll love it.

Head over to read it, or grab the 5 Recipes PDF here!

This is the best easy applesauce recipe ever. This girl cans it in little convenience sized jars that are perfect for lunch boxes- genius! What a time saver! And applesauce is so healthy and delicious. Totally making this.

SaveSave

SaveSaveSaveSave

Filed Under: Can

5 Canning Recipes Perfect for Kids

September 10, 2017 by Jenny Gomes 3 Comments

This post will share 5 canning recipes perfect for pleasing the kids in your life. Think lunch box perfect, mild flavors, few seeds, high nutrition, and great flavors.

5 Canning Recipes Perfect for Kids!

There’s nothing that has helped me stay sane at meal time as a busy working mom of two small kids more than canning. Seriously. Canning is cooking in advance and if you need me to repeat that, I’ll say it a little louder: CANNING IS COOKING IN ADVANCE. By putting wholesome, healthy food into jars (that I got for cheap when they are in season, fresh, and ripe!), that food is ready to go months later. It is mama magic, my friends, and I’ve rounded up a little collection of 5 recipes that I think will please you AND your kids.

If you’d like to grab the PDF of these recipes, including crystal clear water bath canning directions, it is just $3 and you can download it here!

Yes! I Want Instant Access!

Here are the recipes!

Carrot Pickles

Carrots are deliciously pickled in vinegar; they are salty and crisp and they plate beautifully. They are easy to spice up or keep simple for those pickier eaters in your charge!

These are easy to keep crisp, & are a healthy, savory snack!

You will need:

2 pounds good quality carrots, scrubbed.

5 1/2 cups apple cider vinegar

1 tablespoon salt

3 tablespoons sugar

4 cloves garlic, sliced

1/2 small white onion sliced thin, or diced

1 cup of water

Optional seasoning:1/2 teaspoon black pepper, 1 bay leaf per jar, 1 sprig thyme or dill per jar, shake of red pepper flakes to taste, about 1/2 teaspoon per jar- choose any or all of the above to suit your taste!

Cut carrots into sticks that are about 1/2 inch thick and no more than 4 inches tall if you are using pint jars. Let rest in ice water while you prepare your pots.

Heat the processing pot full of 4-5 pint jars and water to a boil.  

In the preserving pan combine the vinegar, 1 cup of water, salt, sugar, and any seasonings. Bring to a simmer and then add the carrots until they are just tender about 9 minutes.

Use the jar lifter to carefully remove a hot jar from the boiling water bath. Pour the hot water back into the pot or into the sink.

Using the funnel, pack the hot carrots into the jars (not tight, just full), and then ladle the hot brine carefully over the carrots, giving it a chance to seep to the bottom. You may have to distribute pieces of onion and garlic and seasonings jar by jar using a clean, long-handled spoon.

After one jar is filled with carrots and covered with brine, put the lid and ring on and return it to the boiling water bath carefully.

Repeat with remaining jars.

When all the jars are filled with carrots and brine, bring the pot back up to boil and process for 15 minutes, and add 5 minutes for every 1000 feet you live above sea level.

When the time is up, remove the jars carefully to rest and seal on the towel covered countertop. Label cool jars and store.

Carrot Pickles | The Domestic Wildflower click through to get this simple canning recipe that is savory and delicious for school lunches!

Print and keep this PDF handy right here!

Buy Now!

Strawberry Kiwi Lemonade Concentrate Recipe

You need:

3 cups strawberries with stems and leaves removed, rough chopped

3 cups kiwi fruit, peeled

4 cups bottled lemon juice

6 cups of sugar

Note: If you haven’t kiwi, you can just double the number of strawberries and skip the kiwi entirely. I think the kiwi is a great addition, however.

Prepare your processing pot with about 5-pint jars, prepare your lids and rings in a saucepan and bring both to a gentle boil.

Blend the fruit together in a blender, food processor, with an immersion blender, or food mill (a baby food mill would work fine!). If you haven’t one of these appliances, just chop the fruit into small pieces and don’t worry. It will cook down readily. If you have terribly picky children, you could choose to strain the mixture through a sieve at this point to remove the pretty black kiwi seeds, but luckily, my kids don’t mind them.

Put the pureed fruit into the preserving pan. Add the lemon juice and sugar and stir to combine. A note about lemon juice. I fresh squeezed every lemon in my crisper and only got a single cup of juice. There’s no shame in using bottled and I definitely had to. Frankly, because you are cooking and canning it, the fresh lemon juice might be better saved for use where it isn’t cooked at all. Use fresh if you have it and want to squeeze them, or bottled if not.  

Bring fruit, lemon juice, and sugar to a gentle simmer. You want the sugar to dissolve but you don’t want the fruit to come to a rapid boil lest the fresh fruit flavor disappear. If it comes to a full boil, that is okay, but the flavor is a bit better if you can avoid a rolling boil.

Using the jar lifter, pull one jar from the boiling water and pour the hot water back into the pot or the nearby saucepan. Set it carefully on the towel-covered countertop. Using your funnel and a ladle, fill the hot jar with hot fruit puree. Leave ½ an inch between the top of the fruit and the top of the jar. Use the lid lifter to pull a lid and ring from the saucepan and put the lid and ring on the jar. Tighten only as tight as you might a faucet in the bathroom. You don’t need or want it super tight. Use the jar lifter to put the hot jar full of hot fruit back into the hot water.

You will repeat this process until you run out of fruit or out of jars. With whatever little bit you have left that isn’t a full jar, pour into a drinking glass and get ready to reward yourself with a cold drink.

Set the timer for 5 minutes. For every 1000 feet of elevation you live above sea level, add 5 minutes. For example, I live at 3000 feet above sea level so I set my timer for 20 minutes total. During this time, the water in the largest pot should be at a rolling boil, with at least an inch of water covering the lids. I know it is difficult to tell how much water is over the jars when it is really boiling but add from a teakettle if you aren’t sure.

When the time is up, use your jar lifter to remove the jars one at a time to carefully rest on the towel covered countertop. Let them cool undisturbed for up to 12 hours. Notice how the lids will seal; they will become concave and firm to the touch and you will probably hear a loud “ping” or clicking noise when the heat forces all the air from the jar which causes the lid to suck down, creating that air-tight seal you are looking for. If you have a jar that doesn’t seal after 12 hours, and the lid pops up and down when pressed, then just store the jar in the refrigerator and eat it up within a month. Label sealed jars and store in a cool, dry place.

To serve, mix 1 part concentrate with 2-4 parts cold water and stir to combine. Feel free to get fancy and use sparkling water, ice, and perhaps one shot of your favorite adult beverage.

Strawberry Kiwi Lemonade Concentrate | The Domestic Wildflower click to read this kid and beginner friendly recipe and tutorial! The turns out so pretty for storing or gifting!

Print the PDF for just $3! 

Yes! I Want Instant Access!

Tomato Sauce Recipe

Here’s the recipe that I use to work up 12-pound batches of Roma tomatoes, that usually yields 4-5 pints (1 pint =2 measuring cups)

12 pounds peeled tomatoes

1 tablespoon olive oil

12 ounces onion, diced (about 2 small or 1 large)

2 teaspoons chopped garlic

2 teaspoons salt, or to taste

about 2 teaspoons citric acid

In a wide preserving pan, heat the oil and saute the onions on medium high for about five minutes. Add the garlic and saute for another five. Combine the peeled tomatoes with the alliums and cook on medium high for about 45 minutes, until the sauce has thickened and darkened in color. Add salt to taste. Stir occasionally and beware of the sauce boiling over the edge.

Add 1/2 teaspoon citric acid to each hot jar that is removed from the water bath. Ladle boiling sauce into sterilized jars (I like wide mouth pints for this recipe, but use what you have) add lids and rings, and process in a water bath for 35 minutes. Add 5 minutes processing time for every 1000 feet you live about sea level.  

Tomato Sauce - A Kid friendly canning recipe!

How handy would it be to have all these recipes printed out?! Grab the PDF for just $3!

Buy Now!

Apple Butter

Note: This recipe takes up to 12 hours to cook entirely. Most of that is in a crock pot. Your active time is about 2 hours preceding but plan ahead to either let the apple butter cook all day for an afternoon or evening canning session or potentially overnight after you have made this recipe once or twice.

You will need:

6 pounds of apples- if you have a food mill, you don’t have to peel and core them first.

6 cups of water

about 1 cup sugar

Fill a large pot with about 6 cups of water hot water and bring to a boil.

Combine the apples and the 6 cups of water to a boil and cook at a medium boil until the apples are broken down, soft, and falling apart, about 30-45 minutes.

Process the apples in a food mill. Put the puree in a crockpot and add the spices (that you can customize to your liking) and about 2 tablespoons of sugar per measuring cup sauce apple puree.

Cook on the “low” setting on the crock pot or slow cooker for 9 to 12 hours, stirring every couple hours, scraping the bottom and sides, and maybe propping the lid a bit akimbo so moisture evaporates. You know it is done when it is delicious, thick, and dark like barbecue sauce.

WAIT UNTIL THE APPLE BUTTER IS COOKED IN THE CROCK POT TO  DO THE FOLLOWING:

At this point, to have the smoothest apple butter, use an immersion blender to further blend the apples smooth. Alternatively, you could process in a regular blender, or skip blending entirely.

Now that the apple butter is cooked, move the butter from the crockpot to a preserving pan and bring to a boil.

While it is heating, you can prepare your boiling water bath.

Fill your pot with jars of your choice, hot tap water, and put on the stove on high. Put a coordinating number of lids and rings in a saucepan and fill halfway with hot tap water. This recipe should yield about 2-pint jars full. 

Have your funnel, jar lifter, ladle, and towel next to the stove. Pull the hot jars one at a time from the water, pour water back into the pot, set jar on the towel-covered countertop. Ladle hot apple butter into hot jars, leaving 1/2 inch headspace (space between the surface of the jam and the rim of the jar). Return the jar (full of hot apple butter) back into the boiling water pot. Repeat.

Bring the water bath pot back to a boil. Set your timer for  10 minutes plus 5 minutes for every 1000 feet above sea level.

When the time has passed, turn the stove off and use the jar lifter to remove the hot jars one at a time to rest gently on the towel-covered countertop. The lids can start to “ping” or seal immediately, and it can take up for 12 hours. Leave the jars undisturbed on the counter. Watch and listen for the distinctive sound of the vacuum seal being created, for the lid to be sucked down, and for it to have no ‘give’ when you press it with your fingertip.

If the jars seal, which they should, label and store in a cool place out of direct sunlight. If they do not seal, refrigerate.

Apples for applesauce and apple butter- kid pleasers and easy to can!

Best Berry Jam

You need:

6 cups blackberries

3 cups strawberries

½ cup bottled lemon juice, or 1 tablespoon for every cup of berries, if you are doubling or halving this recipe

6 cups of sugar

Half a box of powdered pectin and a whisk with which to mix it

A food mill with the plate with the smallest holes.

This recipe will yield about 8 measuring cups of jam, so you will need 8 half pint jars, or 4-pint jars, or the equivalent, in the water bath processing pot. Fill the pot with the jars and hot water from the tap and bring to a boil.

Prepare the fruit: You can gently rinse the berries in a colander but be careful: the more handling the berries get, the more they will fall apart and more juice will end up everywhere but the canning jar. Remove stems from strawberries and chop.

Combine fruit in preserving pan and bring to a gentle boil for 5-10 minutes.

Pour hot fruit slowly and carefully into the top of the food mill, which should be set over a large bowl or another preserving pan. Work all the fruit through the food mill and notice all the seeds that remain in the top section of the hopper.

Return the fruit to the preserving pan and add the sugar and lemon juice. Bring to a gentle boil and stir to dissolve sugar. Let the jam boil gently for another 10 minutes.

Whisk in half a package of powdered pectin when you are ready to can. That means be sure your processing pot is ready and has been boiling, you have a towel covering the countertop, and you have your jar lifter and funnel and lid lifter ready.

Using your jar lifter, pull one jar at a time from the boiling water bath. Pour the hot water from it, and rest it on the countertop. Use the funnel and a ladle to fill the hot jar with hot jam. Maintain a half inch headspace. Apply lids and rings and return the jar to the processing pot. Repeat with the remaining jars. Bring the processing pot back up to boiling and process for 15 minutes, and be sure to add 5 minutes for every 1000 feet above sea level at which you are canning.

Remove the jars and gently rest on the towel covered counter and listen for the distinctive “ping” of the jars sealing.

After 12 hours, label sealed jars and store. Jars that didn’t seal can be refrigerated and eaten promptly.

Smooth Blackberry Jam | The Domestic Wildflower click to read this beginner friendly recipe and tutorial for smooth blackberry jam. It was wonderful flavor without the seeds! Get the recipe here!

There you have it! 5 of my best, most kid-friendly canning recipes all in one place! Be sure to Pin to Pinterest, Wildflowers, and to print these recipes in a handy PDF, grab it for just $3 right here!

Yes! I Want Instant Access!

SaveSave

SaveSaveSaveSave

Filed Under: Can

Steam Canning for Beginners

September 10, 2017 by Jenny Gomes Leave a Comment

This post will explain steam canning for beginners, and share the ebook that will walk a newbie through the steam canning process, step by step, from start to finish.

I’ve had a lot of readers express that they think that steam canning is next level, harder, 2.0, or otherwise more difficult than traditional water bath canning and that simply isn’t so. I’m here to tell you that canning is a piece of cake in a steam canner and in many ways, much easier than traditional water bath canning.

One way that canning in a steam canner is easier is that there are fewer total tools need.

You can grab the checklist for free right here!

There are many ways that steam canning tops the traditional water bath, but the most obvious way is that it is significantly faster. Steam canners are ready to can in about 5 minutes (not an exaggeration- truly, about 5-6 minutes) while a traditional water bath takes 20-30 minutes to be ready to boil.

Steam Canning for Beginners this post explains steam canning for beginners and shares the ebook that will explain step by step how to use the fastest tool in canning!

It’s because they use only 2 1/2 quarts of water- that’s so much lighter!

I recently converted a good friend of my Gram’s to steam canning, and I have to say it was a really wonderful thing. Rita has been canning for 60 years and lifting a heavy, classic canning pot was becoming a bit too much. I brought over my steam canner to show her and she promptly ordered TWO on Amazon. After using them the first time, she couldn’t stop raving about them. She even posted on Facebook about it 🙂 She’s a very tech-savvy 70-something canner 😉

I created a really awesome video course about steam canning called The Steam Canning Workshop and students have been jumping in left and right to explore this amazingly fast way of canning; it’s been such a blast!

I know not everyone is ready to dive into a course, so I wanted to offer to you Wildflowers a rad little ebook that I whipped up; It is an affordable $5, succinct 15 pages of crystal clear instruction that answers the questions beginners have about steam canning!

Buy Now!

This easy-to-read, 15-page ebook will guide you through the parts of the steam canner, the process of setting it up, choosing recipes that maximize it’s efficiency naturally, and help you start canning in minutes!

The Steam Canning for Beginners ebook will explain many of the considerations you’ll encounter, such as:

  • What if you live at a higher elevation?
  • What if you have a longer processing time?
  • Can you add more water to the canner?
  • Is it best to boil it on high, or medium-high, and why?
  • How do I handle a second batch?
  • Why are my jars hazy?

This ebook shares the most valuable tips for getting started using the best, FASTEST way to can. You can take a peek inside here!

Buy Now!

If you’re wanting a bit more info on steam canners before you grab the ebook, I made quick YouTube Video about them that you can watch right here that will explain a bit more.

SaveSave

Think you need a bunch of stuff to steam can? Well the Steam Canning for Beginners Ebook will explain all you need and then how to can better and faster, but here’s the list of equipment PLUS visuals.

Here’s what you need to start steam canning.

Please note that these links are affiliate links which means that if you click over to Amazon and make a purchase, I get at teeny, tiny commission and it makes zero impact on your checkout total. It just keeps your favorite canning blogger in business 😉

You need a steam canner. This is the one I have. It is lightweight, aluminum, and very easy to use.


You need canning jars. I really like the wide mouth pint size because they are 2 measuring cup capacity, they double as drinking jars and are what I consider to be the most versatile jar.


These jars are the quintessential mason jar and I like them for canning juice in particular.


These are smaller size jars, and they are great for jam, applesauce (to-go size!), and more.


You MUST have brand new lids. You absolutely can have used jars and used rings/bands, but you MUST have new lids.


You don’t NEED a jar lifter, but they are very helpful and are frequently sold in a set with a funnel which is a MUST.


Here’s a really nice canning funnel, sold by itself.


If you have been thinking about steam canning, and aren’t ready to dive into the Steam Canning Workshop, I hope you consider learning with the help of the Steam Canning for Beginners Ebook!

Yes! I Want Instant Access!

Steam Canning for Beginners this post explains steam canning for beginners and shares the ebook that will explain step by step how to use the fastest tool in canning!


SaveSave

Filed Under: Can

Do You Have To Simmer Your Canning Lids?

August 21, 2017 by Jenny Gomes 2 Comments

Do you have to simmer your canning lids? This post will explain whether or not you have to simmer your canning lids before putting them on your canning jars. Read on to get the scoop!

Do you have to simmer your canning lids? Find out in this post with the facts from the canning lid company themselves!

Canning is one of those activities, like many in the food world, that is loaded with tradition. Doing things the way that Mom or Grandma did them is really special and can influence, sometimes negatively, how we operate in the kitchen and beyond.

I’ve been asked many times, via email and via Instagram as I livestream my canning sessions, why I don’t simmer my canning lids.

Many have chided me that I need to simmer the lids so the flange is softened.

They’ve remarked that I’ve forgotten to simmer them and the jars won’t seal as a result.

I’ve been told that I can reuse used lids and that the “trick” is to simmer them for a long time to soften the flange so they can be reused.

I love tradition as much as the next Sentimental Sally, but I care a lot about accuracy so I did my research for this post to be doubly sure I was bringing you the best information.

You do NOT have to simmer your canning lids. Period.

Watch the video version of this post below.

The best part? You haven’t had to since 1969.

Ball Brand says, in this post here, http://www.freshpreserving.com/canning-lids-101.html

that the lid’s flange used to be made of latex, and then was switched to Plastisol, and ever since, no simmering has been required.

Also, BOILING the lids was never the recommendation, despite the pervasive myth that was necessary.

I have to say, the reason that I thought, originally, that there must be some mistake and that I should keep simmering as my mom and grandma had, is because Ball sells (and many other companies do too) a kit of canning utensils with a funnel (necessary), a jar lifter (necessary), and a lid lifter (completely unnecessary).

I assumed that if they sold it, it must be required. In my signature canning course, you’ll even see me showing you how to simmer your lids because I wasn’t able to get a clear answer at the time of the original recording in regards to whether we should simmer or not! When I’m able, I’ll re-record the videos showing me NOT simmering. In the meantime, you’ll know better.

Furthermore, canning lids can only be used for ONE canning process. You can use them for canning one time. After that, a reliable seal cannot be achieved.

This part is critical also. It is absolutely possible for a used lid to seal, and I know because I’ve done it on accident. The problem becomes that the seal will fail you, in a few months, on the jar on the shelf, and a festive volcano of mold will grow as a result.

That is the OPPOSITE of the goal of canning. I want you all to can and have all your jars seal, all the time! I want to help making canning easy, fast, and fun, and I’m here to tell you- shout it from the rooftops, Wildflowers- you do NOT have to simmer your canning lids!

Confused about the basics of canning? Wish you could learn, STEP BY STEP, from an expert?

Get the Canning Foundations course!

I have a sweet little video course that is affordably priced that SHOWS EXACTLY

  • how to tell if a canning lid has been sealed or not
  • how to choose a canning jar
  • how to decide set up your stove for success
  • how to process your jars
  • how the whole canning idea works
  • canning safety

Enroll in Canning Foundations for just $25 and have forever access to the premium video course!

Yes! Get Instant Access!
Get the Canning Foundations Course!

Filed Under: Can

  • « Go to Previous Page
  • Page 1
  • Interim pages omitted …
  • Page 31
  • Page 32
  • Page 33
  • Page 34
  • Page 35
  • Interim pages omitted …
  • Page 66
  • Go to Next Page »

Primary Sidebar

Categories

Follow me here, there, & everywhere!

  • Email
  • Facebook
  • Instagram
  • Pinterest
  • RSS
  • Twitter
  • YouTube

Search

Get The Pressure Canning Cookbook

Get 10 Free Recipes Now!

Best Chicken Coop

Footer

Get Started Pressure Canning

Shrubology Ebook

Shrubology: Refreshing Homemade Fruit and Vinegar Syrups for Cocktails
Make easy, no-cook fruit & vinegar syrups for cocktails & mocktails! This ebook shares crowd pleasing recipes and simple to understand ratios so you can make a shrub on your countertop any time- without a recipe. Dive into these Prohibition Era drinks today!

Copyright

Copyright 2019
The Domestic Wildflower
www.thedomesticwildflower.com.
All content created by Jennifer Gomes unless otherwise noted.

Copyright © 2025 · Lifestyle Pro on Genesis Framework · WordPress · Log in