• Skip to secondary menu
  • Skip to main content
  • Skip to primary sidebar
  • Skip to footer
  • The Pressure Canning Cookbook
  • Blog
    • Subscribe
    • Welcome!
  • Perfectly Preserved Podcast
  • About
    • ADW Manifesto
    • Work With Me
      • Read
  • Shop
    • My Account
    • Cart
    • Checkout

The Domestic Wildflower

Handmade Food & Craft Tutorials for Beginners

  • Courses
    • Free Canning Basics
    • Everything Canning Course
    • Steam Canning Workshop
    • Free Homemade Cocktail Mixers
    • Wildflower Mixology
    • Crochet Basket Workshop
  • Can & Preserve
    • Never Canned?
    • Steam Canner Equipment Bundle
    • Shrubs Course
  • Sew
  • Cook
  • Craft
    • Crochet Step-by-Step Guides
      • Crochet Basket
      • Giant Yarn Throw
      • Thick & Thin Throw
  • Living
    • Creativity Challenge
    • Clean
    • Kids
  • Rentals

Can

Beginner Canning Tutorial: Canning Safety

April 23, 2017 by Jenny Gomes Leave a Comment

This post will bust some bogus canning advice I read on a fairly popular-but totally wrong- blog. Watch the video for some good advice for beginning canning!

Beginner Canning Tutorial: Canning Safety | Watch This video blog post as I bust some really bad canning advice I read online and for some good advice for new canners!

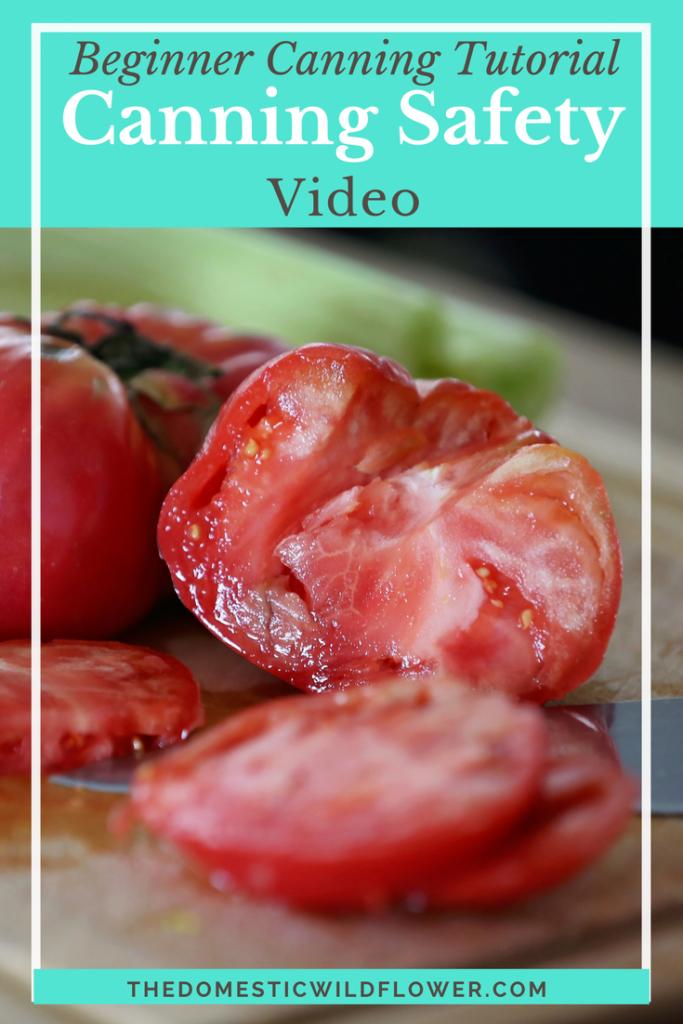
This video will explain a blog post I read online (no, I won’t tell you where, or on what blog) that gave some downright terrible advice that I think would really derail a new canner. It also might make a seasoned, knowledgable canner furious; so if you like getting heated, enjoy!

There’s so much info out there for a newbie to sift through- good info, not so good info- that I took my full-fledged canning course and sliced off the very base, the foundation, and made it available for a bargain price of just $19.

Yes! I Want Instant Access!

I’m so excited to introduce Canning Foundations!

Canning Foundations is the course that teaches the foundations of both water bath and steam canning methods in clear, in depth, short video lessons.

If you are a brand new, never done it before canner, you have TONS of resources out there to choose from- some of it is the garbage I read and refuted in my video above.

In Canning Foundations, one whole video walks you through the USDA website (that website is admittedly dated and confusing) to show you where to go to get SCIENTIFIC and UP TO DATE info….not nonsense from some well meaning blog or friend.

Another video is devoted to explaining the importance of using NEW lids; it seems like a small thing but there are people- bloggers, casual canners- out there who say you can use used lids- and in that video I explain and SHOW you why you cannot.

Here’s the Canning Foundations mini-course curriculum

Canning Foundations is the course that teaches the foundations of both water bath and steam canning methods in clear, in depth, short video lessons.

That’s a TON of information in short, high value lessons.

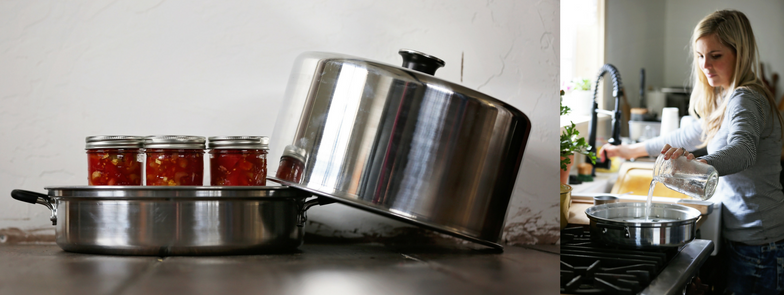
In the Prepping Pots video, I show you HOW to get started at the stove- what pot goes where, what to start boiling when, so that the canning process goes smoothly.

The info in Canning Foundations applies to both water bath canning and steam canning, AND would have you well on your way to pressure canning as well.

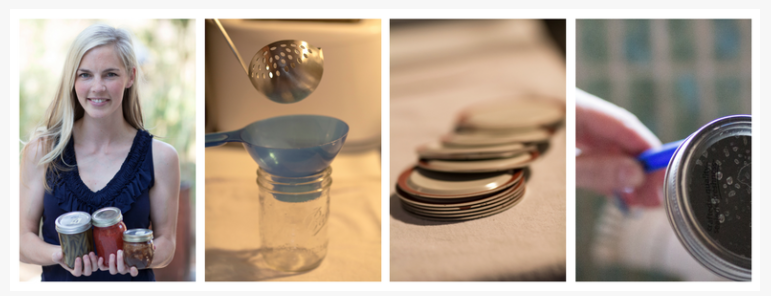
An online course is like a digital book of information you get to access any time- it has videos, printable PDFs, no homework, no deadlines, and no start or end date. If you’re not sure about what an online course would LOOK like, here’s a preview:

This bargain price won’t last for long, Wildflowers. I want you to grab it now while it is still early in the season! It is just $19!

Yes! Get Instant Access!

This mini course is the answer to several of the problems you’ve been having: 

– Wishing you knew how to start canning but feeling overwhelmed by the whole process

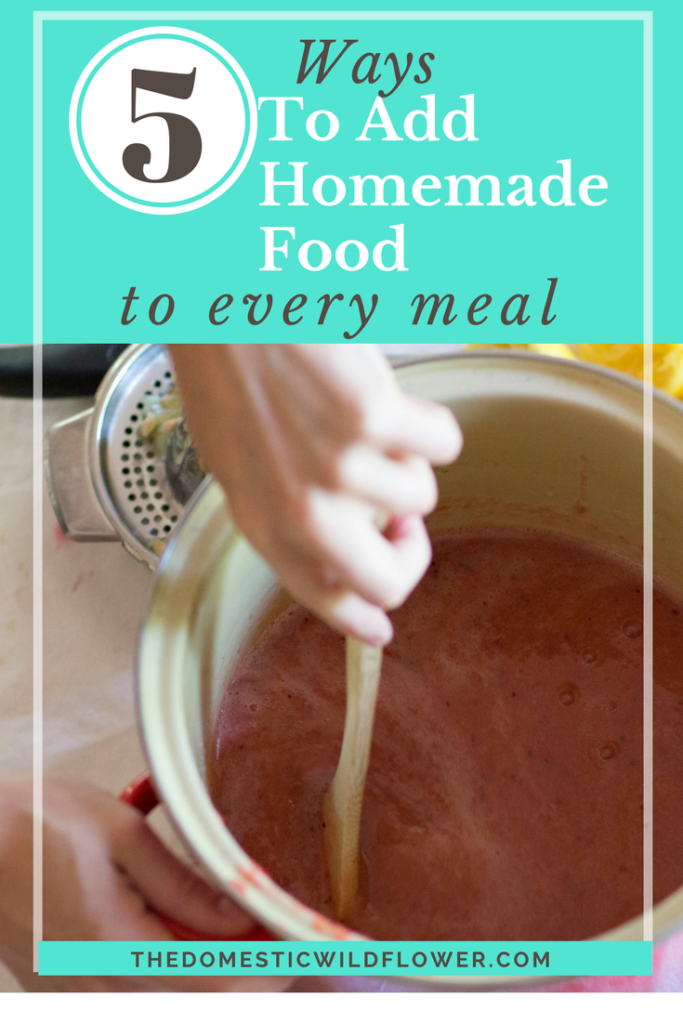
-Wanting to make more homemade food for yourself but the fact that you’re not exactly Suzy Homemaker has posed a bit of a problem

-Thinking canning might be cool…but you have no idea how to get started!

There’s a 30 day money back guarantee, and here’s what some of my sweet students have to say! 

Canning Foundations is the course that teaches the foundations of both water bath and steam canning methods in clear, in depth, short video lessons.

Canning Foundations is the mini course answer- bite sized lessons, itty-bitty price; Enroll Now!

Yes, Please!

Filed Under: Can

5 Ways to Add Homemade Food to Nearly Every Meal

April 19, 2017 by Jenny Gomes 2 Comments

This post will share the 5 ways you can incorporate healthy, homemade food into nearly every meal.

5 Ways to Add Homemade Food into Nearly Every Meal | This post explains how you can add healthy, organic food into almost every meal with these 5 simple steps!

This isn’t a goal that can be achieved overnight, nor should it be. It is something that you can work steadily toward, one 20-30 minute batch at a time, and the satisfaction of incorporating more homemade foods into your diet will be tenfold.


Eating homemade doesn’t have to feel daunting, but I know it does to most people. Dinnertime is at an 11/10 on many mom’s stress level meters. The notion that homemade will take longer is a false one; homemade can save time AND it can save time, and we all know time is money, right?


  1. Can savory foods. Canning crispy carrot pickles, kid-friendly relish for hot dogs, peppers for adding to enchiladas, veggies to fortify your meals, condiments, and snacks. These savory foods fill in the blanks when the kids- and you- need something to snack on and you want to skip a pre-packaged and expensive faux-food.
  2. Can sweet foods. Jam is the quintessential canned food because it is foolproof for a beginner. Many fruits are naturally high in acid, making them super-safe, they cook up quickly, and let’s be honest: jam is delicious. Homemade jam is miles more nutritious than store bought and when you make jam you are incorporating all or much more of the actual fruit than just the juice when making jelly. Canning sweet foods can also allow you to explore those canning recipes that use natural sweeteners so when you make your kids a PB&J the J is far more healthful than a jar from the grocery store shelf. Jam isn’t the only sweet thing you can preserve, of course. Strawberry syrup makes the BEST strawberry margaritas, maple whiskey peaches can top plain yogurt or a cheesecake, and the world of fruit butters – super smooth fruit puree cooked low and slow with minimal sugar- is one that will amaze the uninitiated and elevate your morning toast to delicious heights. Sweet preserves can be used to smother ham, to accompany a turkey sandwich, to marinade a cut of meat, to stir into a cocktail…they are infinitely useful far beyond breakfast.  
  3. Can hors d’oeuvres or appetizers. Pickled pearl onions, dilly beans, skewers of spicy, herbed veggies, sweet and sour fruit (think cherries in pomegranate vinegar), homemade salsa and more fill in the spaces when an occasion calls you to bring something to the table that’s not quite a meal. Whether you are dressing a platter or a drink, this category isn’t to be overlooked as it is often filled in with a bag of chips and store bought, flavorless salsa. Replaced with homemade, the garden fresh flavors and colors shine and you’ll instantly feel satisfied and proud of your offering instead of unsure.
  4. Can super versatile, main dish, eat all the time necessity items like tomato sauce or apple juice. Whatever is in your grocery cart week in and week out, learn to preserve it. Think about what you buy in bulk, what you try to buy on sale, what you always run out of. For my family, these items are tomato sauce and fruit juice. There’s only been one year since I’ve been canning that I didn’t preserve enough tomato sauce to last all year and I’ll never make that mistake again. There’s NOTHING that improved my cooking or my eating as markedly as canning my own staples. Decide to can just one of your basics and you’ll quickly see how easily your meals are improved.
  5. Can a super special preserve. A hostess gift, or treasure for a bridal shower favor, or a thank you gift or the like is made even more special when it is a beautiful jar of marmalade or champagne jelly or a hot sauce from the hottest peppers in all the land. Sharing a jar of cherries preserved in wine, or other unusual, special treat is the final way I suggest you add homemade to every occasion; these occasions might be the least frequent but they are the most special and leave the biggest impression. 

I want to teach you all HOW to add more homemade to YOUR pantry shelves. I want you to sign up here & get instant access to the workshop!


In the hour, I’ll teach you the 4 steps to filling your pantry shelves with homemade food that you can reach for quickly- when life is bananas- and know it is healthy, wholesome, and delicious. I can’t wait to see you there!

Filed Under: Can

Pickled Pearl Onions

April 8, 2017 by Jenny Gomes 4 Comments

This post will share a recipe for a beautiful, fast preserve that is perfect for use in a steam canner which maximizes it’s time-saving benefits and is also well suited for a water bath canner too! Read on for a savory, quick preserve.

Pickled pearl onions are an ideal recipe for steam canning, so I’ll include instructions for both steam canners and water bath canners.

They are delicious on poached eggs, in salads, as part of an hors-d’oeuvres plate, and in a cocktail like a Bloody Mary. They are my favorite on poached eggs on toast with cheese, avocado, tomato, bacon…try it. You won’t be sorry.

If you are new to steam canning but the idea is intriguing, watch this video here to help you get started!

Get the steam canning mini resource guide to help you understand the benefits of steam canning versus water bath canning!

Bring a large pot of water to boil up to 24 hours before you plan to can these onions as they need to bring in a saltwater bath for several hours before canning. I’ve gotten away with as few as six hours soak-time. 

Put 2 ½ pounds of pearl onions (white or red) in boiling water for 2 minutes. Strain and pour into an ice water bath to cool.

When cool to the touch, slice off the root end of the onion, about a quarter of an inch, and squeeze from the opposite end to the external layer remains in your fingers and the skin-free pearl onion squirts out. Reassemble the onion if the layers separate. Put the skinned onion in a bath of cold salt water- 4 cups cold water with ½ cup salt. Let the onions rest for several hours.

Water bath canners: Starting 30 minutes before you plan to make the brine, fill water bath processing pot with water and jars (about 6 wide mouth half-pints) and bring to a boil. Assemble jars, new lids, and rings on a towel covered countertop with a funnel and jar lifter nearby. Bring a saucepan filled with new lids and rings to a simmer and have lid lifter handy. Proceed to the Prepare the Brine step below when the water has come to a boil.

Steam canners: Add the required 2 ½ quarts water to the steam canner and turn on to medium-high. Assemble jars, new lids, and rings on a towel covered countertop with a funnel.

Prepare the brine:

Mix together

1 teaspoon salt

1 ½ cups white wine vinegar, 5% acidity, which I prefer for its mild flavor which really lets the spring flavor of the onions shine, but you can use any vinegar as long as it is 5% acid.

1 teaspoon mustard seeds

1 teaspoon dill weed (so pretty with the white onions!)

Add drained, peeled onions and bring to a boil and gently stir.

Fill jars with funnel each jar one time, leaving ¼ inch headspace, aiming for the jar to be full of onions that are submerged in the brine. Put on new lids and rings and tighten just as tight as you’d tighten a bathroom faucet.

Steam canners: Place the jars on the rack about a quarter inch apart. Put the lid on the steam canner with the vent facing away from you but where you’ll be able to see the column of steam pouring from it. Turn the head up to high and monitor as the dial on the thermometer moves to the green or starting mark for your elevation. Adjust the temperature as needed to prevent the steam canner from boiling too vigorously; medium-high is probably just right. Start the 10 minute processing time when there’s a column of steam pouring from the vent that’s about 6-8 inches and the dial indicates you are in the green/go zone. Remember to adjust for elevation by adding 5 minutes of processing time for every 1000 feet of elevation you are canning above sea level.

When the time is up, you can let the lid remain on the pot indefinitely. When it has cooled significantly, the teakettle-type whistling has stopped, use hot pads to lift the lid open AWAY FROM YOU so the steam pours out the back of the pot away from you. Set the lid aside and either wait till the jars are cool to the touch to place on the towel covered countertop or use a jar lifter to move them to the counter.  

Water bath canners: Use the jar lifter to put one jar back into the water bath process pot at a time. Bring the water back up to boil, and set the timer for 10 minutes, adding 5 minutes for every 1000 feet of elevation you are canning above sea level.

Steam Canning Pickled Pearl Onions A Beginner Canning Tutorial | Read this great post that shares the recipe and process for canning these spring time pearl onions in a super fast steam canner or in a water bath canner.

When the time is up, remove each jar carefully using the jar lifter to the towel covered countertop.
ALL: Label cooled jars and store. Note: If you used red pearl onions in this recipe you’ll be happy to see that your product is a beautiful shade of pink. Store this in a cupboard out of light to help that color hold but know that it fades over time. The white onions stay a pretty white.

Steam Canning Pickled Pearl Onions A Beginner Canning Tutorial | Read this great post that shares the recipe and process for canning these spring time pearl onions in a super fast steam canner or in a water bath canner.

Wildflowers, I’m so thrilled to share with you my new video workshop that will show you exactly how to use the steam canner to prepare healthy, home-cooked foods FAST.

Canning is cooking in advance, and STEAM CANNING is the fastest way to do that.

In the Steam Canning Workshop, you’ll learn

  • how to use the steam canner

  • how to know which recipes to choose

  • the complete steam canning process, from start to finish

Differences between water bath canning and steam canning

You’ll be able to make wholesome foods like

  • pickles

  • hor ‘d oeuvres

  • jam

  • syrups

  • salsa

  • tomato sauce

  • whole fruit in syrup

  • relish

  • fruit butter

And so much more…

And you’ll be able to have these delicious foods prepared exactly as you’d like- with no worries about allergens, additives, processed junk, or dangerous chemicals.

The best part? This workshop is the most affordable I’ve created and at the lowest price, it will be! Grab it now for only $45 

Yes! I Want Instant Access!

Filed Under: Can

How to Maximize Your Steam Canning Time to Can Faster

April 7, 2017 by Jenny Gomes Leave a Comment

This post will share with you some valuable tips for maximizing a steam canner by choosing recipes that are particularly well suited to steam canners, and which to skip. Read on for the post, Wildflowers!

How to Maximize Your Steam Canner Time to Can Faster | Read this post from The Domestic Wildflower to learn which kinds of recipes to choose that make the most of the advantages of a steam canner so you can preserve faster!

Here’s the video I whipped up for you to tell you about how to make the most of your steam canner, and if you are intrigued, I’d love you to grab the Steam Canning Fact Sheet below the video!

Grab the free Steam Canning Fact Sheet & Equipment List here!

So, remember to choose recipes that have fewer ingredients to prepare, fewer steps to process, and shorter cook time. Recipes that are mainly whole or mostly whole fruit or veggies with hot brine (vinegar, salt, water) or syrup (sugar, water) on top are the fastest of all. Also, remember that the processing time IS THE SAME AS WITH A WATER BATH PROCESS; the time savings with a steam canner is ALL in the prep time saved. No more waiting around for a huge pot of water to boil!

I’m just so thrilled with my steam canner and I’ve been working on a set of recipes that will help you maximize the steam canner too! You can get yours from Amazon through this photo that is affiliate linked!

An affiliate link just means I get a teeny, tiny percentage of a commission if you make a purchase and it doesn’t affect your checkout total at all; it just keeps your favorite blogger in business:) 

Let me know in the comments, Wildflowers, what else you’d like to know about these amazing, time and energy savers!

Filed Under: Can

Steam Canning Strawberry Syrup

April 3, 2017 by Jenny Gomes Leave a Comment

This post will teach you how to make strawberry syrup and can it in the fastest way to can out there- the steam canner.

Steam Canning Strawberry Syrup

Strawberry Syrup

Strawberry syrup is, of course, great on breakfast foods but it is very versatile in the beverage realm and after I read the suggestion for strawberry margaritas in “The All New Ball Book of Canning & Preserving” and I felt silly for not using the syrup that my kids love on Saturday morning in one of my favorite grown-up drinks.

I don’t strain with cheesecloth because I personally don’t care about things like tiny strawberry seeds and I am not interested in perfectly clear syrup. Feel free to strain of course as you wish.

To make the syrup, I will share my adaptation of the recipe from The All New Ball Book of Canning & Preserving.

Strawberry Syrup Canning Recipe

You will need

3 ½ pounds of strawberries, stems removed

3 cups of water

6 cups of sugar

½ cup bottled lemon juice (I really like lemon + strawberry, but if it isn’t your favorite flavor, you can safely use a ⅓ cup.

Have ready 5-pint jars, new lids, and rings.

You need a Victorio Steam Canner, which will come with the funnel AND jar lifter.

Prepare your countertop with a towel (on which you will rest the hot jars), funnel, and ladle. Have a large bowl or a second preserving pan and a small-holed colander or sieve set on top of the bowl ready to strain the strawberries from their juice. If you desire perfectly clear syrup, have 2 layers of cheesecloth at the ready as well.

Combine the strawberries and water in a preserving pan and bring to a simmer for about 20 minutes. Heat using the medium-low setting.

Pour carefully the strawberries and accumulated juice into the colander to drain. You can let it sit for up to two hours if you are patient and if you are me, you can use a spoon to gently encourage the berries to release more juice. You will get about 6 cups of juice as a result. The solids can be enjoyed with yogurt, or you can make delicious strawberry butter. I demonstrate how to make these two recipes at the same time in my canning course at www.startcanning.com.

Turn the steam canner on low.

Return the strawberry juice to the preserving pan and add the sugar and lemon juice. Stir to dissolve and heat to a full boil for a minute or two, stirring carefully.

Fill one jar at a time with the syrup, using the funnel and ladle, leaving a 1/4 inch headspace. Put on a new lid and ring and set on the steam canner rack. Repeat with remaining jars.

Put the lid on the steam canner and turn the heat up to medium-high. Start the timer when the dial indicates the steam canner is ready and process for 10 minutes at sea level, remembering to add 5 minutes for every 1000 feet you are canning above sea level.

When the time is up, turn the heat off and let the steam canner cool. USING GREAT CAUTION, use oven mitts to lift the steam canner lid AWAY from you and set it aside. When the jars are cooled significantly further, use either a jar lifter (required for water bath canning) or your fingers to lift the jars off the rack on the place on the towel covered countertop. Label sealed, cooled jars and store.

Just now learning about steam canning? Well it is the latest and GREATEST advancement in the canning world and it will make canning so much faster; the steam canner is ready to can in just 5 minutes instead of taking up to 30 or more minutes to come to a boil. 

Watch this YouTube Video where I’m sharing the main differences between steam canning and water bath canning!

Dive into the Steam Canning Workshop here!

Enroll Now!

This workshop will teach you how canning is WAY faster than you thought possible!


Canning is FAST, easy, and practical for modern, busy home and this course will teach you exactly how to use a steam canner to save you TIME and money.

You’ll learn how to COOK IN ADVANCE and preserve delicious, ready-to-eat, healthy foods QUICKLY in a steam canner.


In addition to learning you how to use this newly, USDA & National Center For Home Food Preservation approved steam canner, you will learn how to make and can a super special cranberry lemon jam that is gift-able, & perfect for beginners.

This lesson also demonstrates TWO different ways of processing for a super smooth jam.

Steam canners use just 2 1/2 quarts of water, as opposed to the 4+ quarts required for water bath canners.

This is a huge advantage for those canners who:

-Live in an RV or sailboat- store canned foods in a dark, cool spot!

-Suffer from an illness or disability that makes it difficult to lift over 10 pounds

-Used to be able to can but cannot due to surgery, health, or living conditions

-Are conserving energy- solar or propane users especially!

-Are canning below 7000 feet elevation

-Live in a small space- hello tiny houses!


Strawberry jam or carrot pickles (which are just a few of MANY quick recipes) would be DONE in under 20 minutes!


Steam canners are an affordable alternative to a water bath canning set up.


Steam canners are about $40, but you don’t have to purchase a separate trivet or wire rack, or a jar lifter… but the greatest savings is TIME.

Steam canners come to a boil in 5 minutes (you’ll see exactly how fast in the video!) and a big enamel canning pot comes to a boil after 30 minutes at LEAST…if not longer!

This course will teach a brand new beginner OR an experienced canner how to use this new time saver to add more wholesome, homemade foods to their diet in under half the time of a traditional water bath canner.

If you love strawberries, you’ll love my Canning Strawberries Recipe Book!

Enroll Now!

Filed Under: Can

  • « Go to Previous Page
  • Page 1
  • Interim pages omitted …
  • Page 12
  • Page 13
  • Page 14
  • Page 15
  • Page 16
  • Interim pages omitted …
  • Page 21
  • Go to Next Page »

Primary Sidebar

Categories

Follow me here, there, & everywhere!

  • Email
  • Facebook
  • Instagram
  • Pinterest
  • RSS
  • Twitter
  • YouTube

Search

Get The Pressure Canning Cookbook

Get 10 Free Recipes Now!

Best Chicken Coop

Footer

Get Started Pressure Canning

Shrubology Ebook

Shrubology: Refreshing Homemade Fruit and Vinegar Syrups for Cocktails
Make easy, no-cook fruit & vinegar syrups for cocktails & mocktails! This ebook shares crowd pleasing recipes and simple to understand ratios so you can make a shrub on your countertop any time- without a recipe. Dive into these Prohibition Era drinks today!

Copyright

Copyright 2019
The Domestic Wildflower
www.thedomesticwildflower.com.
All content created by Jennifer Gomes unless otherwise noted.

Copyright © 2025 · Lifestyle Pro on Genesis Framework · WordPress · Log in