• Skip to secondary menu
  • Skip to main content
  • Skip to primary sidebar
  • Skip to footer
  • The Pressure Canning Cookbook
  • Blog
    • Subscribe
    • Welcome!
  • Perfectly Preserved Podcast
  • About
    • ADW Manifesto
    • Work With Me
      • Read
  • Shop
    • My Account
    • Cart
    • Checkout

The Domestic Wildflower

Handmade Food & Craft Tutorials for Beginners

  • Courses
    • Free Canning Basics
    • Everything Canning Course
    • Steam Canning Workshop
    • Free Homemade Cocktail Mixers
    • Wildflower Mixology
    • Crochet Basket Workshop
  • Can & Preserve
    • Never Canned?
    • Steam Canner Equipment Bundle
    • Shrubs Course
  • Sew
  • Cook
  • Craft
    • Crochet Step-by-Step Guides
      • Crochet Basket
      • Giant Yarn Throw
      • Thick & Thin Throw
  • Living
    • Creativity Challenge
    • Clean
    • Kids
  • Rentals

Can

Best Berry Jam

July 25, 2016 by Jenny Gomes Leave a Comment

This post will share a recipe that is to die for delicious and uses a food mill to easily remove the bulk of the seeds to please even the pickiest eater. Read on for the full tutorial and recipe, Wildflowers!

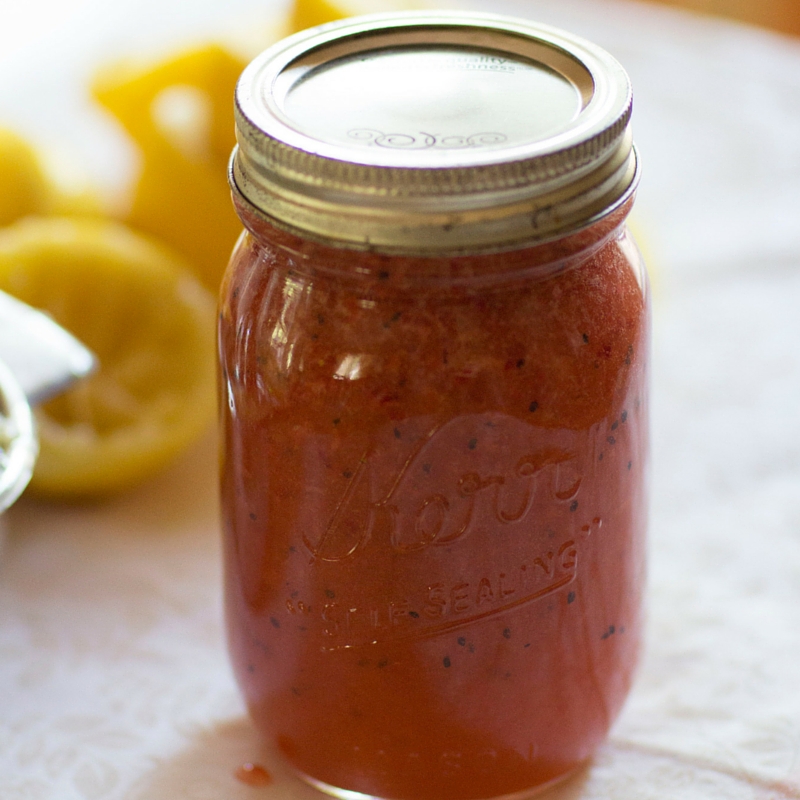
I recently shared a post about why you should head to a U-Pick berry patch this summer after I spent a lovely morning picking a mix of mostly marionberries (similar to blackberries), strawberries, and a handful of raspberries. With this mix, I adapted a recipe from the well worn Farm Journal Freezing & Canning Cookbook written in 1962. I checked my adaptation against other trusted recipes published in my lifetime and it is safe to say that it is a homerun berry jam recipe.

Not sure if you have the equipment to start canning? Watch this first.

Download the equipment checklist here!

You can tweak the proportions of berries and strawberries to fit whatever fills your bucket (or shopping cart) because as we know from my little canning & acid lesson here both berries and strawberries are quite acidic and safely within the 4.6 level of acid and under. You can also swap out blackberries for marionberries.

This procedure uses a food mill. I found that by processing this jam through a mill, most of the seeds were removed and while I like some seeds in my jam, I don’t like them in my teeth and some blackberries and marionberries can be downright seedy. A not-so-seedy jam is also less likely to get an objection from a picky child also. You can skip the food mill step if you’d like but I found the result to be a very smooth, spreadable jam that was still plenty toothsome.

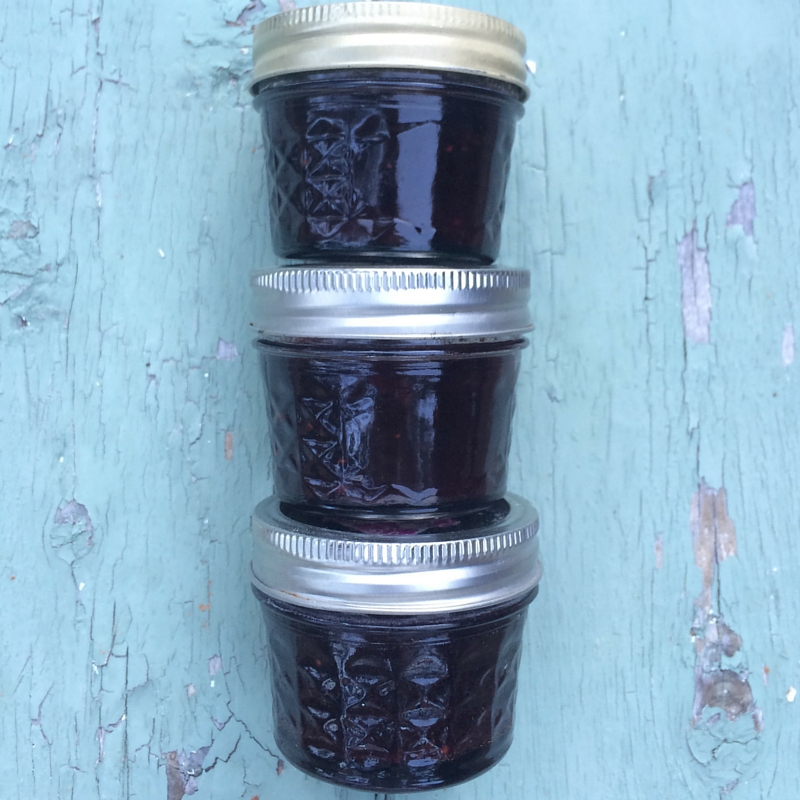
This recipe yields 8 measuring cups of jam.

You need:

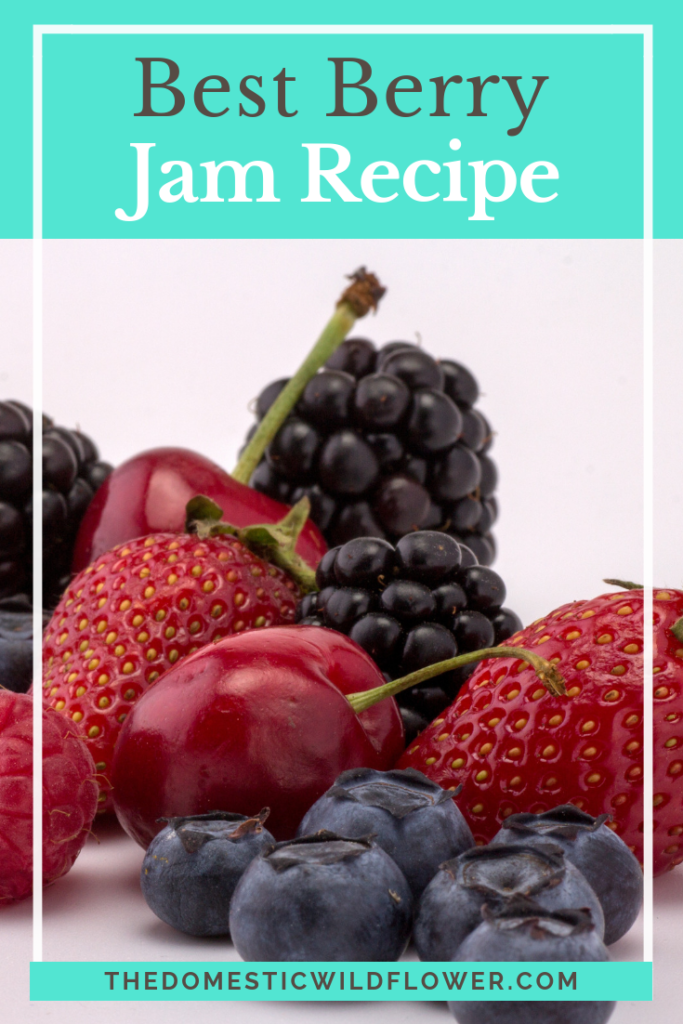
6 cups marrion and/or blackberries

3 cups strawberries

½ cup bottled lemon juice, or 1 tablespoon for every cup of berries, if you are doubling or halving this recipe

6 cups of sugar

Half a box of powdered pectin and a whisk with which to mix it

A food mill with the plate with the smallest holes.

This recipe will yield about 8 measuring cups of jam, so you will need 8 half pint jars, or 4-pint jars, or the equivalent, in the water bath processing pot. Fill the pot with the jars and hot water from the tap and bring to a boil.

Put 8+ new lids and rings in a saucepan and fill halfway with water and bring to a simmer.

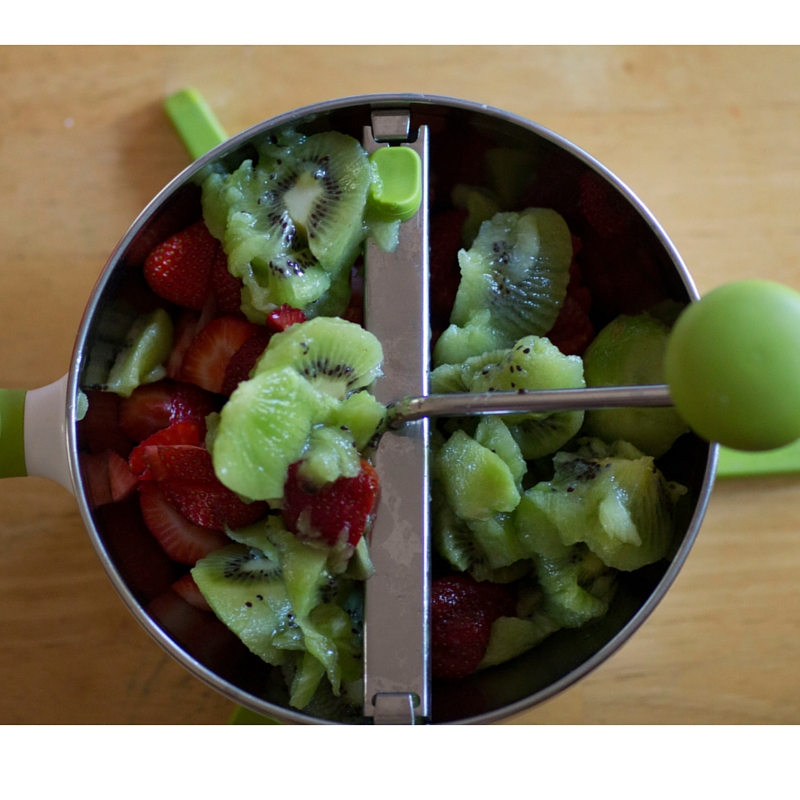
Prepare the fruit: You can gently rinse the berries in a colander but be careful: the more handling the berries get, the more they will fall apart and more juice will end up everywhere but the canning jar. Remove stems from strawberries and chop.

Combine fruit in preserving pan and bring to a gentle boil for 5-10 minutes.

Pour hot fruit slowly and carefully into the top of the food mill, which should be set over a large bowl or another preserving pan. Work all the fruit through the food mill and notice all the seeds that remain in the top section of the hopper.

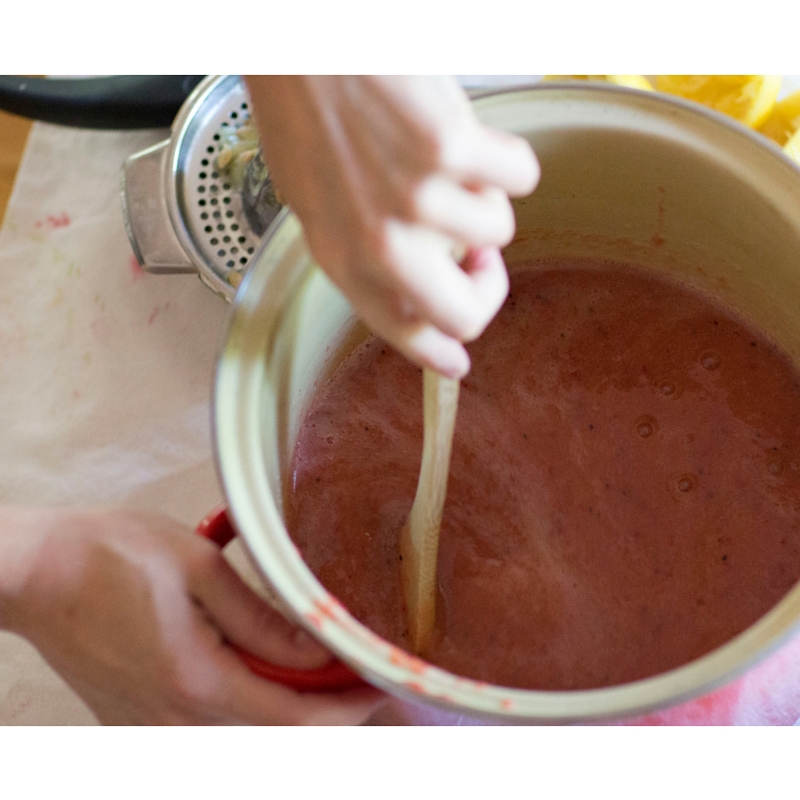
Return the fruit to the preserving pan and add the sugar and lemon juice. Bring to a gentle boil and stir to dissolve sugar. Let the jam boil gently for another 10 minutes.

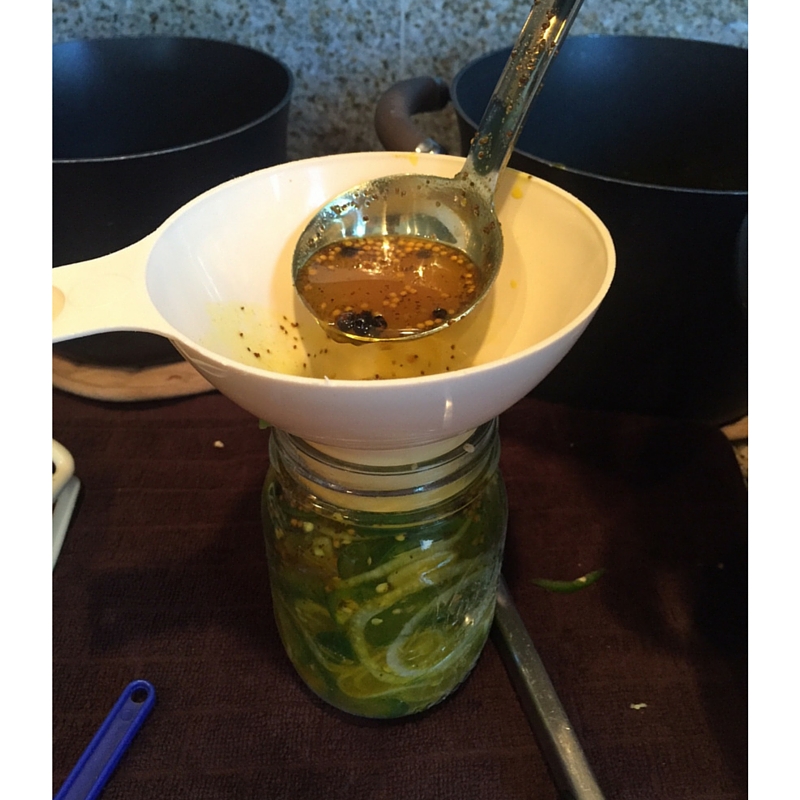
Whisk in half a package of powdered pectin when you are ready to can. That means be sure your processing pot is ready and has been boiling, you have a towel covering the countertop, and you have your jar lifter and funnel and lid lifter ready.

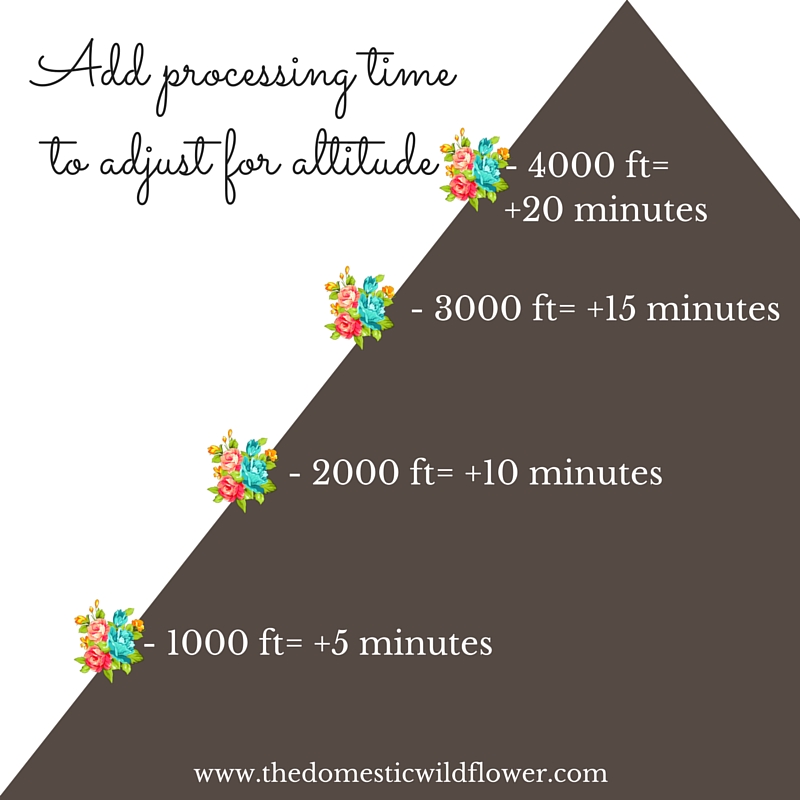
Using your jar lifter, pull one jar at a time from the boiling water bath. Pour the hot water from it, and rest it on the countertop. Use the funnel and a ladle to fill the hot jar with hot jam. Maintain a half inch headspace. Apply lids and rings and return the jar to the processing pot. Repeat with the remaining jars. Bring the processing pot back up to boiling and process for 15 minutes, and be sure to add 5 minutes for every 1000 feet above sea level at which you are canning.

Remove the jars and gently rest on the towel covered counter and listen for the distinctive “ping” of the jars sealing.

Best Berry Jam Canning Recipe | The Domestic Wildflower click to read the full tutorial for making delicious blackberry and strawberry jam!

After 12 hours, label sealed jars and store. Jars that didn’t seal can be refrigerated and eaten promptly.
If making jam like this seems tempting but you are afraid to try canning on your own, you need a course to SHOW you how. Enroll in the canning course for busy beginners HERE!

Best Berry Jam Canning Recipe | The Domestic Wildflower click to read the full tutorial for making delicious blackberry and strawberry jam!

Filed Under: Can

Strawberry Syrup

July 21, 2016 by Jenny Gomes 1 Comment

This post will share a recipe that is a very simple recipe for strawberry syrup and I hope to remind you also that syrup is not just for pancakes.

Strawberry Syrup

Strawberry syrup is, of course, great on breakfast foods but it is very versatile in the beverage realm and after I read the suggestion for strawberry margaritas in “The All New Ball Book of Canning & Preserving” and I felt silly for not using the syrup that my kids love on Saturday morning in one of my favorite grown-up drinks.

Before you begin canning, download the super helpful canning cheatsheet I made for you!

Yes! Download Now!

I don’t strain with cheesecloth because I personally don’t care about things like tiny strawberry seeds and I am not interested in perfectly clear syrup. Feel free to strain of course as you wish.

To make the syrup, I will share my adaptation of the recipe from The All New Ball Book of Canning & Preserving. You should absolutely enter to win your own copy of this super valuable (367 pages!) resource for beginner and experienced canners alike.

You will need 3 ½ pounds of strawberries, stems removed

3 cups of water

6 cups of sugar

½ cup bottled lemon juice (I really like lemon + strawberry, but if it isn’t your favorite flavor, you can safely use a ⅓ cup.

Fill your processing pot with 5-pint jars, or more smaller sized jars and hot tap water. Bring to a boil.

Fill a saucepan with coordinating lids and rings and hot tap water and bring to a simmer.

Prepare your countertop with a towel (on which you will rest the hot jars), funnel, and lid lifter. Have a large bowl or a second preserving pan and a small-holed colander or sieve set on top of the bowl ready to strain the strawberries from their juice. If you desire perfectly clear syrup, have 2 layers of cheesecloth at the ready as well. Have a ladle ready as well.

Combine the strawberries and water in a preserving pan and bring to a simmer for about 20 minutes. Heat using the medium-low setting.

Pour carefully the strawberries and accumulated juice into the colander to drain. You can let it sit for up to two hours if you are patient and if you are me, you can use a spoon to gently encourage the berries to release more juice. You will get about 6 cups of juice as a result. The solids can be enjoyed with yogurt, or you can make delicious strawberry butter. I demonstrate how to make these two recipes at the same time in my canning course at www.startcanning.com .

Return the strawberry juice to the preserving pan and add the sugar and lemon juice. Stir to dissolve and heat to a full boil for a minute or two, stirring carefully.

Use your lid lifter to remove one jar from the boiling water bath and pour the water from the jar back into the pot, into the saucepan of lids & rings, or into the kitchen sink. Set the hot jar on the towel covered countertop and use the funnel and a ladle to fill the hot jar with hot strawberry syrup and leave a ¼ inch headspace (distance between the surface of the food and the top of the jar). Apply a lid and ring, tighten about as tight as you would the bathroom faucet, and use the jar lifter to return the jar to the processing pot.

Repeat the process with the remaining jars until you run out of jars or syrup. If you end up with not enough syrup to fill a jar completely, leave it on the counter to cool. You can use a new or used lid and a ring to lid it and store in the refrigerator and eat up as you would any leftover food. When this happens to me, it usually is enjoyed right away.

The jars will rest on the towel covered countertop until they are cool. Check lids to see if they have sealed and are firm to the touch. Label and store in a cool, dry place. Any unsealed jars can be eaten promptly; waffles for dinner, anyone?

To use this delicious, pretty syrup, you can make strawberry margaritas. Thank you Ball Brand for reminding me of this lovely variation on a classic.

Strawberry Syrup & Strawberry Margarita Recipes | The Domestic Wildflower click to read the simple canning recipe for strawberry syrup that is just as delicious on pancakes as it is in a margarita! Read it now!

You’ll need:

¼ strawberry syrup

¼ tequila

2 tablespoons lime juice

About 7 ice cubes, which is about 2 handfuls.

These ingredients are combined into a shaker, shaken, and poured into salt-rimmed glasses.

To blend, combine the ingredients plus 5-10 fresh strawberries in a blend in a blender until smooth.

I prefer mine on ice, in a wide mouth Ball Brand pint jar, rimmed with a sinful amount of coarse salt.

If the above process sounds appealing, and you’d love to make your own home canned syrups, tomato sauce, pickles, and more, but have no idea where to begin or think that you could never learn how I’m here to help. I have launched a canning course for busy beginners that SHOWS you in over 10 clear videos in a way a cookbook cannot how to start canning. The course comes with my Canning 101 ebook, a supportive Facebook community where you can share successes, questions, and recipes with like-minded learners and myself, printable cheatsheets and diagrams to have stove-side (away from the burner please!) and forever access to the course.

If you are worried you don’t have time, think again. Learning how to can saves time cooking months ahead of time and the course can be watched a few minutes at a time over several weeks or gobbled up in a weekend. Don’t let another season pass you by without learning how to can; Let’s Start Canning!

If you love strawberries, you’ll love my Canning Strawberries Recipe Book!

Enroll Now!

Strawberry Syrup & Strawberry Margarita Recipes | The Domestic Wildflower click to read the simple canning recipe for strawberry syrup that is just as delicious on pancakes as it is in a margarita! Read it now!

Filed Under: Can

Can It Forward Day

July 19, 2016 by Jenny Gomes Leave a Comment

Can it Forward Day is a day where canners can share their love, knowledge, and experience of canning with others and this post will explain everything you need to know about this celebration that canners, food lovers, and gardeners all can enjoy.

Can It Forward Day Explained by The Domestic Wildflower click to read the post that explains what this fun day is all about!

Ball Brands is the organizer behind Can it Forward Day and they will be sharing demonstrations on Friday, July 22 2016 on Facebook Live from 10 am to 3:30 pm EST. FYI, Facebook Live is a way for people to share live video on their Facebook pages. It doesn’t disappear in 24 hours the way Periscope videos do (another video streaming app – I’m on there too @adwildflower 🙂 so you can watch them any time if you miss it. Head to https://www.facebook.com/BallCanning/ on Friday July 22 to watch a variety of demonstrations throughout the day. Facebook Live allows viewers to ask questions by typing into the chat box so it is interactive as well. Better yet, for every like, comment, share, etc, a $1 donation will be made to a select few food bank type charities all over the US. The recipes that will be demonstrated include Apricot Lavender Jam, Spicy Heirloom Tomato Chutney, Green Tomato Pickles, Fiesta Peppers, Chipotle Peach Salsa, and more. I have every intention of sharing some demonstrations of my own that day on Facebook so you should be sure to follow along there too! 


Before you start canning, I want you to download this free canning process guide I created just for you. It will make the canning process a breeze!

Yes! Download Now!

Newbies and experienced canners alike can Pledge to Can it Forward and get a $5 coupon for the Ball Brand online store (hellllooooo pretty blue, green and purple jars!) and commit to learning and sharing what you know about preserving with others.


If Twitter is your social media hangout, you can use the tag #canitforward and ask questions and share ideas there.


You can use the same tag #canitforward on Instagram and Pinterest to share your canning creations. You should absolutely check out the canning inspiration here on Instagram and here on Pinterest!


I encourage you to get a trusted canning cookbook and this is one that would be an excellent resource for any canner regardless of experience.


There you have it! Who’s canning it forward with me this year? Share in the comments below!


Filed Under: Can

Pickled Bread and Butter Jalapeños

July 18, 2016 by Jenny Gomes 7 Comments

This post will share a recipe for pickled bread and butter jalapeños and a few clever techniques for keeping your sweet and sour pickles crisp and delicious.

I don’t can a lot of pickles. I also don’t can much that is very spicy, either. As you learn more about canning and develop the set of recipes you enjoy making and your loved ones enjoy eating, you will too find that there are some foods you can over and over and others you don’t end up trying.

Before you start this recipe, download this free canning process guide I created for you. It will simplify everything!

Yes! Download Now!

Enter my friend Kimmy. We grew up in the same little community, laughed our way through many an FFA van ride, ruled the Parliamentary Procedure circuit together, and have both made canning a part of our motherhood cooking routine. Kimmy is an experienced preserver; when I told my mom that I asked Kimmy to guest post, she enthused about how Kimmy’s mom was a great canner as well and recounted various dishes prepared by her mom she enjoyed at baby showers and other events over the years.

As you can more and more, and you feed your partner longer and longer, it often happens that their eating preferences become part of your cooking routine. This is true with our lovely guest poster Kimmy. She shares below the technique for keeping your peppers crisp and the varieties of peppers you can use to spice your jar up even more. Here’s Kimmy!

I love this recipe for so many reasons! Mostly, because growing up I never appreciated how delicious a jalapeno was. Hot peppers were never something that we had around or used in cooking very much. My mom would chop up a few for a homemade salsa now and then, but that was pretty much it. Enter my husband Ricardo. When I met my husband back in 2006, every time we would have a meal, at home or in a restaurant, he would order jalapenos on the side. I thought he was nuts, but soon, refrigerators of every place that we frequented were well stocked with his favorite condiment. Fast forward 10 years and our house is stocked with hot peppers in many forms, some of which I have come to love. We have hot sauce, dried peppers, jalapenos pickled in vinegar, and my all-time favorite- bread and butter pickled jalapenos.

This recipe is adapted from the Blue Book Guide to Preserving, which is the book I recommend to all of my friends who want to get started canning. I love this book because it has simple recipes to can pretty much anything and is up to date with current USDA recommendations for canning. Along with this book, I also recommend Jenny’s canning course, Start Canning. She asked me about a month ago to preview the course that she created for new canners and it is amazing! She shows you the process of canning step by step. It truly is the next best thing to actually having someone in your kitchen with you, showing you each step of the canning process. I highly recommend it.

*Aw, shucks Kimmy, thanks!

To get started you will need around 4 lbs of hot peppers. I like using jalapenos but have also mixed in serranos, anaheims, and other kinds of hot peppers as well. I like to slice the rounds into ¼ inch slices using my mandolin cutter, but a cutting board and a knife will do just fine. Oh, and I prefer to use gloves while dealing with these peppers. I had an unfortunate incident one time where I wiped my eye while cutting peppers and it burned for days! So now, I am very careful.

Bread & Butter Pickled Jalapeños | The Domestic Wildflower click to read this sweet sour spicy canning recipe! So good!

Next, you will need a few onions, thinly sliced. I used 4 small onions, but you can use more or less depending on if you like a lot of onions in your peppers. Go ahead and throw the onions and peppers in a big bowl together. You are going to layer them with canning salt (About ⅓ cup total). Then, cover the top layer with ice cubes. The salt and the ice help to keep your pickles crisp. Go ahead a let these sit on the counter for an hour or two.

While you are waiting you can prepare your jars, lids, and canner. Fill your large stockpot with water. I use a big enamel canner when doing these peppers because I usually do two or more batches at a time. However, you can use any large pot that you already own. Just make sure to have some sort of rack on the bottom so that your jars aren’t sitting directly at the bottom of the pot. Put your jars inside your pot so they will heat up and boil as your canner starts to boil. This sanitizes your jars. This recipe yields about 7 pints, but I always do a jar or 2 extra just in case there are more peppers. I like to use pint jars for these peppers, but any canning jar would work. Sometimes I do them in ½ pint jars to give away as gifts. The jar size is totally up to you.

*You can print off the canning equipment list here! 

CLICK TO PRINT!
Bread & Butter Pickled Jalapeños | The Domestic Wildflower click to read this sweet sour spicy canning recipe! So good!

Ok, so you have your peppers and onions bringing in the salt, covered in ice. Your canner is filled with jars, working on a boil.

Now for the rest of the pickled jalapeno recipe. Combine 2 cups white sugar, 2 Tbs mustard seed, 2 tsp turmeric, 2 tsp celery seed, 1 tsp ginger, 1 tsp whole black peppercorns, and 3 cups vinegar in a saucepan. Bring to a boil.

It’s time to drain and rinse your peppers/onions. It’s ok if they are a little wet, but you don’t want any extra water in the bottom of your bowl. One at a time, you are going to take your jars out of the boiling canner and fill it with the pepper and onion mixture. Squish those babies down; don’t be afraid to really pack them in there. If you leave too much space, after canning them, you will have a ton of liquid on the bottom of your jar. It will still be perfectly safe to eat, and really yummy, but it just doesn’t look as good as a full jar sitting on your shelf.

Bread & Butter Pickled Jalapeños | The Domestic Wildflower click to read this sweet sour spicy canning recipe! So good!

Next, you are going to use your jar funnel, and ladle your liquid into the jar with the peppers and onions. Make sure to leave ¼ headspace at the top. At this point, I always take a clean washcloth, dampen it with hot water and wipe the ring of the jar off, just to make sure that there isn’t a spec of anything that will cause my jar not to seal. Add a ring and tighten on your jar and return this full jar to the canner. Repeat with the rest of your jars. Process for 10 minutes, making sure to adjust for altitude if needed. Add 5 minutes for every 1000 feet above sea level.

Adjusting for Altitude: Start Canning from The Domestic Wildflower click for canning tutorials and recipes!

Download the altitude adjustment guide below!

Once your processing time is complete, using your jar lifter to lifter your hot jars from the canner, placing them onto a towel on your counter. Let the jars sit for 24 hours before washing, removing the rings and setting in your pantry. Don’t forget to admire your handy work.

*You can print the helpful canning process cheat sheet here to guide you at the stove!

These peppers are sweet and tangy and not overly spicy. They are better if you let them sit and cure for 4-6 weeks before eating. The longer you wait, the more flavor that develops. We like to eat them on hamburgers, nachos, over even plain on an hors d’oevre tray.

I hope you enjoy this recipe as much as my family. It is a great way to preserve those jalapenos that all seem to ripen at the same time in your garden.  

Bread and Butter Pickled Jalapenos

Adapted from Blue Book Guide to Preserving

4 pounds jalapenos cut into ¼ inch slices

4 small onions, thinly sliced

⅓ cup canning salt

2 cups of sugar

2 Tbs mustard seed

2 tsp turmeric

2 tsp celery seed

1 tsp ginger

1 tsp whole black peppercorns

3 cups vinegar

Combine peppers and onion slices in a large bowl, layering with salt. Cover with ice cubes. Let stand 1-2 hours. Drain, rinse, drain again. Combine remaining ingredients in a large saucepan and bring to a boil. Pack peppers and onions into jars. Cover with simmering liquid, leaving ¼ inch headspace. Wipe jar rims, tighten lids and rings onto canning jars. Process 10 minutes in a boiling water bath canner, adding 5 minutes for every 1000 feet of elevation above sea level. Label sealed jars and store in a cool, dark spot.  

Yields about 7 pints

What do you think, Wildflowers? I don’t mean to toot my own horn, but I sure do know how to pick a guest poster 😉 When I read this recipe to my husband he immediately asked, “Why don’t you can things like that?!” I guess I will have to start 😉

If you would love to learn how to can but have no idea where to begin, I’m here to help. I want you to head to Start Canning so I can SHOW you in a way a cookbook cannot how easy and fun canning can be.

Enroll Now!
Pickled Bread and Butter Jalapeno Canning Recipe | Easy beginner recipe for delicious bread and butter pickled jalapenos!

Psst- if jalapeños aren’t ripe where ever you are, pin this recipe anyway- you won’t want to skip it!

Filed Under: Can

Strawberry Kiwi Lemonade Concentrate

July 11, 2016 by Jenny Gomes 7 Comments

This is a kid-friendly strawberry kiwi lemonade concentrate canning recipe that is just as beautiful on the shelf as it is for gifting. It helps kids and moms alike get out of the sugary soda drink trap and cooks up quickly. Read on for the strawberry kiwi lemonade concentrate recipe!

Strawberry Kiwi Lemonade Concentrate

This recipe is for Strawberry Kiwi Lemonade concentrate and that is the best part. You can pour a spoonful or two into a glass and fill it with water (or sparkling water if you want to trick them even further!) and stir it up and it is suddenly a natural soda that you made yourself. If I want to add a shot of grown-up libation to it, I can, and if my youngest wants to have some I can make his weaker still.

The concentrate also takes up less room on the shelf to store which is another advantage. Here’s how you can easily make your own. I tried to tweak the recipe to require quantities of fruit you could actually quickly purchase in the market too.

Strawberry Kiwi Lemonade Concentrate Recipe

You need:

3 cups strawberries with stems and leaves removed, rough chopped

3 cups kiwi fruit, peeled

4 cups bottled lemon juice

6 cups of sugar

Note: If you haven’t kiwi, you can just double the number of strawberries and skip the kiwi entirely. I think the kiwi is a great addition, however. 

Prepare your processing pot with about 5-pint jars and bring to a gentle boil. If you are new to canning and want to learn how to make awesome stuff like this recipe, head to www.startcanning.com to learn how. That’s my e-course that is perfect for the busy beginner. Check it out, Wildflowers!

Blend the fruit together in a blender, food processor, with an immersion blender, or food mill (a baby food mill would work fine!). If you haven’t one of these appliances, just chop the fruit into small pieces and don’t worry. It will cook down readily. If you have terribly picky children, you could choose to strain the mixture through a sieve at this point to remove the pretty black kiwi seeds, but luckily, my kids don’t mind them.

Strawberry Kiwi Lemonade Concentrate | The Domestic Wildflower click to read this kid and beginner friendly recipe and tutorial! The turns out so pretty for storing or gifting!
Put the pureed fruit into the preserving pan. Add the lemon juice and sugar and stir to combine.

A note about lemon juice: I fresh squeezed every lemon in my crisper and only got a single cup of juice. There’s no shame in using bottled juice and I definitely had to. Frankly, because you are cooking and canning it, the fresh lemon juice might be better saved for use where it isn’t cooked at all. Use fresh if you have it and want to squeeze them, or bottled if not.  

Strawberry Kiwi Lemonade Concentrate | The Domestic Wildflower click to read this kid and beginner friendly recipe and tutorial! The turns out so pretty for storing or gifting!

Bring fruit, lemon juice, and sugar to a gentle simmer. You want the sugar to dissolve but you don’t want the fruit to come to a rapid boil lest the fresh fruit flavor disappear. If it comes to a full boil, that is okay, but the flavor is a bit better if you can avoid a rolling boil.

Strawberry Kiwi Lemonade Concentrate | The Domestic Wildflower click to read this kid and beginner friendly recipe and tutorial! The turns out so pretty for storing or gifting!

Using the jar lifter, pull one jar from the boiling water and pour the hot water back into the pot. Set it carefully on the towel-covered countertop. Using your funnel and a ladle, fill the hot jar with hot fruit puree.

Leave ½ an inch between the top of the fruit and the top of the jar.

Put the lid and ring on the jar. Tighten only as tight as you might a faucet in the bathroom. You don’t need or want it super tight. Use the jar lifter to put the hot jar full of hot fruit back into the hot water.

You will repeat this process until you run out of fruit or out of jars. With whatever little bit you have left that isn’t a full jar, pour into a drinking glass and get ready to reward yourself with a cold drink.

Set the timer for 5 minutes. For every 1000 feet of elevation you live above sea level, add 5 minutes. For example, I live at 3000 feet above sea level so I set my timer for 20 minutes total. During this time, the water in the largest pot should be at a rolling boil, with at least an inch of water covering the lids. I know it is difficult to tell how much water is over the jars when it is really boiling but add from a teakettle if you aren’t sure.

Adjusting for Altitude: Start Canning from The Domestic Wildflower click for canning tutorials and recipes!

When the time is up, use your jar lifter to remove the jars one at a time to carefully rest on the towel covered countertop. Let them cool undisturbed for up to 12 hours. Notice how the lids will seal; they will become concave and firm to the touch and you will probably hear a loud “ping” or clicking noise when the heat forces all the air from the jar which causes the lid to suck down, creating that air-tight seal you are looking for. If you have a jar that doesn’t seal after 12 hours, and the lid pops up and down when pressed, then just store the jar in the refrigerator and eat it up within a month. Label sealed jars and store in a cool, dry place.

Strawberry Kiwi Lemonade Concentrate | The Domestic Wildflower click to read this kid and beginner friendly recipe and tutorial! The turns out so pretty for storing or gifting!

To serve, mix 1 part concentrate with 2-4 parts cold water and stir to combine. Feel free to get fancy and use sparkling water, ice, and perhaps one shot of your favorite adult beverage. I like tequila on a hot afternoon with this mix in particular but then again I like it with most everything 🙂 

I want to hear in the comments: what are YOUR favorite kid-friendly canning recipes? Share in the comments below and be sure to share this recipe with your friends. Those Pinterest buttons aren’t going to click themselves 😉

Related:

I wrote a blog post about the 5 Perfect Recipes for Kids right here 🙂 

If you love strawberries, you’ll love my Canning Strawberries Recipe Book!

SaveSave

Filed Under: Can

  • « Go to Previous Page
  • Page 1
  • Interim pages omitted …
  • Page 16
  • Page 17
  • Page 18
  • Page 19
  • Page 20
  • Page 21
  • Go to Next Page »

Primary Sidebar

Categories

Follow me here, there, & everywhere!

  • Email
  • Facebook
  • Instagram
  • Pinterest
  • RSS
  • Twitter
  • YouTube

Search

Get The Pressure Canning Cookbook

Get 10 Free Recipes Now!

Best Chicken Coop

Footer

Get Started Pressure Canning

Shrubology Ebook

Shrubology: Refreshing Homemade Fruit and Vinegar Syrups for Cocktails
Make easy, no-cook fruit & vinegar syrups for cocktails & mocktails! This ebook shares crowd pleasing recipes and simple to understand ratios so you can make a shrub on your countertop any time- without a recipe. Dive into these Prohibition Era drinks today!

Copyright

Copyright 2019
The Domestic Wildflower
www.thedomesticwildflower.com.
All content created by Jennifer Gomes unless otherwise noted.

Copyright © 2025 · Lifestyle Pro on Genesis Framework · WordPress · Log in