This post will show you a smart, simple way of fixing jeans that have lost a button.
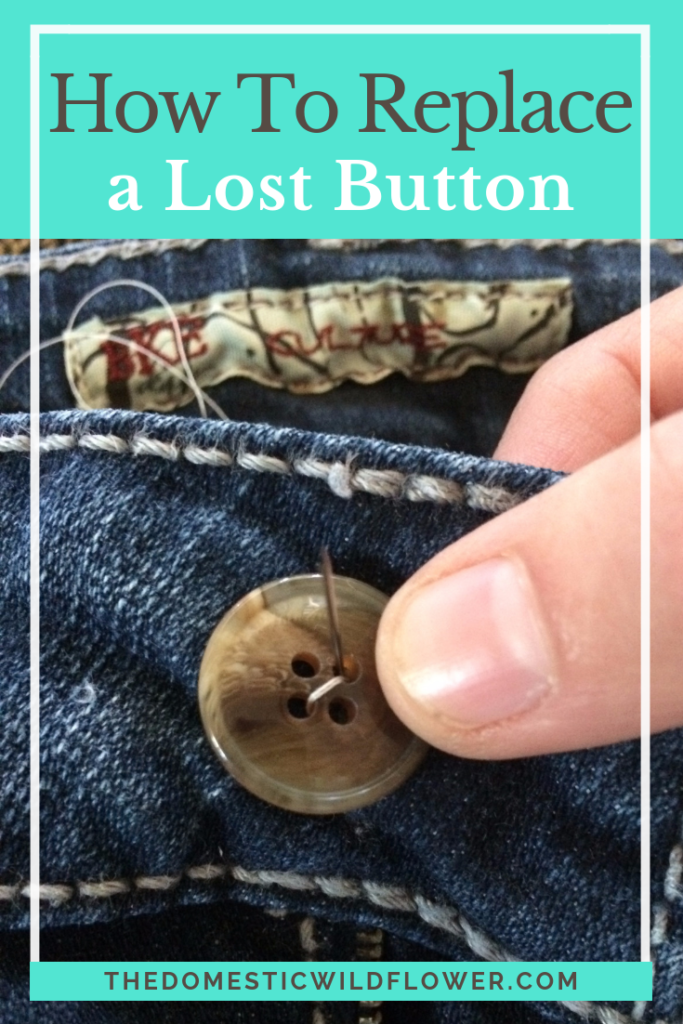
Fixing a broken button from a beloved pair of jeans isn’t as easy as it seems. You can buy replacement buttons but they often require a special tool to clamp them to the waistband. If the button pulled it’s way completely through the waistband, you are left with a hole that is larger than the shank of most replacement buttons…and then what? Add in a zipper that doesn’t prefer to stay up all on its own, and your jeans are ready for demotion to the rag pile.
I have a good way of mending the hole where the button pulled through that leaves you without having to buy a replacement button and tool that may or may not work that is difficult to use. It also makes your mending job last so you won’t be sewing the button back on every time you want to wear the jeans.
Read on for the full mending tutorial + video!
The first thing you need is a regular button that slides in and out of the factory buttonhole in the waistband of your jeans. You have a few stylistic choices when it comes to the color and style of button. You could find a metal button that closely resembled the button that originally was on the jeans, you could find a neutral colored plastic button, or you could choose a bright, colorful, or otherwise really fun button that would be meant to stand out. For jeans, I usually wear each pair with a variety of outfits so I choose my replacement buttons to be as neutral as possible.
You will need thread that matches the button, a sewing needle with an eye large enough to accommodate the thread, a pair of sharp scissors, a pair of tweezers, and a scrap of denim that is at least 2 inches x 2 inches.
Take the tweezers and insert them in between the layers of the waistband. Your waistband is made from at least 2 layers of fabric, almost certainly, if not more, and you’ll be able to feel with the tweezers that there’s space for a flat, smooth, denim square to be inserted.
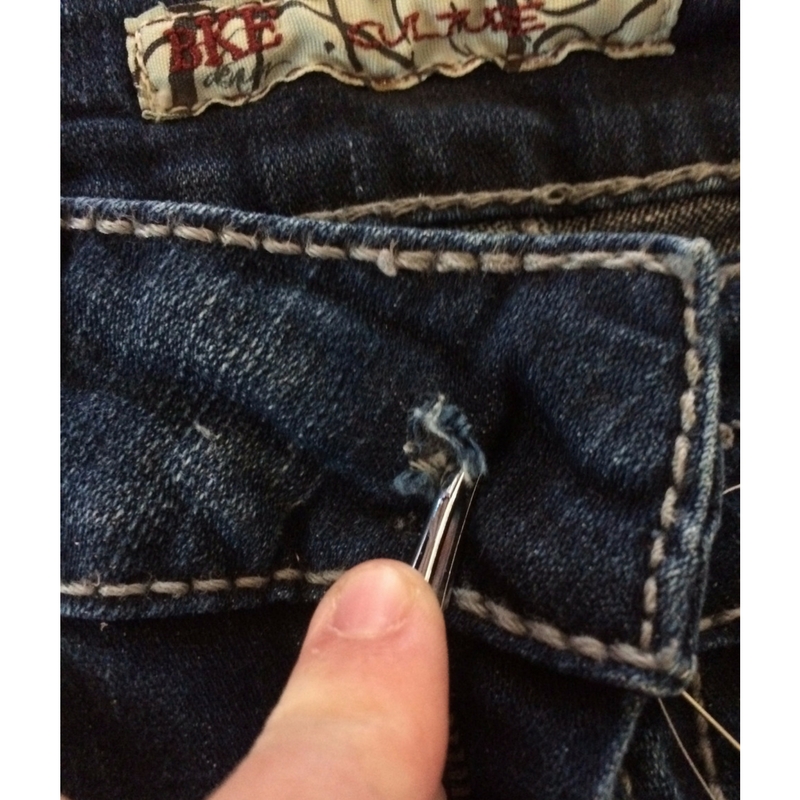
The extra fabric that you will insert will become a strong anchor onto which you will sew the new button without making the waistband of the jeans look mended. It will be completely invisible within the waistband and will give you something sturdy to sew on.
Trim the denim patch to be just a bit smaller than the height of the waistband. When mending, always make the patch bigger than you think. You can always pull it out and trim a little more.
Using the tweezers, pinch the edge of your denim anchor patch and slide it into the hole (that used to house the shank of the original jeans button). Use the tweezers to wiggle and shimmy the patch between the layers so it is flat. Imagine opening up a sandwich that’s already prepared to slide in one more piece of cheese. It’s like that. Sort of 🙂
Use your fingers, the tweezers, a ball point pen, the tines of a fork, or any other small tool to patiently wiggle the fabric into place.
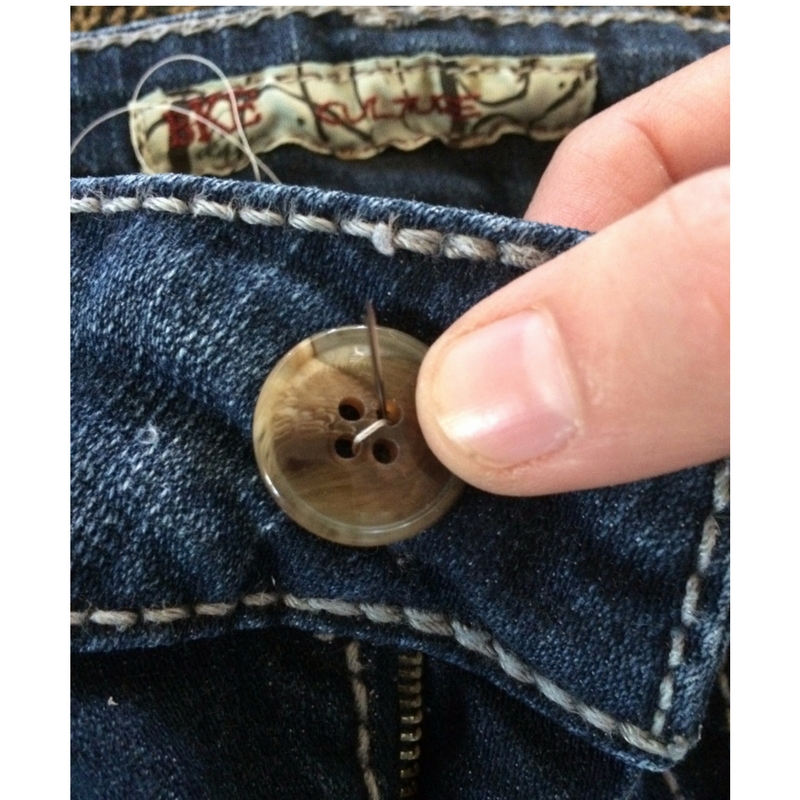
After the fabric is flat within the layers, begin sewing the button exactly over the same hole that the original button was in. As you sew, you’ll feel that you are sewing through several layers of fabric which will firmly anchor the button in place. Try to stab through layers of the original waistband also, but because you’d added the extra layer, you shouldn’t end up with a button that separates from the waistband at all.
This video should show you exactly how to mend this way; be sure to pin it for reference later!
After making about 8 passes (on a 4 hole button I like to do 4 one way, 4 the other), knot the thread on the backside (by your tummy) and snip the thread. You could add a dot of Fray Check or clear nail polish, but I usually don’t find it necessary.
Now, your jeans can remain in the regular line up instead of lingering in the purgatory of unwearables.
If you want to learn how to sew, check out the courses HERE!
Happy Mending, Wildflowers!

Love this! Such a simple way to fix jeans that are seemingly on the way out the door. Thanks for the tip!
Thanks Diana! I think the tweezers help anchor it so the mending job lasts a lot longer too!