 There are lots of beginning sewists out there with basic sewing skills and a desire to tackle clothing alterations but aren’t confident enough to begin. I hope to demonstrate some easy alterations that anyone can do to make your clothes fit better and thus will put those items in your regular lineup.
The hooded sweatshirt is a casualwear standby but often times comes in a boxy, too-large, and unflattering shape. Don’t get me wrong, I love that a hoodie can be pulled on without considering if it will showcase an imperfection in my middle and I wouldn’t dare try to turn an apple into an orange, or a hoodie into a fitted tee. However, a too large sweatshirt can be easily taken in a few inches to make it a closer fit and a more feminine and flattering shape. Here’s how.
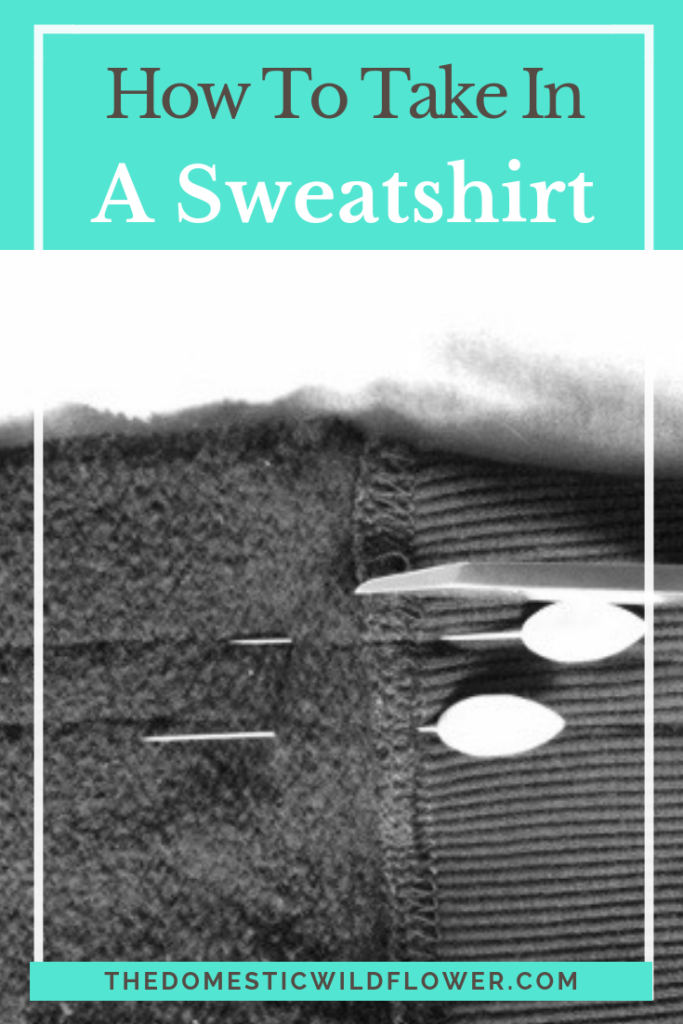
Turn the sweatshirt inside out. Stand before a mirror with pins nearby in a well-lit room. Identify where you’d like to take in the sweatshirt, starting at the wrist or at the waist. If your sweatshirt is one size too big for example, it is likely that you need to begin about an inch in on each side of your waist, at each hip, and pin every few inches up each side and down each sleeve, tapering very gradually off down the sleeve so that you are very, very slowly “exiting” the alteration freeway and merging onto the existing sleeve seam that is almost assuredly a serged seam with plenty of room for you to park and backstitch. You may find it easy to pin one side and impossible with the other because you will have to use your not-dominant hand to pin. Take the shirt off and pin the opposite side.

After pinning (and shimmying out of the pinned sweatshirt) sew an inch or so away from the existing seam all the way up to where the sleeve meets the body where you will drop your needle, raise your presser foot, turn the corner, and drive down the sleeve. Very gradually taper off, as described above, and backstitch.
A word of caution against taking in a shirt (sweatshirt or otherwise) in this simple manner: The more you take in, the more likely your underarm will have a weird, totally obvious and undesirable wrinkling and puckering no matter how smoothly you sew. It is hard to explain why this happens so take my word for it. To take in a shirt much more than about 2 inches, or more than one size, in my experience, causes this wrinkling and you would need to alter the shirt in a different way (removing the sleeve entirely, altering the sleeve and body separately, and re-attaching the sleeve) which I would consider a bit beyond simple and achievable for a beginning sewist. By all means, try the more advanced alteration it if you are inclined, but not if you need to wear the shirt to a wedding in 30 minutes. After all, that is how we all improve, by trying difficult things!
Sometimes, a garment only needs to be taken in on the sides. If this is the case, start at the top, near your ribs or wherever you’d like your shirt to be a bit skinnier, and very, very gradually, sew in, first at about an eighth of an inch, then to a quarter, and then in to the inch or so you desire. Imagine, if geometry class isn’t too far away from your memory, that you are sewing one side of a very tall and skinny isosceles triangle. If it has been a while since you have been in geometry, stick with my freeway exit and merging metaphor. It may be wise to lay a shirt that fits well atop the one being altered to guide your pinning.

Leave a Reply