• Skip to secondary menu
  • Skip to main content
  • Skip to primary sidebar
  • Skip to footer
  • The Pressure Canning Cookbook
  • Blog
    • Subscribe
    • Welcome!
  • Perfectly Preserved Podcast
  • About
    • ADW Manifesto
    • Work With Me
      • Read
  • Shop
    • My Account
    • Cart
    • Checkout

The Domestic Wildflower

Handmade Food & Craft Tutorials for Beginners

  • Courses
    • Free Canning Basics
    • Everything Canning Course
    • Steam Canning Workshop
    • Free Homemade Cocktail Mixers
    • Wildflower Mixology
    • Crochet Basket Workshop
  • Can & Preserve
    • Never Canned?
    • Steam Canner Equipment Bundle
    • Shrubs Course
  • Sew
  • Cook
  • Craft
    • Crochet Step-by-Step Guides
      • Crochet Basket
      • Giant Yarn Throw
      • Thick & Thin Throw
  • Living
    • Creativity Challenge
    • Clean
    • Kids
  • Rentals

Jenny Gomes

Stout Floats

May 25, 2015 by Jenny Gomes Leave a Comment

Stout, or a particularly creamy porter, pairs so naturally with vanilla (or chocolate if you are feeling daring) ice cream so well that this treat should be on the regular rotation for grownup’s summer dessert. Sure, it is a bit strange to wrap your head around an unusual combination like beer and sweets but consider instead that they are ingredients and this is just a new pairing.

Let me digress and share briefly why I love dark beers, stouts and porters in particular. There’s a time and place for light beers and you’ll never catch me criticizing the quenching Corona & lime beach standby but I really, really enjoy a dark beer. Dark beer has a much more complex flavor profile in a way similar to that of white bread versus whole wheat (or other whole grain, for that matter). Dark beer can have notes of chocolate, smoke, vanilla, and other flavors that clearly compliment sweets like ice cream. The particular variety that you should seek out for this recipe is up to you, but I’d encourage an oatmeal stout for the same reasons oatmeal cookies are the standby in an ice cream sandwich. See? You don’t need a food science degree or be a foodie to see that it is a combination worth trying. The higher alcohol content of most dark beers takes this small serving of sweets from really good to positively divine.

As for the ice cream, I typically choose a good quality vanilla bean or chocolate. The chocolate and stout can be pretty rich but sometimes you really want something rich. This would also be a good occasion to make your own ice cream. I’m a big fan of using fewer ingredients of higher quality with fewer steps and this is one of the many examples of how I do that in my little kitchen.

Here’s the how-to:

Scoop 2 scoops of ice cream into a jar. I like the wide mouth pint in this application, but use what you have that is more like a glass and less like  a bowl. You’ll want to drink what remains when the ice cream is melted, I promise.

Slowly pour the beer over the ice cream, being wary of a slow and steady eruption of foam that may occur. I consume about a third of a bottle of beer (so small a quantity, I know) with a scoop of ice cream. Get crazy and use a whole half a bottle, Wildflowers; I won’t tell anyone. I use a super handy beer bottle cap designed to keep it from going flat so I can have fresh beer for the next night. If you are hung up on the ice cream to beer ratio, go with whatever you’d do for a root beer float.

Some like to leave the ice cream in beautiful ice cream-bergs to slowly melt at their own pace but I like to break the ice cream up with my spoon so there’s ice cream and stout in every bite.

Cheers, Wildflowers! What ways will you enjoy beer and ice cream, together or separate, this summer?

Filed Under: Cook

Simple Alterations: How to take in a Sweatshirt

May 21, 2015 by Jenny Gomes Leave a Comment

There are lots of beginning sewists out there with basic sewing skills and a desire to tackle clothing alterations but aren’t confident enough to begin. I hope to demonstrate some easy alterations that anyone can do to make your clothes fit better and thus will put those items in your regular lineup.
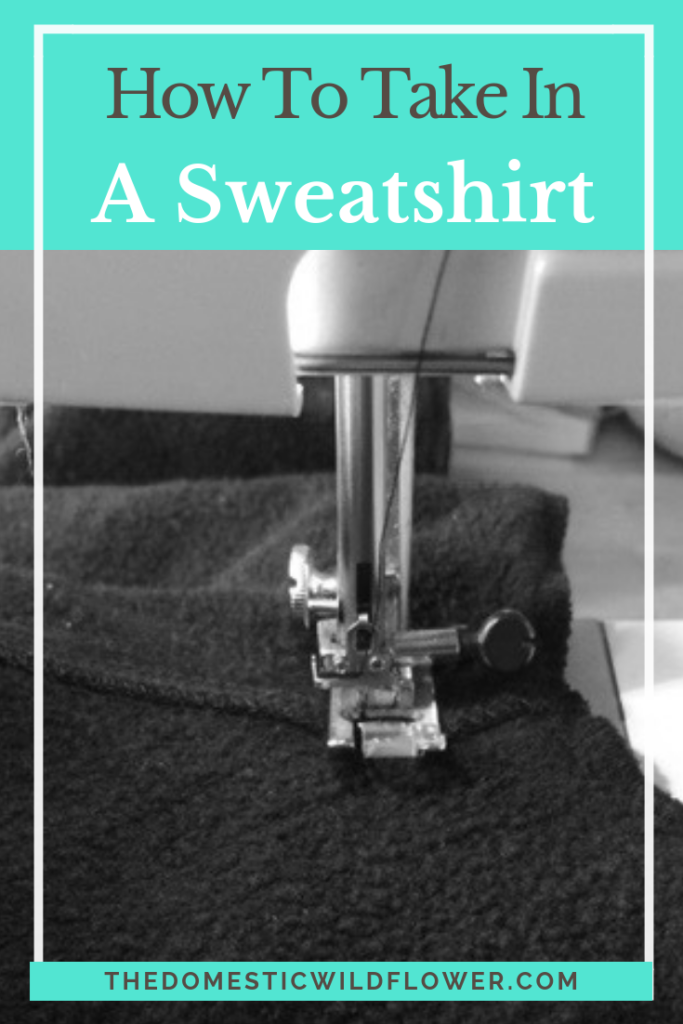
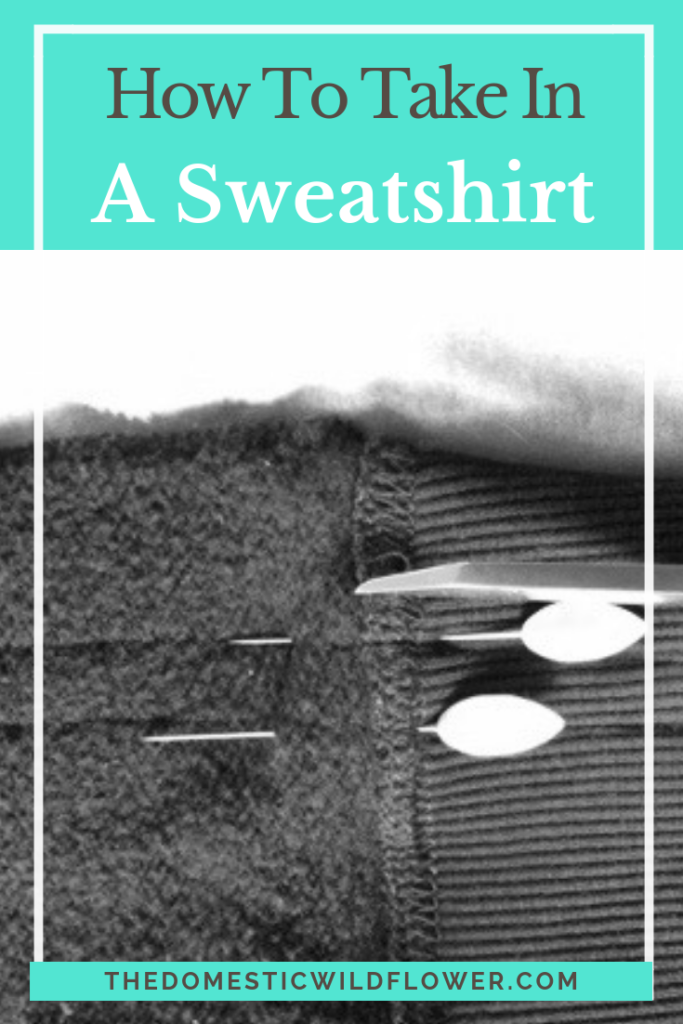
The hooded sweatshirt is a casualwear standby but often times comes in a boxy, too-large, and unflattering shape. Don’t get me wrong, I love that a hoodie can be pulled on without considering if it will showcase an imperfection in my middle and I wouldn’t dare try to turn an apple into an orange, or a hoodie into a fitted tee. However, a too large sweatshirt can be easily taken in a few inches to make it a closer fit and a more feminine and flattering shape. Here’s how.

Turn the sweatshirt inside out. Stand before a mirror with pins nearby in a well-lit room. Identify where you’d like to take in the sweatshirt, starting at the wrist or at the waist. If your sweatshirt is one size too big for example, it is likely that you need to begin about an inch in on each side of your waist, at each hip, and pin every few inches up each side and down each sleeve, tapering very gradually off down the sleeve so that you are very, very slowly “exiting” the alteration freeway and merging onto the existing sleeve seam that is almost assuredly a serged seam with plenty of room for you to park and backstitch. You may find it easy to pin one side and impossible with the other because you will have to use your not-dominant hand to pin. Take the shirt off and pin the opposite side.

Altering in this simple way can be improved by remembering to take in a little at a time. This means you will have to put the shirt on and off a couple times to get the exact fit for which you are looking. Be patient. Don’t hesitate to use your seam ripper if you have taken in a bit too much. When you are sure you have taken it into your satisfaction, trim the excess. I haven’t found it necessary to zigzag or serge to finish your seam but you definitely can.

After pinning (and shimmying out of the pinned sweatshirt) sew an inch or so away from the existing seam all the way up to where the sleeve meets the body where you will drop your needle, raise your presser foot, turn the corner, and drive down the sleeve. Very gradually taper off, as described above, and backstitch.

A word of caution against taking in a shirt (sweatshirt or otherwise) in this simple manner: The more you take in, the more likely your underarm will have a weird, totally obvious and undesirable wrinkling and puckering no matter how smoothly you sew. It is hard to explain why this happens so take my word for it. To take in a shirt much more than about 2 inches, or more than one size, in my experience, causes this wrinkling and you would need to alter the shirt in a different way (removing the sleeve entirely, altering the sleeve and body separately, and re-attaching the sleeve) which I would consider a bit beyond simple and achievable for a beginning sewist. By all means, try the more advanced alteration it if you are inclined, but not if you need to wear the shirt to a wedding in 30 minutes. After all, that is how we all improve, by trying difficult things!

Sometimes, a garment only needs to be taken in on the sides. If this is the case, start at the top, near your ribs or wherever you’d like your shirt to be a bit skinnier, and very, very gradually, sew in, first at about an eighth of an inch, then to a quarter, and then in to the inch or so you desire. Imagine, if geometry class isn’t too far away from your memory, that you are sewing one side of a very tall and skinny isosceles triangle. If it has been a while since you have been in geometry, stick with my freeway exit and merging metaphor. It may be wise to lay a shirt that fits well atop the one being altered to guide your pinning.

Simple Alterations: How to take in a Sweatshirt

I am petite and have taken in a lot of shirts as a result. This simple method works for taking in a shirt that is one size too large and also solves the problem of the disproportionate shrinking that sometimes happens over time. Sometimes sweatshirts shrink to be shorter and weirdly too wide, for example. Proceed with confidence, beginning Wildflowers, and soon you will be altering for friends and family. In the comment section below, share some alteration success or hard-learned lessons from which we can all learn!

If you want to learn how to sew, check out the courses HERE!

Filed Under: Sew

How To Mend a Rug With a Curved Needle

April 30, 2015 by Jenny Gomes Leave a Comment

When my husband and I were buying our home, we bought this rug at a local furniture store and we loved everything about it. We quoted the movie, “The Big Lebowski” for weeks, noting how the rug really “tied the room together.” This rug has been in our high traffic living room for over five years now, and we have since had two babies and a Lab, and it is a little worse for wear. The binding of the rug has started to split from the body of the rug along the edge and by repairing it with a strong, curved needle, we can enjoy it for years to come.

To mend a rug yourself, you need a strong needle. Because you will be pushing the needle through a fairly thick item with your fingertips, the curve of the needle allows you to have a curve to push on, rather than a pointed eye. It is not that you are sewing in a circular fashion, but rather the rounded edge gives you a surface edge to press upon that won’t pierce or hurt your fingers. If you don’t have a curved needle (many needle sets come with one-check your sewing basket before heading to the store) a strong darning needle is suitable but you might need to rustle up a thimble while you’re at it to protect your fingertips when pushing through the rug. In a pinch, I have used leather gloves so try that if company is on the way over and you need something mended now.

I have mended my rug at two different times with two different types of thread with equal success. I had a spool of very strong “button thread” that I bought by accident years ago and have been using for tasks like this ever since. It is one of the strongest threads sold in a standard sewing store and if you have a needle with an eye large enough, you would likely be very glad you purchased a spool.

Another very handy spool of thread you could use is denim thread. This is the goldenrod (not blue) colored thread that matches the leg and hem seam stitching on your jeans and while it is not as quite as strong as button thread, it is plenty strong for rug mending and can be used for hemming and repairing denim later.

I would bring your needle, thread, and scissors to the floor and sew sitting cross legged if your rug is large. If it is small and not too awkward, bringing it to your lap would probably save your neck and shoulders some strain. This project might be a good chance to be on the floor while the kids play.

To mend, thread your needle and make a heavy knot at the end. Work methodically from one end of your tear to the other. Bring the needle up from the underside, and down on the other side of the split, about an eighth of an inch from the tear. Space your next stitch about a quarter inch from the last. Repeat until you have closed the split and knot on the underside.

When I share such simple tips with my friends, the reaction is often, “That’s it?” And the answer is yes! Some of the best ways to keep what we have lasting are the simplest. By using an appropriate and curved needle, your fingers will be saved and your effort will be preserved by using sturdy thread.

Here’s to rugs that really tie the room together. Please share any other uses for curved needles and sturdy thread you have found!

Filed Under: Sew

Teaching Toddlers Using a Deck of Cards

April 27, 2015 by Jenny Gomes Leave a Comment

I have a three year old daughter who, like nearly all kids this age, loves to learn. There are countless products out there that promise, and many surely deliver, important learning outcomes for an eager kid. As a new mom, I felt utterly overwhelmed by the choices before me in regards to items to buy. I felt pressured to buy and have the right gear. I fretted over buying the right food. I worried if I was preparing my child for school even though that was years away, and I am a seasoned classroom teacher for Heaven’s sake! Now that I have a few years of motherhood under my belt I have really tried to relax, both inwardly and outwardly, in regards to “preparing” my kids for the future.

Using a deck of cards was one way that I found that there are opportunities to teach kids all around us and they needn’t be expensive or purchased at a specialty store nor executed by an education professional.

I also have found that using a deck of cards is handy for those who don’t have kids. My friends and child care providers who don’t have kids (and thus untold numbers of toys at home) could use a deck of cards or simply apply the same mindset to any other learning opportunity. For example, I have only a faint idea of what the game “Dominoes” is about, but the next time I see a set at a yard sale I am snapping it up because I can imagine the fun matching, stacking, and sorting games we could play with the tiles.

Here are the “games” I play with my toddler that are educational and simple using a deck of cards. No, Texas Hold ‘Em won’t be on the list but as I mentioned, dear readers, we have lots of time ahead to prepare for the future.

Shapes

I started out showing my daughter the different shapes on the cards. Diamonds and hearts were easy of course and the spade shape brought about the opportunity to talk about gardening tools like spades and shovels. The club is a lot like a clover, and now my girl uses both words to describe the club.

Colors

You might be unimpressed as a deck typically has only two colors. Most decks have a variety of colors present on the face cards and knowing the colors paired with the numbers and suits presents appropriate and additional challenge to the “game” of playing with cards. Being able to say, “A red, heart, 2!” is actually a lot of information for a toddler.

Number Order

You can practice order number with just a handful of cards or the whole deck, depending on the age and ability of the toddler at hand. I started out by just pulling the 2,3,4 and 5 of one suit, “shuffling” them, and helping my toddler put them in number order. Build up to more number, add more suits, and practice in reverse order.

Matching

This isn’t quite a game, but I call it one and my daughter loves it. I give her the first two cards off the top and I get the next two. We look to see if any of the four cards showing match any of the others. Often they don’t. One of us draws a card from the deck. We see if that card matches the ones in our hands. Often they don’t. We take turns drawing cards (sometimes with me setting some aside if our hands get too full) until we draw a card that matches in number a card in our hand. Then there is lots of cheering because we found a match and that gets set on the table, face up. We repeat in this way, finding matches until we have four of everything or until she has tired of the game. As we find the third and fourth of each number, I can point out one that’s a heart, one that’s a spade, and so on. As I arrange the sets on the table, I try to arrange them in order so the aces and twos are on the left, and the face cards to the right.

Mix Up

My daughter named this Mix Up and the name stuck. She LOVES to mix the cards, face up, in a big mess on the table. Then, she draws whatever card she wants, and then looks for another like it either in suit, color, or number. It is kind of like a treasure hunt for her. I like to save “Mix Up” for the end of the card playing time because the mixing is more kinesthetic, and is more child-driven rather than Mommy-driven.

There are many variations you can feel confident in creating off of these activities. You don’t have to be a teacher, subscribe to a parenting magazine, or have your mother-in-law’s or neighbor’s or friend’s approval to create fun and free ways of teaching kids. What ways have you created learning opportunities for kids, Dear Reader? Tell me in the comment section below!

Filed Under: Craft, Kids

How to Create Wild Outdoor Arrangements: Barbed Wire Wreaths

April 27, 2015 by Jenny Gomes Leave a Comment

One of my favorite things it arranging plants in junk to make beautiful, funky, and welcoming additions to my home. I see the great outdoors as part of our living space and I love putting my resourcefulness and pruning shears to good use to decorate it.
  1. Find a base. This base item, organic or inorganic, is what you will tie, wire, or otherwise attach your plant matter to. These bases fall into two general categories:Fill Up/Vase-like OR Tie On/Wreath-like

Fill up containers are buckets, pails, boxes, wash basins, pitchers, cans, etc that may or may not be water-tight (I prefer mine not to be) and are suitable for living outside. A rummage through a barn, shed, lean-to, or attic may yield fantastic and free containers. One of my favorites was found on our property after we moved here. The old yellow Pennzoil can had been shot (for target practice, surely) dozens of times. The surface is like a giant cheese grater but is so bright, beat up, and fun, it is a perfect receptacle. Be creative and feel free to think outside my suggested list.

Tie on bases are a sturdy item onto which you can attach plants and then can attach to a fence or gate. Think of a wire wreath base and then go from there to the junkyard or the great outdoors. A manzanita branch (or any interesting limb for that matter), a round of old barbed wire, or a weathered piece of lightweight lumber are at the top of my list for tie on bases. Just bear in mind these items have to be propped up or connected someway to your display site so they can’t be too heavy.

2. Select your plants based on these 3 categories

  1. Color
  2. Texture
  3. Height

What you find in your backyard or roadside may vary greatly from what I can find in Northern California but I seek out evergreen limbs in various lengths, deciduous limbs growing moss, bushes with interesting leaves, and finally shorter, greener plants that may or may not dry outdoors well.

My go-to plant list includes:

Juniper

Pine limbs and cones

Cedar boughs

Oak limbs

Branches from various fruit trees like pear and apple

Oregon grape (which looks nothing like a grape vine and more like holly than anything)

Sweet pea vine

Wild rose (which has wicked thorns)

any green weed that looks like it might hold up well in a dried and wind-blown arrangement.

I choose those plants because grow near me for free,  can be cut to different heights/lengths, and grow in a variety of colors and textures.

Use those guidelines when foraging. I have made really pretty arrangements with just juniper and oregon grape because they dry well and they have different textures. Because this is going to be sitting outside in the elements, keep it simple.

3. Arrange. Generally, I go for a walk with my gloves, pruning shears, dog, and one or two children. I clip whatever strikes my fancy, trying to collect an armful of plants and then walk to the hanging site. So, if I am wiring weeds to a barbed wire wreath, I assemble the wreath at the gate where it will hang.

I have used a variety of materials to secure plants to wreaths in into buckets and I like wire. Because of my husband’s job, I happen to have a lot of wire scrap around, in handy lengths of about 3 feet. You do not need wire but it is pretty tough to beat for securing weightier branches. I have used baling twine, acrylic scrap yarn, fishing line, and leftover twine from packages all successfully. Be resourceful and you will be even more pleased with the frugality and beauty of your arrangement.

I like to start with the longest or tallest branches first and then arrange shorter in front or on top. I set a branch or two, and connect it to the bucket or wreath (or broomstick or weathered old two-by-four or whatever) with the wire or twine, and repeat. Filling a receptacle can be faster and easier than creating a wreath, but if you have adequate greenery, wreath making can be plenty quick. Most of my projects can be measured in the number of nap times they take for completion and this is a half a nap project.

One method to the madness is to alternate between plants. So for example, I might choose a tall oregon grape, then a tallish juniper branch, then a medium oregon grape, then a medium juniper and then finish with a short sprig of whatever green plant I liked, or just a short branch of oregon grape. It really can be that simple. I like to wire in a fall horn (a deer antler that is shed yearly) or a weird old piece of metal junk. My husband builds power lines, so I have all manner of metal numbers and shapes (like stars!) salvaged from old poles at my disposal. Be creative!

The last step is to hang or place your arrangement. This is actually pretty important because inevitably the wind will blow it about and you want this to last. In my case, I want it to last a month or more. Surely you didn’t think I rearrange weekly, did you Wildflowers? Simulate some wind or jostling and secure your arrangement.

Here are some ideas to get you started.

Filed Under: Craft

  • « Go to Previous Page
  • Page 1
  • Interim pages omitted …
  • Page 62
  • Page 63
  • Page 64
  • Page 65
  • Page 66
  • Go to Next Page »

Primary Sidebar

Categories

Follow me here, there, & everywhere!

  • Email
  • Facebook
  • Instagram
  • Pinterest
  • RSS
  • Twitter
  • YouTube

Search

Get The Pressure Canning Cookbook

Get 10 Free Recipes Now!

Best Chicken Coop

Footer

Get Started Pressure Canning

Shrubology Ebook

Shrubology: Refreshing Homemade Fruit and Vinegar Syrups for Cocktails
Make easy, no-cook fruit & vinegar syrups for cocktails & mocktails! This ebook shares crowd pleasing recipes and simple to understand ratios so you can make a shrub on your countertop any time- without a recipe. Dive into these Prohibition Era drinks today!

Copyright

Copyright 2019
The Domestic Wildflower
www.thedomesticwildflower.com.
All content created by Jennifer Gomes unless otherwise noted.

Copyright © 2026 · Lifestyle Pro on Genesis Framework · WordPress · Log in