• Skip to secondary menu
  • Skip to main content
  • Skip to primary sidebar
  • Skip to footer
  • The Pressure Canning Cookbook
  • Blog
    • Subscribe
    • Welcome!
  • Perfectly Preserved Podcast
  • About
    • ADW Manifesto
    • Work With Me
      • Read
  • Shop
    • My Account
    • Cart
    • Checkout

The Domestic Wildflower

Handmade Food & Craft Tutorials for Beginners

  • Courses
    • Free Canning Basics
    • Everything Canning Course
    • Steam Canning Workshop
    • Free Homemade Cocktail Mixers
    • Wildflower Mixology
    • Crochet Basket Workshop
  • Can & Preserve
    • Never Canned?
    • Steam Canner Equipment Bundle
    • Shrubs Course
  • Sew
  • Cook
  • Craft
    • Crochet Step-by-Step Guides
      • Crochet Basket
      • Giant Yarn Throw
      • Thick & Thin Throw
  • Living
    • Creativity Challenge
    • Clean
    • Kids
  • Rentals

Blog

How to Grow Microgreens in a Victorio Sprouter

April 8, 2019 by Jenny Gomes Leave a Comment


This post will explain how to sprout microgreens easily on your countertop especially if you would like a steady supply of sprouts for eating on salad, sandwiches, eggs, and more. The sprouter that I use is forgetfulness-proof and helps you sprout more of your seeds, saving you money, and allows for you to have sprouts ready all the time, as opposed to one jar full ready, and then having to wait for another week to go by without any fresh spouts.

How to Grow Microgreens in a Victorio Sprouter

This post contains affiliate links.

You may remember that I shared my mom’s method of sprouting in a mason jar in this post, and it is indeed a good solid method that works just fine. It costs very little and is super simple and effective.

The trouble with the jar is that you sprout a jar full, and then in a week or so, you have sprouts and then you have to wait another week for more. A family can eat a jar full of sprouts in a single sitting. This isn’t a problem, exactly, but it can be a drawback for some families.

I also find the jar method to be a bit more hands on. You have to wait for alllllll the water to drain out, which takes time. It doesn’t take a TON of time, but it absolutely does take a minute or so. I would find myself thinking, “Oh I’ll water my sprouts in a bit when I have a minute” and that minute seemed hard to come by, there in the busiest room of the house.

The Victorio Sprouter is a tool that I honestly wouldn’t have sought out because I’m a person that would just “tough it out” with the jar. Once I got to know Amy, one of the owners of Victorio Kitchen Products, I realized that if this busy mom is using it, I probably should give it a shot.

Let me explain why the Victorio Sprouter is a genius tool.

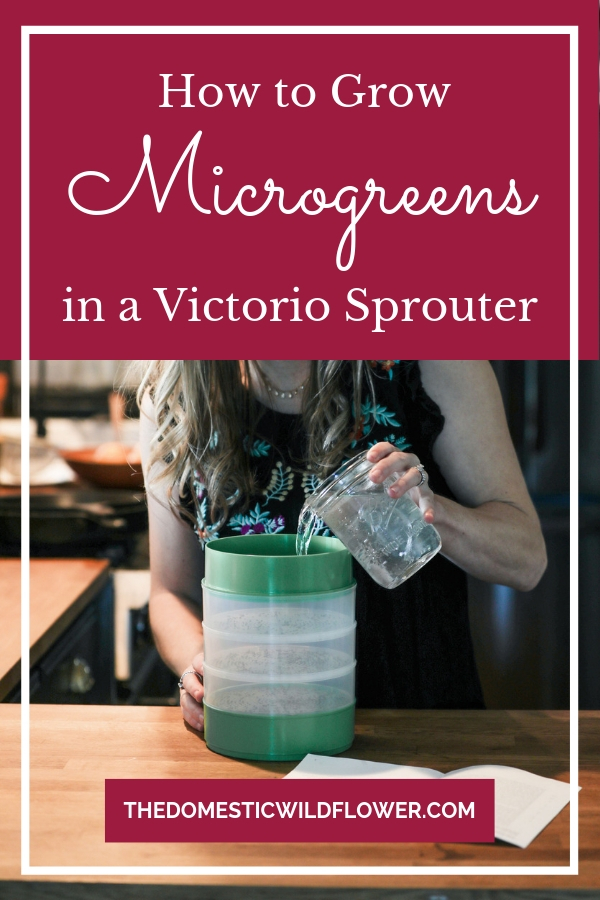
Each tray has little holes that allow water to drip to the tray beneath, creating a self watering system. It’s low tech but super smart. You just pour 2 cups (or just a water class full) into the top green tray morning and night (or just once a day if you’re Forgetful Franny like me) and go about your day.

The bottom green tray collects the water that the seeds aren’t using to turn into sprouts so you don’t have to stand there at the sink waiting for the water to drain out the way you do when you sprout in a mason jar.

You can fill one tray with sprouts, water it, and the next day start another, and the next, start ANOTHER. In that way, you’d have one tray of sprouts ready on Monday, and another tray ready on Tuesday, and so on.

OR you can start ALL of the trays on the same day and have a lot of sprouts ready all at once.

You could get two sets and combine the trays into one tower.

I really like that the trays are see-through so my kids and I can peek in and see the seeds sprouting and I didn’t have to open any lids- it’s completely hands off.

Here’s a video showing how it works.

The set comes with seeds, which were tasty indeed and really handy. If you’re looking to sprout a variety of seeds, I really liked Sustainable Sprouts- their Spicy Mix is one of my favorites.

I’ll be using my Victorio Sprouter to have sprouts ready steadily, one tray at a time, so I can have them on my sandwich today, and tomorrow my husband and I can add them to an omelette.

If you loved this post, sign up to have fresh blog posts delivered right in your inbox!

Filed Under: Cook

Meyer Lemon Champagne Shrub Recipe

March 31, 2019 by Jenny Gomes Leave a Comment

This post will share the recipe for Meyer Lemon Champagne Shrub and the best Moscow Muled Copper Mugs in which to serve it. You’ll learn a little about how easy shrubs are to make and why you need to have this recipe in a mason jar in your fridge all summer long.

Meyer Lemon Champagne Shrub Recipe

This post contains affiliate links.

What the heck is a shrub?

Shrubs were popularized during the Prohibition era when hostesses had no alcohol, little money, a little fruit and sugar, and wanted to create a refreshing drink for guests. You can learn how to create a shrub out of nearly any quantity or type of fruit in my Free Shrub Making Email Course. Sign up and I’ll send you a few simple email lessons right to your inbox.

Shrubs are essentially a sweet tart syrup made from fruit, sweetener and vinegar. They are NO COOK, and are concentrated so you’d only use a tablespoon or two in a glass with sparkling water.

Be sure to read after the recipe to check out my favorite mugs!

Meyer Lemon Champagne Shrub Recipe

3 Meyer lemons, scrubbed clean

1 cup (or 1 gourmet bottle of 6 ounces) champagne vinegar*

1 cup sugar

*if this cannot be sourced, use the lightest tasting vinegar you can find; try a white wine vinegar or a rice wine vinegar but remember the champagne vinegar is really delicious.

Slice lemons and add to the bottom of a wide mouth quart jar or another clean glass jar. Add the sugar and wait 1 hour.

Add the champagne vinegar and stir with a wooden spoon till sugar is mostly dissolved.

Let shrub rest on the countertop for 3 days. Shake or stir daily.

Strain the shrub into a clean jar and store in the refrigerator.

Meyer Lemon Champagne Shrub Recipe

The Best Copper Mugs

Moscow Mules are all the rage and for good reason. They are a refreshing, delicious cocktail served in a completely unique mug. These copper beauties are distinctive, insulative, and beautiful. When Jessica of Moscow Muled taught me about her company’s mugs, I realized how important the quality of the mug really is.

Moscow Muled Copper Mugs are lined with nickel, which I think is a very important distinction. Normally, drinks of all kinds have acid (read my blog post about acid here) which would corrode the copper and thus cause copper to leech into your drink. It also causes the mug to break down over time, making them not as long lasting. Moscow Muled Copper Mugs are lined in food-safe nickel, meaning no copper will leech into your drink and they’ll remain in beautiful shape for years to come. The nickel lining also looks really sharp, I think.

Meyer Lemon Champagne Shrub Recipe

Copper not only conducts electricity, but it’s also an excellent insulator. These copper mugs keep your drink- or dessert- really cold for longer.

To clean these copper mugs, you’d skip the dishwasher. Instead they are best cleaned with a slice of lemon and some sea salt. This will keep them looking their best and prevent pitting of the metal.

The copper mugs will develop a gorgeous patina, as copper does, and you’ll have the nickel lining still shining bright on the inside, protecting you from leeched copper.

Meyer Lemon Champagne Shrub Recipe

Their copper mugs aren’t just for Moscow Mules. They are ideal for parfait-style desserts that depend on dairy remaining really cold to hold their shape.

The Meyer Lemon Champagne Shrub Mocktail

Add 2 tablespoons Meyer Lemon Champagne Shrub to a chilled Moscow Muled Copper Mug. Top with sparkling water (I love this kind because they are a beautiful color, the glass is recyclable, and they stay cold when chilled) and cheers!

If you love this recipe, you will love the Shrubology Ebook. Check it out here!

Shrubology: Refreshing Homemade Fruit and Vinegar Syrups for Cocktails

Filed Under: Cocktails

Homemade Tooth Powder Recipe

February 25, 2019 by Jenny Gomes 2 Comments

This homemade tooth powder recipe is the answer to your natural toothpaste desires. Read on for the homemade tooth powder recipe that’s easy, natural, and healthy!

Homemade Tooth Powder Recipe to naturally clean your teeth!

This post contains affiliate links.

The internet is full of friends, Wildflowers, and I had the pleasure of connecting with Nikki at The Little Farmhouse.

She’s a girl after my own heart; I could tell immediately by her Instagram and her thoughtful, well-written blog posts helping newbies adopt a more healthful life. We are both Laura Ingalls in modern day, basically 🙂

This is Nikki.

When I saw that she made her own homemade tooth powder as a replacement for potentially toxic toothpaste, I asked her to share her recipe for homemade tooth powder with you all. She kindly agreed, and I know you all will enjoy the following recipe.

How To Make Homemade Tooth Powder

I’m Nikki from The Little Farm House, guest posting!

I haven’t used toothpaste in over 9 months! Call me crazy but this tooth powder is magic. When I was switching out my icky filled products in my home I got to my toothpaste, I hit a wall. I wanted something that didn’t contain glycerin, which can prevent remineralization. I found a few brands but they were crazy expensive. I’m all about affordable!

I came across several recipes on Pinterest. I was overwhelmed by all the options you can do! But don’t worry, this recipe is here to help!

I wasn’t sure how this was going to go at first. It took me a few days to get used to it because the texture is of course different from conventional toothpaste. The main difference is it doesn’t foam up like the other toothpaste.  

I can say this tooth powder is life changing.

Over the last 9 months I have noticed my teeth are whiter and less sensitive. My mouth just feels cleaner and stays ‘fresher’ longer. It’s hard to put it into words. I always tell people to just try it to get the full experience!

The base or main ingredient is Bentonite Clay. From there you add baking soda, activated charcoal, cinnamon, turmeric, and essential oils.

Let’s look at each ingredient and their importance.

Homemade Tooth Powder Ingredients & Their Uses

Bentonite Clay– when this clay gets wet it expands and changes its electrical charge to a negative charge. It becomes like a sponge that can absorb toxins and heavy metals. At the same time it replaces what it takes away with healthy, strengthening, and replenishing minerals such as calcium and magnesium. This is awesome for remineralization (aka rebuilding of the tooth)!

Activated Charcoal– is effective in absorbing plaque. Because it has a negative charge and is super porous it binds to toxins and doesn’t let go, which results in whiter teeth.

Cinnamon– is loaded with antioxidants and works  as a highly effective anti-inflammatory agent, so healthy gums! It also has amazing antibacterial, antifungal, an antiviral properties, so no stinky breathe and no cavities!

Turmeric– is another great anti-inflammatory agent that aids in the fight against periodontal disease.

Baking Soda– helps whiten teeth by removing stains. It also contains minerals and is alkaline.

Essential Oils– I (Nikki) use Plant Therapy, DoTERRA, and Young Living. Please do your own research on oils before using them. I like to use peppermint, tea tree, clove, and a protective blend (germ fighter/  OnGuard/ Thieves just depends on what brand you go with).

If  you’ve been excited to try essential oils, this is a great recipe to try them with. The Domestic Wildflower suggests DoTerra.

Supplies for Homemade Tooth Powder

  • 4 Tablespoons of Bentonite Clay
  • 1 teaspoon activated charcoal
  • 1 teaspoon baking soda
  • 1 teaspoon turmeric
  • 1 teaspoon cinnamon
  • 3-5 drops each of the following essential oils: clove, melaluca, OnGuard (protective blend), and peppermint
  • Half pint canning jar

Directions for How to Make Homemade Tooth Powder

  1. Add bentonite clay in the jar.
  2. Then add your other other powder choices (activated charcoal, baking soda, turmeric, and cinnamon) You can do all or one, whatever you would like!
  3. Add the essential oils. I add 3-5 drops a piece. You can pick and choose your oils to suit your tastes and needs.
  4. I normally shake the jar from side to side so the oil drops get covered up. Then I place the cap on and roll and shake it till it looks evenly combined.
  5. To use I always recommend tapping the water off your tooth brush twice before dipping it in the powder and taking a sip of tap water before brushing. If you don’t have enough moisture in your mouth it will get really dry and no one likes that!
  6. Brush as normal.
  7. This little jar lasts me 3-4 months if not longer.

Pro Tip: Once you have the powder made up you can keep it in powder form or to turn it into a paste by adding some filtered water or coconut oil to it. I recommend doing this for the kiddos because accidents tend to happen and you don’t want to try to clean up the fine powder!

Here’s the wooden toothbrush that I love (that my sister always makes fun of me for haha!) to accompany your tooth powder.  It’s totally compostable and a great value.

If you would like to learn more about other affordable DIY swaps, raising cattle, farm field work, gardening, preserving, and fantastic food ideas you can head over to https://thelittlefarmhouse95.blogspot.com/. If you choose to subscribe be sure to check your junk folder for the confirmation email.

Happy trails my friends!

Thanks so much to Nikki for this post! I am excited to hear how you all like it! 


Filed Under: Living

8 Unexpected Uses For Maple Syrup

January 14, 2019 by Jenny Gomes Leave a Comment

Name one cooking trend that everyone has shared in over the past few years? Of course, we’d probably all have a different answer, but given a list, many of us might name pumpkin spice. However, one thing is set to supplant that trend, and it’s maple madness. This post shares 8 unexpected uses for maple syrup, 2 excellent canning recipes that use maple syrup, an explanation of the rating scale of maple syrup, and more. Read on for more maple syrup uses!

8 Unexpected Uses For Maple Syrup

This post may contain affiliate links.

Part of the reason for this is, of course, the move to healthy cooking. People want to eat more whole foods that are really–not processed—and that might help them add the necessary minerals and vitamins to their daily eating routine. And of course, when they’re cooking they want it to taste good, too. And they’re looking for alternatives to processed additives such as sugar that may wreak havoc on our bodies.

Before you dive full-fledged into a maple syrup tasting routine, it’s helpful to know the different types and grades, and their potential uses. This graphic from www.zerocater.com helps to explain it all.

Here Comes Maple Madness (See Ya, Pumpkin Spice)

Maple Syrup Shopping List

Maple Syrup

  • This is a great, everyday option HERE
  • For gifts (hostess, Valentine’s Day breakfast, etc) THIS looks amazing
  • A family sized jug of high quality, Canadian syrup

Wheat Crackers

  • The classic
  • The healthy version

Polenta

Bacon

Coffee

Recipes That Use Maple Syrup

My favorite recipe that uses maple syrup is Maple Whiskey Peaches.  These peaches are dreamy on top of a cheesecake or your morning yogurt.

Another best-loved Domestic Wildflower maple-y recipe that you will love is the Applesauce Recipe. There are no-sugar versions friendly for tiny kids, and the addition of maple syrup adds such a great flavor; you’ll dig it.

Apples for applesauce and apple butter- kid pleasers and easy to can!

Want to try these canning recipes but aren’t sure how to can? Join my free canning basics course! You’ll learn about the equipment you need (way fewer items that you think!), the process (easy peasy!), and safety (always first!).

8 Unexpected Uses For Maple Syrup

Sign up for the Free Canning Basics Course here!

Filed Under: Cook

10 Canning & Freezer Meal Recipes to Win at Meal Planning

January 9, 2019 by Jenny Gomes Leave a Comment

Get meals under control with  STEP BY STEP instruction recipe booklet with crystal clear snacks, homemade pantry staples, and freezer meal recipes perfect for beginners that will please the whole family!

10 Canning & Freezer Meal Recipes to Win at Meal Planning

This post contains affiliate links.

5 Canning Recipes & 5 Freezer Meal Recipes to Win at Meal Planning

If you follow a keto diet or a low carb diet, preserving low carb veggies is technique that can help you access minimally processed vegetables when they are out of season or when you are simply not able to run to the store. This post shares 4 of the best kept and low carb canning recipes for beginners!

What always overwhelmed me about meal planning was it was so much planning. Don’t laugh because I’m totally serious. I love canning because it allows me to stock my pantry with ready-cooked ingredients for cooking and snacks for me and the kids. And, it’s inherently NOT-planning. The recipes that I compiled with my good friend Elisa of www.mealplanningblueprints.com  are a combination of snacks, homemade pantry staples, and freezer meals so you have a little bit of planning, a little bit of flexibility, and none of the what’s-for-supper madness.

10 Canning & Freezer Meal Recipes to Win at Meal Planning
Elisa of www.mealplanningblueprints.com and I met after being online friends for about a year at a blog conference. We both showed up wearing florals and had such a blast together!

With this booklet, you’ll master:

Best Berry Jam
Tomato Sauce
Strawberry Kiwi Lemonade Concentrate
Apple Butter
Carrot Pickles
French Dip Sandwiches
Apricot BBQ Wings
Chicken Tortilla Soup
Loaded Potato Soup
Man-Pleasing Chicken
Meal planning + jar planning = time freedom and meal flexibility!


5 Canning Recipes & 5 Freezer Meal Recipes to Win at Meal Planning (Recipe Ebook)


Having fully cooked staples like tomato sauce and apple butter on the pantry shelf and full meals in the freezer like loaded potato soup and french dip sandwiches mean no more impatient “What’s for dinner??” and instead you’ll be hearing, “Yum!” and, “More, please!”

Downloadable and printable, as well as easily viewed on your mobile phone, this recipe booklet will guide you from meal planning overload to confident and cool mealtimes.

I truly think it’s a no-overwhelm collection of recipes that will help you get rolling with meal planning and canning in a low-key way (low key is the name of the game, right?!)

Get the 10 Canning & Freezer Meal Recipes here!

Worried about the canning portion? Don’t be! I teach beginners all the time in my Free Canning Basics Course!

You can sign up to learn easy-peasy canning right here-

Filed Under: Can, Cook

  • « Go to Previous Page
  • Page 1
  • Interim pages omitted …
  • Page 21
  • Page 22
  • Page 23
  • Page 24
  • Page 25
  • Interim pages omitted …
  • Page 66
  • Go to Next Page »

Primary Sidebar

Categories

Follow me here, there, & everywhere!

  • Email
  • Facebook
  • Instagram
  • Pinterest
  • RSS
  • Twitter
  • YouTube

Search

Get The Pressure Canning Cookbook

Get 10 Free Recipes Now!

Best Chicken Coop

Footer

Get Started Pressure Canning

Shrubology Ebook

Shrubology: Refreshing Homemade Fruit and Vinegar Syrups for Cocktails
Make easy, no-cook fruit & vinegar syrups for cocktails & mocktails! This ebook shares crowd pleasing recipes and simple to understand ratios so you can make a shrub on your countertop any time- without a recipe. Dive into these Prohibition Era drinks today!

Copyright

Copyright 2019
The Domestic Wildflower
www.thedomesticwildflower.com.
All content created by Jennifer Gomes unless otherwise noted.

Copyright © 2025 · Lifestyle Pro on Genesis Framework · WordPress · Log in