• Skip to secondary menu
  • Skip to main content
  • Skip to primary sidebar
  • Skip to footer
  • The Pressure Canning Cookbook
  • Blog
    • Subscribe
    • Welcome!
  • Perfectly Preserved Podcast
  • About
    • ADW Manifesto
    • Work With Me
      • Read
  • Shop
    • My Account
    • Cart
    • Checkout

The Domestic Wildflower

Handmade Food & Craft Tutorials for Beginners

  • Courses
    • Free Canning Basics
    • Everything Canning Course
    • Steam Canning Workshop
    • Free Homemade Cocktail Mixers
    • Wildflower Mixology
    • Crochet Basket Workshop
  • Can & Preserve
    • Never Canned?
    • Steam Canner Equipment Bundle
    • Shrubs Course
  • Sew
  • Cook
  • Craft
    • Crochet Step-by-Step Guides
      • Crochet Basket
      • Giant Yarn Throw
      • Thick & Thin Throw
  • Living
    • Creativity Challenge
    • Clean
    • Kids
  • Rentals

Can

Keto Preserving: 4 of the Best Recipes for Beginners

January 15, 2018 by Jenny Gomes 2 Comments

Keto Preserving: 4 of the Best Recipes for Beginners: If you follow a keto diet or a low carb diet, preserving low carb veggies is a technique that can help you access minimally processed vegetables when they are out of season or when you are simply not able to run to the store. This post will share 4 of the best keto preserving recipes for beginners plus a great keto meal planning tool that will save you a ton of time. 

If you follow a keto diet or a low carb diet, preserving low carb veggies is technique that can help you access minimally processed vegetables when they are out of season or when you are simply not able to run to the store. This post shares 4 of the best keto and low carb preserving recipes for beginners!

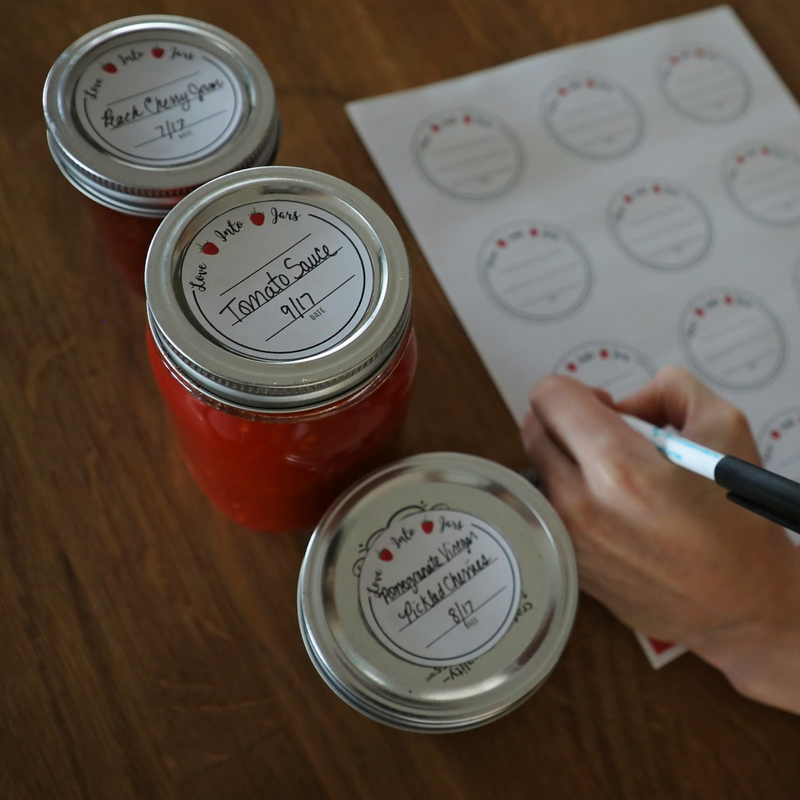
Canning is a simple way of preserving food in BPA-free glass jars so they are shelf-stable for a year or longer. You might think of canning as a way of making jam and jelly, and it is, but reimagine it instead as a method to help you attain your low carb diet goals.

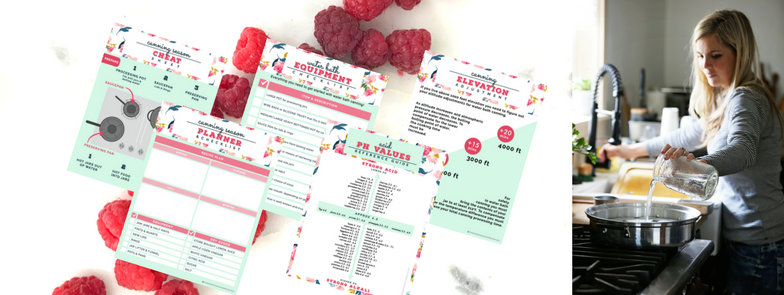
Once you can some or all the following recipes, you can use my friend Elisa’s Keto Meal Planning Resource to use theme nights to plan out a whole week -or more!- of keto meals- and use these keto friendly canning recipes as ingredients. It’s a genius pairing, really.

Canning in a modern home is fast and fun. If you haven’t tried it, you can take my quick, FREE Canning Basics Course to teach you how to preserve these recipes (and any canning recipe!) in jars. You can sign up right here!

Let’s get you excited about keto preserving with these beginner-friendly recipes!

Keto Preserving

If you follow a keto diet or a low carb diet, preserving low carb veggies is technique that can help you access minimally processed vegetables when they are out of season or when you are simply not able to run to the store. This post shares 4 of the best keto and low carb preserving recipes for beginners!

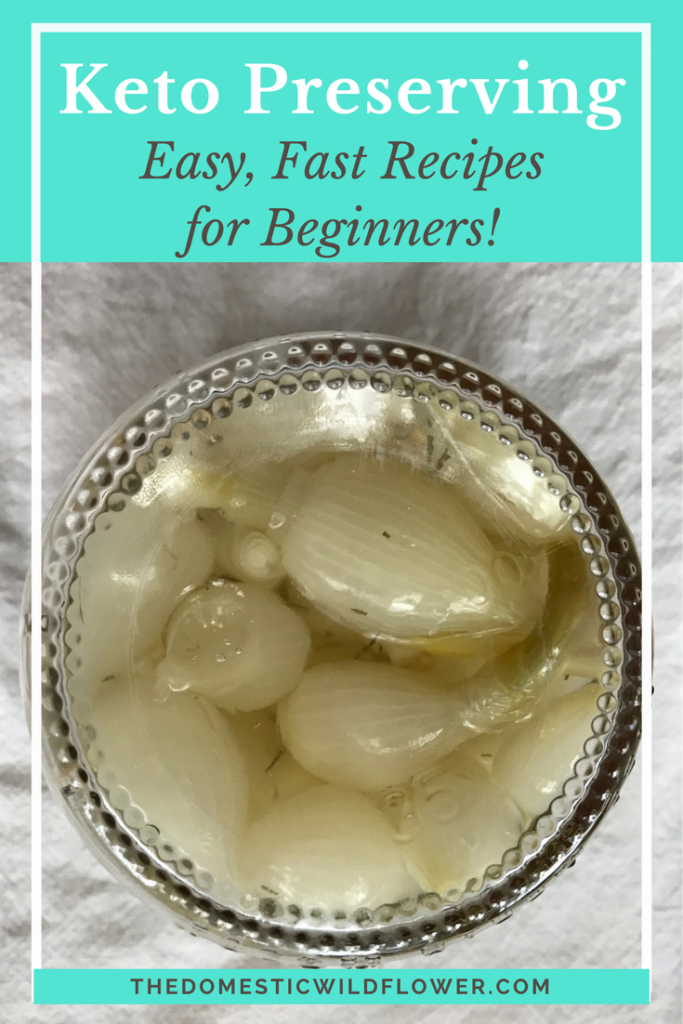
Pickled pearl onions are delicious on a pile of shredded beef topped with melted cheese, skewered on a toothpick garnishing a cocktail, or straight out of the jar. Grab the recipe here!

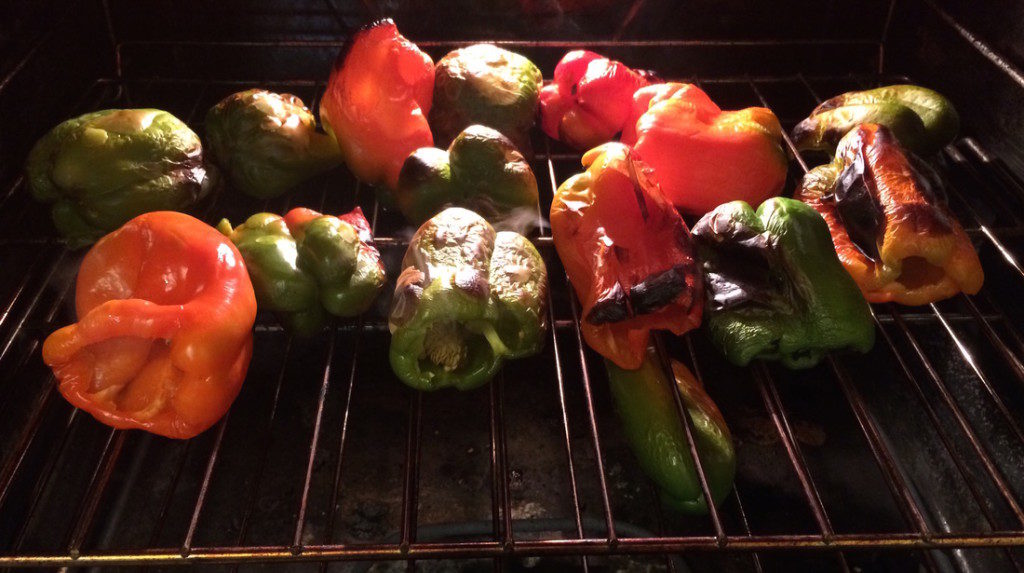
Roasted bell peppers are versatile in Mediterranean or Mexican dishes, and are right at home mixed with white or red meat. They add a ton of flavor to any dish- especially in the dead of winter when delicious veggies are harder to find. Get the recipe right here!

If you follow a keto diet or a low carb diet, preserving low carb veggies is technique that can help you access minimally processed vegetables when they are out of season or when you are simply not able to run to the store. This post shares 4 of the best kept and low carb canning recipes for beginners!

Pickled carrots are a super simple preserve that satisfies the craving for a salty snack. Where you used to grab a bag of chips, now you’ll grab a jar of pickled carrots. Aside from snacking straight out of the jar, they are great adding color and flavor to salads. Read the easy recipe now!

Keep reading for more keto preserving goodness!

If you follow a keto diet or a low carb diet, preserving low carb veggies is technique that can help you access minimally processed vegetables when they are out of season or when you are simply not able to run to the store. This post shares 4 of the best kept and low carb canning recipes for beginners!

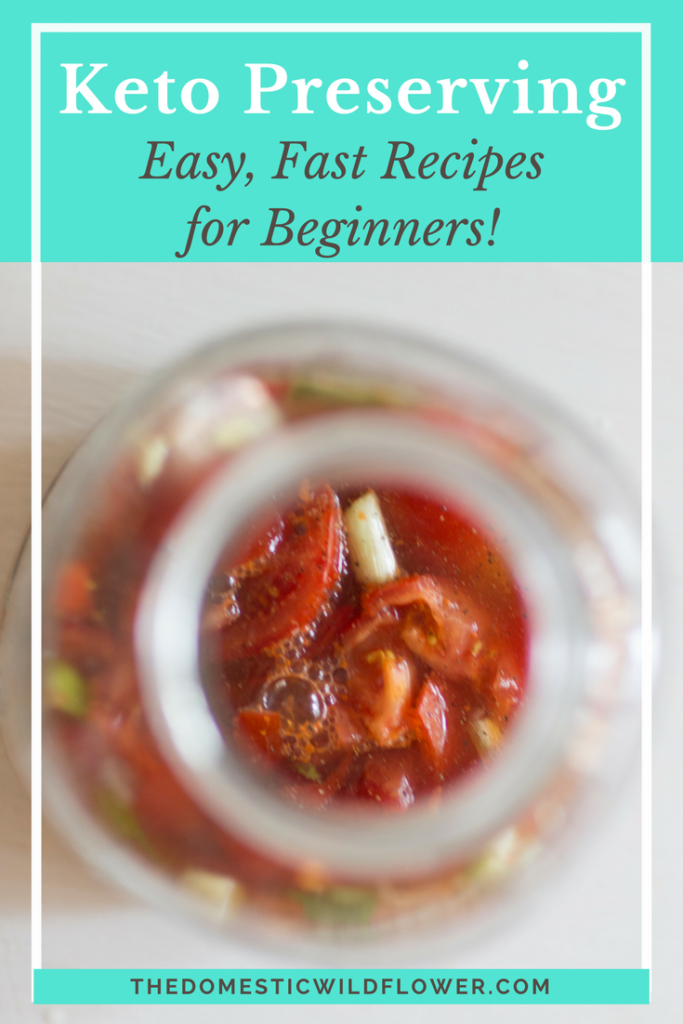
I always tell people if I had to can one recipe for the rest of my life, it would be this sugar-free tomato sauce recipe. As a busy mom, I NEED a sauce that still counts as a wholesome vegetable that can be used as a blank slate for whatever I’m cooking for supper. It tastes like summer, is rich and flavorful, and I can use it for any number of recipes. Head to the best tomato sauce recipe right here, my friends!

If you follow a keto diet or a low carb diet, preserving low carb veggies is technique that can help you access minimally processed vegetables when they are out of season or when you are simply not able to run to the store. This post shares 4 of the best kept and low carb canning recipes for beginners!

If you have read this far and are thinking that canning seemed really hard and complicated when Grandma did it, I assure you that adopting a diet like Keto or Paleo is far more complex. Canning is easy! If you would like simple, step by step canning lessons, sign up for my FREE Canning Basics Course!

Canning Essentials Workbook Keto Preserving

Keto Meal Planning

If you came to this post and are still hungry for more keto resources, I have an awesome resource to share with you. My friend Elisa is a meal planning wizard (and by wizard I mean she makes meal planning FUN and EASY even for a Type B person like me!) and she’s created the Simple Keto Meal Planning Guide where you use theme nights (think One-Pot Wednesdays, Slow Saturday, Mexican Monday, etc) to meal plan. The guide is under $10, and it allows you to plug in keto recipes that match! It’s a genius! Here’s how it works!

Check It Out!

Filed Under: Can

Best Home Canning Equipment for an Experienced Canner

November 8, 2017 by Jenny Gomes Leave a Comment

This gift guide will list the items perfect for the canning enthusiast who has canned a season or two and has the basic gear already. These tools will help them can better, faster, and will take their canning to a whole new level. Read on for the complete list of canning gear for an intermediate canner!

The Best Canning Equipment for an Experienced Canner | This lists all the canning supplies for a canner who has a season or two under their belt and shares the tools that make their hobby more fun...gift one of these items and I bet they will share a jar with you!

This post contains affiliate links. That means that if you click through a link and make a purchase, I get a teeny tiny commission that doesn’t affect your purchase price at all. It’s a great way to support your favorite canning blogger. 

If you are looking for gear that’s best for a beginner, check out my beginner’s home canning equipment guide here! 

First up is the best food mill around. This food mill processes cooked foods and removes skins, seeds, peels, cores, and makes a super smooth sauce in one step. There’s no motor that will fail, or no junky plastic parts that will fail in a year or two; this is a well made, easy to clean tool that will last years and years.

Next in the list of Best Home Canning Equipment for an Experienced Canner is the beautiful preserving pan by Kilner. This is a pan for cooking jam, jellies, and more. It is heavy bottomed, and basically perfect for making preserves. It would last a lifetime, prevent jam from begin scorched, and allow it too cook low and slow, and thicken perfectly.

These jars may look “French Countryside” even though they are German in origin. An experienced canner would love to try their hand at canning with these Weck jars. They are a little different than standard Ball jars- the lid has a removable rubber flange and there’s no satisfying “pop” sound like when canning Ball lids & jars, but they work with the same processes and same recipes. They are beautiful and chic, to boot.

They come in these many other shapes as well, which is so fun:

Next up in Best Home Canning Equipment for an Experienced Canner is the newest development in the canning world, the Steam Canner. These pots were approved for use by the USDA in 2015 and they make canning SO MUCH FASTER. They work exactly the same way as regular canning but they heat up much less water, so they are ready to go in 5 minutes instead of 30. If I could give every canner ONE gift, it would be one of these. I NEVER pull out my regular water bath canning pot anymore because they work so well and save so much time.

You don’t have to worry; they are NOT hard to use, and they aren’t at all like a pressure canner. I wrote a blog post about them here called 29 Reasons You Should be Using a Steam Canner and there’s another great post I wrote called Steam Canning for Beginners.

Once a canner has canned a few seasons, they know that it would be really nice to keep track of which recipes they loved, which they didn’t, how many jars each recipe yielded, etc. I have a free Canning Log that’s beautiful and printable, and you can print it off right here to give to the canner in your life!

A steamer juicer is a contraption that your grandma probably used for canning grape juice. They are a really useful device and can be used for juicing elderberries, grapes, currants, and more. This one is the same brand as the steam canner that I love so I’d suspect it would be the very same high quality. I’m still steaming in my grandma’s steamer but if I had to ask Santa for one, this is the one I’d love:

This item is a lower price point, but if you had to can many pounds of cherries, you’d probably pay 10 times whatever a pitter cost to have it. A cherry pitter can save so much time and make the job of canning one of the most delicious fruit so much more fun. This kind is hand held, in the same brand as the food mill I’ve had and used for several years.

This cherry pitter is by Norpro, which is another brand I trust, and it suctions to the tabletop. I have the very similar model, that I got at a yard sale, but mine screws to the table ledge, and has scratched it more than once. I have not used this suction one but I bet it would work perfectly AND it wouldn’t damage your countertop. I like this style of model because it is really nice to have several cherries in the hopper so you can just bang-bang-bang pit them and then grab another handful.

This little strawberry huller is a great stocking stuffer if your canner preserves a lot of strawberries. This little guy does his one little job very, very well and if faced with a mountain of berries to preserve, the canner in your life would thank you.

This ladle is called a “strainer ladle” and they are wonderful for canners because they allow you to control how much liquid and how much solid (salsa+ tomato juice, for example) ends up in each jar that gets filled. It’s under $20 and I love mine.

This little jar is only 4 ounces, which means it’s perfect for the canner in you life to fill with hot sauce, chocolate cherry jam, or any other perfectly gift-able preserve and give as gifts.

And for the canning enthusiast, they need these super cute canning tee shirts.

Cutest canning shirt! From Love Into Jars!

As any experience canner knows, Canic is the fear brought on by having tons of quickly ripening produce, but not enough time to can it all. It’s a very real thing, and the canner in your life needs this shirt.

Cutest canning enthusiast shirt! Chance from Love Into Jars!


Many canners have little Berry Picker helpers- these shirts are awesome for those littlest helpers whose motto usually is, “one for the basket, two for me.”

Cutest little berry picker tee shirt! For canning lovers from Love Into Jars!

I hope this guide to the best home canning equipment for an experienced canner was helpful! Remember, if you have a canner in your life that’s just getting started, or is “canning curious” check out this guide for The Best Home Canning Equipment for a Beginner !

Best Home Canning Equipment For A Beginner


Filed Under: Can

Best Home Canning Equipment For A Beginner

November 5, 2017 by Jenny Gomes 2 Comments

Have a beginning canner you are shopping for? Want to get the best canning supplies for the beginning canner in your life? This post will share exactly the Best Home Canning Equipment For A Beginner, even if they are just canning curious and want to to start canning, or if they have canned a few times before. Read on for the complete list of canning supplies for a beginner!

The Best Canning Equipment for a Beginner - Get this must have home canning kit list for beginners if you are shopping for gifts or for yourself, this lists the gear you need, and tells you how to skip that giant pot!


This post contains affiliate links. That means I get a teeny, tiny commission if you click through and make a purchase and your purchase price isn’t affected at all. It’s a great way to support your favorite canning blogger.  

The first item that everyone thinks of when they think of canning is the big, speckled canning pot. My favorite tips for beginners is that they DON’T need that pot! What?! That’s right. You don’t need it.

Here’s what you need instead. You need a regular stockpot, or a pot that’s 3 inches taller than the tallest jar you plan to can. A pot that you could boil artichokes in is probably large enough. Think this type:

You don’t need the lid. Yeah, it’s helpful if you have it but it’s not absolutely necessary. THEN, you need this gem:

 This is a silicone trivet, and they sit in the bottom of the regular stockpot and prevent the mason jars from rattling around and breaking. They are useful as a regular trivet, inexpensive, collapse for storage, and once I got one, I NEVER pulled the giant speckled canning pot out again.

The canning jars that are best for a beginning canner are wide mouth pint canning jars. You want to get wide mouth canning jars because they are easy to clean, the most versatile size for the widest number of recipes, double as drinking classes, and you can freeze in them.

The next size that’s great for beginners is the wide mouth half pint. This size jar holds one measuring cup, so it’s just right for jam, applesauce, and for gifting the fruits of the canner’s labor.

Best Home Canning Equipment For A Beginner Continued: If the canner in your life has jars already , or maybe has canned a time or two, you should DEFINITELY get them several boxes of NEW lids. Lids can only be used ONE time through the canning process so a canner goes through them fairly quickly. They are a great gift item that a canner will always use in the same way a cooking enthusiast would always love a great bottle of olive oil. Here are the wide mouth lids that fit the jars above.

A beginning canner needs a set of tools that are usually sold together called a canning utensil kit.

Here’s my pro tip: That little wand that has a magnet at the end is called a lid lifter. They are used to lift lids out of simmering water before putting them on jars. If you’ve not canned much, or even if you’ve canned a lot, you might think that because that thing is sold in the kit, you need it, right? Wrong. You actually do NOT need to have that lid lifter and I wrote a blog post about why here but the short reason is that the lids haven’t had to be simmered since the 1960’s.

You NEED the tongs (called a jar lifter) and the funnel and you can get them separately through those links if you don’t want to purchase the kit, though I bet the kit is cheaper.

The Best Home Canning Equipment For A Beginner list is nearly finished- download the checklist here to be sure you got everything you need!

The Best Canning Equipment for a Beginner - Get this must have home canning kit list for beginners if you are shopping for gifts or for yourself, this lists the gear you need, and tells you how to skip that giant pot!

And finally, if you or someone dear to you wants to learn how to can, I cannot recommend enough that they join the Start Canning Course. This premium video course teaches STEP BY STEP exactly what to do when!

In Start Canning

I teach how to can:

  • Strawberry Jam
  • Strawberry Rhubarb Jam
  • Strawberry Syrup and Strawberry Butter
  • Tomato Sauce
  • Roasted Bell Peppers

Plus once you know how to make the basics, you can take your newfound skills and use them with different types of fruit and vegetables. It’s like having an entire farmer’s market on your pantry shelf!

Click here to learn more about Start Canning!

Best Home Canning Equipment For A Beginner Join the Start Canning Course to learn how to preserve healthy, homemade food in jars!

And for the canning enthusiast, they need these super cute canning tee shirts.

Cutest canning shirt! From Love Into Jars!

And once a canner starts canning, it’s not long before they experience Canic- the fear brought on by having tons of quickly ripening produce, but not enough time to can it all. It’s a very real thing, and the canner in your life needs this shirt.

Cutest canning enthusiast shirt! Chance from Love Into Jars!


Many canners have little Berry Picker helpers- these shirts are awesome for those littlest helpers whose motto usually is, “one for the basket, two for me.”

Cutest little berry picker tee shirt! For canning lovers from Love Into Jars!

I hope this Beginner’s guide to home canning equipment was helpful! Best Home Canning Equipment For A Beginner shouldn’t feel daunting- there’s really not a lot you need to start preserving healthy, homemade food in jars!

Best Home Canning Equipment For A Beginner

Filed Under: Can

Canning Pumpkin

October 15, 2017 by Jenny Gomes 2 Comments

I’m a big fan of doing things at home, making food for yourself, and generally believe homemade is best. You can read my manifesto for more on the purpose behind this blog and truly, I love helping my Wildflower readers learn how to make things for themselves.  There’s a few situations where you cannot make something at home and one of those is canned pumpkin puree.

Canning Pumpkin | This post explains why canning pumpkin is not safe and why old cookbooks said you could. Great info in this post!

This subject undoubtedly will bring about cries from readers who will say truthfully that they themselves, their mother, grandmother, and great grandmother have been canning pumpkin puree for years and no one has ever gotten sick.

To them I will say that I am truly happy that they’ve never gotten botulism. That would be a real bummer to have diarrhea for a week, or worse, if you were elderly or had a compromised immune system.

One of my favorite college professors specialized in food, culture, and literature. She had red hair and wore fabulous clothing and taught poetry, among other things. She taught me a lot about how strongly people feel about their food and the love that goes into preparing it. I showed up to every single one of her classes at 8 am on Friday mornings in Taylor Hall of Chico State, even though Thursday nights were a very fun night indeed and I would have much rather slept in because she was such a great teacher. She shared example after example of how we eat what we eat, because of our mothers, because of our geography, and because of our husbands. It all made perfect sense to me, and her early morning lessons really ring true now that I’m blogging about canning.

I had a follower on social media recently reference the 1973 edition of the Better Homes and Gardens Canning Cookbook when she stated that she was following the directions therein to can pumpkin puree. I’m sure that book had great directions for doing so…44 years ago. I too love reading old cookbooks for inspiration and using recipes that my great grandma used- those old recipes make me feel genuinely connected to the women in my family and the recipes are usually dang good!

But here’s the problem. Canning science has improved in the last 44 years, and the latest recommendations by the USDA are that you CANNOT can pumpkin puree.

I could not, in good conscience, suggest to any reader, that they can pumpkin puree based on that science.

Pumpkin is a low acid vegetable. It is also very dense. Even in a pressure canner, which gets over 220 degrees, it is too dense for the heat to reliably penetrate the puree to kill any potential botulism spores.

Don’t worry, new canners; there are VERY FEW items that you cannot preserve in a home canning setup and this is one of them. Truly, very few. And, just like when you bake bread, you don’t have to understand why or how the bread rises. You DO have to follow the directions in order for it to work. Canning is the same. You just have to follow the directions.

All foods have an acid value, which I explain in detail in this blog post, but you can download this free acid & canning chart which lists the pH of all the foods you might can for reference. It will show you that lemons have an acid level of a 2 (high acid!) and tangerines are significantly, and somewhat surprisingly less acid 4. It will list all the low acid veggies, like pumpkin too. Download it here!

You may, according to the USDA, can in a pressure canner cubed pumpkin, but I would consider this to be an intermediate canning activity. No freshmen allowed 😉

Cubed is required because a trusted recipe source (the USDA for example) TESTED the size of the cubes (1 inch by 1 inch) and measured the heat inside those little cubes to be sure that it was hot enough inside to kill the spoilers that would make you sick.

It is for this reason that you cannot ever can spaghetti squash at all– it won’t hold a cube shape and becomes a mushy mass that the heat, again, can’t reliably penetrate. And, doesn’t that sound super unappetizing? I love canning, but canning is NOT the only way to preserve food and given that squash comes naturally in a shell that protects it quite well from the elements, I’d suggest storing in a cellar far before tackling preserving it in jars. 

Cubed winter squash must be peeled first, which seems like a colossal chore to me personally, but it can be done.

So, what should you do if pumpkin is your favorite fall flavor and you want to preserve it?

It can be frozen, and I’d recommend these wide mouth pint jars for freezing.

Those jars have a freezer safe line right on them, are easy to clean by hand or in the dishwasher, and are my favorite for canning.

You can read this page on the USDA site for more detailed, and tested by science specifics on exactly what you can and cannot do with pumpkin.

To be clear, “puree” also refers to pumpkin butter, pumpkin pie filling, mash, mush, or anything that’s not a 1×1 inch chunk. No pumpkin baby food, no smooth pumpkin of any kind. No can do- pun definitely intended 😉

Canning pumpkin is not safe.

If this post was interesting to you, I’d highly recommend you download the Acid & Canning Chart– it lists the pH values for all the foods you might consider putting into jars, include cocoa, persimmons, tuna, and more. I’ll let you download it to see where those yummy items fall on the scale 🙂

If you are feeling too beginner for an acid chart, I have a completely free Canning Basics Course that I’d love you to join. Teaching beginners is my absolute favorite and you’ll learn how to get started making jam, pickles, applesauce and more. It’s easy, fun and free! Join here!

Enroll Now!

Canning Pumpkin | This post explains why canning pumpkin is not safe and why old cookbooks said you could. Great info in this post!

These are the new shirts for the new sister site, www.loveintojars.com where my new book, Love Into Jars and related party is being held. Grab a shirt here! http://loveintojars.com/shop/

SaveSave

SaveSave

SaveSave

Filed Under: Can

Applesauce Canning Recipe

September 23, 2017 by Jenny Gomes 14 Comments

This post will share an easy homemade applesauce recipe that you can preserve in jars with the traditional water bath instructions OR the steam canning directions. I’ll also share my favorite jars for lunch box size portions of this healthy snack!

This is the best easy applesauce recipe ever. This girl cans it in little convenience sized jars that are perfect for lunch boxes- genius! What a time saver! And applesauce is so healthy and delicious. Totally making this.

This post contains affiliate links. That means that if you click on a link and make a purchase, I get a tiny commission. That link doesn’t affect your purchase price at all, and I wouldn’t link to products that I wouldn’t recommend to my best friends. Click through and get those tiny jars I recommend; you’ll love them!

My daughter started kindergarten this year and about six months ago she had a terrible bout of dental cavities that meant that 1) she got her father’s teeth (I have ZERO cavities) and 2) I began my process to find foods that were not the normal highly processed lunch box fare like Goldfish crackers and graham crackers. Those fine flours stick in the crevices of little teeth and cause more carries so those items are never making it into my shopping cart, not even in a rush or special occasion.

Homemade applesauce is something that is easy to make, fast (only 10 minutes in the canning process and there’s an easy trick to skipping peeling and coring I’ll explain in a moment) and you can skip the sugar entirely especially if you have sweet apples on hand.

This is the best easy applesauce recipe ever. This girl cans it in little convenience sized jars that are perfect for lunch boxes- genius! What a time saver! And applesauce is so healthy and delicious. Totally making this.

Everyone always asks at this part of my applesauce story if the jar is hard to open for a kindergardener. The answer is that I crack the seal the night before when I put her lunch together, screw the ring back on, and put it in her backpack. She’s had no trouble– but she has had to ask for help opening her string cheese, tying her shoe, and remembering her jacket. The jars are easy 🙂

It bears mentioning that canning jar glass is really sturdy, free from BPA, and the small jars especially tend to hold up really well.  The only jars I ever break are the big ones 🙂

Download the PDF of the applesauce recipe with steam canning AND water bath directions for free here!

Gather your canning equipment, if you plan to can it (I promise its such a quick step) and you can grab my canning equipment checklists right here!

Jars that are perfect for applesauce: 

Okay, so my mother would have never canned these tiny jars because in her mind, it might have taken longer. I’m not my mother 😉 This step of canning in smaller jars saves me SO much time when I’m really rushed packing lunch that it is TOTALLY worth it.

I canned in these half-pint jars, which are 8 ounces, and my kindergartener can eat one easily if she’s hungry.

I also canned in these little 4 ounce jars which I love for when I have a variety of things in the lunchbox and the applesauce isn’t a main part of the meal.

Here’s how you skip peeling and coring the apples. Chop them, remove worms or bad spots, and cook until soft as the directions explain. Use this food mill (my all time favorite tool) to puree them. The mill keeps the skins and seeds and cores up top in the hopper and the sauce just falls through in minutes below. They are super easy to use and clean and are a fun way to include kids in the process. I love love love the food mill.

Here’s how to make healthy homemade applesauce

You will need 
8 cups apples, washed and chopped, stems, cores, and seeds may remain
water to cover- at least 8 cups
1 cup sugar
2 tablespoons real maple syrup
2 teaspoons vanilla
1 teaspoon cinnamon
**for baby food, omit all but apples and water and use 4-ounce jelly jars.

1. Prepare your water bath canning pot or your steam canner. Fill the water bath canning pot with water, add 8 half pints (1 measuring cup total) jars, and bring to a boil OR fill the steam canner to fill line and turn on low with 10-11 pint jars nearby on a towel-covered countertop.

2. Combine apples and water and simmer together in a preserving pan (a heavy-bottomed, wide pan) and stir occasionally for 30 minutes or until apples are very soft.

3. Puree: Remove from heat and ladle into a food mill. OR apples could be peeled and cored prior, and mashed with a potato masher.

4. Return apples to a boil, add sugar, maple syrup, vanilla, and cinnamon.
Cook for 5 minutes.

5. Ladle into jars one at a time, apply lids and rings, and either submerge into the boiling water of the boiling water bath with a jar lifter  OR set gently on the rack of the steam canner.

6. Process for 10 minutes PLUS 5 minutes for every 1000 ft above sea level. Remove from heat, rest jars carefully on a towel-covered countertop. Label cooled jars and store for up to 1 year.

Yields about 10 cups of applesauce.

Download the free recipe PDF here!

This little recipe has been so valuable- now, I have a healthy, homemade go-to for lunches that won’t get stuck in her teeth and cause dreaded cavities.

I wrote a blog post last week about the 5 Recipes Perfect for Kids and I think you’ll love it.

Head over to read it, or grab the 5 Recipes PDF here!

This is the best easy applesauce recipe ever. This girl cans it in little convenience sized jars that are perfect for lunch boxes- genius! What a time saver! And applesauce is so healthy and delicious. Totally making this.

SaveSave

SaveSaveSaveSave

Filed Under: Can

  • « Go to Previous Page
  • Page 1
  • Interim pages omitted …
  • Page 9
  • Page 10
  • Page 11
  • Page 12
  • Page 13
  • Interim pages omitted …
  • Page 21
  • Go to Next Page »

Primary Sidebar

Categories

Follow me here, there, & everywhere!

  • Email
  • Facebook
  • Instagram
  • Pinterest
  • RSS
  • Twitter
  • YouTube

Search

Get The Pressure Canning Cookbook

Get 10 Free Recipes Now!

Best Chicken Coop

Footer

Get Started Pressure Canning

Shrubology Ebook

Shrubology: Refreshing Homemade Fruit and Vinegar Syrups for Cocktails
Make easy, no-cook fruit & vinegar syrups for cocktails & mocktails! This ebook shares crowd pleasing recipes and simple to understand ratios so you can make a shrub on your countertop any time- without a recipe. Dive into these Prohibition Era drinks today!

Copyright

Copyright 2019
The Domestic Wildflower
www.thedomesticwildflower.com.
All content created by Jennifer Gomes unless otherwise noted.

Copyright © 2025 · Lifestyle Pro on Genesis Framework · WordPress · Log in