This post will show you step by step how to can peaches in a vanilla syrup with a splash of whiskey. The resulting preserve can be eaten out of the jar plain, are perfect on top of a cheesecake, waffles, or ice cream, or are a flavorful alternative to plain ol’ peaches in a pie or crisp. Read on for the tutorial!
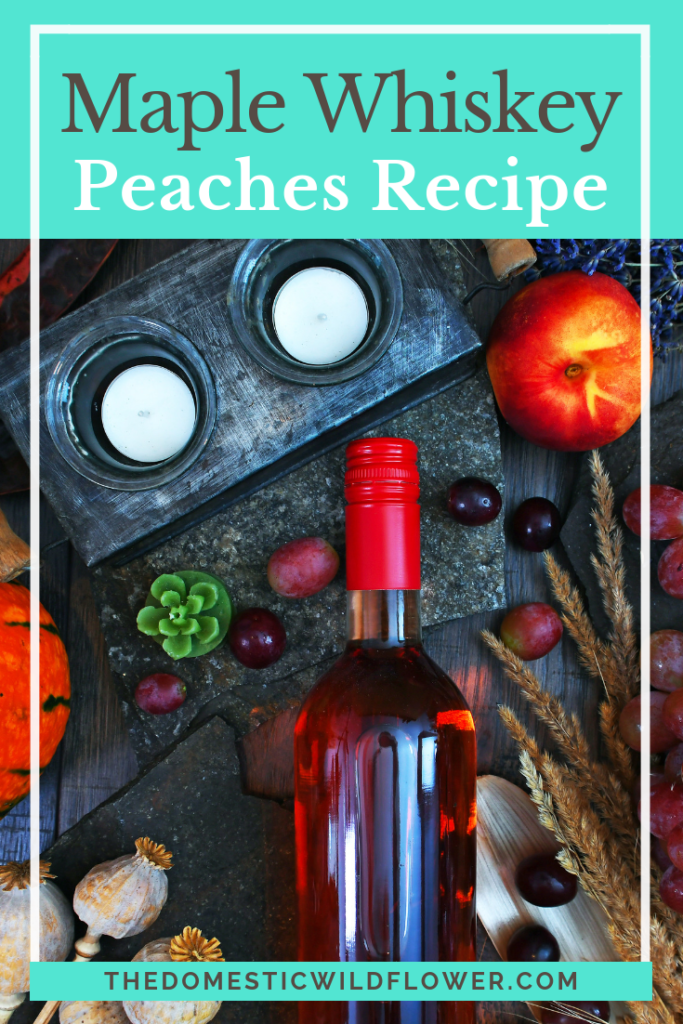
This recipe is based off one my grandmother tore out of the Sacramento Bee for me several years ago. I’ve changed a few things and added complete canning instructions, but this recipe was one of the first I tried where I canned with booze and I’m forever grateful to both my Gram and the good ol’ SacBee. It is so, so good.
The alcohol mostly if not entirely cooks off so you can feel safe feeding this preserve to those who are children or who abstain from alcohol. I’m actually very sensitive to approximately 10,000 migraine triggers and alcohol is one of them. I’ve never eaten these and felt like it caused one. So, pour in a generous ⅓ cup, make yourself a cold drink for the canning process, and relax!
The peaches in this recipe are not pureed or milled up the way I often process fruit. They are in halves if your peaches are freestone (the pit just comes right out with ease) or in chunks if your peaches are clingstone (no force in the world can pull the flesh of peach from the pit).
This brings up an interesting point about canning safety. The processing time (the time the hot food in hot jars is submerged in boiling water) is determined in large part by the density and/or size of the fruit and veggies in the jar. Larger, more dense pieces mean slightly longer processing time. This time is critical to observe because the center temperature of the jar MUST have time to rise above the 212-degree mark to kill spoilers. It takes a bit longer to get the center of a peach half that hot than it does in say peach nectar (same ingredients just more water and pureed thinly). Do not cut the processing time short, newbies or experienced canners. Keep the jars submerged for the prescribed amount of time, and don’t forget to adjust for altitude by adding 5 minutes of processing time for every 1000 feet you are currently canning above sea level.
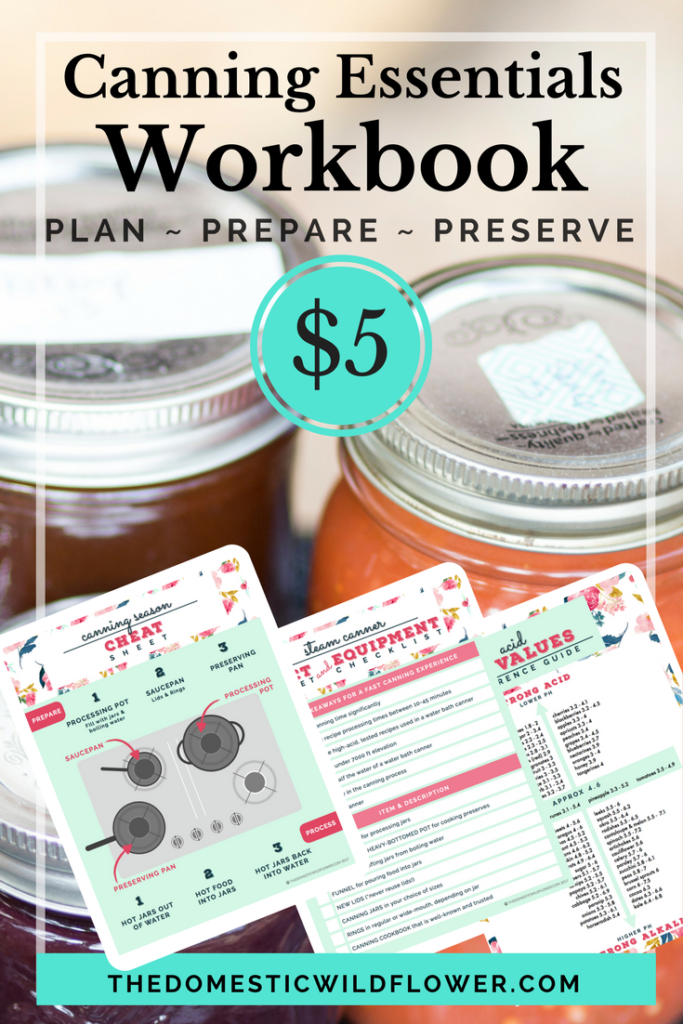
Get the Canning Essentials Workbook for $5 and be guided every step of the way making this recipe, and every recipe this season! The Workbook includes
- Canning Season Planner
- Pantry Checklist
- Equipment Checklist
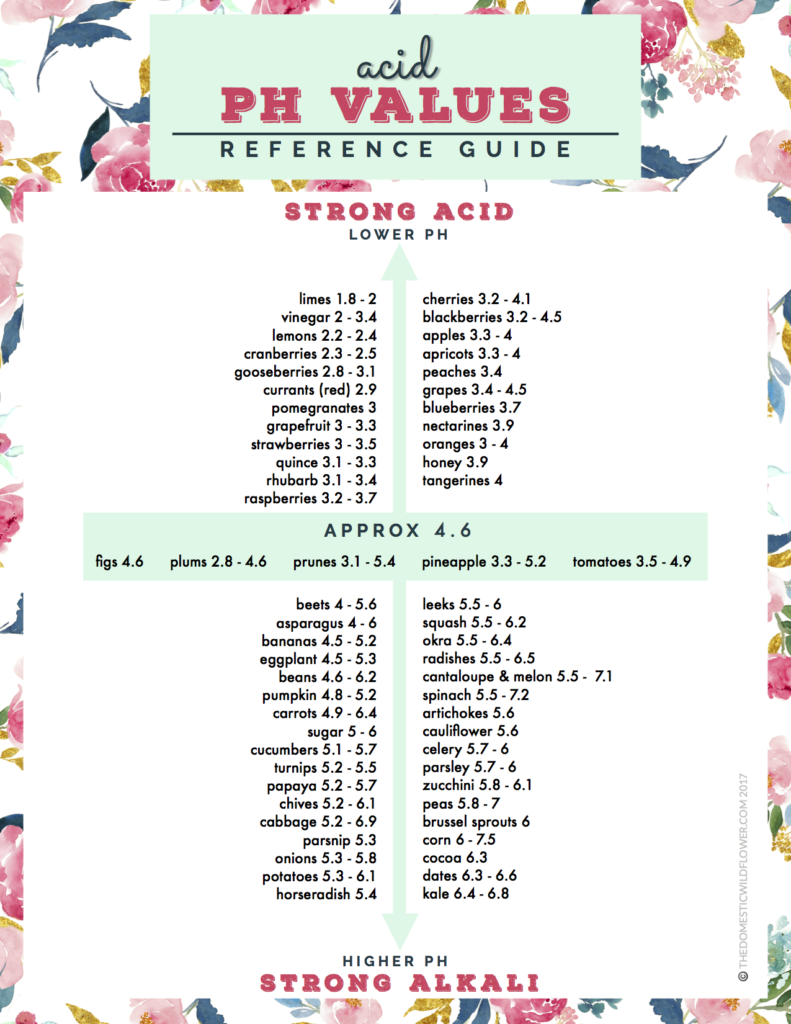
- Acid & Canning Guide
- Canning Log
- Process Cheat Sheet
- Elevation Adjustment Guide
- Bonus Recipes
Here’s what you need:
4 lbs peaches (10-11 peaches)
2 cups water
2 ½ cups sugar (brown is good but white is good too)
Pinch salt
¼ cup vanilla extract (I make mine at home)
¼ cup good quality real maple syrup
⅓ cup whiskey