• Skip to secondary menu
  • Skip to main content
  • Skip to primary sidebar
  • Skip to footer
  • The Pressure Canning Cookbook
  • Blog
    • Subscribe
    • Welcome!
  • Perfectly Preserved Podcast
  • About
    • ADW Manifesto
    • Work With Me
      • Read
  • Shop
    • My Account
    • Cart
    • Checkout

The Domestic Wildflower

Handmade Food & Craft Tutorials for Beginners

  • Courses
    • Free Canning Basics
    • Everything Canning Course
    • Steam Canning Workshop
    • Free Homemade Cocktail Mixers
    • Wildflower Mixology
    • Crochet Basket Workshop
  • Can & Preserve
    • Never Canned?
    • Steam Canner Equipment Bundle
    • Shrubs Course
  • Sew
  • Cook
  • Craft
    • Crochet Step-by-Step Guides
      • Crochet Basket
      • Giant Yarn Throw
      • Thick & Thin Throw
  • Living
    • Creativity Challenge
    • Clean
    • Kids
  • Rentals

Cook

How to Save Time Cooking

February 28, 2017 by Jenny Gomes Leave a Comment

This posts will share my favorite tips for saving time on the never-ending task of cooking.

How to Save Time Cooking | The Domestic Wildflower read the #1 time saving tip for cooking. This article is so good- it's perfect for busy moms! Start saving time now Mamas!

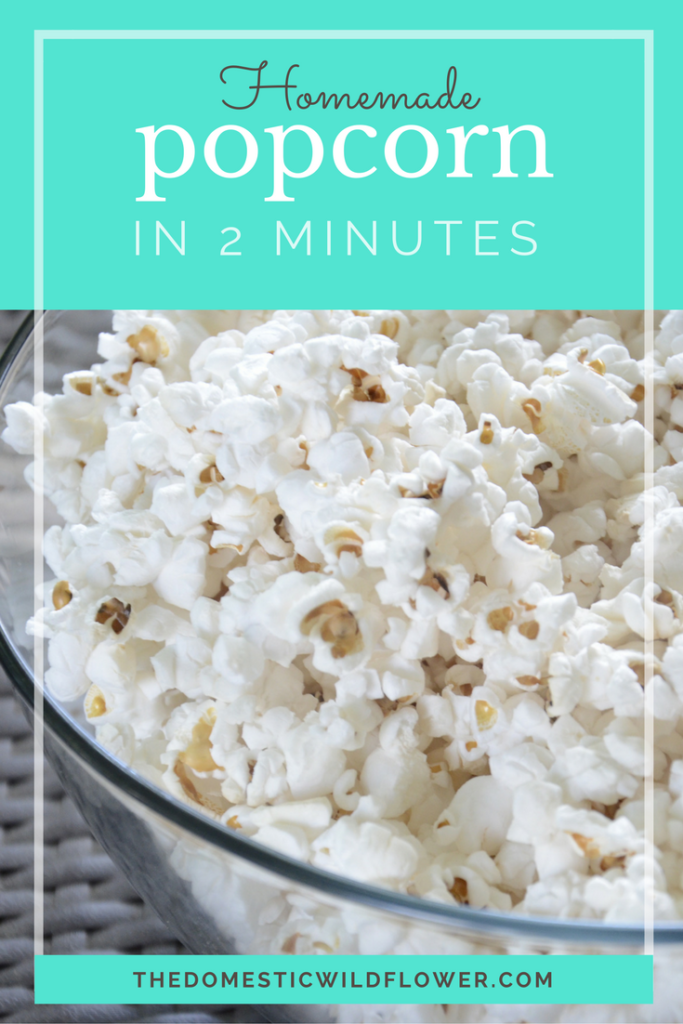
College was amazing for several reasons. I lived where the weather was terrific, my dear friends were always around, my jobs were a blast, our apartment had a pool, and I didn’t have to cook if I didn’t want to. I would eat a can of pineapple out of the can as a meal and not think twice about it. And maybe I might have a side of popcorn. Ah, college. Let’s all just take a moment to remember that wonderful phase of life that involved late nights, cold drinks, few obligations, tons of laughter, and NO required cooking.

There are a few affiliate links in this post. That means that if you click over to Amazon and buy that item, I get a tiny, minuscule commission. It doesn’t change your final total at all; it’s just a great way to support your favorite blogger. I’d never suggested any item I don’t use and love myself. 

I like to cook, don’t get me wrong, but I HATE that I have to. I really hate that it forces me to plan, which is something I’m not naturally good at, and I hate how much time it takes. If I can remove some of those negative aspects, then I’m a much happier girl. Wife. Mom. Cook. Whatever.

It wasn’t far into my wife live that I realized I REALLY needed to start making the cooking experience for me better since I wasn’t going to get a cooking break anytime soon. And no, my husband doesn’t cook. He can fry eggs and that. Is. it.

At about the same time I started realizing I needed to improve my cooking game, I was pregnant with my first child. When before I’d feed myself the supremely unbalanced meal of popcorn + canned pineapple, I was suddenly very focused on healthy eating.

I was really in a tight spot. I dreamed, simultaneously, about cooking less but also dreamed about feeding my unborn babe homemade everything. I wasn’t going to feed my little darling prepackaged junk, no sir-ee, I was going to feed Baby homemade applesauce.

Does any Wildflower out there feel that way? Pregnancy makes you think some pretty difficult things so no worries if that’s you. This too shall pass 🙂

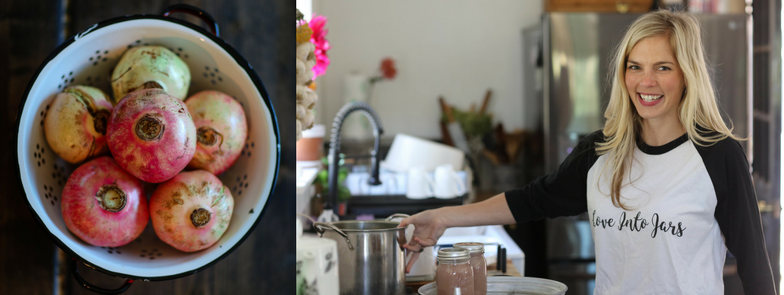
We cook what we cook because of our mothers, usually, and my mom and grandmother had gardens and canned. With the idea of standing at the kitchen stove for an hour a day, three times a day, looking like an imminent domestic hangover, I decided to resolve this desire to cook less AND to make more homemade food with canning.

Well, I resolved to try. I had watched Mom and Gram can as a kid but as soon as I could drive I was focused on life outside the home; working, school, friends, and cute guys. I hadn’t watched canning actually happen in a long time (I was pregnant for the first time at age 28) and while I thought I could do it, I had no idea of what it was actually like to can alone.

Well, can alone I did. I got a good canning book, which actually steps number one in saving time cooking. Flying by the seat of your pants works in the movies (and in cooking shows I guess) but in real life, following directions actually speeds things up. I got this book, and read it like a suspense novel. I devoured it, and read it again. I got lucky because that was actually a really dang good canning book and taught me a lot.

I borrowed a huge pot from my Gram, a jar lifter from my Mom, and rustled up used jars from various family pantry shelves.

I got all set up at the kitchen stove, now with my tummy large enough that I had to stand sideways, and was stressed to the max. I didn’t know how long each step would take, what to do when, what could be done simultaneously if I was doing it right, and of course the heat combined with the pregnancy made me certain I was going to make my whole family deathly ill. It wasn’t fun. I’m not exaggerating; canning sucked. I broke more than one jar IN the processing pot, which is pretty much the worst mess (boiling applesauce + shards of glass) I’d had (I hadn’t enjoyed a diaper blow out yet) in my life. I burned my fingertips, I had jars that didn’t seal (bummer) and didn’t know what to do about it (even bigger bummer). And I wasn’t even clueless! I actually had helped do this many times but the years in between clearly blurred my memory significantly. I actually didn’t know about adjusting for altitude (I must have skipped that paragraph…whoopsie) and then later read after the fact how important it is to do that (shoot!). In short, I had no idea what I was doing, despite life experience and a great book. It was awful.

As you gals who have had a baby know, that metaphorical clock while pregnant is ticking ever louder for you to accomplish whatever it is you want to accomplish. Some women nest by painting baby rooms, I nested by making applesauce. I kept standing sideways at the stove, sweating bullets because my kitchen is the tiniest room in the house, no joke, with a window the size of a chicklet (almost). I kept reading, kept calling my Gram and Mom, kept making stressful mistakes but by the time Baby S was born, I had applesauce in jars, sealed, on the shelf.

I continued to self-educate and read while I was glued to my breastfeeding chair and by the time summer was around, I was ready to tackle canning tomatoes. Because I had to eat too, I realized. And, my infant hadn’t eaten her applesauce, because babies don’t eat that much other than milk. Fancy that 🙂 

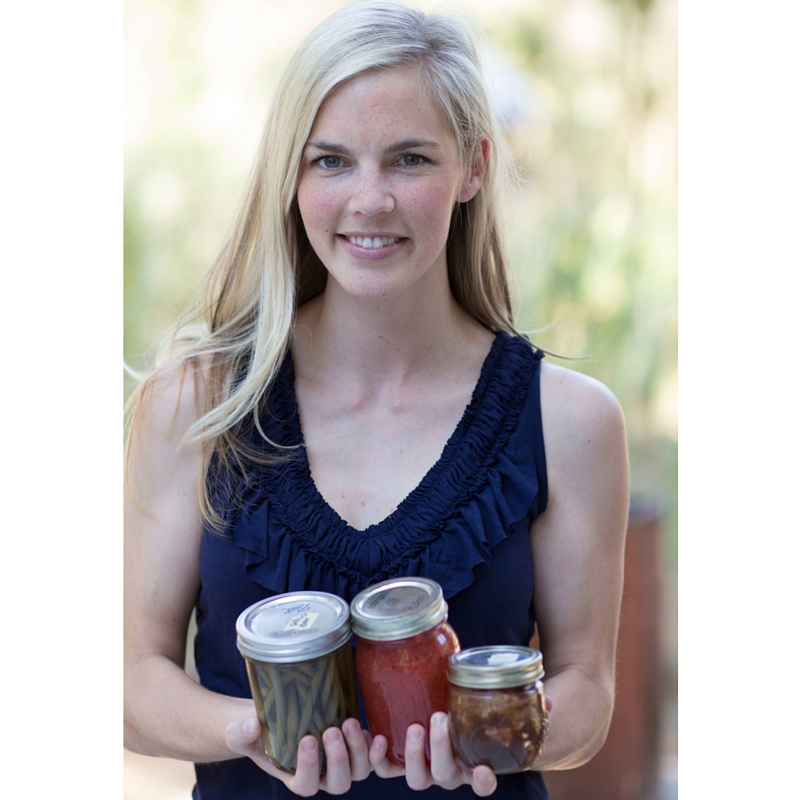
I called my dear friend Anna to come over one exceptionally hot summer day and she and I canned flat after flat of tomatoes. We had to work fast because naptime only lasts so long and I wanted to be done by the time Baby woke. We successfully canned well over 2 dozen jars of tomato sauce and while we were canning, we talked, drank cold beers, and had a great time. We didn’t break any jars, we didn’t have a single no-seal, and the end product was delicious. I’m not kidding you, that tomato sauce was FRESH TASTING if you can imagine that, rich, and versatile. In one afternoon, we had successfully reached several significant canning milestones and made enough tomato sauce to last us months.

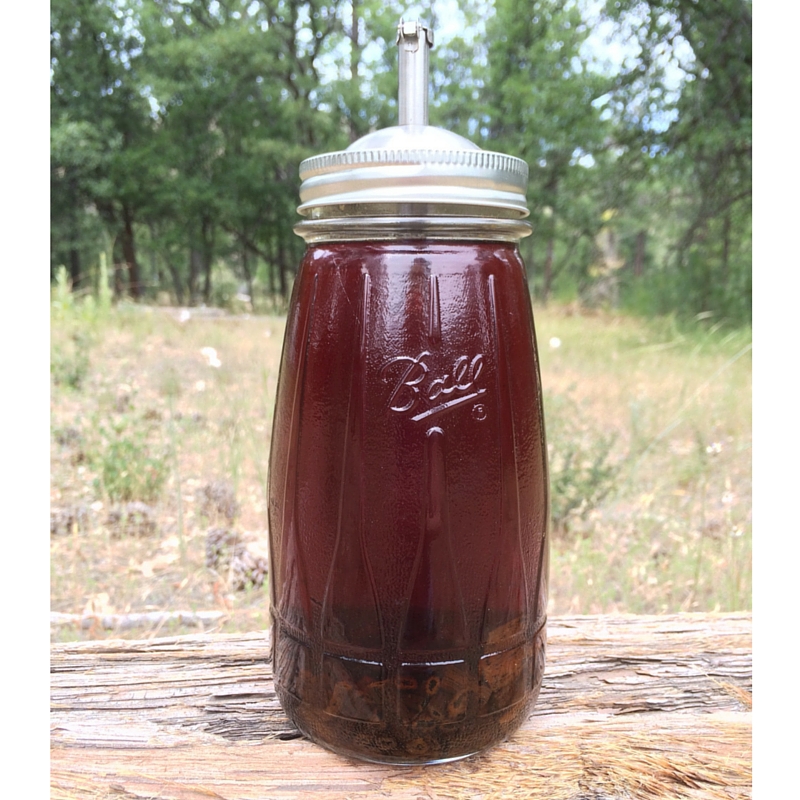
And just like that, I didn’t have to spend as much time cooking. Learning to can means you have COOKED IN ADVANCE. Canning is the homemade version of a prepackaged meal.  Tomato sauce, for example, IS ALREADY COOKED when you open the jar. Not only is it cooked, but it is also a blank slate onto which you can add anything you want and nothing you want. Tomato sauce can be transformed rather quickly into tomato soup, or enchilada sauce, or the filling in stromboli, or as any iteration of pasta sauce or a base for the beef stew…the list is endless.

Not only is it already cooked, but it is also HOMEMADE. Homemade food is less expensive, tastes a million times better (okay, well at least twice as good), AND HAS NO MYSTERY INGREDIENTS. How much time do you want to spend reading labels? Oh, none? ME EITHER. Whether you are worried about cutting artificial ingredients, colorings, toxic chemicals, or just eating less sugar or have specific dietary concerns like you are eating gluten-free, or maybe you just don’t like a surprise onion flavor. Canning lets you control ALL of that, for less money, in less time.

I want to invite you to the Start Canning Course.

How To Save Time Cooking by learning how to Start Canning!
In the Start Canning Course you and I will tackle together the pantry items (what’s the difference between pickling salt and regular salt? Can I use these canning lids that my grandma used? I’ll explain all that in the course videos!), the safety concerns (important temperatures to keep in mind, WHY canning works (hello acid + boiling water + vacuum seals!), and how to know you are doing it right. You’ll determine which pots & pans you already own that will work perfectly (probably lots!) and which you need to borrow or buy, and I’ll explain what gear you definitely can skip (no giant pot for you!). You will feel like you are learning from a new best friend, hanging out in my kitchen with me. 

Sign up now at this special price and finally have more time to spend doing what you LOVE instead of standing in the kitchen!

Guys I cannot WAIT to see you there. In my “day job,” I’m an English teacher and it is my favorite thing ever to explain what people think is complicated to show how simple that “complicated” thing is, and how capable YOU are.

How to Save Time Cooking | The Domestic Wildflower read the #1 time saving tip for cooking. This article is so good- it's perfect for busy moms! Start saving time now Mamas!

This blog and this course, in particular, is devoted to helping you see how achievable, easy, and time-saving old-fashioned things like canning are and how they can work FOR you to help make your life better.
So sign up, bring a friend, and see you in the course!

Filed Under: Can, Cook

How to Make Homemade Popcorn in 2 Minutes

January 23, 2017 by Jenny Gomes Leave a Comment

Did you know you can make homemade popcorn in the microwave? That’s right, you do NOT need to buy microwave popcorn, slathered in Heaven only knows what kind of pretend butter-flavored not-ingredients, nor do you have to have a fancy popper to pop kernels. Grab a small brown lunch sack and read on, Wildflowers!
Get the simple recipe to healthy, whole grain, homemade popcorn with no crazy artificial flavors!

In a lunch sack or in the white ice cream bags in which the grocery store checker insists putting ice cream, pour ¼ cup of popping corn kernels. These are often sold on the very bottom shelf in the popcorn section in the grocery aisle. Drip a few drops, probably half a teaspoon, of oil (I use olive but whatever you use for cooking will do) shake the bag about to coat the kernels, and fold the top of the bag shut.

My newish microwave cooks popcorn in 1 minute and 25 seconds. You want to stop the microwave when the popping slows and the kernels continue to pop after the microwave is off for a few seconds. The first couple times you do this, stand by the door and listen for the slowing of the popping. A few old maids is much better than scorched corn.

I dress with either a little salt or a little cinnamon and sugar mix. I would challenge you to try it without butter only because butter makes everyone’s fingers buttery and it is pretty good without it, not because you should be anti-butter. I’m actively pro-butter, in fact.

Sadly, I have no clever solution to the popcorn getting stuck in your teeth. I hate it too, but this popcorn is such an easy, fast, and healthful snack especially when made this way that we eat it on the regular in my home, and just floss afterwards.

Here’s a helpful info graphic that will help you visual learners SEE the inside scoop on popcorn 🙂


Source: Fix.com Blog

Happy snacking, Wildflowers! Share in the comments below your favorite way to dress popcorn! Also, please share if you know what the term “old maid” means as it has come to my attention that it is likely a colloquialism that may be lost on some of my readers. I love language almost as much as I love popcorn!

Filed Under: Cook

Kombucha for Beginners: 7 Easy Steps

August 1, 2016 by Jenny Gomes 2 Comments

This post will share with you how to make kombucha tea in 7 easy steps. You’ll learn how beginners can make kombucha easily, too! Read on to get your scoby on, Wildflowers.

Kombucha for Beginners: 7 Easy Steps

I cannot say I have ever had kombucha. As a working mom of small children, it does feel as if I’m living under a rock sometimes but it has not been lost on me that this “booch” is THE hottest beverage in the grocery store, on Pinterest, etc. I have read a bit about its health benefits, it looks tasty and bubbly, but I haven’t dipped my toe into its yeasty waters yet. I am still on a sweet-tart shrub drinking kick but I think there might be something to these weird, slimy scoby kombucha brews.

I strive to bring you Wildflowers guidance on all things handmade, homemade and self-made. I like to think that it is a good quality of mine that I know how to ask an expert for help and that is exactly what I did for this post. The lovely Bree of Family As We Go blog has written the following post for a beginner who is brand new to the kombucha scene. There’s an easy, printable PDF that you can print off at the bottom too 🙂  Take it away, Bree!

What is Kombucha?

Have you heard the latest talk about kombucha? Yes, so have we. It has definitely been the new “hip” health fad to consume. I usually am not a fan of jumping on the latest health craze, but I feel kombucha is one to take a closer look at.

People have been home brewing and consuming kombucha for centuries with possible origins in China. It has been told to have so many great health benefits including liver support, detoxification, aiding digestion, and it can help maintain a healthy weight. We will not say it is the cure-all that some naturalists might claim, but once you have read the numerous health benefits and felt great from it, we definitely recommend trying it for yourself!

So why not just buy it at the store with all your other groceries? Well, if you get addicted to it and start drinking it daily as I do, you will realize since being the latest health fad, it is NOT CHEAP. I started calculating how easy and inexpensive it is to homebrew your own: once you have all the equipment, the recurring cost for a one-gallon brew is $2, which per serving is only fifteen cents!!! Or you can just shill out $3.49 for a store bought one.  

Every kombucha is based around the living, slimy-looking scoby which stands for symbiotic culture of bacteria and yeast. There is an allotment of good organic scobys on the internet such as Amazon and Etsy for very reasonable prices. The great part about scobys is once you bought one, it will continue to produce a baby scoby each batch, so if you take good care of him, he will keep producing new ones!

7 Steps to Easy Kombucha: The Family As We Go Method | The Domestic Wildflower click to read this beginner's guide to making your own kombucha tea at home! This post includes a free printable checklist!

So I will admit, I killed my first scoby! And it was like losing a pet, I was really sad! So after burying him with tears streaking down my cheeks, I… just kidding 🙂  I reordered a new one and gave myself a second chance.

I decided to do a green tea based kombucha. You can choose either a green, black, or oolang tea. If using white, rooibos, or herbal, you have to mix around 40%/60% with either one that they say to use for optimal scoby health. As I’ve said, it is all about the scoby! I decided to go with green tea since most research points to the higher health benefits of green opposed to black tea. Also the usual kombucha I opted to buy at the store was the GT’s Multigreen Kombucha which is green tea based, so knew I would like the flavor. I have tried both green and black, and to be perfectly honest, they really do not taste too different, so either would work.

Kombucha brewing is actually a very simple, easy process, and like most fermentation, depends on patience to let the bacteria and yeast do its job. Here are my steps to brewing and I will note where I messed up and killed my first scoby to hopefully save you from the pitiful death of your own. I have messed around with different fermentation time and tea amount, and have really enjoyed the flavor that is produced with the instructions below.

How To Make Kombucha

  1.  Make sure you have all the equipment (cleaned carefully since you are dealing with a healthy, live bacteria). You do not want the potential of bad bacteria to grow and cause harmful mold.

You will need:

A gallon glass jar (preferably with a large top opening for the scoby to grow). 

Good organic sugar 

Black or green tea from a reputable source making sure the ingredient is camellia sinensis, proving it is real tea leaves.

You can use either tea bags or loose leaf tea, I started with tea bags then switched to buying bulk loose leaf.  

A healthy scoby, starter kombucha from a previous batch or a store bought plain kombucha like GT’s Original.

Have either a cheesecloth, paper towel, or kitchen towel. Since I do a secondary fermentation to produce a carbonated flavored kombucha, I also have mason jars (or you can use flip-top jars or anything airtight).

How to Make Kombucha Continued

  1. Start with making your sweet tea. I brew about 1 quart (4 cups) of purified water. Do not use tap water. Since I used green tea, I stopped the heating of the water at 175ºF instead of boiling to not burn my tea leaves. There are many different amounts of tea you can use (every ‘booch maker has their unique take). I feel 1/2 cup loose leaf tea or 10 packets of tea make a good gallon batch. After putting the tea in, add 2 cups of sugar. *Usually it is just 1 cup of sugar, but for your first batch with a new scoby it is better to chunk him up with more sugar to make sure he survives. * Stir until the sugar has dissolved. You can either take the tea out after 10 minutes or leave it until the sweet tea is cool and ready for the next step.

***IMPORTANT! You must be patient and wait for the tea to cool to below 80 degrees or your scoby will die!!***

  1. Once the tea is at room temperature, you can put all the water in your CLEAN gallon glass jar. 
  2. Pour in the 1/2-1 cup starter kombucha, store-bought or from the previous batch (many times when you order a scoby online, the provider will send enough starter liquid to help preserve the scoby during shipment and to help in your first batch). ***Have at least 1 cup starter liquid to make sure the scoby will survive too.***I didn’t have enough on my first failed batch. If after pouring it there is still room in the jar, fill with more water until there are a few inches of space at the top.
  3. You are now ready to touch that weird creepy-looking scoby. Do not fret, it didn’t feel as slimy as I thought it would. Just handle carefully and make sure your hands are clean! And by all means do not have anti-bacterial soap on your hands; that would kill your poor bacterial-yeasty pal. Place the scoby gently on the top of the liquid mixture in the filled glass jar.
  4. Cover with a loose cloth and rubber band to keep in place. You are done with the hands-on part! Put in a room without direct sunlight and preferably one of the warmest rooms in your house. When in a cold area, it takes longer to ferment. I keep mine on top of our refrigerator where it stays a little warmer.

Fermentation is a great practice for me as it is helping with my patience. You have to wait anywhere from 7-15 days depending on how sweet you want the kombucha. I, being sugar-free these days, wanted the scoby to feast on most of the sugar so I am not drinking a sugar-filled drink. Anytime after 7 days you can put a straw in and get a taste. The longer you wait for the more tart the kombucha will be.

  1. In my preference, I have enjoyed a 10 day fermentation period. It is pretty tart and shows that most of the sugar was fed on by the scoby. When done, you need to transfer your finished kombucha to any type of container you want to store in the refrigerator with. At first, I was using my recycled store-bought kombucha bottles. Now I use quart size mason jars since I do a second fermentation. 

7 Steps to Easy Kombucha: The Family As We Go Method | The Domestic Wildflower click to read this beginner's guide to making your own kombucha tea at home! This post includes a free printable checklist!

7 Steps to Easy Kombucha: The Family As We Go Method | The Domestic Wildflower click to read this beginner's guide to making your own kombucha tea at home! This post includes a free printable checklist!

Once you have done it all once, you just start at the beginning and do it all over again! If you want to learn the extremely easy second fermentation process so that you can flavor and carbonate your kombucha for an extra taste profile, go check out my Top 10 Flavorings and easy steps to doing it! The flavor combinations are endless!

Here’s a PDF of the 7 steps in a printable, quick-to-read list! No opt-in for this one, Wildflowers, just download and enjoy! Head over to Family As We Go to learn about secondary fermentation to create flavored, fizzy riffs on the basic ‘booch!

7 Steps to Easy Kombucha: The Family As We Go Method | The Domestic Wildflower click to read this beginner's guide to making your own kombucha tea at home! This post includes a free printable checklist!

Bree and her husband Justin write the Family As We Go blog. A blog is a place where friends and family can join their journey towards reaching a healthy, simplistic, and self-sufficient lifestyle as individuals or a family unit. They enjoy researching and finding tricks and trades to make that possible. If you would like to see more you can go to www.familyaswego.com.

There you have it Wildflowers! Be sure to pin this baby to Pinterest; you’ll want to refer to it later when you are whipping up your own batch!

Filed Under: Cook

Homemade Vanilla Ice Cream

June 20, 2016 by Jenny Gomes Leave a Comment

This post will share a simple, classic recipe for homemade vanilla ice cream featuring the vanilla extract, paired with the amazing cranberry chocolate fermented mole I made that knocks the trio of recipes into the stratosphere. Read on for the final layer of homemade dessert divinity!

Homemade Vanilla Ice Cream

Now that you have fermented your cranberries, cherries, cocoa, and chile together into a paste, and you have your vanilla beans soaking to make vanilla extract, you can now make your homemade vanilla ice cream.


Vanilla is a term that has unfairly been applied to the boring, mediocre, and forgettable. My cousin dated a girl that was described as “vanilla” because she was nice…and that was about all she was.


How unfair to both the girl and the flavoring because vanilla really shines when favorably paired, as with the fermented mole.


When scooped together on the same dish, the cool, sweet, creamy vanilla ice cream is a perfect foil for the fruity heat of the mole and you can actually taste the vanilla really well.


It is weird, delicious, and totally unusual. Make it and impress a crowd, Wildflowers.


This ice cream recipe was shared with me by my neighbor and friend Nan who is a goat farmer and homeopath. She makes it with her own fresh goat milk and if you can get your hands on such heavenly dairy, you should. If that isn’t available to you, use plain cow’s milk.   


Recipe:

2 and 3/4 cups whole fresh goat milk or cow’s milk

1/4 c heavy cream

*Use goat cream if you can get it; heavy cow’s (whipping) cream works fine too. You can also substitute whole (not light) coconut milk – make sure to shake well. Also acceptable is sour cream, or whole-milk plain, high-quality yogurt such as Straus brand.

*You can also vary the proportions within the 3 c. of milk/cream as far as1 cup whole milk and 2 cups cream


3/4 c white sugar


small pinch salt


1 tablespoon vanilla extract. Use the best you can afford because this is what really makes the taste, which is exactly why I like to make my own. Read how I do it here.


Put milk, sugar, and salt in mixing bowl and use hand or stand mixer to combine until sugar dissolves. This can take a while (up to several minutes) so keep stirring.

Stir in cream and vanilla. Chill in the fridge for 1 hour (or as long as 8 hours).


Process according to the directions for your ice cream maker until thickened and creamy, usually about 20 minutes.


Store in the freezer but bear in mind when you make homemade, preservative-free ice cream it is very best devoured fresh.


And there you have it, Wildflowers. Have you entered to win the corresponding dessert post’s giveaways? For the fermented mole post, one lucky reader will win a copy of “Fermented Vegetables” which is over 300 pages of fermentation instruction, photography, recipes, and inspiration.

Enter to win the "Fermented Vegetables" cookbook!

For the homemade vanilla extract post, we have been kindly gifted a Mason Jar Tap lid which makes your infusions perfectly pourable. To further elevate your canning jar affection, the winner will also get a drinking lid to transform their jar into a to-go cup.

Click to enter the Mason Jar Tap & Drinking Jar Lid Giveaway!


If you are loving this homemade goodness, and want to learn even more about putting food and love into jars, sign up here to know when the Start Canning Ecourse is live. I can’t wait to help you busy beginners Start Canning this month!


Filed Under: Cook

Homemade Vanilla Extract

June 16, 2016 by Jenny Gomes 2 Comments

Making vanilla extract at home is easy, fun, and the result is way better than storebought. This post will explain exactly how to make vanilla extract, and you can make it now so next week when I share how to make an amazing cranberry-cocoa fermented paste and an amazing homemade vanilla ice cream recipe, you’ll be ready to rock dessert. Read on Wildflowers!

Homemade Vanilla Extract

Vanilla beans + alcohol (typically vodka, but we’ll get to other options in a bit) is all it takes to make homemade vanilla extract. That, and time.

Vanilla beans are typically very, very expensive. In my local grocery store, I could buy 2 vanilla beans in a glass jar for $12. I did not buy the shriveled, brown beans that way. I went on Amazon and bought a package for $25 that has 25, 5 to 6-inch tall vanilla beans in a vacuum sealed bag. I have purchased this package 3 separate times, over a year between instances, and haven’t been sorry yet. The label (which has remained unchanged) makes me laugh every time. It tells the buyer how to make vanilla extract, and step two says, “Chop the beans into ½ inch pieces. Slicing is ok, but is a waste of time.” Thanks, www.vanillaproductsusa.com for not wasting my time!

I realize that there are probably fresher, better, more expensive alternatives out there but I live a very, very long way from a metropolitan area that might sell such high-quality beans and this is a great way to add real, customized vanilla flavor to the sweet things I like to make.

If you haven’t ever handled whole vanilla beans, you are in for a treat. They smell divine even through plastic packaging. It almost becomes a worry when faced with how to wrap up the remaining beans after you have made your extract. I usually split the purchase with a friend in order to maximize the freshness. As the helpful label explains, “For best results, triple wrap in ziplock freezer bags immediately upon receipt.” I wrapped twice and put them in a mason jar when I have had leftovers. They are not to be frozen or refrigerated, either.   

The versions of extract I have tried to feature different types of alcohol and each has its merits.

I used Bacardi Oakheart Spiced Rum (left at my house after some festive occasion) for my first batch and it turned out to be a great way to use up the spiced rum. The “notes of brown sugar, vanilla, and cinnamon” are an obviously nice, however not-top-shelf it may be, pairing. I think this is my favorite- I use vanilla extract in homemade ice cream and in whipped cream and in both applications I find it to be so, so good.

I have used bourbon as the medium after I saw vanilla beans advertised as being infused with bourbon flavor (I never bought them myself, but was intrigued nonetheless). I found this option to be the least desirable of the three because the whiskey flavor was really strong, and when mixed in things like whipped cream…it was too much competition for the vanilla. The vanilla should be the star.

The standard go-to alcohol for making homemade vanilla extract is inexpensive vodka. While this isn’t all that creative, it is certainly very versatile and foolproof.

Chop up the vanilla beans as the package describes and cover with the alcohol of your choice. I used a quart of vodka to cover the 25 vanilla beans that came in my package. Lid, shake and store on a shelf. The extract gets better and better the longer you can wait, but I have used it in a week in a pinch and it was okay. When I am ready to use it, I give the jar a shake and pour it into my measuring spoon. I leave the beans in the jar and never remove them until the liquid has been all used up.

Homemade Vanilla Extract | The Domestic Wildflower click through to read this simple tutorial to make your own super flavorful vanilla extract in a mason jar!

Homemade Vanilla Extract | The Domestic Wildflower click through to read this simple tutorial to make your own super flavorful vanilla extract in a mason jar!

After you create your infusion, you then get to use a delightful infusion lid with which to dispense your flavorings. You can get an infusion lid from the delightful folks at Cuppow. They are the clever minds behind the BPA drinking lid that turns a canning jar into a travel mug  They have kindly shared an infusion lid called the Mason Tap AND drinking for this post giveaway and you can enter to win here! Remember, the giveaway program rewards you with extra entries so share, share, share!

Click to enter the Mason Jar Tap & Drinking Jar Lid Giveaway!

If infusions are right up your alley, then you are in for a treat. I found some terrific recipes from other blogger friends that you might enjoy making and that you could use with the above infusion lid. Head here to buy your own!

More Infusion Inspiration:

Make Rosemary Infused Olive Oil with this simple tutorial.

http://www.thriftynorthwestmom.com/rosemary-infused-olive-oil/

Blueberry Vinegar looks simple and perfect for vinaigrettes. http://www.sidewalkshoes.com/2013/08/blueberry-vinegar.html

Homemade Mint Extract would be right at home in lots of sweets- and who doesn’t love mint in their iced tea on a hot day? http://www.sidewalkshoes.com/2013/11/diy-mint-extract.html

Rhubarb is one of my favorite fruit flavors and this Rhubarb Infused Vodka infusion sounds easy and delicious. Pass the whiskey and sparkling water please 🙂  http://simplydarrling.com/2013/07/rhubarb-infused-vodka/

If you love making homemade and found this tutorial helpful, you are going to love this:

I have created a  completely free canning basics course for busy beginners (that is as clear and simple as this post!) that will teach you the equipment, the process, and the way to know how canning is safe. Get in the free course here!

What infusions have you tried, Wildflowers?

Filed Under: Cook

  • « Go to Previous Page
  • Page 1
  • Interim pages omitted …
  • Page 4
  • Page 5
  • Page 6
  • Page 7
  • Page 8
  • Page 9
  • Go to Next Page »

Primary Sidebar

Categories

Follow me here, there, & everywhere!

  • Email
  • Facebook
  • Instagram
  • Pinterest
  • RSS
  • Twitter
  • YouTube

Search

Get The Pressure Canning Cookbook

Get 10 Free Recipes Now!

Best Chicken Coop

Footer

Get Started Pressure Canning

Shrubology Ebook

Shrubology: Refreshing Homemade Fruit and Vinegar Syrups for Cocktails
Make easy, no-cook fruit & vinegar syrups for cocktails & mocktails! This ebook shares crowd pleasing recipes and simple to understand ratios so you can make a shrub on your countertop any time- without a recipe. Dive into these Prohibition Era drinks today!

Copyright

Copyright 2019
The Domestic Wildflower
www.thedomesticwildflower.com.
All content created by Jennifer Gomes unless otherwise noted.

Copyright © 2025 · Lifestyle Pro on Genesis Framework · WordPress · Log in