• Skip to secondary menu
  • Skip to main content
  • Skip to primary sidebar
  • Skip to footer
  • The Pressure Canning Cookbook
  • Blog
    • Subscribe
    • Welcome!
  • Perfectly Preserved Podcast
  • About
    • ADW Manifesto
    • Work With Me
      • Read
  • Shop
    • My Account
    • Cart
    • Checkout

The Domestic Wildflower

Handmade Food & Craft Tutorials for Beginners

  • Courses
    • Free Canning Basics
    • Everything Canning Course
    • Steam Canning Workshop
    • Free Homemade Cocktail Mixers
    • Wildflower Mixology
    • Crochet Basket Workshop
  • Can & Preserve
    • Never Canned?
    • Steam Canner Equipment Bundle
    • Shrubs Course
  • Sew
  • Cook
  • Craft
    • Crochet Step-by-Step Guides
      • Crochet Basket
      • Giant Yarn Throw
      • Thick & Thin Throw
  • Living
    • Creativity Challenge
    • Clean
    • Kids
  • Rentals

Craft

How to Create Greeting Cards from Found and Salvaged Papers

July 13, 2015 by Jenny Gomes Leave a Comment

This post is mostly about getting over the mental hump that some of us are hampered by that one has to spend money to extend kind written words in the form of a card. I love snail mail and cards of all kinds, including the kid-created version here, and I long ago got over the worry that a card recipient would judge me or my card negatively because it was homemade. I have created many cute and completely free cards over the years with found or salvaged papers. Here are some examples to get your creativity flowing the next time you need to open your feelings.

I wrote a baby shower card on an orange paint sample card and I’ll never forget how my dear friend laughed at how “me” it was to do that. You can do that too! There is beautiful paper all around us and one only has to think outside the box to see it. The next time you purchase something, examine the packaging that was already paid for, and is likely destined for the trash can, and see if it can be repurposed. This applies for gifting also. A great friend gave me a baby gift in a lime bag- as in the bag the limes came in from the store. It was adorable, matched the stuffed alligator inside, and I reused shortly thereafter for another gift. That, my friends, is the epitome of sensibility.

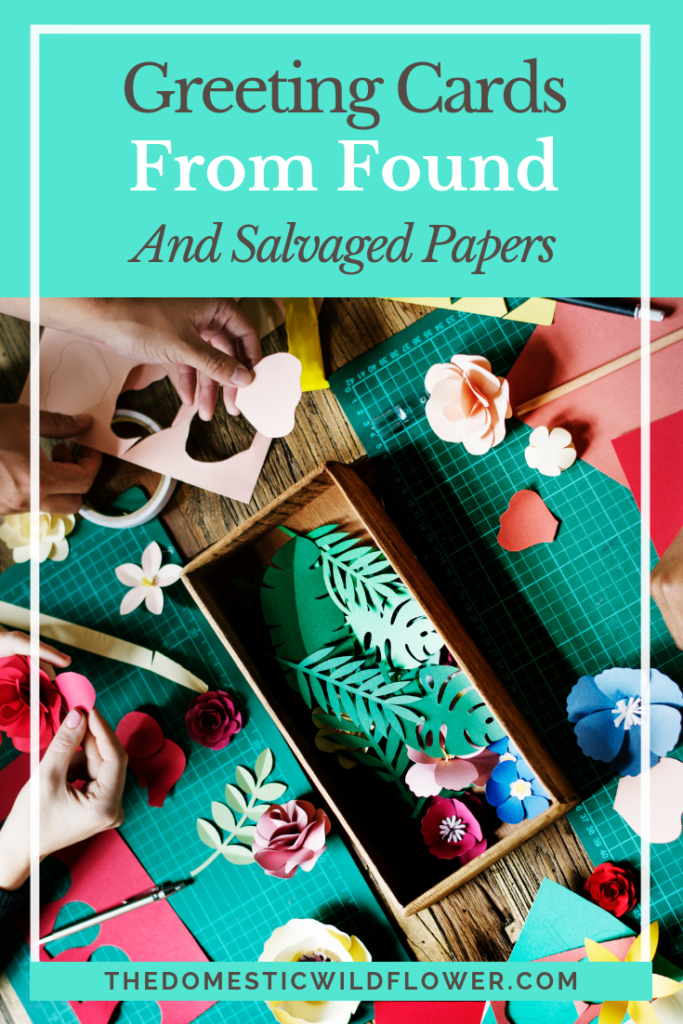
The photos for this post show a box that a pair of Stella & Dot earrings came in. I fell in love with the box, cut if flat, and saved until I needed a card. I cut the rectangles, wrote in colorful sharpie my salutation on the back, and sent. I didn’t have to remember to search for a card in a store which is clearly a time saver.

I have confessed in other posts that I am no wizard in the paper arts but if you were such a wizard, there is no limit to the darling things that could be created, for free or nearly free, with minimal effort, with found papers. I am limited in artistic ability and am in a state of near constant haste so my cards are often limited to cute paper and a colorful pen. No one has ever sneered at my cute homemade card, at least to my face though perhaps they have worried to themselves what others might think if they did something so unconventional.

Well, Wildflowers here’s to the sensible, the unconventional, and the creative! What cute, brave, and clever ways have you reused paper? Share your ideas in the comments below and next time you have to send a card, be willing to be a little unconventional!

Filed Under: Craft

How To Dye Fabric

June 25, 2015 by Jenny Gomes Leave a Comment

How To Dye Fabric

Dying fabric takes a certain level of comfort with commitment. There are products sold to remove dye but I have never used them and it sounds like more work and less fun than I’m looking for in my naptime sewing pursuits. I chose to dye several of my husband’s worn out, plain white work tee shirts with the intention of sewing them into baby leggings (excellent use of any knit), little girl skirts, and my flyaway back tank that I posted about here. This was a great way to use up the parts of the shirts that aren’t worn out, though was a little tedious cutting around the holes.

You can buy a fairly inexpensive bottle of liquid dye or even less expensive powdered dye and new life to old or faded fabrics pretty easily. Rit is a popular brand that I have had great success with but there are many other brands out there that are awesome also. Rit is appropriate for cotton, cotton blends, linen, other natural fibers, and some polyester blends. Generally, the more man-made fiber content, the more it would behoove you to seek out a brand of dye specifically for that fabric type.

I was inspired by the beautiful shibori dying technique (examples here and here) but chose teal dye instead of navy. I used rubber bands to bunch up tie-dye-style the old tee shirts and placed them in a clean 5-gallon bucket, and put the bucket in our wash basin. Someday I may write an ode to the ever-useful wash basin that seems less and less popular in newer homes but I will be brief and just say I love mine for projects just like this one. In addition to needing a clean, non-porous bucket or receptacle you need a stirring stick. I grabbed a stick from the yard and was very glad to not have to worry about cleaning it. For past projects, I used a yardstick. If you have no stick handy, choose a non-porous (hard plastic) stick and avoid metal as it can react with the dye and probably change the dye a bit and perhaps pit the metal.

Picture

Picture

The directions will likely direct you to stir, stir, stir, and I wouldn’t skimp on this even if you are dying old tee shirts. The agitation is pretty important. The next step will be to rinse by hand and wash in a washing machine. Surely, you should use gloves to rinse but I’d be lying if I said I did. And my cuticles were green as a result.

I like to have a plan of what I will wash in the washing machine after I dye fabric. Rags or the plastic shower curtain are good choices to be sure your washing machine is free of excess dye. Run a large, empty load or a tub wash cycle, then wash something like rags directly afterward to be on the safe side.


Picture

The dying is actually very simple. Follow the directions on the bottle or box which are all basically going to tell you to add water, the dye, maybe white vinegar and/or salt (as a fixative which will help the dye “stick” to the fabric) and stir. The amount of fabric you can dye is based on weight- usually a pound or two of fabric per container of dye.

The advantage of liquid dye is minimal but clear: you don’t have to wonder if you have stirred vigorously enough for long enough the cauldron of teal blue water to dissolve the powder entirely. I have never had trouble with the Rit powdered kind and because it comes in a cardboard box, rather than a plastic bottle, and is less expensive by about $2, I’d say it is preferable for casual dying projects.

As for washing the hand-dyed garments later, I try my best to wash in cold water and with vinegar in the additive dispenser.

Easy, right? Tell me in the comment section below, Wildflowers, what have you dyed with success? Share your tips below!

How to Dye Fabric | A Domestic Wildflower

Filed Under: Craft, Sew

Metal Cots: A Summertime Must Have

June 18, 2015 by Jenny Gomes Leave a Comment


Summer is here, and to a teacher, this is a sacred time of year where we plan to do all of the things we can’t quite fit in from September to May. On my summer to-do list is reading and relaxing with a cold drink on my newly painted and spruced up outdoor cots.

An old metal cot is a thing you should absolutely seek out at your next barn sale or flea market. There are several kinds I have seen including ones with springs (like the inside of a mattress), cots that fold up and have wheels (handy dandy if the wheels are still in good shape), and simpler designs with no springs or wheels but are plenty comfortable. When choosing one, look for what will clean up the easiest. I left one behind that had a LOT of unidentified dark grease that I imagined would 1) be difficult and time-consuming to clean and 2) would probably make my spray paint not stick. Cots also come in non-standard sizes. For example, I have one that is wider and shorter than a twin bed but definitely not as wide as a double. This makes dressing them in bedding an exercise in creativity but that’s half the fun.

A word of caution about these dinosaurs. They were manufactured before the time of plastic-everything and safety mechanisms. Many a finger has been pinched or worse in the hinges and springs of old metal contraptions. Keep your fingers away from the moving parts and your nap and reading should commence without a band-aid needed.

Often times I am overcome with spray paint enthusiasm and in classic Wildflower style, I recently drug home three found cots. I already have two. There are four humans in my household. I definitely do NOT need five metal cots but in my imagination, my children’s future sleepovers will be thus elevated to awesome.

I scrubbed my found cots and sprayed with white spray paint. I propped one cot up on four pieces of firewood which actually made it a lot easier to spray the underside of the rails. Because I drug home so many cots, I got a little hasty and failed to prop up the remaining ones but they all turned out nicely. I have found that the spray paint that can be sprayed upside down makes the task of painting even easier and faster and may be worth the extra couple bucks per can. I used two cans of paint for four cots but my cots weren’t all that rusty.


Picture

Picture

One way I dressed my cot is by making an outdoor fabric duvet (tutorial coming soon!) and filling it with an old queen sized comforter folded in thirds. Be creative and don’t get hung up on finding a mattress. I have found that a blanket has been quite comfortable.

Happy napping, Wildflowers! What treasures have you found to elevate your summertime?


Picture

Picture

Metal Cots: A Summertime Must Have

Filed Under: Craft Tagged With: metal cot

Teaching Toddlers Using a Deck of Cards

April 27, 2015 by Jenny Gomes Leave a Comment

I have a three year old daughter who, like nearly all kids this age, loves to learn. There are countless products out there that promise, and many surely deliver, important learning outcomes for an eager kid. As a new mom, I felt utterly overwhelmed by the choices before me in regards to items to buy. I felt pressured to buy and have the right gear. I fretted over buying the right food. I worried if I was preparing my child for school even though that was years away, and I am a seasoned classroom teacher for Heaven’s sake! Now that I have a few years of motherhood under my belt I have really tried to relax, both inwardly and outwardly, in regards to “preparing” my kids for the future.

Using a deck of cards was one way that I found that there are opportunities to teach kids all around us and they needn’t be expensive or purchased at a specialty store nor executed by an education professional.

I also have found that using a deck of cards is handy for those who don’t have kids. My friends and child care providers who don’t have kids (and thus untold numbers of toys at home) could use a deck of cards or simply apply the same mindset to any other learning opportunity. For example, I have only a faint idea of what the game “Dominoes” is about, but the next time I see a set at a yard sale I am snapping it up because I can imagine the fun matching, stacking, and sorting games we could play with the tiles.

Here are the “games” I play with my toddler that are educational and simple using a deck of cards. No, Texas Hold ‘Em won’t be on the list but as I mentioned, dear readers, we have lots of time ahead to prepare for the future.

Shapes

I started out showing my daughter the different shapes on the cards. Diamonds and hearts were easy of course and the spade shape brought about the opportunity to talk about gardening tools like spades and shovels. The club is a lot like a clover, and now my girl uses both words to describe the club.

Colors

You might be unimpressed as a deck typically has only two colors. Most decks have a variety of colors present on the face cards and knowing the colors paired with the numbers and suits presents appropriate and additional challenge to the “game” of playing with cards. Being able to say, “A red, heart, 2!” is actually a lot of information for a toddler.

Number Order

You can practice order number with just a handful of cards or the whole deck, depending on the age and ability of the toddler at hand. I started out by just pulling the 2,3,4 and 5 of one suit, “shuffling” them, and helping my toddler put them in number order. Build up to more number, add more suits, and practice in reverse order.

Matching

This isn’t quite a game, but I call it one and my daughter loves it. I give her the first two cards off the top and I get the next two. We look to see if any of the four cards showing match any of the others. Often they don’t. One of us draws a card from the deck. We see if that card matches the ones in our hands. Often they don’t. We take turns drawing cards (sometimes with me setting some aside if our hands get too full) until we draw a card that matches in number a card in our hand. Then there is lots of cheering because we found a match and that gets set on the table, face up. We repeat in this way, finding matches until we have four of everything or until she has tired of the game. As we find the third and fourth of each number, I can point out one that’s a heart, one that’s a spade, and so on. As I arrange the sets on the table, I try to arrange them in order so the aces and twos are on the left, and the face cards to the right.

Mix Up

My daughter named this Mix Up and the name stuck. She LOVES to mix the cards, face up, in a big mess on the table. Then, she draws whatever card she wants, and then looks for another like it either in suit, color, or number. It is kind of like a treasure hunt for her. I like to save “Mix Up” for the end of the card playing time because the mixing is more kinesthetic, and is more child-driven rather than Mommy-driven.

There are many variations you can feel confident in creating off of these activities. You don’t have to be a teacher, subscribe to a parenting magazine, or have your mother-in-law’s or neighbor’s or friend’s approval to create fun and free ways of teaching kids. What ways have you created learning opportunities for kids, Dear Reader? Tell me in the comment section below!

Filed Under: Craft, Kids

How to Create Wild Outdoor Arrangements: Barbed Wire Wreaths

April 27, 2015 by Jenny Gomes Leave a Comment

One of my favorite things it arranging plants in junk to make beautiful, funky, and welcoming additions to my home. I see the great outdoors as part of our living space and I love putting my resourcefulness and pruning shears to good use to decorate it.
  1. Find a base. This base item, organic or inorganic, is what you will tie, wire, or otherwise attach your plant matter to. These bases fall into two general categories:Fill Up/Vase-like OR Tie On/Wreath-like

Fill up containers are buckets, pails, boxes, wash basins, pitchers, cans, etc that may or may not be water-tight (I prefer mine not to be) and are suitable for living outside. A rummage through a barn, shed, lean-to, or attic may yield fantastic and free containers. One of my favorites was found on our property after we moved here. The old yellow Pennzoil can had been shot (for target practice, surely) dozens of times. The surface is like a giant cheese grater but is so bright, beat up, and fun, it is a perfect receptacle. Be creative and feel free to think outside my suggested list.

Tie on bases are a sturdy item onto which you can attach plants and then can attach to a fence or gate. Think of a wire wreath base and then go from there to the junkyard or the great outdoors. A manzanita branch (or any interesting limb for that matter), a round of old barbed wire, or a weathered piece of lightweight lumber are at the top of my list for tie on bases. Just bear in mind these items have to be propped up or connected someway to your display site so they can’t be too heavy.

2. Select your plants based on these 3 categories

  1. Color
  2. Texture
  3. Height

What you find in your backyard or roadside may vary greatly from what I can find in Northern California but I seek out evergreen limbs in various lengths, deciduous limbs growing moss, bushes with interesting leaves, and finally shorter, greener plants that may or may not dry outdoors well.

My go-to plant list includes:

Juniper

Pine limbs and cones

Cedar boughs

Oak limbs

Branches from various fruit trees like pear and apple

Oregon grape (which looks nothing like a grape vine and more like holly than anything)

Sweet pea vine

Wild rose (which has wicked thorns)

any green weed that looks like it might hold up well in a dried and wind-blown arrangement.

I choose those plants because grow near me for free,  can be cut to different heights/lengths, and grow in a variety of colors and textures.

Use those guidelines when foraging. I have made really pretty arrangements with just juniper and oregon grape because they dry well and they have different textures. Because this is going to be sitting outside in the elements, keep it simple.

3. Arrange. Generally, I go for a walk with my gloves, pruning shears, dog, and one or two children. I clip whatever strikes my fancy, trying to collect an armful of plants and then walk to the hanging site. So, if I am wiring weeds to a barbed wire wreath, I assemble the wreath at the gate where it will hang.

I have used a variety of materials to secure plants to wreaths in into buckets and I like wire. Because of my husband’s job, I happen to have a lot of wire scrap around, in handy lengths of about 3 feet. You do not need wire but it is pretty tough to beat for securing weightier branches. I have used baling twine, acrylic scrap yarn, fishing line, and leftover twine from packages all successfully. Be resourceful and you will be even more pleased with the frugality and beauty of your arrangement.

I like to start with the longest or tallest branches first and then arrange shorter in front or on top. I set a branch or two, and connect it to the bucket or wreath (or broomstick or weathered old two-by-four or whatever) with the wire or twine, and repeat. Filling a receptacle can be faster and easier than creating a wreath, but if you have adequate greenery, wreath making can be plenty quick. Most of my projects can be measured in the number of nap times they take for completion and this is a half a nap project.

One method to the madness is to alternate between plants. So for example, I might choose a tall oregon grape, then a tallish juniper branch, then a medium oregon grape, then a medium juniper and then finish with a short sprig of whatever green plant I liked, or just a short branch of oregon grape. It really can be that simple. I like to wire in a fall horn (a deer antler that is shed yearly) or a weird old piece of metal junk. My husband builds power lines, so I have all manner of metal numbers and shapes (like stars!) salvaged from old poles at my disposal. Be creative!

The last step is to hang or place your arrangement. This is actually pretty important because inevitably the wind will blow it about and you want this to last. In my case, I want it to last a month or more. Surely you didn’t think I rearrange weekly, did you Wildflowers? Simulate some wind or jostling and secure your arrangement.

Here are some ideas to get you started.

Filed Under: Craft

  • « Go to Previous Page
  • Page 1
  • Interim pages omitted …
  • Page 3
  • Page 4
  • Page 5
  • Page 6
  • Go to Next Page »

Primary Sidebar

Categories

Follow me here, there, & everywhere!

  • Email
  • Facebook
  • Instagram
  • Pinterest
  • RSS
  • Twitter
  • YouTube

Search

Get The Pressure Canning Cookbook

Get 10 Free Recipes Now!

Best Chicken Coop

Footer

Get Started Pressure Canning

Shrubology Ebook

Shrubology: Refreshing Homemade Fruit and Vinegar Syrups for Cocktails
Make easy, no-cook fruit & vinegar syrups for cocktails & mocktails! This ebook shares crowd pleasing recipes and simple to understand ratios so you can make a shrub on your countertop any time- without a recipe. Dive into these Prohibition Era drinks today!

Copyright

Copyright 2019
The Domestic Wildflower
www.thedomesticwildflower.com.
All content created by Jennifer Gomes unless otherwise noted.

Copyright © 2025 · Lifestyle Pro on Genesis Framework · WordPress · Log in