• Skip to secondary menu
  • Skip to main content
  • Skip to primary sidebar
  • Skip to footer
  • Blog
    • Subscribe
    • Welcome!
  • Perfectly Preserved Podcast
  • About
    • ADW Manifesto
    • Work With Me
      • Read
  • Shop
    • My Account
    • Cart
    • Checkout

The Domestic Wildflower

Handmade Food & Craft Tutorials for Beginners

  • Courses
    • Free Canning Basics
    • Everything Canning Course
    • Steam Canning Workshop
    • Free Homemade Cocktail Mixers
    • Wildflower Mixology
    • Crochet Basket Workshop
  • Can & Preserve
    • Never Canned?
    • Steam Canner Equipment Bundle
    • Shrubs Course
  • Sew
  • Cook
  • Craft
    • Crochet Step-by-Step Guides
      • Crochet Basket
      • Giant Yarn Throw
      • Thick & Thin Throw
  • Living
    • Creativity Challenge
    • Clean
    • Kids
  • Rentals

Craft

Homemade Gift Basket Ideas

November 14, 2016 by Jenny Gomes 2 Comments

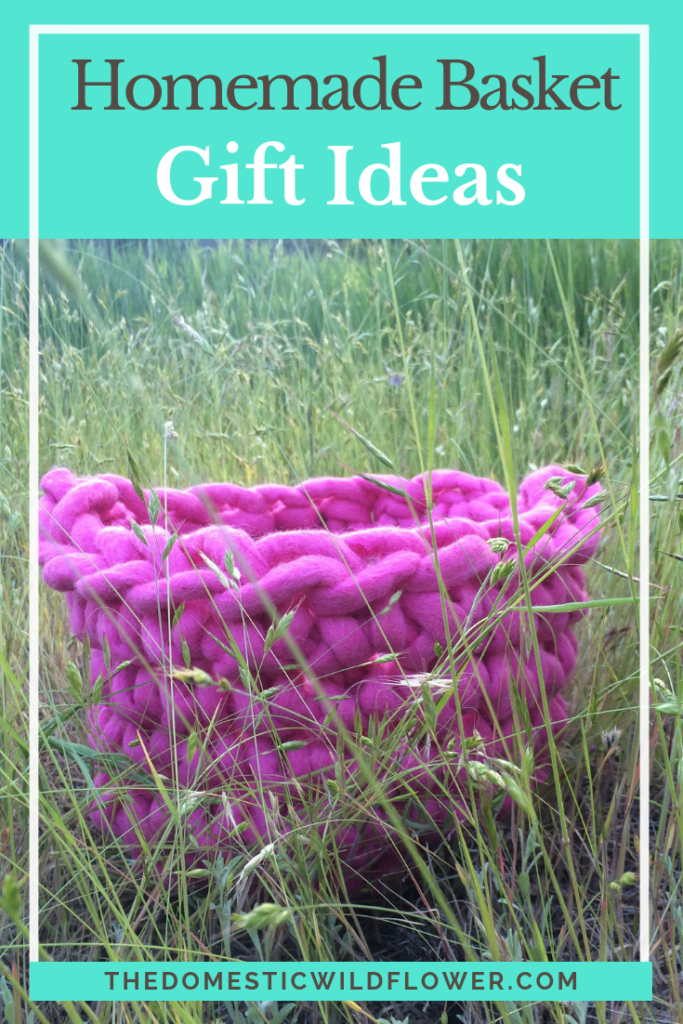
This Homemade Gift Basket Ideas post will inspire you to create a chunky wool basket and fill it with thoughtful gifts for the handmade loved ones in your life.

Homemade Gift Basket Ideas

Last week I shared with you a super simple tutorial for learning how to crochet, my favorite low-commitment craft. If you missed it, here’s the video tutorial. In it, I will teach you how to crochet in just 15 minutes and I won’t use any language that you are unfamiliar with and I’ll show you slowly, over and over, so you can actually crochet by yourself. Oh yeah, and the best part? You don’t even need a crochet hook if you use big yarn. Watch the video here!

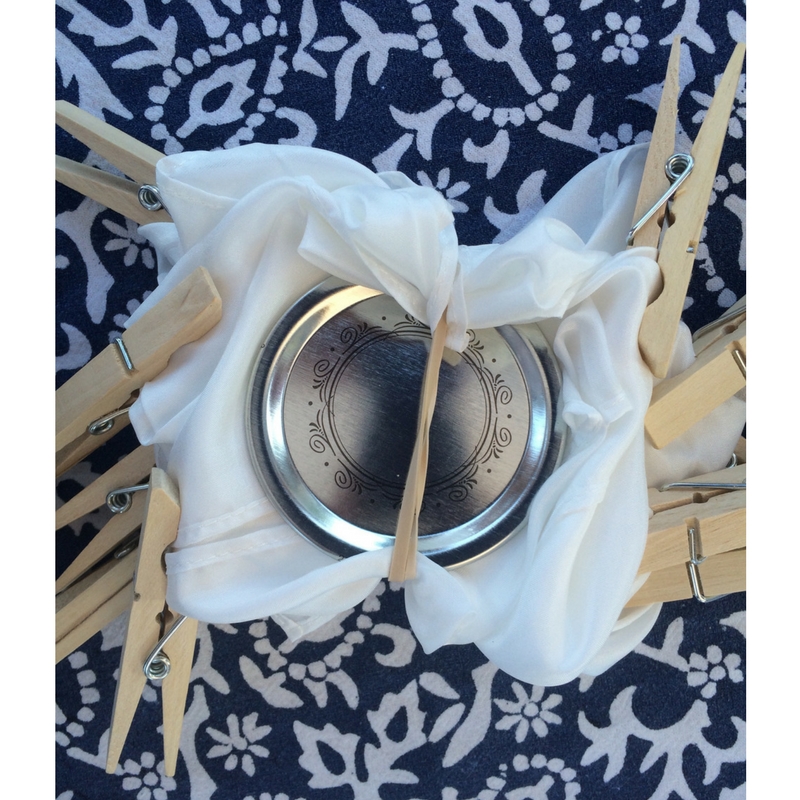
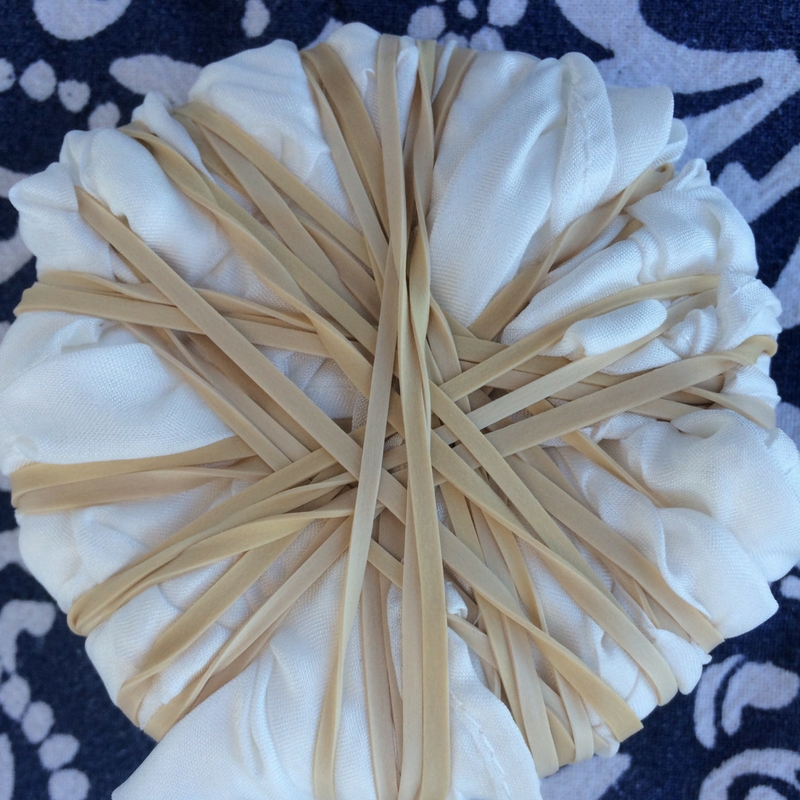
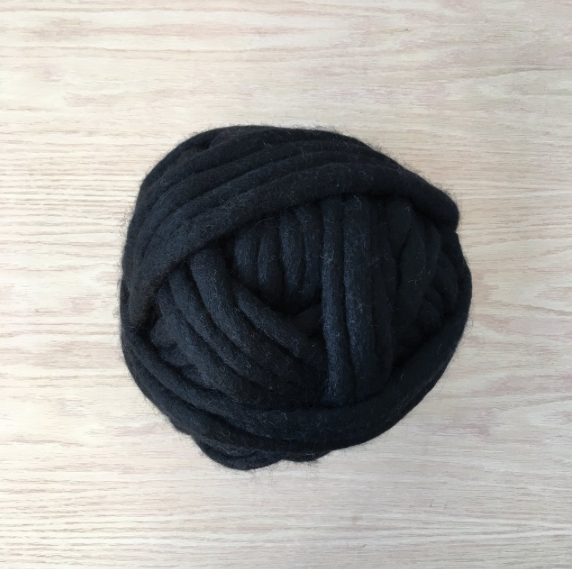
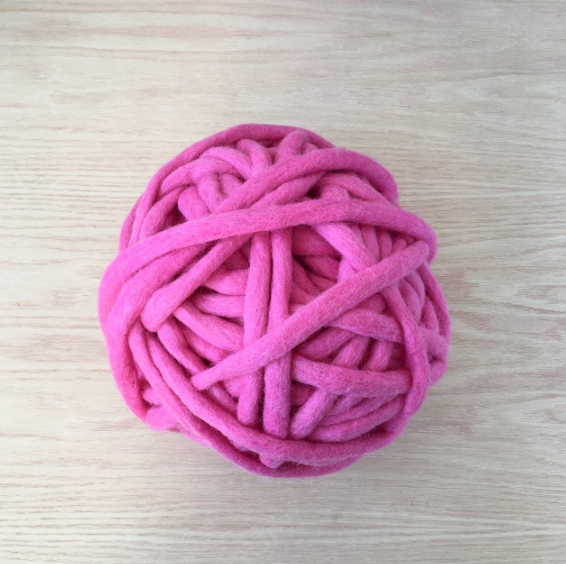
The yarn I used is called Tough Love by Love Fest Fibers and it is about as big around as a dime and is crafted from New Zealand wool in Nepal by women who benefit from this stable employment and help them to recover economically from a devastating earthquake in 2015. Each ball takes about 3-4 hours to felt (that means to make strong and sturdy, basket perfection!) and comes in a ton of dreamy colors. Basically, it’s my favorite giant yarn yet.

It is super practical because it is easy to crochet for a brand new beginner, it is a natural, easy to handle fiber (no delicate wicker here), and it won’t lead to stubbed toes or goose-egg noggins if a little one bumps into it. It is stout enough to stand up on its own, but soft enough you can scoot it into a corner or onto a shelf and make it fit its surroundings easily. It is functional, it breathes, is a renewable resource, and it beautiful.

Felted Wool Basket | The Domestic Wildflower click through to read the full tutorial for how to crochet a felted wool basket in giant yarn in under 2 hours!

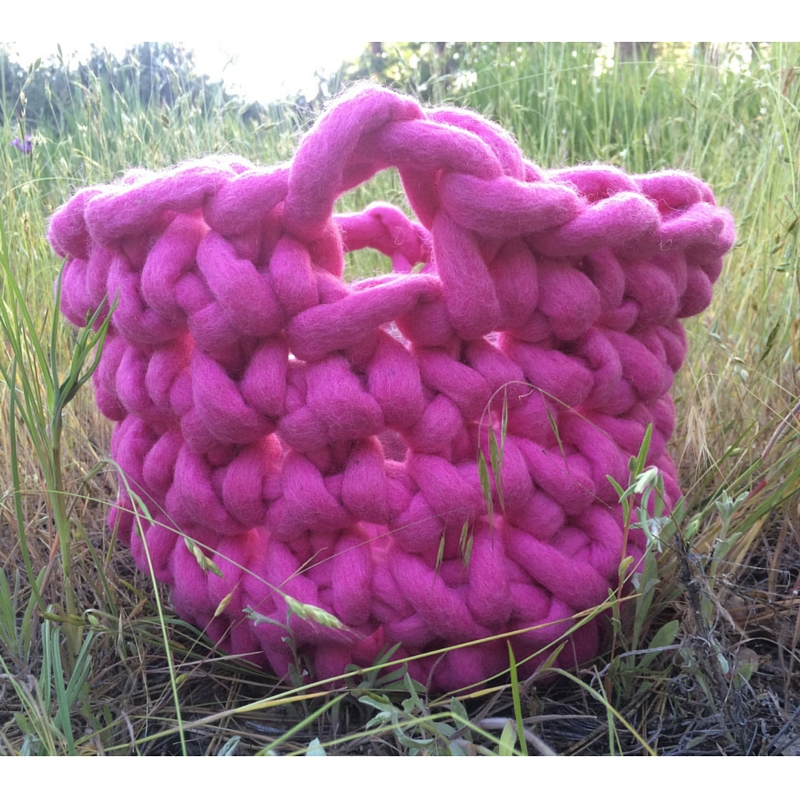
1 ball is all it takes to be made into a gorgeous, hand crocheted basket and it can be done (done I tell you!) in about 2 hours.

I want to show you how to make this easy basket, stitch by stitch. I can teach you how in the Unhooked Quick Crochet Basket Workshop that’s at a holiday-perfect price. You’ll have forever access to the video tutorial, Plain-English pattern PDF, and you’ll be able to make one of these baskets in under 2 hours. Grab the workshop today!

Buy Now!

I wanted to inspire you with the ways you can share a Homemade Gift basket like this for the holidays, as well as year round. Here’s what my real life inspiration team (my FB friends 🙂 and I came up with. The following photos are indeed affiliate links but I wouldn’t recommend something that I wouldn’t recommend my dear friends. 

Homemade Gift Basket Ideas

A gentleman’s basket in black, with a bottle of whiskey, whiskey rocks, a mason jar shaker, and a batch of homemade brownies.

Handmade Gift Basket Ideas | Learn how to make this gift basket in just 2 hours and get real, creative gift ideas with which you'll fill the homemade basket. Genius!


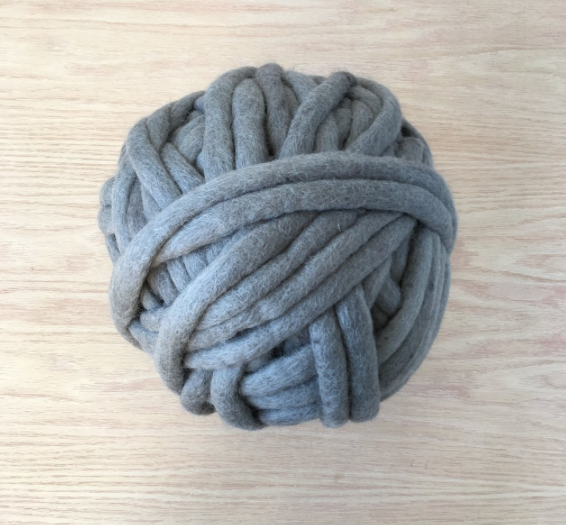
A hostess gift in classic grey with a fresh kitchen towel, some bottle of 1-hour Kahlua, canned whiskey peaches, and wooden spoons.

Handmade Gift Basket Ideas | Learn how to make this gift basket in just 2 hours and get real, creative gift ideas with which you'll fill the homemade basket. Genius!

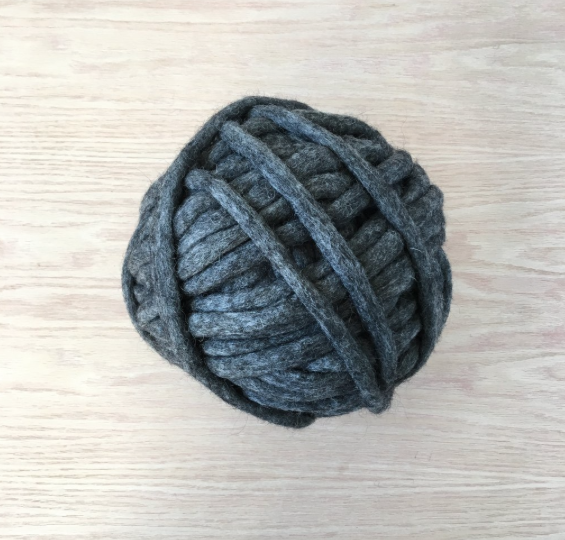
Charcoal grey basket with a story about exploration, a flashlight,  a leatherman, pair of the best socks, and a container of Mailander cookies (they are like sugar cookies but Swiss and better- try them!).

Handmade Gift Basket Ideas | Learn how to make this gift basket in just 2 hours and get real, creative gift ideas with which you'll fill the homemade basket. Genius!


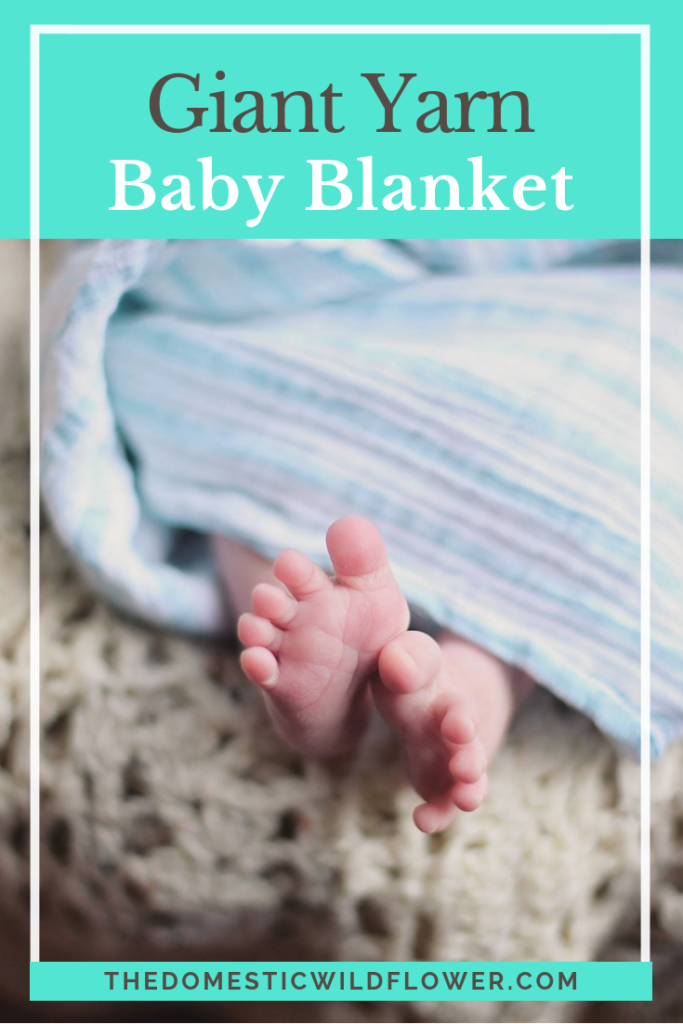
A pink or blue basket for a baby you know with cloth diapers, cloth wipes, and natural baby wash.

Handmade Gift Basket Ideas | Learn how to make this gift basket in just 2 hours and get real, creative gift ideas with which you'll fill the homemade basket. Genius!

A neutral basket for the expecting mother mints, a sip-able water canteen, and nursing mom supplies like nursing pads.

Handmade Gift Basket Ideas | Learn how to make this gift basket in just 2 hours and get real, creative gift ideas with which you'll fill the homemade basket. Genius!

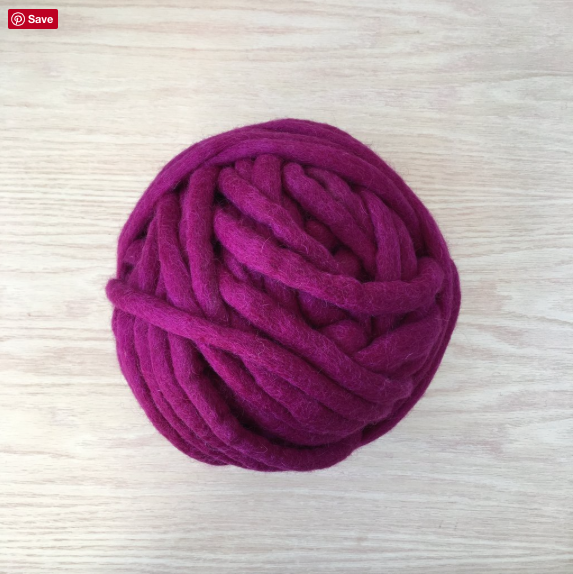
A wine-colored basket with a pair of glasses, opener, and this new non-fiction book about wine & war that looks SO interesting.

Handmade Gift Basket Ideas | Learn how to make this gift basket in just 2 hours and get real, creative gift ideas with which you'll fill the homemade basket. Genius!

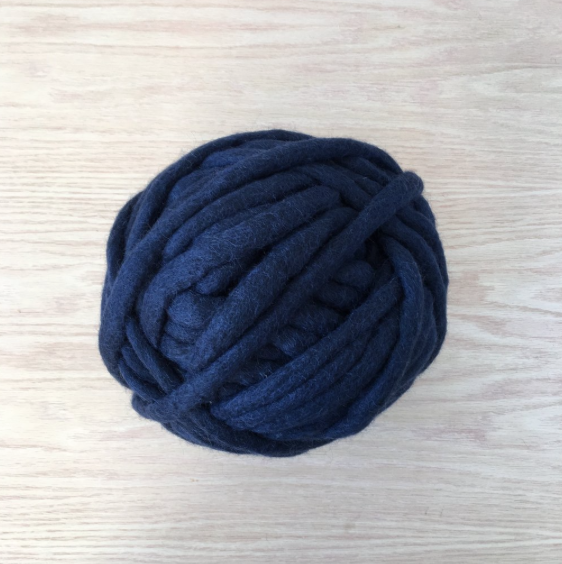
A navy basket filled with the makings of an Old Fashioned: a good bourbon, bitters, maraschino cherries, oranges, a muddler, and cocktail glasses.

Handmade Gift Basket Ideas | Learn how to make this gift basket in just 2 hours and get real, creative gift ideas with which you'll fill the homemade basket. Genius!

A red basket with the makings for a picnic: shelf-stable dips and cheeses, crackers, olives, and good charcuterie.

A purple basket for the artist in your life with high-quality blank postcards, art supplies, and a gift certificate to a local studio for a class.

Handmade Gift Basket Ideas | Learn how to make this gift basket in just 2 hours and get real, creative gift ideas with which you'll fill the homemade basket. Genius!

A neutral hued basket for the dog lover in your life (match the color to the pet so the shed blends in 😉 with a new chew toy, treats, leash, and collapsable water bowl. Mom gets the basket and the dog gets treats! Win win!

screen-shot-2016-11-08-at-8-49-11-pm

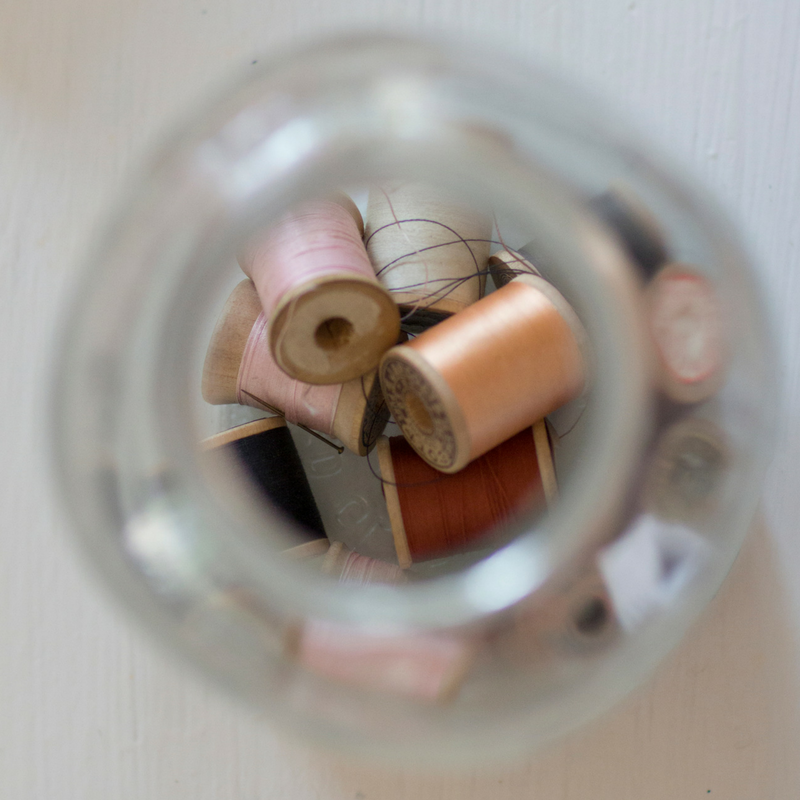
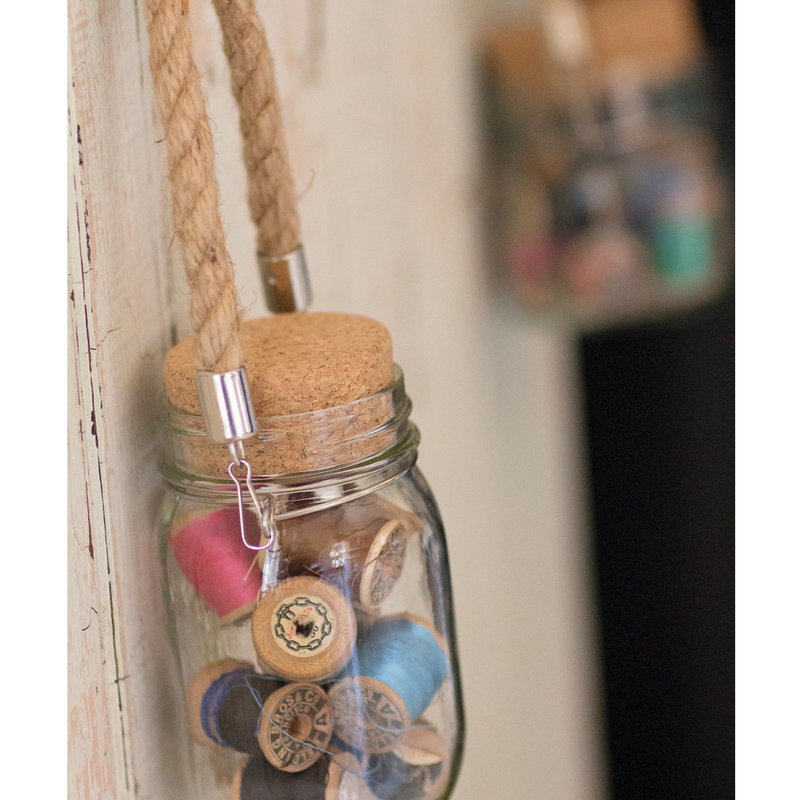
  • A selection of handspun yarns for the crafter in your life and needles or hooks of the appropriate size, with a pattern gift cert for a favorite Etsy shop.
  • A blue basket for the spa lover with artisanal bath products, soft, homemade socks, and an aromatherapy candle.
  • Homemade jam, fresh bagels, and whole bean coffee.
  • A journal, a throw blanket, and tea.
  • Handmade fragrance, fine skincare, and some fancy underthings.


Have I got your wheels turning yet? I want to inspire you to create something homemade BECAUSE I KNOW YOU CAN. You already know that handmade is so much better, so much more thoughtful, and way more fun, to give and to receive. I can teach you how to crochet and I’ll be there to help you crochet the basket so it will be done, and you’ll be able to keep it, or gift it!  

I want to teach you, STEP BY STEP, how to make this easy, NO HOOK basket. YOU can finger crochet it in under 2 hours with my Unhooked Quick Crochet Basket Workshop. You’ll have forever access to the video lesson and the Plain-English printable PDF. You won’t believe the holiday-perfect workshop price- get it here!

Enroll Now!

Filed Under: Craft

Antique Door Project

October 19, 2016 by Jenny Gomes Leave a Comment

This post will show you my heirloom door project and show you how you can add a few new or old items to make a functional workspace.

Antique Door Project

Ranches are full of many wonderful things beyond animals, feed, and family ties. Ranchers get good at ranching by saving old things for use in some future project. Old baling wire is saved for mending projects decades later. Old appliances are refashioned for a new purpose out of practicality rather than fashion. Old building materials are used over and over in fences, shelters, and finally, sometimes burned to ash. Farms and ranches are the original up-cyclers, far before that was a hashtag or buzzword.


That said, I love old things. On our family ranch where I grew up, there used to be a house in what is now the front yard. In that old house, my great-grandmother lived, and a few items from that old house have been saved in various buildings. In the “storehouse” as opposed to the granary or hogshead, has been stored the door that went from the dining room to the bathroom. It’s a bit narrow, white and chipping paint, and as genuine farmhouse fabulous as a girl could hope for. This door and the clawfoot tub that will make it’s blog debut someday soon I hope is what I have wanted to feature in my home for a long time.


So a door all alone, without an entrance to guard, is sort of a tricky item to display. I had to put it where it would be useful, where its whole shape would be visible, and where it would be accessible. I planned on attaching shelves and hooks and making a sort of vertical buffet, to lend a hand to a sort of furniture-less dining area (which is really part of the living room in our small home).


I had the pleasure of visiting and purchasing my shelves and hooks at the lovely Pretty in Paint store in Medford, Oregon. If you’re ever nearby, definitely check them out. This is a family owned business with a gorgeous supply of home furnishing for both the DIY girl or the ready-made purchase. They carry chalk paint (which totally transformed my dining room table and my entryway- that’ll be another blog post!), fixtures, pillows, knobs, rugs, tables…it is just my favorite.


I got 2 galvanized shelves, one sort of woven looking galvanized basket that I originally thought I might put on the center of my dining room table and instead decided to screw to the door as well, and several hooks. One hook is a flying bird- a swallow, we’ll say- , several aged white hooks, and a few that I’ll call barn wood brown.

Antique Door Project | The Domestic Wildflower click to see how an antique ranch door was transformed into a functional, farmhouse style workspace. Click through to read the post!

After we decided that we’d place the door near the dining room table, I decided a few low hooks could welcome kid’s sweatshirts, and the higher ones could hold extra towels (those worn, white gems were my Great Aunt Nadine’s). The shelves hold the cloth napkins, a very antique tools with wooden handles on the very top shelf, and the bottom basket holds extra silverware, cookie cutters, and a pot holder. I wanted the few extra items I always need at the table at hand. I might also hide DVDs or other things I don’t want my kids to see on the top shelf. Don’t tell 🙂

The door is screwed into a stud and I just LOVE the way I was able to make something gorgeous and old work for me and my little home.

Antique Door Project | The Domestic Wildflower click to see how an antique ranch door was transformed into a functional, farmhouse style workspace. Click through to read the post!

The rope and wire contraptions are from my favorite online retailer of all things mason jar related, Mason Jar Lifestyle. They sell anything and everything you could want to accompany your mason jar including mason jar lids of all kinds from decorative to lunchbox-able, cookie cutters shaped like mason jars, and more. They have been exceedingly generous to me and my Wildflower readers and I’m giving away the rope and wire mason jar hangers so you can suspend your very own mason jars full of…whatever gems you like. I filled mine with antique spools of thread (because the colors! swoon!) but you could do whatever you like.
I’m sharing this rapid-fire giveaway on INSTAGRAM (I’m at @adomesticwildflower) from October 19th at 8am to the 21st at 11pm Pacific Time. Go to Instagram, follow me @adomesticwildflower and @masonjarlifestyle, turn on notifications (touch the three dots in the upper right hand of the account, and TAG three mason jar loving friends in the post. Sorry, this giveaway is only on Instagram. I can’t wait to see who wins!

Filed Under: Craft

Giant Yarn Crochet Baby Blanket Pattern

October 3, 2016 by Jenny Gomes Leave a Comment

This post will share how to create a practical giant yarn crochet baby blanket with this easy pattern.

Giant Yarn Baby Blanket

You all may have noticed, I’m a huge fan of giant yarn, pun absolutely intended. I love it because it is unusual, warm, fast to work with, and easy to see errors you might have made. Love Fest Fibers has become my favorite domestic source of giant yarn and for good reason. They have a variety of large-scale yarns to choose from, in neutrals and dreamy colors, in both all natural and recycled plastic + natural material blends.

For the baby blankets I decided to make for a pair of cousins who are pregnant and due at nearly the same time, I chose the Relove Merino blend that is wool and recycled plastic bottles. I’m not going to bluff you; I chose it because it is washable, not because I am primarily interested in using, or not using, recycled plastic. Function comes first and foremost in my mind. However, it is clearly an advantage to use up some of those wasted plastic bottles in a rad baby blanket. Additionally, a baby blanket must be washable. Unless you aren’t giving it to a baby 😉

This yarn is about as big in diameter as a dime, which isn’t the biggest yarn I’ve worked with but it comes in a delicious aqua (that I really, really want to use in a blanket for my bed), a pink, and a blue. They also have large wooden hooks and needles available for purchase which is very helpful indeed. I crocheted a basket with their Tough Love felted yarn with my fingers but for this project, a hook was definitely faster.

One skein of their largest size, 100-yard length made a perfectly sized baby blanket. I crocheted a chain about as wide as a crib, and used my go-to single crochet stitch, chain one and skip a stitch, single crochet routine on repeat back and forth. That way you get a lot more blanket area than if you made a stitch in every single chain.

One important tip when working with really large scale yarn is that because you want to use up every last bit of it, sometimes you’d rather not just end a row and cut it off. You might want to keep crocheting but aren’t sure if you’ll make it to the other end without running out. I will taper off by making a few short single crochets (just a tighter stitch) and then doing a looser slip stitch, and then a snug slip stitch. That way you can gradually decrease and hopefully make it to the other end. You don’t have to do this of course but that’s one way I’ve found that is helpful.

This video will show what can’t be explained in words. I hope it is helpful, Wildflowers!

Making a baby gift by hand is something that many people wish they could do but don’t realize that the actually CAN do. You absolutely can learn how to crochet a baby blanket. If you don’t want to learn how to crochet, you can learn how to sew. If you’d rather not sew, I bet you can paint silk, or embroider a baby monogram, or make a bib, or customize a diaper bag…you are capable beyond your wildest dreams, Wildflowers, and that’s why you are here. Learn how to create more by hand and reap the benefits tenfold. 

Giant Yarn Crochet Blanket Pattern

If I have thoroughly whet your appetite for giant, yarn, I think you will LOVE this thick and thin yarn crochet step by step guide.

Filed Under: Craft

Shibori & Indigo Dye

August 15, 2016 by Jenny Gomes Leave a Comment

This post will explain indigo dye and the technique of dyeing with indigo known as shibori.

Shibori & Indigo Dye

I had the distinct pleasure of attending a shibori workshop at the start of the summer and in addition to learning all about the shibori technique and the amazing indigo dye, I got to meet some lovely makers including the host, Allie. She shared with me the following information during and after the workshop.


Shibori is a resist dye technique that was developed in Japan. The philosophy of shibori is that rather than the maker force the fabric to result in the image of the mind’s eye, but rather the cloth, dye, and maker work together to make the unexpected, which of course is better than what we makers could dream up alone anyway. The philosophy of ‘wabi-sabi’ was explained at the workshop as well and its tenets of embracing imperfection and appreciating the organic outcome were very welcome to my generally rushed, stressed, and way too busy mama’s heart.


The idea with shibori is wherever you fold or crease the fabric, that is where the dye will not reach it and thus will remain the original color of the fabric.


One method of shibori, or folding, is Kumo Shibori. This is basically accordion folding your fabric (in my case a white, silk scarf) in a Z shape.

Shibori & Indigo Dyeing | The Domestic Wildflower Read this tutorial for about how to create gorgeous hand dyed textiles with the very simple, beautiful technique of shibori. Indigo dye isn't like regular Rit dye, and this post will explain why and how to be successful. Read the full post here!

Another method you could experiment with is the Arashi Shibori or “storm” where you use a PVC or similar pipe or pole. Accordion fold your fabric so it is the length of the pole, and bind the fabric to the pole with rubber bands. Imagine trying to dress a giraffe’s neck. The result is a stormy-ocean type of pattern, hence the storm denomination.


The method that most Westerners would recognize looks the most like tie-dying. This is called Kanoko, or “bound” shibori. The maker pinches a spot on the fabric, form a stem or center of the round design. Then rubber bands or string can be used to be wrapped around the stem. The more bands mean a larger circle. A little pinch of fabric bound just once will create a type of polka dot pattern, whereas a larger pinch of fabric bound several times will look more like the classic tie-dye.


The final method covered in the shibori workshop was Itajime, or “shape” shibori. This is where 2 flat objects (wood blocks, or canning lids, as in my example) press folded and pressed fabric within. The idea with this method is that by binding tightly, the shape of the object will remain undyed, and only the exposed edges will touch the dye.

Shibori & Indigo Dyeing | The Domestic Wildflower Read this tutorial for about how to create gorgeous hand dyed textiles with the very simple, beautiful technique of shibori. Indigo dye isn't like regular Rit dye, and this post will explain why and how to be successful. Read the full post here!


Shibori & Indigo Dyeing | The Domestic Wildflower Read this tutorial for about how to create gorgeous hand dyed textiles with the very simple, beautiful technique of shibori. Indigo dye isn't like regular Rit dye, and this post will explain why and how to be successful. Read the full post here!

Shibori & Indigo Dyeing | The Domestic Wildflower Read this tutorial for about how to create gorgeous hand dyed textiles with the very simple, beautiful technique of shibori. Indigo dye isn't like regular Rit dye, and this post will explain why and how to be successful. Read the full post here!


Shibori & Indigo Dyeing | The Domestic Wildflower Read this tutorial for about how to create gorgeous hand dyed textiles with the very simple, beautiful technique of shibori. Indigo dye isn't like regular Rit dye, and this post will explain why and how to be successful. Read the full post here!

The dye was actually the most fascinating part of the workshop to me. I have used Rit dye, I am read about using other plants for dying fiber, but I have never used indigo.


Indigo is made from the leaves of the indigo plant. It has been being used as such for over 3000 years. The plant prefers hotter, humid climes. Indigo is unique because most dyes are water-soluble (will dissolve in water) and all you need to get the dye to “take” is heat and perhaps a little agitation. Not indigo. Indigo is NOT water soluble, and to be used it must be reduced with a chemical reaction to remove all the oxygen from the liquid. The resulting dye is rather ugly, kind of oily looking, NOT pretty blue the way you’d expect, and very alkaline, at about 10 or 11 pH. As this chemical process is occurring, a coppery scum form on the top of the liquid (and it is indeed kind of algae looking) and should be skimmed off to the side when you are ready to submerge your fabric. The scum is called the “flower.”


Indigo can be purchased on Amazon among many other locations and while you definitely should follow the directions, it is not a difficult process to mix up in a 5-gallon bucket outside on a warm day.


After the dye is mixed, take care to not splash or agitate the liquid as such would introduce oxygen which is what you don’t want.


While wearing gloves, submerge your fresh- water-dampened item and swish it gently around in the dye. This allows the color to bond to the fabric. After about a minute, pull from the dye carefully.


This is where the real magic is. The item will be a greenish-yellow and as it is exposed to the oxygen, it literally turns blue before your eyes. I watched example after example as workshop attendees folded their silk scarves in a variety of the above methods and unfolded it after a short swim in the dye. It turned deep blue as we watched; it reminded me of in Sleeping Beauty, when the fairies change Aurora’s dress from blue to pink and back again.

Once you have rinsed and dried the fabric, you can refold and redye up to 3 times. After that, the dye won’t stick anymore and will bleed.


In the spirit of ‘wabi-sabi’, I suggest you get some of your own indigo by clicking the affiliate link below and trying it out. It was THE ideal way to craft outside on the lawn on a hot evening. Embrace the imperfections, try something new, and put a pair of used canning lids to use the way I did to create a beautiful and completely unique textile.

Filed Under: Craft

Chalk Paint Cabinet Rehab

February 22, 2016 by Jenny Gomes 2 Comments

This post will share why I love chalk paint, why you will too, and how I used chalk paint to refinish an old medicine cabinet that was covered in rust.

Chalk Paint Cabinet Rehab

I am actually a terrible painter. Most people think that because I’m crafty, I must be good with paint. I am not. In fact, I’m awful. I don’t know what it is about putting a paintbrush in my hand, but I become a total spaz as soon as I am holding one. I love all hobbies that have a visible, tangible result at the end, so sometimes I forget (or block out) how messy and imperfect my painting is and I attempt to paint something. It takes under five minutes every time to remember how much I stink. I am messy, I can’t care enough about perfection (which seems to only exist in painting) to make my hand move carefully and slowly, and I am so impatient that I rush and drip and smudge and it is awful.

[Read more…] about Chalk Paint Cabinet Rehab

Filed Under: Craft

  • « Go to Previous Page
  • Go to page 1
  • Go to page 2
  • Go to page 3
  • Go to page 4
  • Go to page 5
  • Go to page 6
  • Go to Next Page »

Primary Sidebar

Categories

Follow me here, there, & everywhere!

  • Email
  • Facebook
  • Instagram
  • Pinterest
  • RSS
  • Twitter
  • YouTube

Search

Get 10 Free Recipes Now!

Best Chicken Coop

Footer

Start Canning Course

Start Canning Course | The Domestic Wildflower click to read this super helpful list of resources, tools, and gift ideas for the homemade and handmade enthusiast in your life!
This video course will invite you into my kitchen to watch me can a wide variety of recipes and use several beginner friendly techniques. It is the perfect course if you want to learn but have no idea where to start; even if you've never boiled a pot of water! Learn how you will know you are doing it right, safety best practices, simple recipes that are foolproof and guaranteed to impress, and skills to apply to any recipe.

Shrubology Ebook

Shrubology: Refreshing Homemade Fruit and Vinegar Syrups for Cocktails
Make easy, no-cook fruit & vinegar syrups for cocktails & mocktails! This ebook shares crowd pleasing recipes and simple to understand ratios so you can make a shrub on your countertop any time- without a recipe. Dive into these Prohibition Era drinks today!

Copyright

Copyright 2019
The Domestic Wildflower
www.thedomesticwildflower.com.
All content created by Jennifer Gomes unless otherwise noted.

Copyright © 2023 · Lifestyle Pro on Genesis Framework · WordPress · Log in