|
Handmade Food & Craft Tutorials for Beginners
|
|
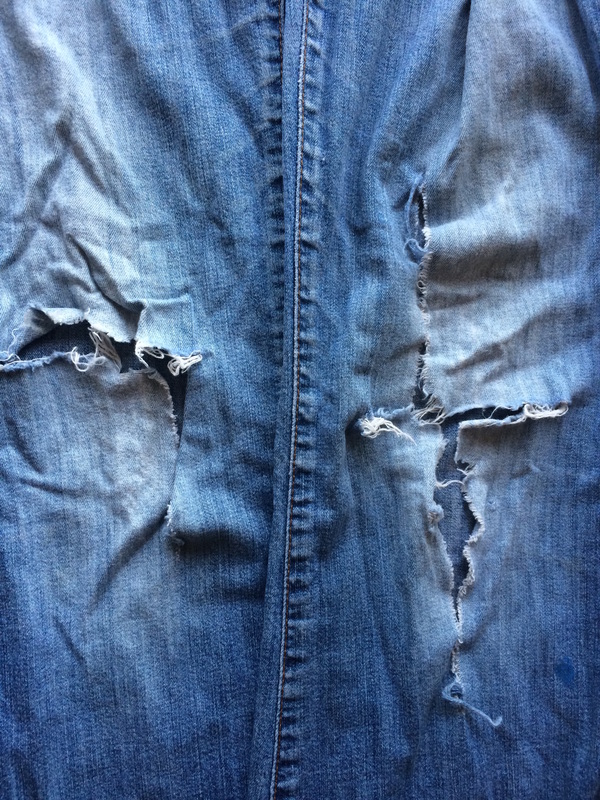
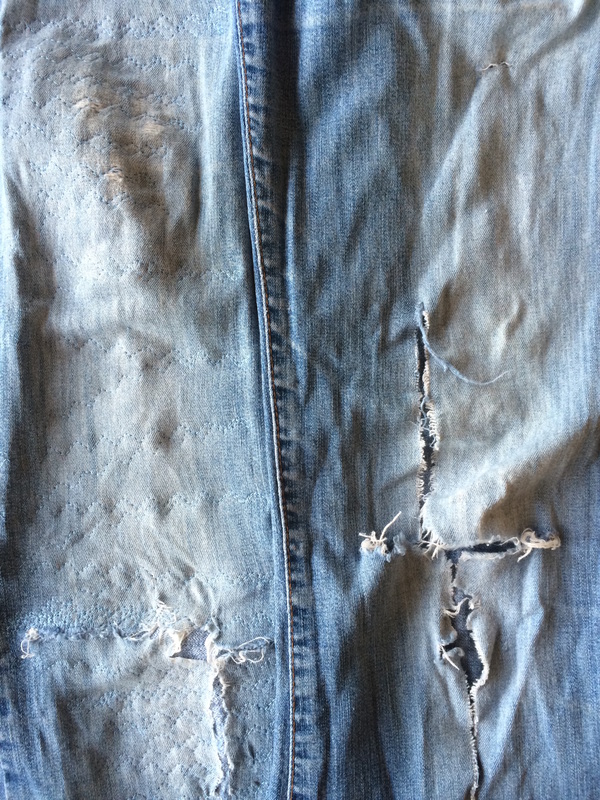
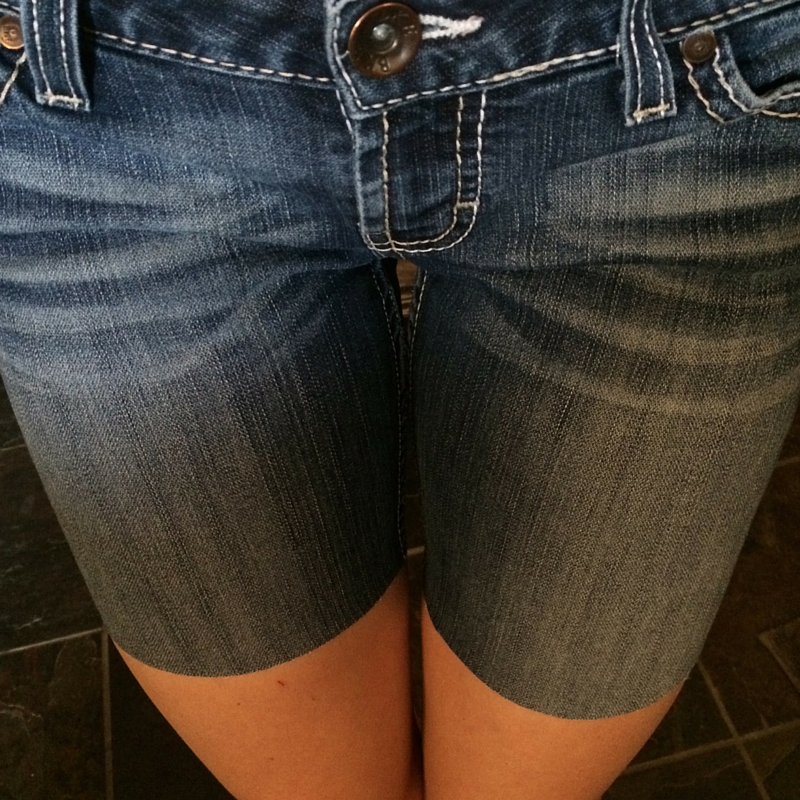
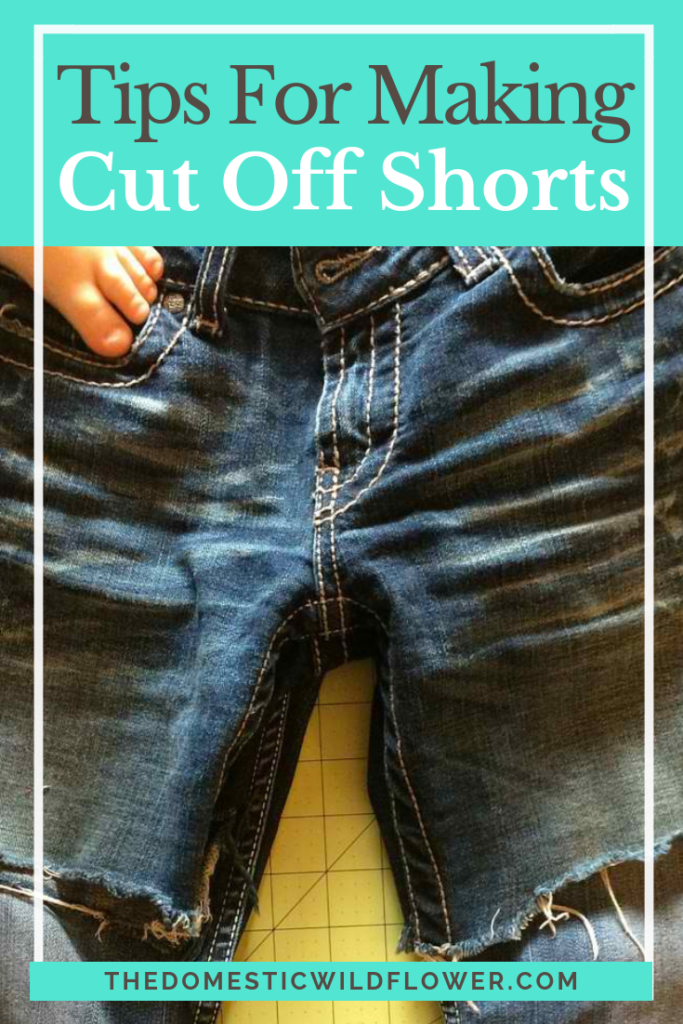
There are a few tricks to making perfect cutoffs that I will share with you here. I hope the next time you wear the knees out of your favorites or score some secondhand jeans that are too short the way I just did, you can spend a few minutes cutting them off the right way to wear all summer long
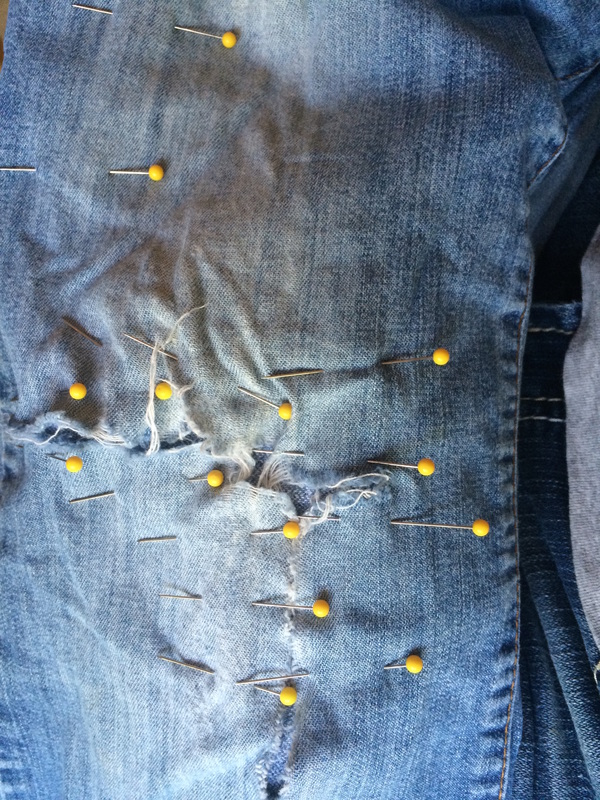
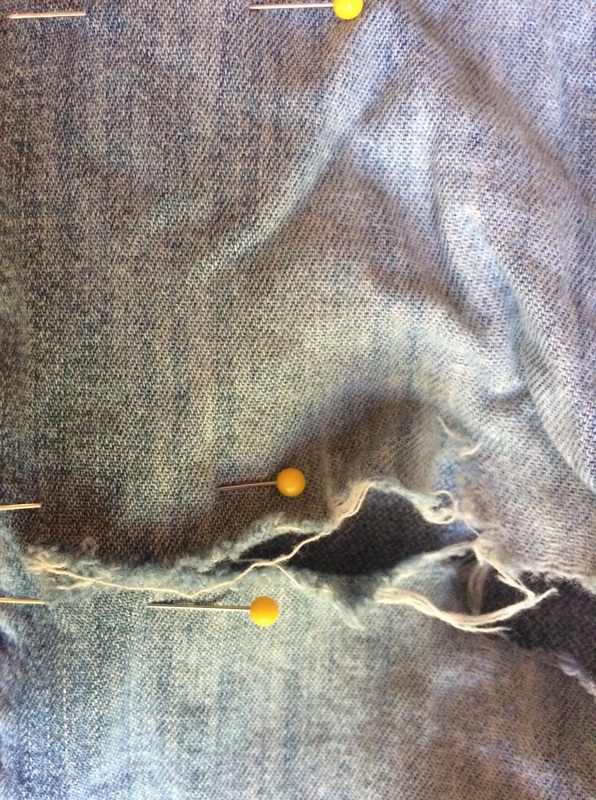
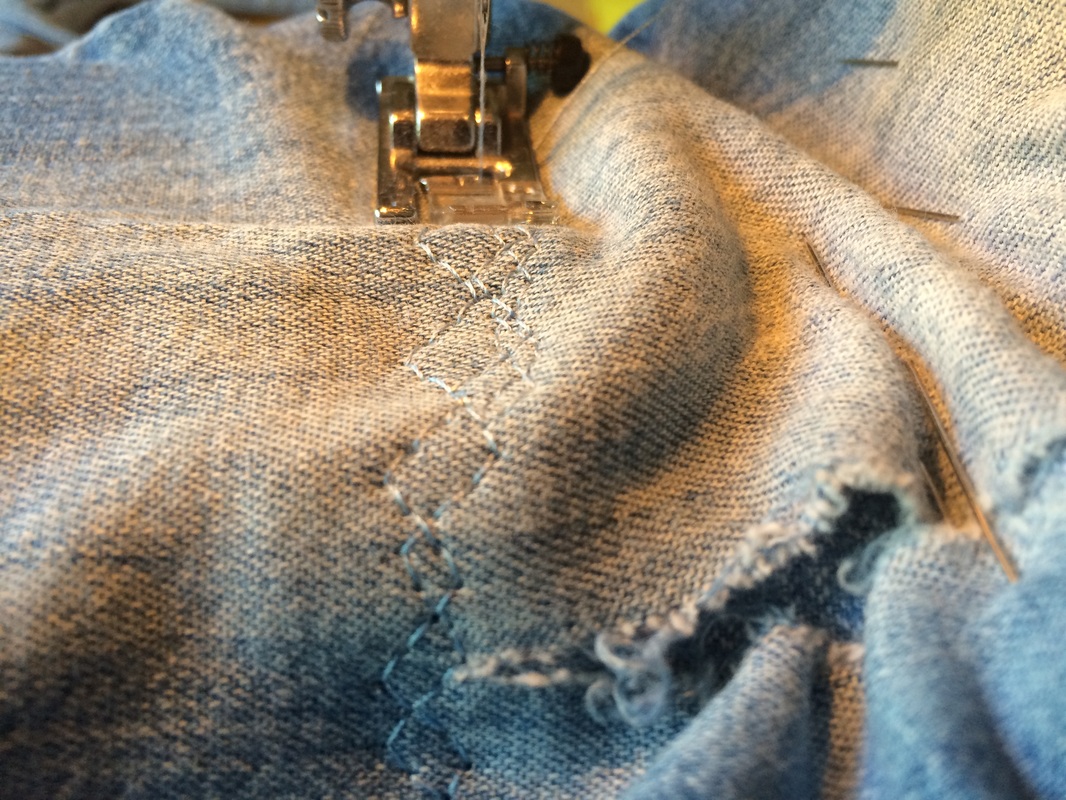
 Tips: Use a pair of shorts you already own as a guide. You don’t have to, but this can be really handy. If possible choose a pair in a similar fit and style to the pants at hand. 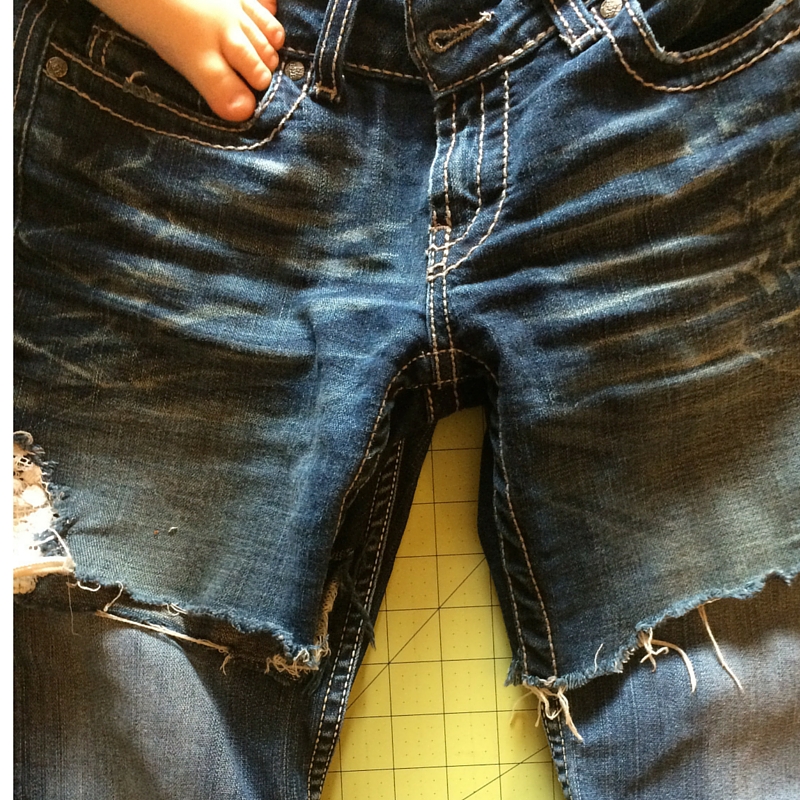 I cut each leg separately. If you have sharp scissors, you could cut through both legs at once but that doesn’t mean you should. I always cut an inch longer than I think I will want them and you should too. Cutting fabric is permanent. You can always try them on, decide you want them a half inch shorter and cut again. Lay the pants flat. The inseams will be spread apart, making the top of a triangle. Smooth the pants flat, being mindful that the back of each leg may possibly be wrinkled. If you have example shorts, lay those on top, lining up the crotch seams. This is important. Don’t worry about lining up the waistbands, or the zippers. Line up the crotch seams. 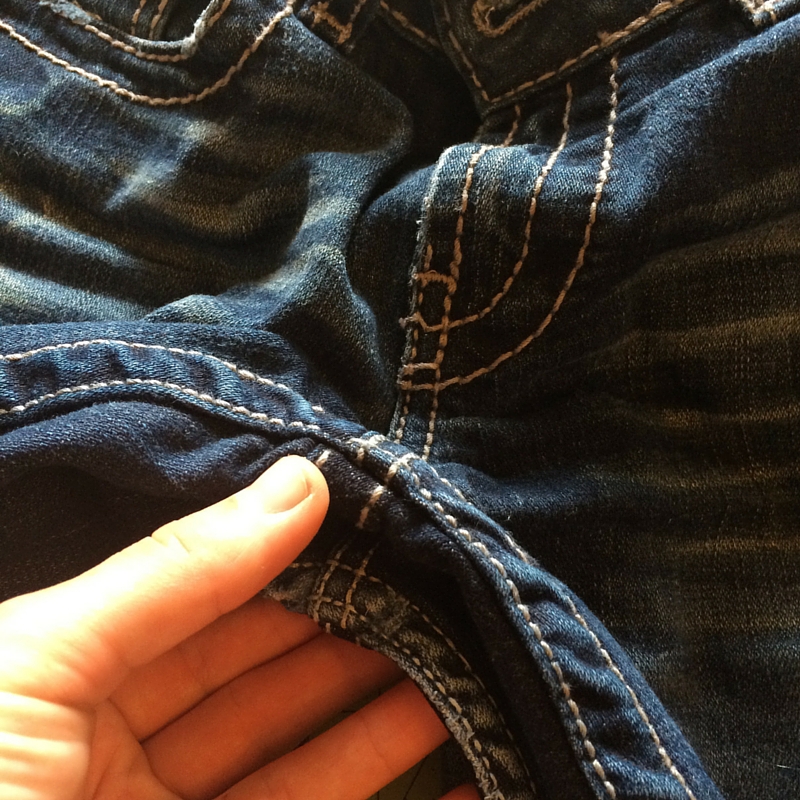 Because I had a pair of shorts I loved to use as a pattern, I was able to see that the legs were NOT cut off in a straight line, but rather angling up to the outer thigh, for example. Your desired look may have a greater angle than mine did in these photos. To finish the ends you can do nothing (my summertime uniform has no finished edge) or you can zigzag in a matching thread close to the edge. I have done this with great success for shorts that are thisclose to being too short. The zigzag keeps the fraying from washing and wearing to a minimum but allows for the amount of fray that is fashionable and desirable.
I keep the legs to use to mend jeans and for other sewing projects and you should too!
If you want to learn how to sew, check out the courses HERE!Happy cutting, Wildflowers! Share your successes or failures in the comment section below! |
I have been honored with the Very Inspiring Blogger award by Hannah of Palindrome Dry Goods. Her blog is spot on and her taste in fabrics is delicious. Check her blog out here and Etsy shop here.
Here’s how the award works!
Award Guidelines:
1. Thank the person who nominated you and add a link to their blog.
2. Display the award logo in a blog entry
3. List the award guidelines so your nominees will know what to do
4. State 7 hidden facts about yourself OR 3 things that inspire you.
5. Nominate other blogger friends for the award.
I will choose to share three things that inspires me with you all.
Fabric is as much a part of my memory as smell or music is the rest of us. When I see fabric from my past- the heart print sheet set from when I was a little girl, the jewel tone floral from the couch cushions my mom made, the mod polka dot print of my first day of teaching school skirt- I can recall instantly, effortlessly, the feeling of the time when I wore or felt or enjoyed the fabric (or didn’t enjoy, like the scratchy green lame’ sleeves from when I was a wintertime flower girl). I remember what each interviewer wore when I was interviewed for the Ford Family Scholarship when I was a senior in high school and when I applied for my first and only teaching job. I remember what many of my students wore on their first days of school, all eight first days that I have taught.
For me, fabric choice is such a deliberate and personal thing, and though often free and easy when I’m standing in my closet or in the fabric store, I read into it a great deal. So when I’m checking out what someone wore to an important event, it isn’t with a negative eye. It is me making a memory and trying to discern what consciously or subconsciously the wearer was trying to feel by choosing it. When I open dusty boxes of old fabric belonging to my Gram or other relatives I feel a great excitement and privilege, like I am seeing paints belonging to Botticelli or Michelangelo. This is all so, so “fabric nerd” of me but I will wear that label with pride. Fabric inspires me big time.
2. My Gram
My grandma Glory Ann inspires my creative process in many ways. She’s a realistic and practical sewist. I often think, “What would Gram do?” when faced with domestic dilemmas. She is 83 years young and has lived through some very tough and some very wonderful things. Because of her unfailingly kind and sensible influence, I am a better, more practical, reflective, and more realistic sewist and person.
She would never splurge on yards of fabric without having a plan in mind for their use, for example. She and I might come up with a realistic plan on the spot in the fabric store, but we aren’t gals without a plan. When I make a mistake cutting, I admonish myself to be more like her, to read the directions more carefully before taking out the scissors. When I need to rip out a seam, I try to recall her saying, “Oh, it will be all right!” and laughing about a sewing misstep. When I suggested trying out an old, found pressure cooker without getting the gauge checked and without the instruction book, she wisely recalled a kitchen explosion of her own where berries and glass ended up in her ceiling. I thus got the pressure cooker checked.
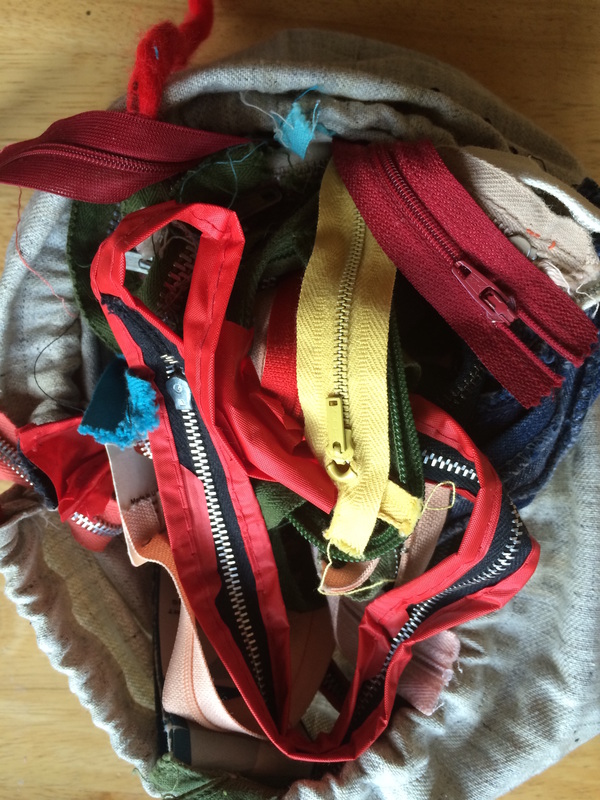
Frugality and thrift are popular buzzwords now but until you see the large sack of zippers my Gram ripped out of worn-out garments and saved her whole dang life for future use, I’m afraid you aren’t understanding the real philosophy of “make do and mend” the way she (and other awesome ladies of a certain age, time and place) does. I’m working my way through her sack of zippers, one project at a time, and I’ll never forget to ask myself, “What would Gram do?”.
3. Saving Money
It is all well and good to say that money doesn’t matter but it does. It matters a lot. It matters a lot to me because I see money as time. The more money I make plus the less money I spend equals more time. I want all the time I can at home with my kids, spending time doing things I want to do. I love my job and am lucky to have a well-paying job that is so enjoyable and I wish the same for all of my students. But, I am inspired by those who figure out a way to make something last, make it for less, and make something better. If money-saving steps like hanging laundry out to dry (in my post here) and saving some strawberries from the compost pile (here and here) can become automatic, our lives improve in ways we can’t measure in dollars and cents. I was lucky enough to have some very frugal women in my family (my mom and Gram above, specifically) teach me how to do things the smart way, as opposed to the easier, and often more expensive way, and thus I spend very little time thinking about money now. I want to work smarter, not harder, and I’m inspired by anyone who does just that.
I’d like to nominate Elena of Randomly Happy. Her sewing technique is top notch and I love her choice in fabrics. Her writing style is smooth as silk as well. Be sure to check out her very inspiring sewing blog!
What inspires you, Wildflowers? Share in the comment section below!
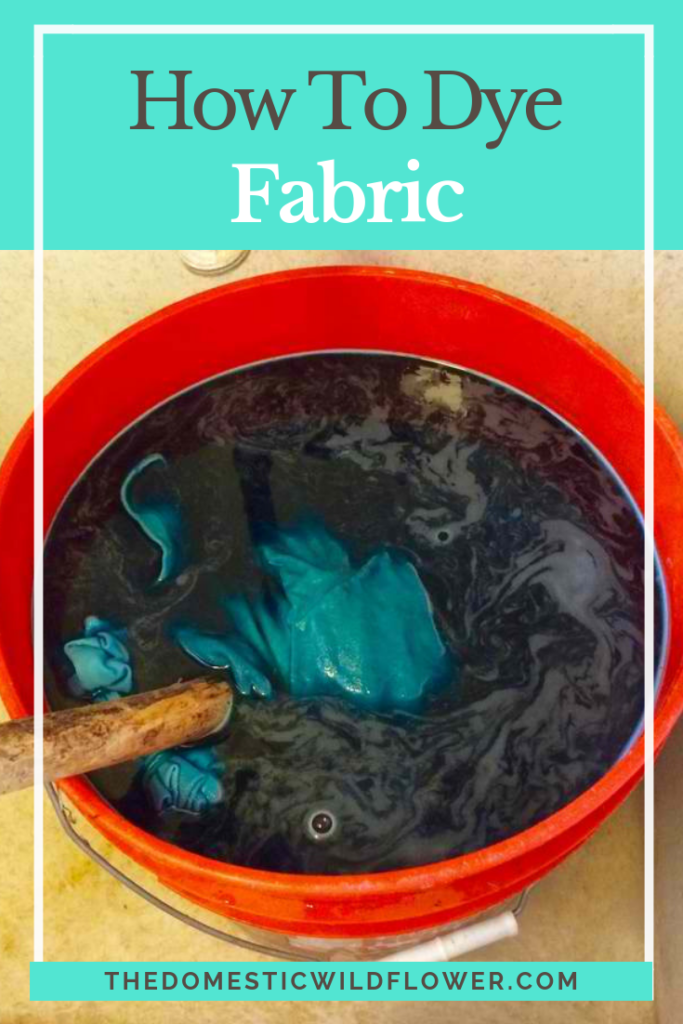
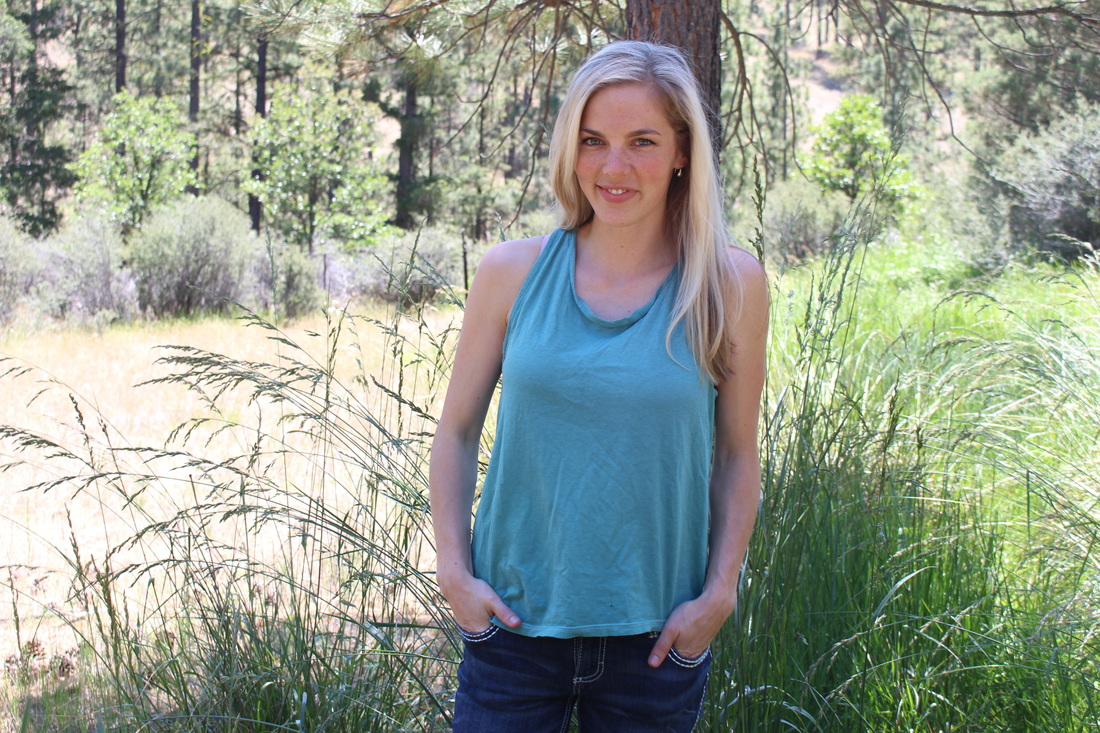
Dying fabric takes a certain level of comfort with commitment. There are products sold to remove dye but I have never used them and it sounds like more work and less fun than I’m looking for in my naptime sewing pursuits. I chose to dye several of my husband’s worn out, plain white work tee shirts with the intention of sewing them into baby leggings (excellent use of any knit), little girl skirts, and my flyaway back tank that I posted about here. This was a great way to use up the parts of the shirts that aren’t worn out, though was a little tedious cutting around the holes.
You can buy a fairly inexpensive bottle of liquid dye or even less expensive powdered dye and new life to old or faded fabrics pretty easily. Rit is a popular brand that I have had great success with but there are many other brands out there that are awesome also. Rit is appropriate for cotton, cotton blends, linen, other natural fibers, and some polyester blends. Generally, the more man-made fiber content, the more it would behoove you to seek out a brand of dye specifically for that fabric type.
I was inspired by the beautiful shibori dying technique (examples here and here) but chose teal dye instead of navy. I used rubber bands to bunch up tie-dye-style the old tee shirts and placed them in a clean 5-gallon bucket, and put the bucket in our wash basin. Someday I may write an ode to the ever-useful wash basin that seems less and less popular in newer homes but I will be brief and just say I love mine for projects just like this one. In addition to needing a clean, non-porous bucket or receptacle you need a stirring stick. I grabbed a stick from the yard and was very glad to not have to worry about cleaning it. For past projects, I used a yardstick. If you have no stick handy, choose a non-porous (hard plastic) stick and avoid metal as it can react with the dye and probably change the dye a bit and perhaps pit the metal.
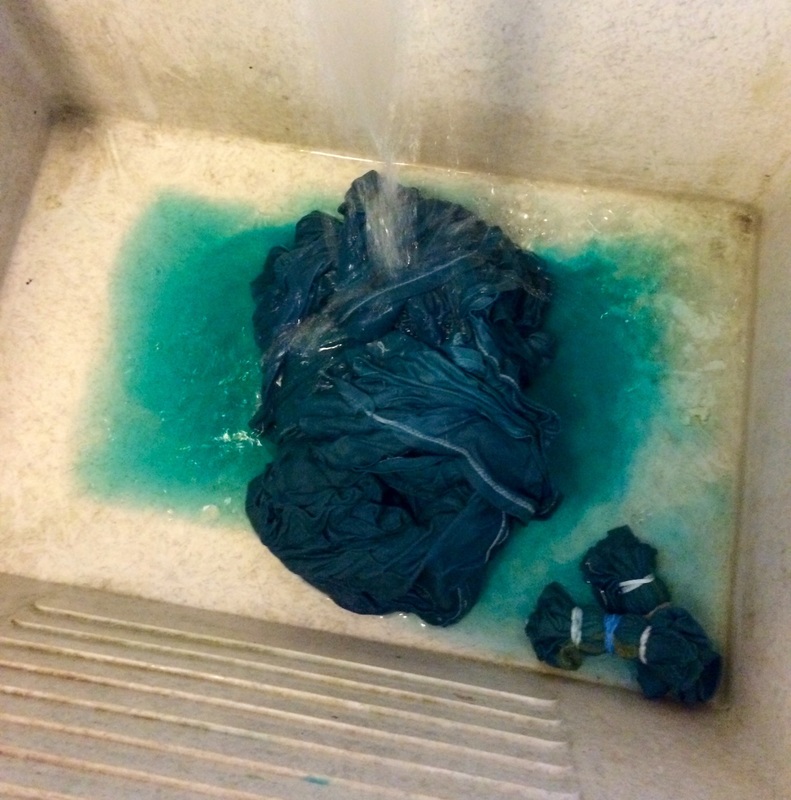
The directions will likely direct you to stir, stir, stir, and I wouldn’t skimp on this even if you are dying old tee shirts. The agitation is pretty important. The next step will be to rinse by hand and wash in a washing machine. Surely, you should use gloves to rinse but I’d be lying if I said I did. And my cuticles were green as a result.
I like to have a plan of what I will wash in the washing machine after I dye fabric. Rags or the plastic shower curtain are good choices to be sure your washing machine is free of excess dye. Run a large, empty load or a tub wash cycle, then wash something like rags directly afterward to be on the safe side.
The dying is actually very simple. Follow the directions on the bottle or box which are all basically going to tell you to add water, the dye, maybe white vinegar and/or salt (as a fixative which will help the dye “stick” to the fabric) and stir. The amount of fabric you can dye is based on weight- usually a pound or two of fabric per container of dye.
The advantage of liquid dye is minimal but clear: you don’t have to wonder if you have stirred vigorously enough for long enough the cauldron of teal blue water to dissolve the powder entirely. I have never had trouble with the Rit powdered kind and because it comes in a cardboard box, rather than a plastic bottle, and is less expensive by about $2, I’d say it is preferable for casual dying projects.
As for washing the hand-dyed garments later, I try my best to wash in cold water and with vinegar in the additive dispenser.
Easy, right? Tell me in the comment section below, Wildflowers, what have you dyed with success? Share your tips below!

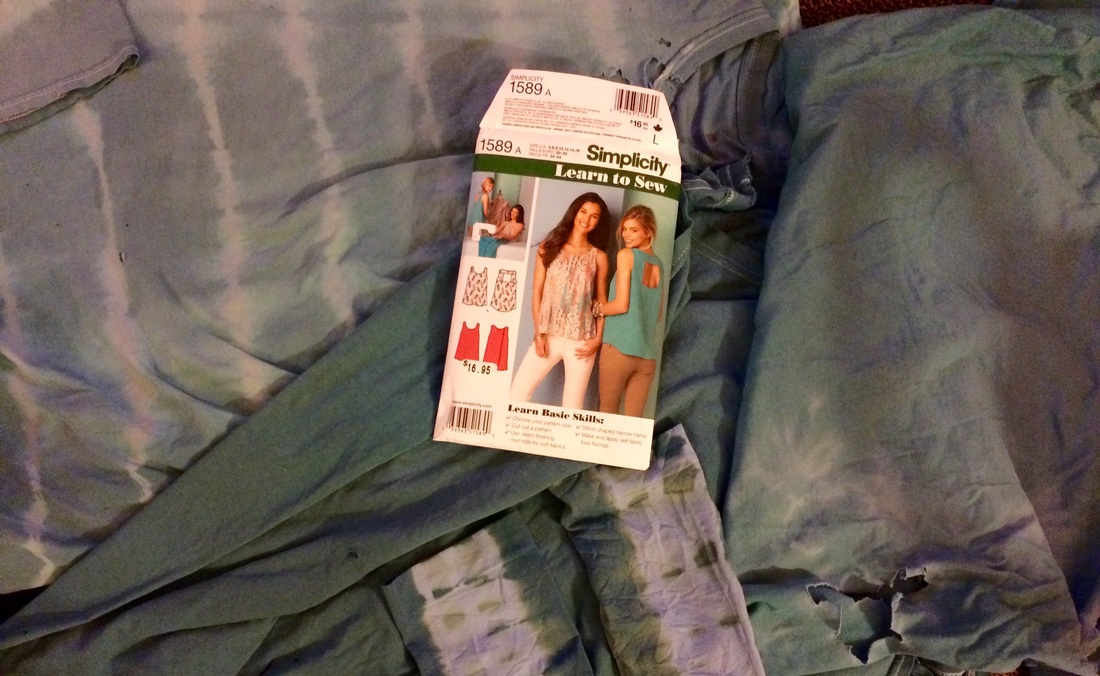
I worked at JoAnn’s Fabrics the whole time I was in college and let me tell you; I LOVED it. If you have to be at work early in the morning on the weekend while attending college in a super fun town like I had to, JoAnn’s is the place to be. Customers choose to shop there because they are making something awesome. That’s a great vibe to be around and I learned a lot about sewing by working there.
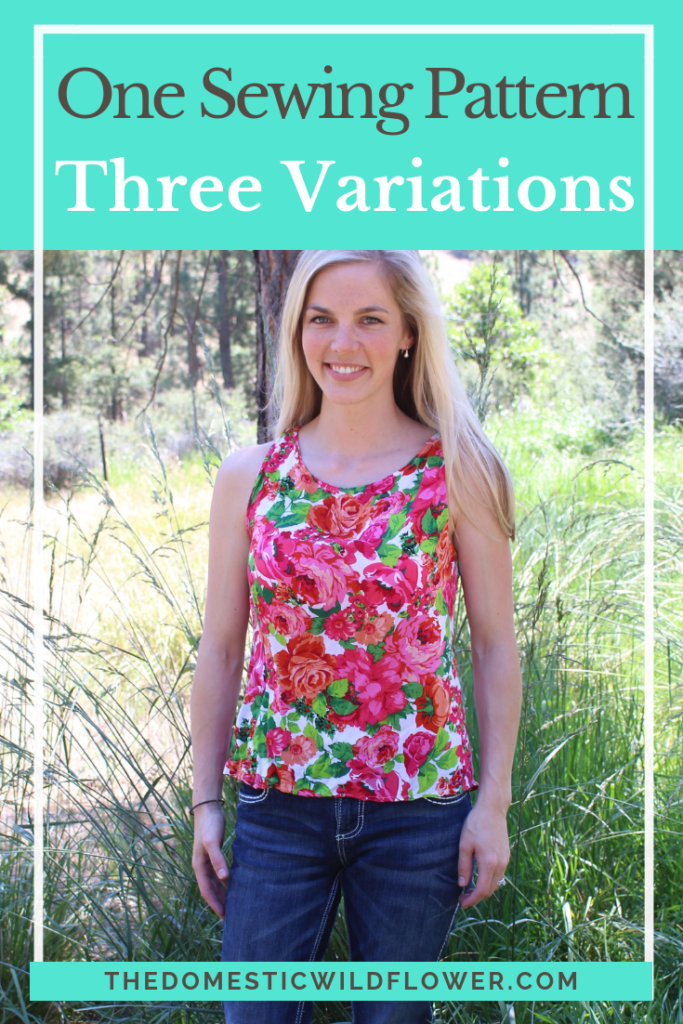
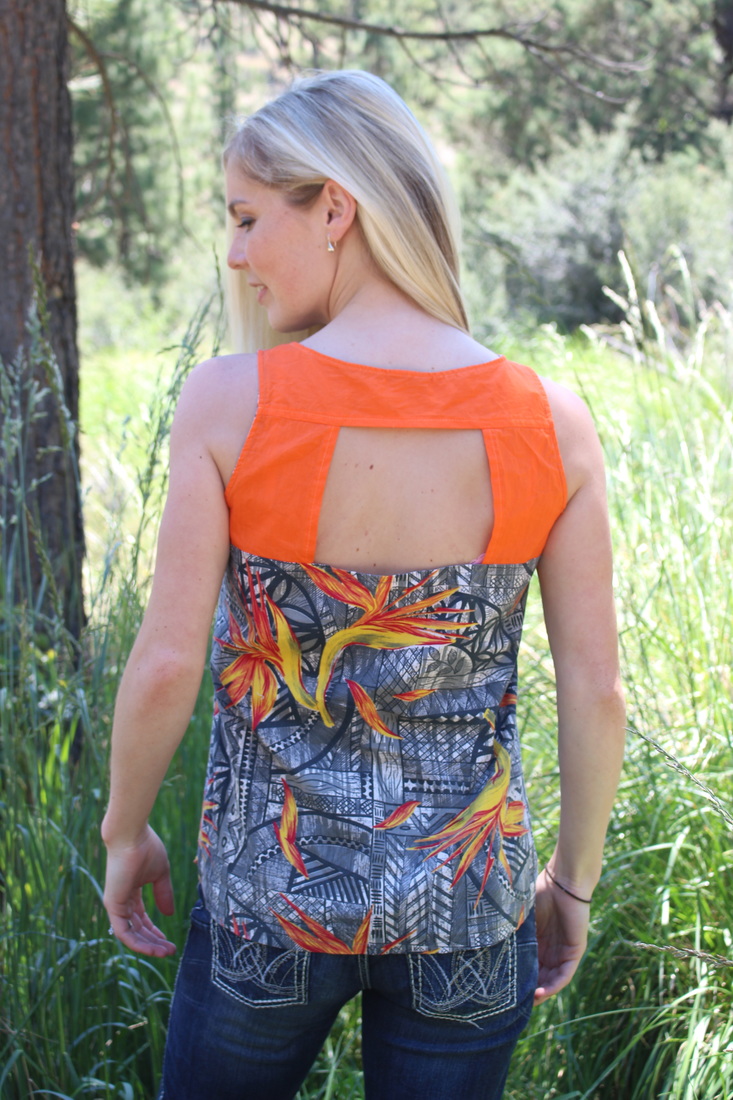
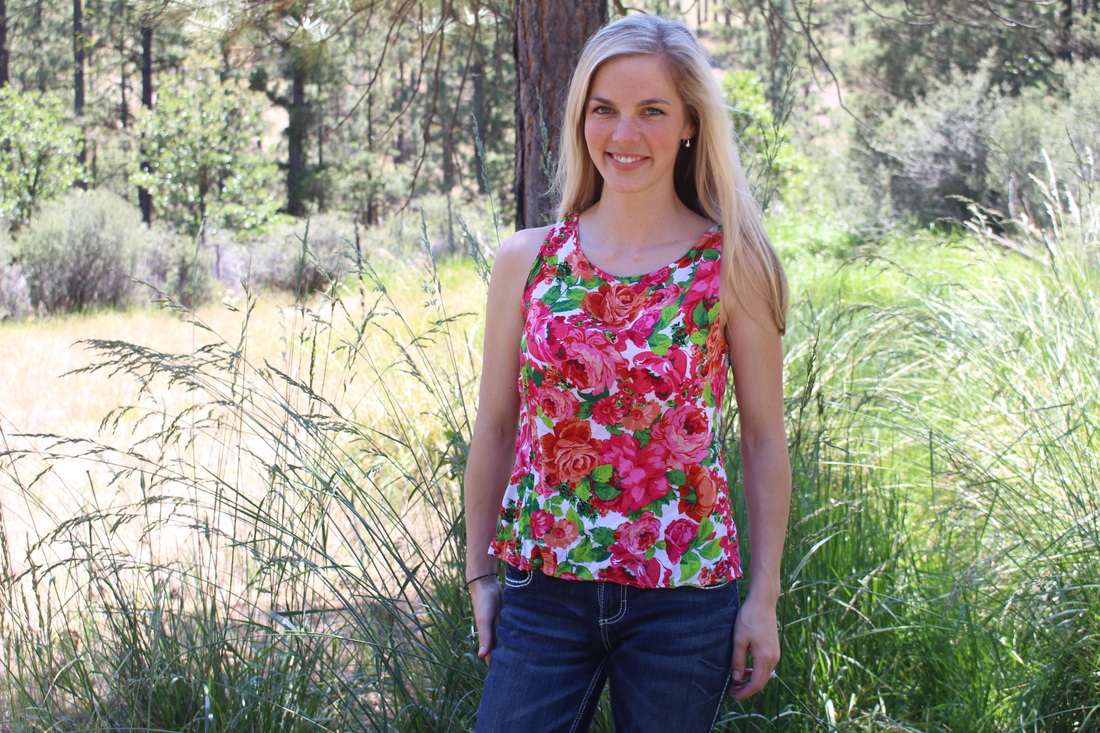
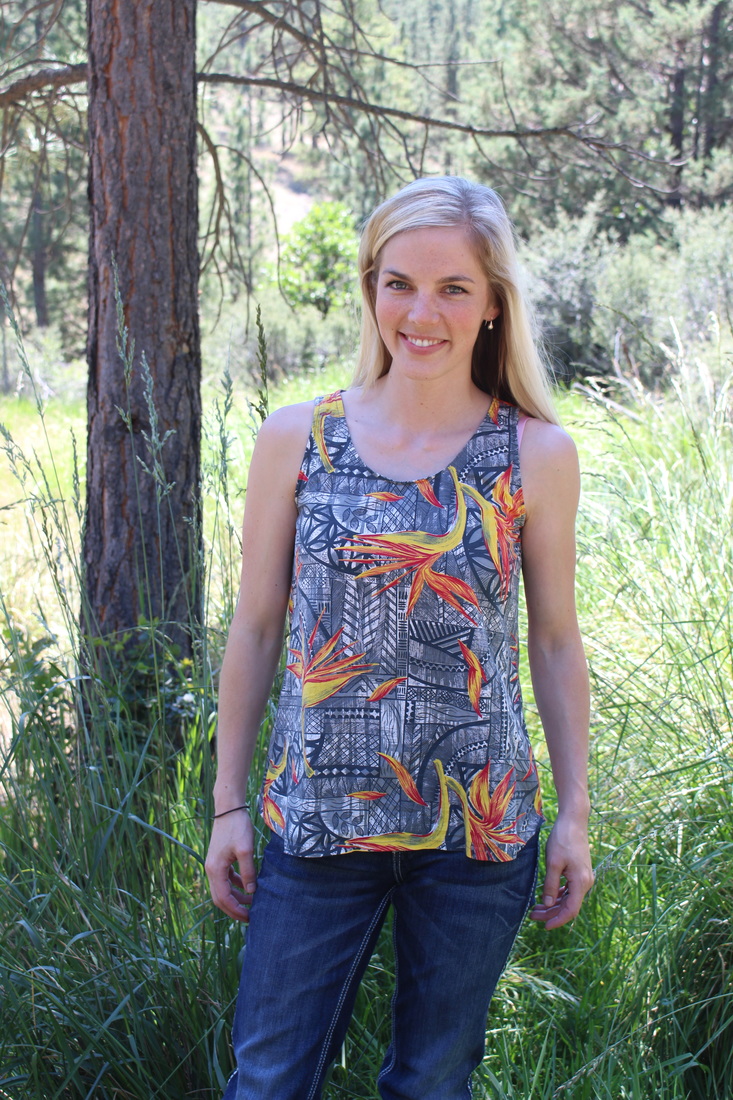
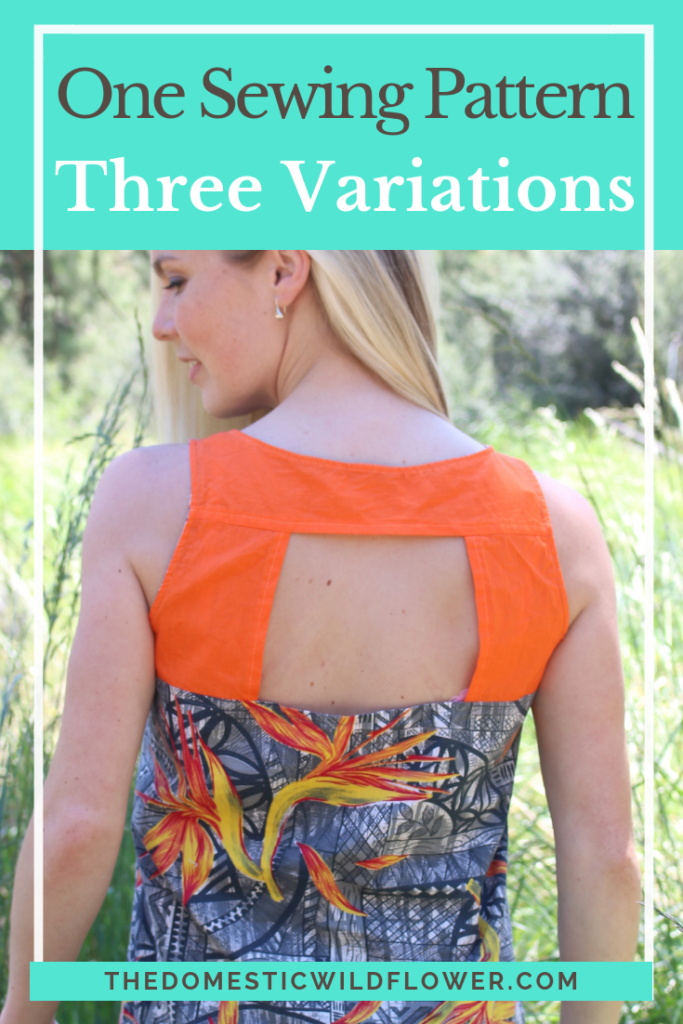
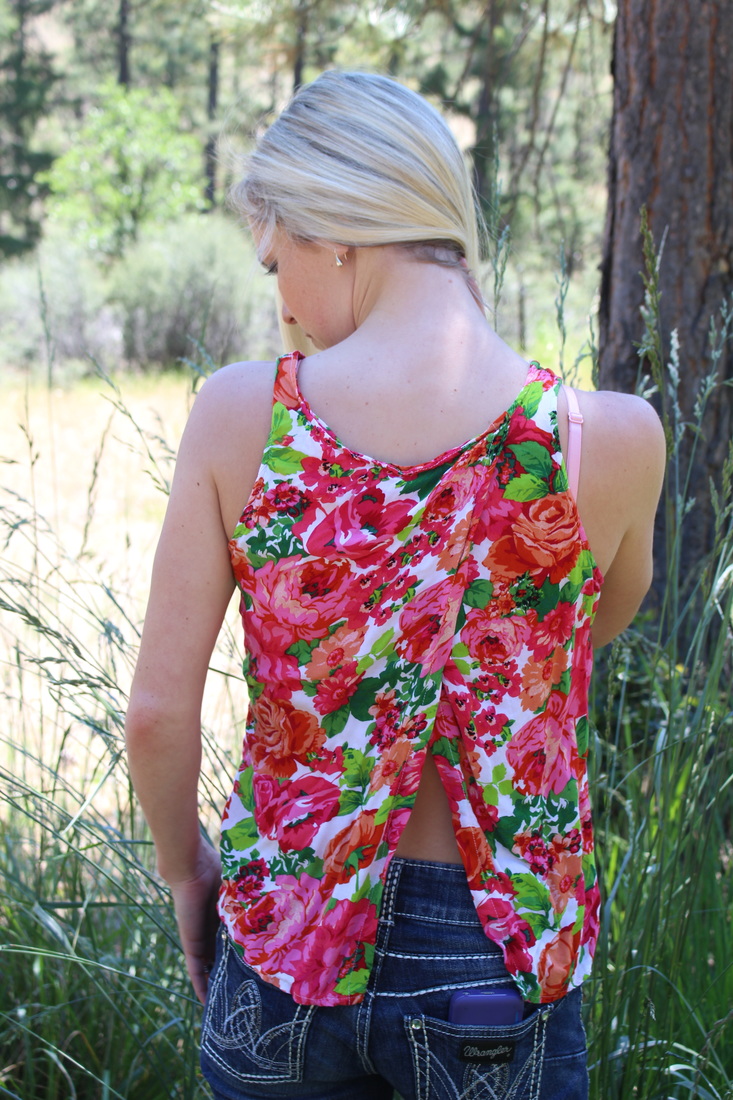
I’d recommend this pattern to a beginner as it is from their “Learn to Sew” line which means the instructions are very clear, the techniques needed are fairly basic, and it was simple to sew. I chose it specifically because I love back interest in garments and this pattern is a loose tank that pulls over the head and has either a cut out or a flyaway back interest. Both styles allow for a standard brassiere and are easy to take in.
On all three tanks I took the sides in significantly; about three inches on each side. I’m slender and while I like the flowy look it was a bit too billowy and hid my shape rather than flattered it.
The pattern suggests lots of types of wovens that are making me eager to rustle up a yard and a half of eyelet, voile, or linen.
I know there is a lot to consider when choosing a sewing pattern but I have found that the most important thing when investing in a pattern is the different options it has and the likelihood that you will sew the pattern multiple times. Bear that in mind and you will get a greater return on your sewing investment.
The photographs for this post were taken by the lovely and talented Della Hayden of Circle Bar Photography. If only she lived closer, she’d be taking all my photos!
Sew on, Wildflowers! What pattern have you used and loved for its versatility? Share in the comment section below!