• Skip to secondary menu
  • Skip to main content
  • Skip to primary sidebar
  • Skip to footer
  • The Pressure Canning Cookbook
  • Blog
    • Subscribe
    • Welcome!
  • Perfectly Preserved Podcast
  • About
    • ADW Manifesto
    • Work With Me
      • Read
  • Shop
    • My Account
    • Cart
    • Checkout

The Domestic Wildflower

Handmade Food & Craft Tutorials for Beginners

  • Courses
    • Free Canning Basics
    • Everything Canning Course
    • Steam Canning Workshop
    • Free Homemade Cocktail Mixers
    • Wildflower Mixology
    • Crochet Basket Workshop
  • Can & Preserve
    • Never Canned?
    • Steam Canner Equipment Bundle
    • Shrubs Course
  • Sew
  • Cook
  • Craft
    • Crochet Step-by-Step Guides
      • Crochet Basket
      • Giant Yarn Throw
      • Thick & Thin Throw
  • Living
    • Creativity Challenge
    • Clean
    • Kids
  • Rentals

Sew

How to Sew Spandex

September 1, 2016 by Jenny Gomes 2 Comments

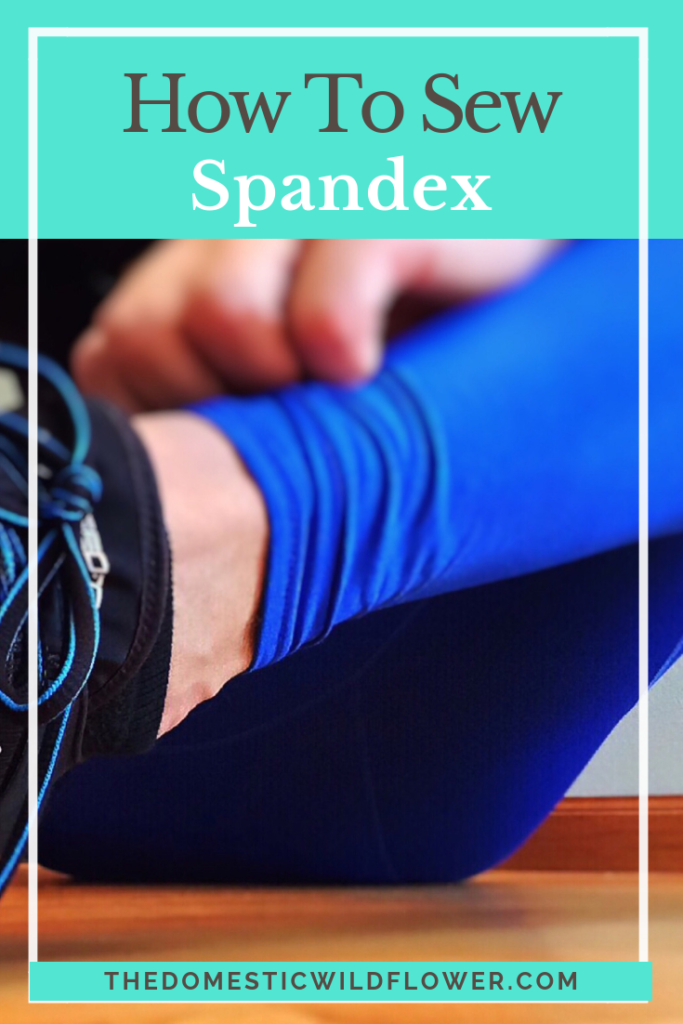
This post will explain several helpful tips for how to sew spandex- one of the trickiest fabrics- but will have you sewing your own yoga pants, mending leotards, and creating your own running gear in no time.

How to Sew Spandex

Want to learn to sew? This is the course that I recommend and love!

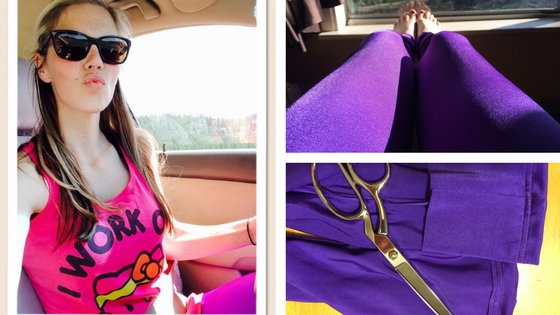
Sewing super stretchy spandex and similar knits can be intimidating but the results can be totally rad workout clothes like the neon purple leggings I made recently. These are the tips I can share to ensure a successful spandex sewing session (like what I did there? I’m an English teacher at heart!).

Sewing machine needles may seem like they are all the same but they are not. They differ in very important ways and by using the correct needle for your fabric type you can avoid a less-than-awesome project which is a buzzkill for any sewist.

Here’s a link to a great article on the Craftsy.com blog http://www.craftsy.com/blog/2015/03/schmetz-sewing-machine-needles/

This explains clearly all the different types of needles better than I ever could.

If a long-ish pdf isn’t something you need in your literal or metaphorical sewing basket, here’s the really short version.

You need stretch needles for stretch knits (drapey tee shirt knit, spandex, anything quite stretchy),

universal or standard needles for sewing wovens (quilting cotton, non-stretchy fabrics commonly used in clothing and textiles, etc)

and if you have a fancy project where you are sewing something like vinyl, sequins, something very sheer or delicate like the top layer of a formal gown, refer to a guide like the one above.

The difference between a “sharp” needle which is used for wovens and a “ball” needle used for knits is a simple but crucial one. A sharp slice through the fabric and a ball somehow wiggle through the loops in the knit the way you might stick your finger through an afghan. It is magic and by using the correct needle for knits, you prevent a whole host of fabric-ruining troubles. Get the right needle for the project.

My spandex legging project came about when my mom unearthed yards of neon purple swimsuit spandex from when I was a child. As in over twenty years ago. Did I mention, dear readers, that we are borderline fabric hoarders in my family? My passion for sewing plus my new passion for yoga resulted in a plan for leggings.

There’s enough purple spandex to make a full Jane Fonda-esque leotard, which would be AWESOME but I am really busy and leggings seemed much more achievable in the time I have to sew.

I used a Simplicity legging and dress pattern but you could get a legging pattern from nearly any pattern company. I chose a pattern that included not only the pattern for leggings but for a tank top dress also. I could have purchased a leggings-only pattern but for the same price, it seemed sensible to choose the pattern with the most choices in the envelope.

Because leggings are a very close fitting and unforgiving garment (especially in neon purple), take the time to measure yourself carefully, Wildflowers. I took my pants off and measured several times around the smallest part of my waist (called the waist, which is confusing since most denim waistbands now sit much lower than that) and the fullest part of my rear (called the hip).

I was in between sizes so I chose the larger of the two because, as with your hair, you can always cut more (take in) but once you cut, that’s it. I ended up taking the leggings in, a quarter inch at a time, in the thigh and crotch seams, for the perfect fit.

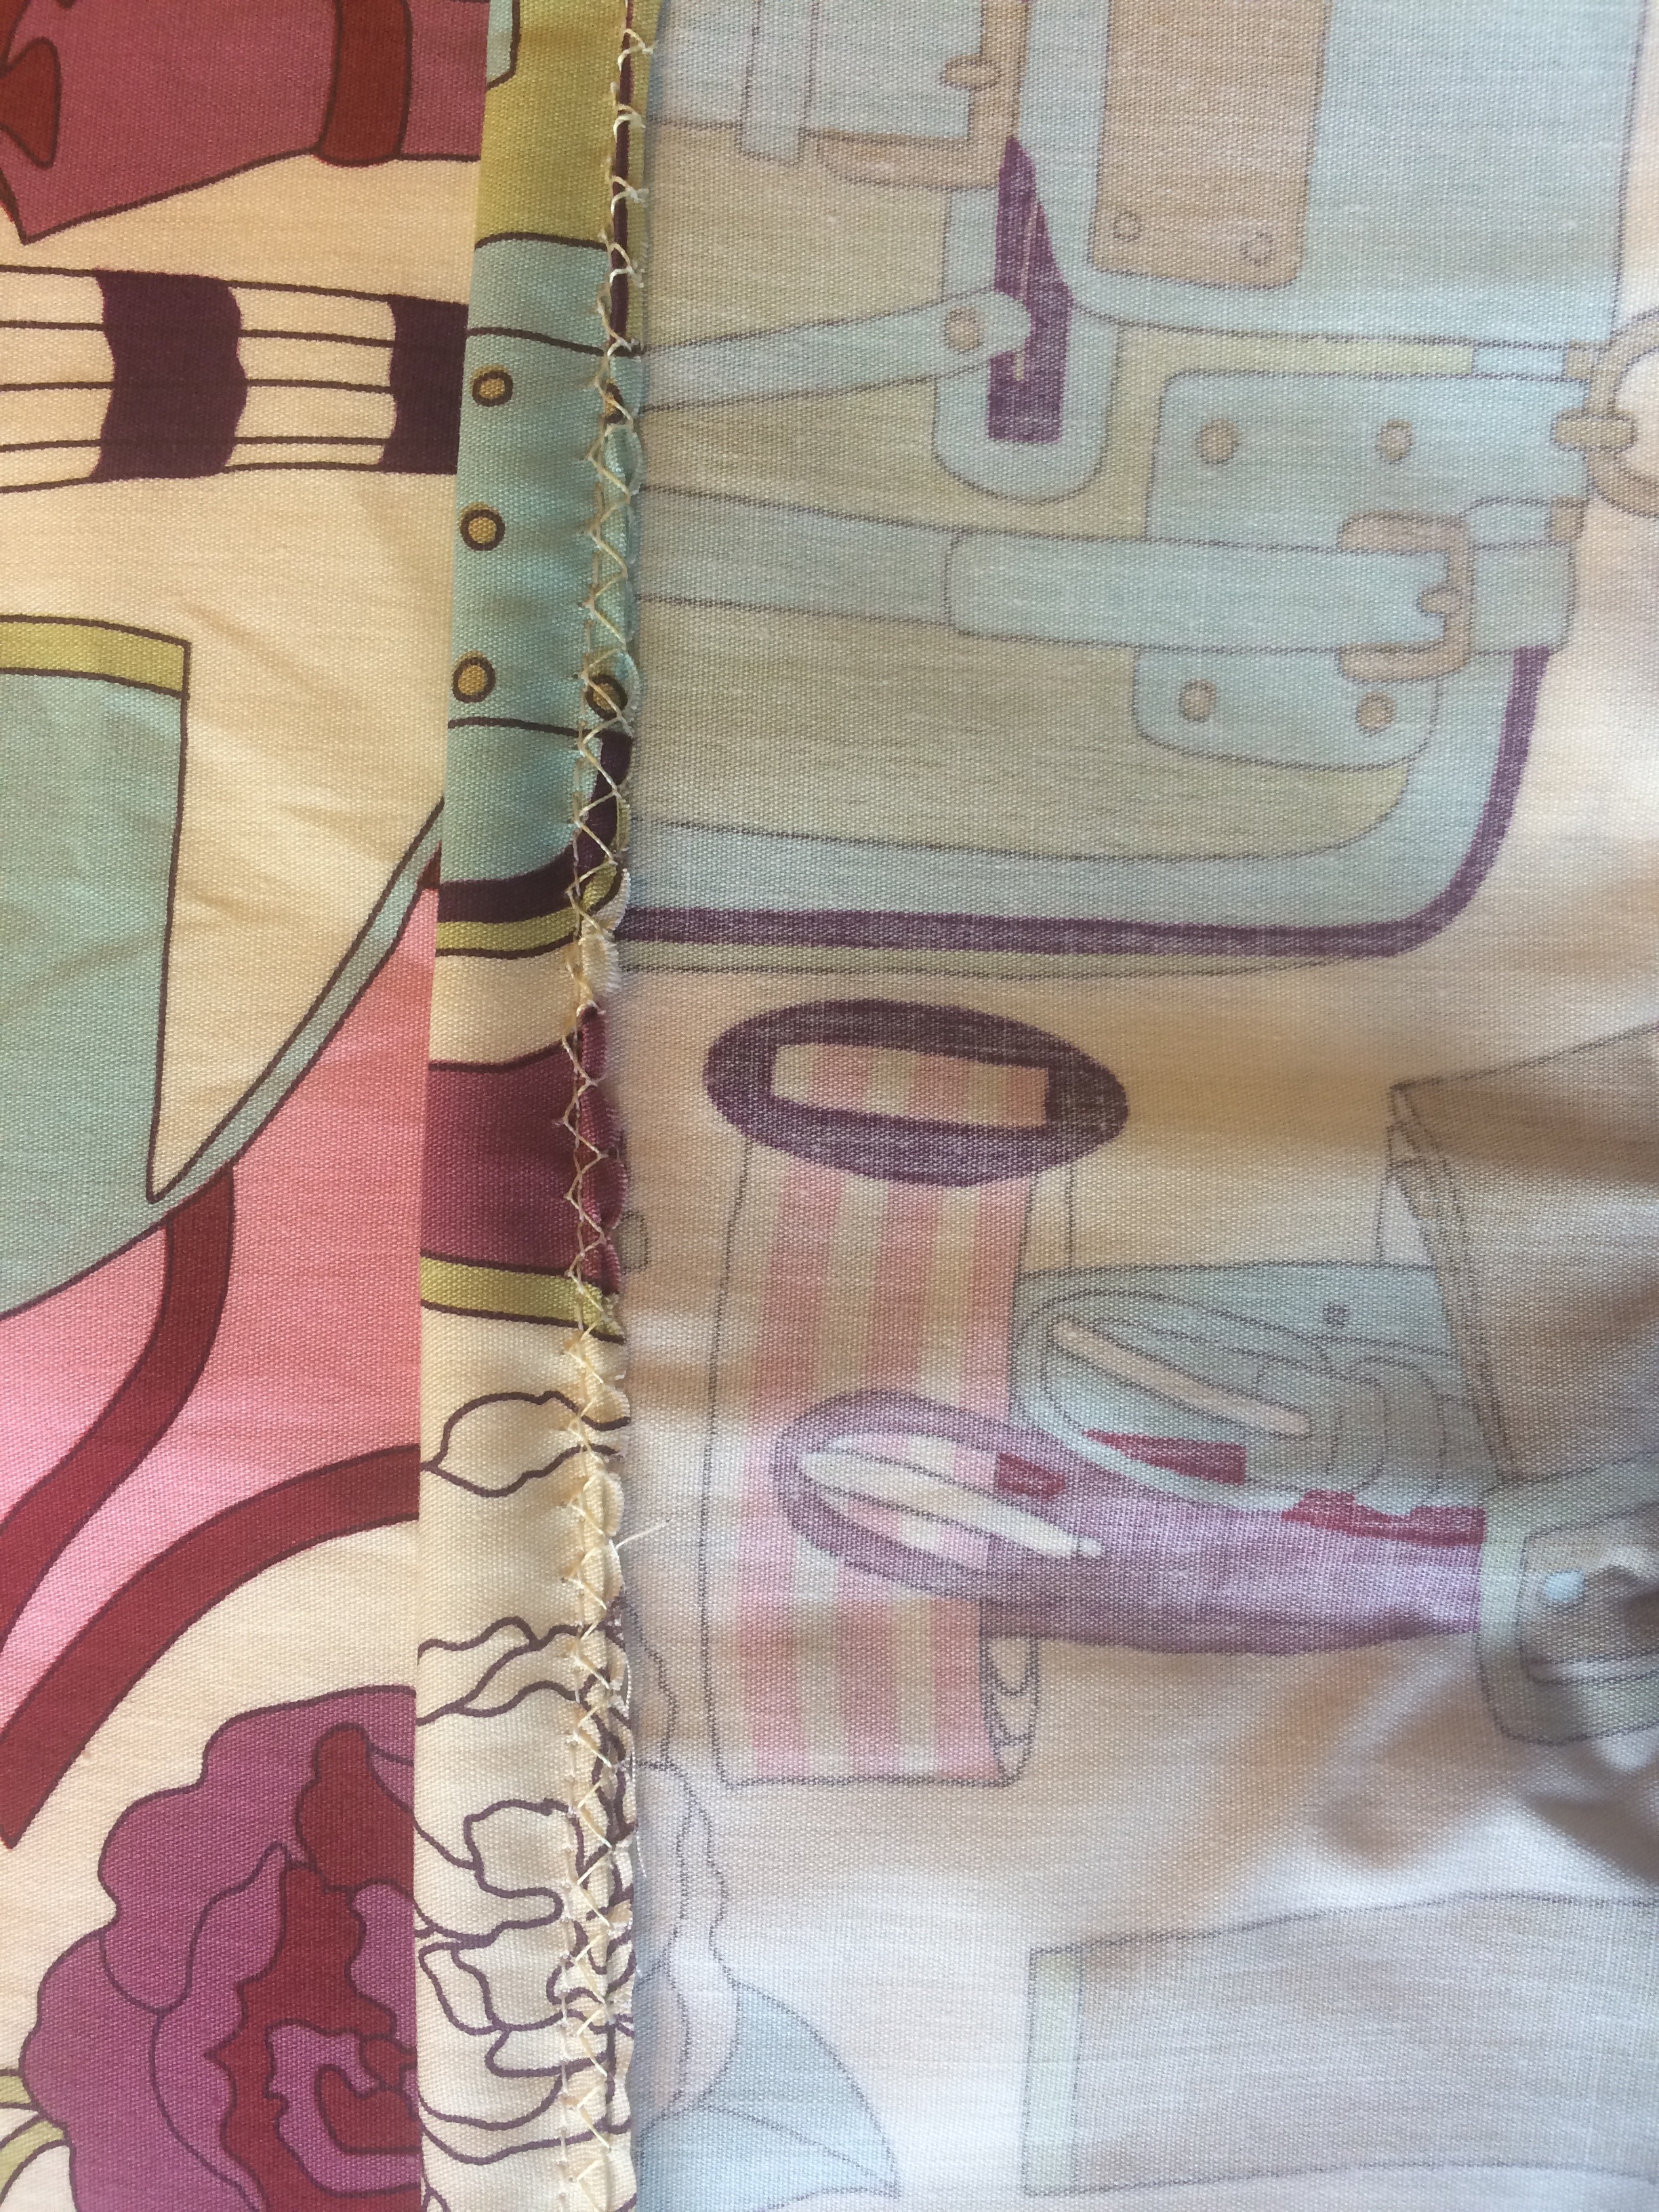
Another important tip I can share is that on the leg hem I stitched a second seam around each leg opening about an eighth of an inch from the first and trimmed the excess. This created a professional finish and was a nice alternative to using a serger, which I do not own.

Because I used old but well-cared for fabric and I purchased the correct stretch needle, I have a new pair of leggings that I love for a very low cost.

Sewing spandex was much easier than I expected because it isn’t super slippery (which can be challenging), it didn’t slide off my lap and table the way chiffon might (also difficult), and it was actually an easy sewing experience. I’d recommend it to any sewist who is comfortable sewing and cutting wovens to the point they can whip out a pillowcase or pair of pajama bottoms with ease and without tears.

Notice in the photo above the horizontal fold in the rise of the pattern piece. I did this because I have a short waist, I’m a  short girl, and I didn’t want my leggings to have a high rise. There’s a line where it is appropriate to make such an adjustment on most pant pattern pieces.

Before you cut, be sure your pattern pieces are pinned to the spandex so the MOST stretch is going from hip to hip, or AROUND the biggest part of your body. You do not want the most stretch to be from hip to ankle. Some spandex stretches almost the same in both directions and if this is the case with your fabric at hand, rest easy. As long as there is a lot of stretch happening from hip to hip, your garment will likely fit and be flattering.

Cutting out the two legs of the leggings was a small chore and very few seams required (2 leg seams, the crotch, the waistband, and 2 leg hems) were also simply because I had the right needle.

 How to Sew Spandex | The Domestic Wildflower click to read this helpful tutorial full of tips and tricks for sewing stretch fabric with ease! Mend or make your own yoga pants!

If you have read this set of tips, you’ll now know that you need to get a ball needle that is specially made for sewing stretch, use a pattern that is specifically for stretchy spandex, and remember you can always sew your item a bit smaller, and it is wiser to start larger and alter it to be smaller.

I dove into ANOTHER stretch sewing project very recently. Check out my latest post, 10 Things You Think When Sewing Lingerie For The First Time right here! 

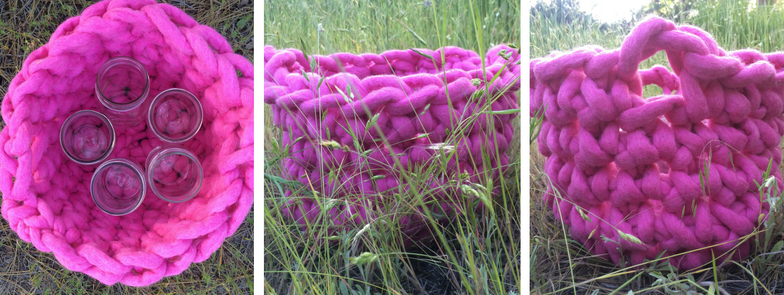
You may now also see that I can break something pretty complicated into simple, clear, easy-to-follow steps. For example, I made this super cute basket in ONE (just 1!) nap time:

If you want to learn how to sew, check out the courses HERE!

Get the chunky crochet basket mini masterclass here from The Domestic Wildflower!I wrote all the instructions out in a fun PDF that I’d love to share with you completely for free, you crafty readers!

 I want the basket step-by step guide!

What projects have you tackled with stretch fabrics, dear Wildflowers? Share your successes (or flops!) in the comment section below!

SaveSave

Filed Under: Sew

How To Darn Socks

July 14, 2016 by Jenny Gomes 2 Comments

One mantra that guides my life is “make do and mend”. Darning socks used to be a common activity and now, it is much more common to toss a pair of socks out or at best, use holey socks as a rag. I’d like to show you how to darn and help you extend the life of your socks.

How To Darn Socks

You don’t need a sock darner but if you come across one either in Grandmother’s sewing basket or in a thrift shop, snap it up. They are very handy indeed. If you don’t have a darner, you can use your hand (which is what I usually do) or a tennis ball. You need a darning needle or any needle that has an eye large enough to fit your chosen yarn through.

I purchased one skein of sock yarn from my local thrift shop and it has met all my darning needs. You might feel tempted to find a yarn that matches your worn socks but that’s something I don’t worry about. Sock yarn is skinnier than many other yarns and most importantly it has a lot of spring and stretch, which you obviously want in a sock.

Thread your needle and knot your end. I then stitch a running stitch (up, down, up, down) in columns (top to bottom of the worn area) and then rows (horizontal) attempting to keep stitches relatively even. I usually make stitches that are a quarter of an inch in length or shorter, and each row and column between a quarter and an eighth of an inch apart. Bear in mind that your sock will be stretch over your foot and the stitches will be stretched accordingly. The goal is to add integrity to the work area with the sock yarn and to bring together any hole edges that may exist. Because you are simply mending (rather than painting the Sistine Chapel) you should allow yourself room for imperfections and feel okay going back to add one more small row if your original rows were a bit too far apart, for example.

Darning may require you to try your sock on a time or two during the darning process, and that’s okay too. Sometimes sewists and crafters get hung up on perfection and this activity is a good exercise in accepting imperfection.

If you want to learn how to sew, check out the courses HERE!

Here’s a video of me doing the above process. Enjoy, Wildflowers!

Happy darning!

Filed Under: Sew

Tips for Sewing Sheers: A Craftsy Class for Sewing Success

November 23, 2015 by Jenny Gomes 2 Comments

Tips for Sewing Sheers: A Craftsy Class for Sewing Success

Sewing with sheer fabrics like chiffon can seem tricky, but with a little self-education, you can tackle sheers like a pro.

I can sew woven cotton with my eyes closed (and perhaps with a child wielding a popsicle on the chair behind me) but sheers are another story. They sometimes have a mind of their own and any sewist is wise to realize they are a different beast entirely than your standard quilting cotton.

Because I am willing, I am often asked to hem bridesmaid or formal dresses for gals I know and I always agree but hemming the beautiful sheer layer has always resulted in a hem I wasn’t totally happy with, lots of unnecessary stress, and cursing.

This post may contain affiliate links. All opinions are my own. 

Because I work, have small children, and live rurally, taking an in-person sewing class is impractical and very unlikely. Enter Craftsy. I’m a huge fan of this site because they have TONS of classes that are free or reasonably priced on topics I care about. Each class has beautiful videos (no wobbly YouTube tutorials!) and very clear instructions on whatever your heart desires. I have a very long list of classes I want to take (Um, French Cooking? Yes please!) but sewing sheers made it to the MUST list in short order this wedding season. I hated doing a mediocre job on dresses and frankly I have plenty else to stress and curse about so this class was a huge help. And these classes don’t have homework, deadlines, or detention. It is a self-paced, learn at your leisure type of thing. You always have access and you can watch and rewatch over and over.

The class, Sewing Sheers with Sara Alm, was awesome and taught me in a few lessons the big mistakes I was making when sewing sheers. Here are the tips I was able to employ immediately but I can’t recommend the class enough to you sewists out there. Enroll and you’ll be a sheer pro in no time, pun absolutely intended.

Enroll in Sewing With Sheers!

Tips:
Use a little washi or masking tape to cover the hole in your throat plate (where your needle goes down). Washi tape is actually preferable because it is less sticky than masking tape. Cut a tiny piece, just a bit bigger than the hole and place. This helps prevent your machine from ‘eating’ your bridesmaid dress. This one little tip prevented the most cursing in my home, which is why I listed it first. Get some washi tape or masking tape, Wildflowers! If you are as late to the washi tape party as I was, here’s a link to some cute rolls that you can use for lots of other things besides on your throat plate.
The Essential Guide to Sewing With Sheers (w/ Sara Alm)
Use a needle designed for sheers. I was using my regular ol’ standard needle and it was too big. A needle that is too large will blow through the delicate fabric, making the seam weak and giving the seam the appearance that it may tear apart. Here’s a link to the needles I used.
Use a rolled hem foot for hemming. The class demonstrates LOTS of ways to finish (another way to say ‘hem’), but this is a way I use often for hemming formalwear. Your sewing machine very likely came with a rolled hem foot, even if your machine is older. Check the compartments where the feet are stored and see if you have one. Practice on a scrap of sheer beforehand and you will see how the front of the foot rolls the fabric into a tiny hem.
If you follow these simple tips, you will likely end up cursing a whole lot less and if you enroll in this time and headache saving class you will be a wizard with sheers.

If you want to learn how to sew, check out the courses HERE!

Enroll in Sewing With Sheers!

Want more helpful sewing, canning, & DIY tutorials? Subscribe and never miss a weekly post!

Yes, PLEASE!

What do you think, Wildflowers? Share in the comments below if there’s another Craftsy class I should add to my list. Happy Sewing!

Filed Under: Sew

Messenger Bag: A Great Sewing Pattern for Beginners

November 12, 2015 by Jenny Gomes Leave a Comment

 Messenger Bag: A Great Sewing Pattern for Beginners

Messenger Bag Pattern from Palindrome Dry Goods

I made this beginner friendly messenger bag using a pattern from the Palindrome Dry Goods blog and Etsy shop using easy-to-sew cotton that I purchased before I had my first child, over 4 years ago. Once you have been sewing a while you may experience the thrill of finding fabric that you forgot you have purchased and/or forgot how much you love the way I did. This bag was also easy enough to whip up while the children were awake, and in between stirring supper on the stove. I used a super stiff decor bond interfacing that the pattern designer didn’t call for but I had on hand and used on a whim with good success. Read on for the super easy tutorial!

 This post may contain affiliate links. All opinions are my own. ​

First: Get your pattern here at Palindrome Dry Good’s Etsy Shop. Blogging this short while has helped me “meet” several superstars and this gal Hannah is one of them. She found me and nominated me for the Very Inspiring Blog Award, about which I blushed and blogged about and then we kept communicating and discovering things we share in common. We are both Chico State alumni, we both are lovers of power linemen (which ultimately means lots of denim mending) and are from smaller places in California. Her taste in fabric is top notch and I doubt any of you can visit her Etsy shop without swooning over her darling aprons or pillowcases.

Next: Choose 3 coordinating fabrics. She lists needing a ¼ yard of fabric A, a ¼ yard of fabric B, and 1 ¼ yard fabric C. I appreciate how her pattern uses up almost every bit of fabric. I hate having ⅛ yd left over that I hate to keep and hate to toss. Waste not, want not, Wildflowers!

Cut: Follow the pattern directions to cut your fabric into a few simple rectangles.

Sew: Sew the rectangles into a set of three stripes, thus forming the basis for the outside of the messenger bag. Sew the lining of the bag and apply the pocket (which uses up the bit of fabric you didn’t use in the strap: Smart!

Iron: Interface the outside of the bag and the strap. I used Decor Bond, available by clicking the picture below, and found it to give serious substance to the bag. The difference between this interfacing and regular interfacing is a bag that will stand up on its own if you use Decor Bond. It gives body to the bag and when I open it up to dig my yoga clothes out of it, the opening stays open. Regular interfacing won’t give a bag that is as stiff and it won’t quite stand up the way Decor Bond does. It is a matter of personal preference and truthfully, if the regular interfacing wasn’t absent from my stash, I wouldn’t have thought about the really cool Decor Bond option. If you don’t find Pellon’s Decor Bond in your local sewing store, you can purchase it on Amazon by clicking the photo below.

Sew: pin and sew the straps to the sides of the bag outside. Match right sides with right sides of the outside of the bag and the lining and sew around the top of the bag, leaving a 4 or 5-inch opening. Turn bag right side out and sew the seam closed. I chose to continue sewing all the way around the top of the bag, topstitching and giving the top edge a nice, finished look.

Impress: Friends, classmates, family, and fellow yogis with your super cute homemade messenger bag.

Messenger Bag: A GREAT Sewing Pattern for Beginners | A Domestic Wildflower click to read this super helpful tutorial for a simple messenger bag sewing project!

I zigzagged around the edge of the pocket piece, hemmed the top edge, folded the other edges under and sewed in place. I chose to sew a line down the middle of my pocket to create 2 smaller pockets to help stay organized.

Want to learn to sew? This is the course that I recommend and love!

Messenger Bag: A GREAT Sewing Pattern for Beginners | A Domestic Wildflower click to read this super helpful tutorial for a simple messenger bag sewing project!

The fabric I chose is an Alexander Henry print, which is my favorite fabric designer, ever.

If you want to learn how to sew, check out the courses HERE!

I’d love to hear if you make this bag, Wildflowers! Fire away if you have questions and please do share your successes in the comment section below! Happy Sewing!

Filed Under: Sew

How to Sew an Ironing Pad

November 5, 2015 by Jenny Gomes Leave a Comment

 
How to Sew an Ironing Pad

How to Sew an Ironing Pad

In this tutorial, I’ll show you how to sew your own ironing pad and avoid hauling out a cumbersome ironing board next time you need to iron. This ironing pad tutorial is beginner friendly, and the result is space saving and customizable.

When I was brainstorming this post, I thought a lot about how infrequently some people iron. Ironing can be a pain for a few reasons and one of which is the ironing board. They are big, awkward, and mine is so noisy I would never iron when my kids were napping, ever, for fear of waking them. This little sewing project will result in an ironing pad that you can use (quietly!) on the floor, on the top of your washer or dryer (thanks to the magnets sewn in) or on the dining room table. You can roll it up or fold it like a blanket when you are done and stow it away. I think it would be a great gift for a college student. Sew on, Wildflowers!

This post may contain affiliate links. All opinions are my own. ​

Feeling inspired? Sign up for weekly crafty tutorials!

Yes, PLEASE!

You will need:
Quilted ironing board fabric. This is critical because of the reflective fabric needed to iron properly. You could throw a towel down and iron away and it will largely be a waste of time because the heat is warming the towel, not being reflected back up to smooth your fabric. Head to the utility section of your nearest fabric store, or click the affiliate photo link below to order some from my favorite sewing store, JoAnns.

Quilted Ironing Board Cover Fabric

The amount you buy is up to you. I bought a yard and a half because I didn’t know what my plan was exactly and when I got it home I realized I could cut it to fit on top of my washer and dryer exactly but then I’d be wasting an awful lot of fabric. While you could use the left overs for potholders and cute, quilted trivets, I thought it would be more useful for my ironing needs while sewing to keep it nice and big.

Whatever you decide, you need a piece of backing material the same size. I may never say this again, ever, but I have to advise you to NOT purchase cute colorful fabric. Ugh. I hated typing that. Choose white fabric, an old white or cream sheet, or unbleached muslin. If you chose a super cute red print for the other side, time plus the heat and steam of the iron could result in the dye seeping up through the silver fabric and staining your ironing project. I know it seems unlikely but it could absolutely happen. And of course, it would happen when you were ironing a white button down to wear for a job interview happening in an hour. Choose wisely, Wildflowers.

If you are shopping online, you can order this bleached muslin from Joann’s.

Sew Essentials Bleached Muslin 44

The final bit of fabric required is binding. This is where you can choose something cute and colorful. I used less than a quarter yard to create 2-inch wide binding that went all the way around the yard and a half of ironing board fabric.

To determine the yardage for any binding, measure the perimeter. Divide that number by the width of your binding fabric. That number will be the number of strips you should cut off your binding fabric.

For example: My perimeter is 54+45+54+45 = 198 inches. I will divide that total by 44 inches (as that is the width of my binding fabric) to get 4.5. That means I need 4 and a half strips of 2 ½ inches wide. Then I can multiply 2 ½ by 5 (since I will cut 5 full strips and just have some left over) which = 12.5. Thus I need 13 inches of 45-inch width fabric to make my binding.

Procedure: Lay your muslin or plain cotton fabric on top of the white side of the ironing board material.

Smooth it carefully and make pin edges. Sew all the way around the edge at a quarter inch seam allowance. Trim any excess, including extra batting that may have escaped the inside of the ironing board fabric.

Optional Magnets: I wanted to add magnets to my corners for when I want to put the pad on top of the washing machine. These are the magnets I used, and I used 8 total.

I sewed a square in every corner of my pad, plus in the middle of each edge. I made the square about 2 ½ by 2 ½ inches, but you want there to be plenty of room for your magnet. Sew the square and then use a seam ripper to open up the outside edge just enough to slip the magnet in and then sew it back up.

Make your binding by cutting your strips, sewing them right sides together, pressing those seams open, and pressing the whole long strip in half hot dog style.

Binding: You will now be learning or practicing how to bind. I bind all my quilts this way and if you ran into trouble, a quilter friend could easily help you with this step.

Leaving a 4+ inch ‘tail’, sew the binding to the sandwich you’ve created of the ironing board cover and the muslin. All the raw edges will be facing the right, as indicated in the photo.

Binding a Mitered Corner: This sounds hard, but it isn’t. As you approach the corner, stop a ¼ inch from the edge and backstitch. Pull the pad out of the machine, cut the threads, and turn it a quarter turn counterclockwise, so you will be “driving” down the next side.

How to Sew an Ironing Pad | A Domestic Wildflower click through to read this tutorial for working with ironing board fabric and how to sew a mitered corner!

Want to learn to sew? This is the course that I recommend and love!

Pull the binding (which will be a really long strip, up and back, like in the photo above, so it is creating a straight line with the road on which you will be driving. The binding will be back behind your sewing machine.

Hold your finger on that 45-degree fold and with the other hand bring the rest of the binding toward you.

How to Sew an Ironing Pad | A Domestic Wildflower click through to read this tutorial for working with ironing board fabric and how to sew a mitered corner!

Press your fingers on top of that fold. Slide the corner under the needle of the machine and lower the presser foot.

How to Sew an Ironing Pad | A Domestic Wildflower click through to read this tutorial for working with ironing board fabric and how to sew a mitered corner!

Sew straight down the road. Repeat on all corners.

When you are nearly done, and you are approaching the ‘tail’ of the binding, stop about 6 inches from the tail. You will fold the raw edge under about an inch and tuck the tail inside. Sew to create a complete perimeter and backstitch.

Now, flip the pad over and roll the binding from the front to the back (or vice versa, it doesn’t matter which side you sewed it to initially) and sew it to the pad, feeling carefully with your fingers and trying to keep your seam either in the binding or in the ironing board fabric, but not both. In other words, be aware of what the other side will look like. It depends on how much extra fluff you have in the seam allowance; sometimes your binding can easily fold over and you have an easy time but if your binding is skinny and/or you have a lot of extra bulk in the seam allowance, it will be difficult to pull the binding around.

How to Sew an Ironing Pad | A Domestic Wildflower click through to read this tutorial for working with ironing board fabric and how to sew a mitered corner!

Sewing the mitered corner is a lot like wrapping a present. As you approach the corner, pull the extra toward you. Stop about a ¼ inch from the edge and backstitch. Cut the threads and pull the pad out and turn a quarter turn counterclockwise, just as you did the first time around.

How to Sew an Ironing Pad | A Domestic Wildflower click through to read this tutorial for working with ironing board fabric and how to sew a mitered corner!

To sew the mitered corner is a lot like wrapping a present. As you approach the corner, pull the extra toward you. Stop about a ¼ inch from the edge and backstitch. Cut the threads and pull the pad out and turn a quarter turn counterclockwise, just as you did the first time around.

Fold the binding toward the left, and scoot the corner under the presser foot. This can be tricky because there’s a lot of bulk in the corner. If need be, trim the excess in the seam allowance, and use your hand wheel to get the seam started.

There you have it! While going around the perimeter all three times may take a bit of time, the techniques you will use are fairly basic and the result is a very handy alternative to a heavy, noisy, clunky ironing board.

How to Sew an Ironing Pad

If you love helpful tutorials like this one, Subscribe and never miss a weekly post!

If you want to learn how to sew, check out the courses HERE!

Yes, PLEASE!

I’d love to hear what you think, Wildflowers! Please share in the comment section below other uses for ironing board fabric!

Filed Under: Sew

  • « Go to Previous Page
  • Page 1
  • Page 2
  • Page 3
  • Page 4
  • Page 5
  • Interim pages omitted …
  • Page 7
  • Go to Next Page »

Primary Sidebar

Categories

Follow me here, there, & everywhere!

  • Email
  • Facebook
  • Instagram
  • Pinterest
  • RSS
  • Twitter
  • YouTube

Search

Get The Pressure Canning Cookbook

Get 10 Free Recipes Now!

Best Chicken Coop

Footer

Get Started Pressure Canning

Shrubology Ebook

Shrubology: Refreshing Homemade Fruit and Vinegar Syrups for Cocktails
Make easy, no-cook fruit & vinegar syrups for cocktails & mocktails! This ebook shares crowd pleasing recipes and simple to understand ratios so you can make a shrub on your countertop any time- without a recipe. Dive into these Prohibition Era drinks today!

Copyright

Copyright 2019
The Domestic Wildflower
www.thedomesticwildflower.com.
All content created by Jennifer Gomes unless otherwise noted.

Copyright © 2025 · Lifestyle Pro on Genesis Framework · WordPress · Log in