• Skip to secondary menu
  • Skip to main content
  • Skip to primary sidebar
  • Skip to footer
  • The Pressure Canning Cookbook
  • Blog
    • Subscribe
    • Welcome!
  • Perfectly Preserved Podcast
  • About
    • ADW Manifesto
    • Work With Me
      • Read
  • Shop
    • My Account
    • Cart
    • Checkout

The Domestic Wildflower

Handmade Food & Craft Tutorials for Beginners

  • Courses
    • Free Canning Basics
    • Everything Canning Course
    • Steam Canning Workshop
    • Free Homemade Cocktail Mixers
    • Wildflower Mixology
    • Crochet Basket Workshop
  • Can & Preserve
    • Never Canned?
    • Steam Canner Equipment Bundle
    • Shrubs Course
  • Sew
  • Cook
  • Craft
    • Crochet Step-by-Step Guides
      • Crochet Basket
      • Giant Yarn Throw
      • Thick & Thin Throw
  • Living
    • Creativity Challenge
    • Clean
    • Kids
  • Rentals

Jenny Gomes

What Happens if You Forget The Lemon Juice?

March 19, 2018 by Jenny Gomes 2 Comments

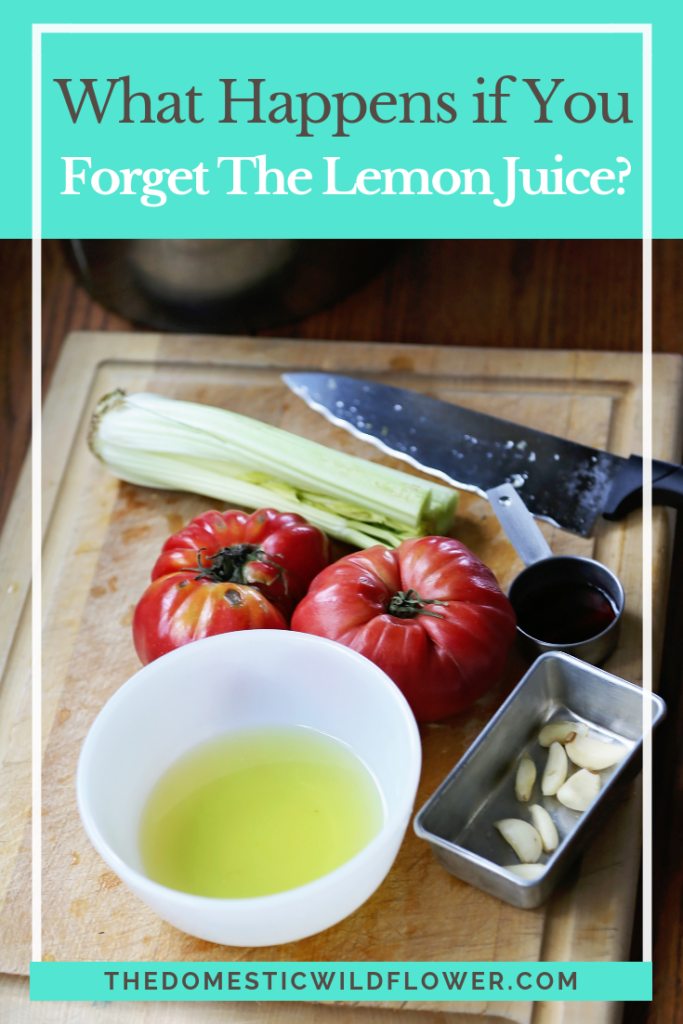
What Happens if You Forget the Lemon Juice? In many canning recipes, it is required that you add an acidifying ingredient like bottled lemon juice, citric acid, or vinegar. What happens if you forget? This post will explain. Spoiler alert: it ain’t pretty.
What Happens if You Forget The Lemon Juice?

Canning works and is an effective means of food preservation because of several elements. One element is the inside of the jar is sufficiently acid. That is to say, it is too acidic for spoilers (bugs that would make us sick and decay our food) to grow.

This post contains affiliate links. 

The magic number on the acid scale that canners care about is 4.6. Any less acid, or higher a number, and the recipe is too alkaline, or not acid enough to be safely water bath or steam canned.

This is why green beans (an alkaline veggie) are preserved with acidic vinegar into the delicious Dilly Bean we all know and love today. Same with alkaline carrots- we make Carrot Pickles by acidifying them with vinegar.

You can print off the Acid & Canning Chart- for FREE- right here!


Because the vinegar in pickle recipes is so great in volume and makes the brine that the pickles are submerged in, it’s less likely that you’d forget that ingredient, but much more likely you might forget a little quarter cup of bottled lemon juice or the seemingly unnecessary teaspoon of citric acid.

At the end of the last canning season, I made a batch of roasted pineapple salsa from a trusted source. Pineapple is somewhat acid but varies significantly from fruit to fruit, and the recipe called for onions (not acid), garlic (also not acid- those tasty alliums never are), cilantro, and other veggies that make it necessary to add bottled lemon juice.

I’ll note here the importance of using BOTTLED LEMON JUICE as opposed to a romantically squeezed fresh lemon. A lemon you squeeze might be 5% acid, and it might not. The trusted canning recipe you are using is calling for bottled lemon juice because it needs that acid to bring the overall acid level up (and acid number down) to a safe level so spoilers can’t survive in the canning jar.

Also, note that plenty of trusted recipes call for fresh lemon juice. These recipes need the lemon juice for the flavor, not for the 5% acid.

Back to my roasted pineapple salsa. I made it, canned it, cleared my tiny countertops off and saw my new bottle of lemon juice sitting there, undisturbed. I hadn’t even opened it. I completely forgot all about the lemon juice, which was absolutely required for safe canning in this recipe.

The salsa that I had just prepared and canned was delicious and safe to eat if I put all the jars in the refrigerator (even though the lids all sealed) and ate it in about a week, just as I would any other leftovers. So, that’s what I did- we had tacos for 3 nights in a row and we ate most of it all up.

Except…I saved 2 jars, marked them well, and stuck them way up high on my pantry shelf, just for my Wildflower blog readers.

Fast forward 6 months, and I opened the jar. This is what happens when you forget the lemon juice.  

The Color:

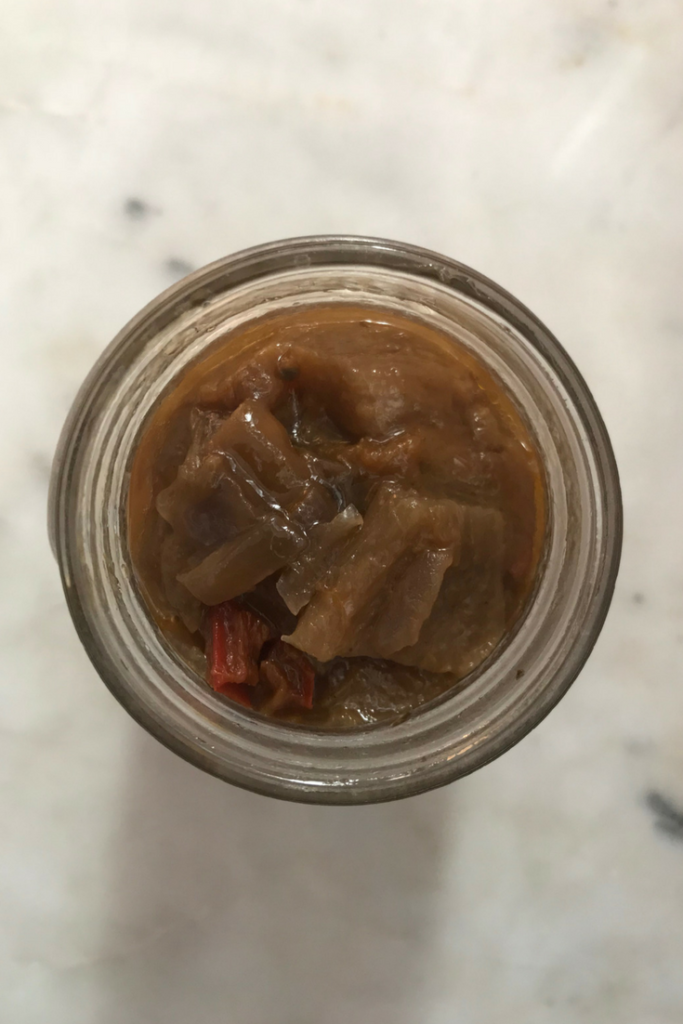
Normal salsa (or any preserve, for that matter) retains much more color than that of this non-acidified salsa. It was indeed an ugly pale brown. All the ingredients were nearly the same color. The red bell peppers were still reddish…but everything else looked very unappetizing.
What Happens if You Forget The Lemon Juice in a Canning Recipe? Find out in this post!
Photo is completely unedited. Roasted Pineapple Salsa with lemon juice omitted by mistake.

The Texture:

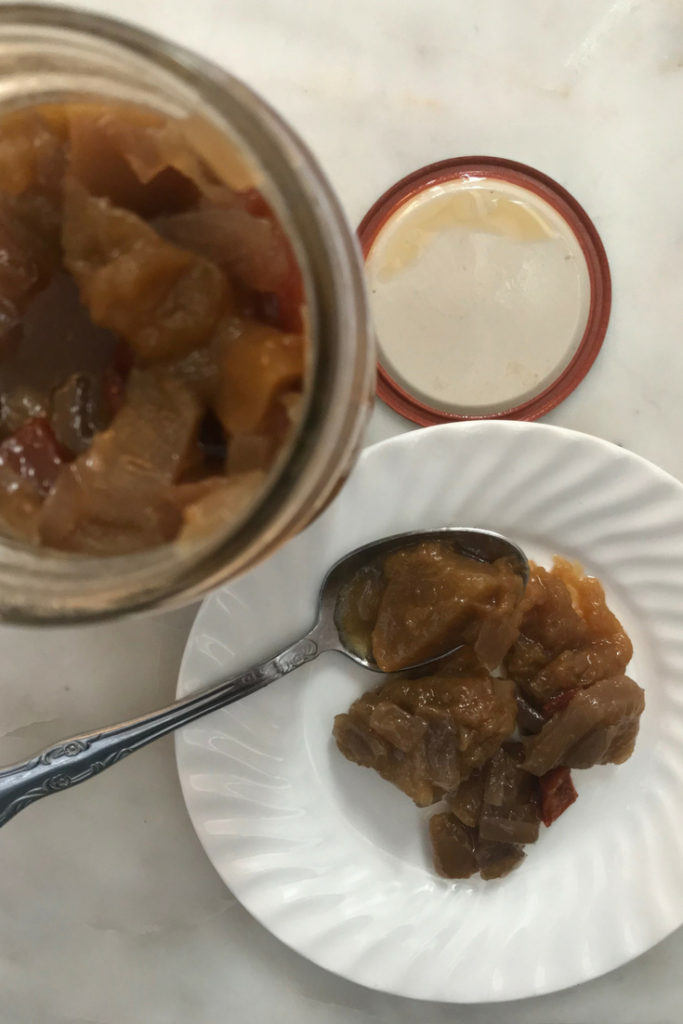
The spoilers had begun to act upon the food and started the decay process; the salsa was absolute mush. The peach, pineapple, and onion pieces were barely identifiable and were very easily smashed flat with very little pressure from a fork on a plate. True, canned salsa is always a little less crisp than fresh salsa, but this is completely different. This was nearly baby-food consistency with a little agitation.  
What Happens if You Forget The Lemon Juice in a Canning Recipe? Find out in this post!
Photo is completely unedited. Roasted Pineapple Salsa with lemon juice omitted by mistake.

The Smell:

It didn’t smell like poison, but it definitely didn’t smell good. The odor was musty, stale, and old smelling. It didn’t smell like something you’d want to pour on top of your chips. However, it is important to point out, that it did NOT stink to the High Heavens. You might accidentally dump some on your plate if you weren’t aware.

The Disposal:

Because spoilers (germs that could make us sick, probably with diarrhea) are almost assuredly at work in this salsa, I took care to dispose of this salsa carefully. I threw the lid away, and I used bleach to clean the jar. The contents of the jar went into the garbage carefully- not where a kid or pet would accidentally have a snack. It is worth noting that while food poisoning is serious, it would likely not be lethal to anyone in my family as we have healthy immune systems. I don’t want anyone throwing up or having a tummy ache and God knows I have enough laundry already. If for some reason you uncover a jar of very old canned food (say, you’re cleaning out Grandma’s cellar) I’d dispose of the contents and clean the jars the same way.

The Takeaway:

I wrote this post to simply educate a curious reader – canner or not- what would happen if you were to forget the acidifying ingredient. I don’t advise doing this on purpose, and I hope to answer the question of what to do IF you do what I did: Eat it up, store in the fridge, and be more careful next time.

Learn MORE:

If you want to learn more, I have a FREE Canning Basics Course that I invite you to try- you’ll learn more about canning, how it works, and how it is most delicious salsa all year round 🙂 Sign up here!

Enroll Now!

Best Home Canning Equipment For A Beginner Join the Start Canning Course to learn how to preserve healthy, homemade food in jars!

Filed Under: Can

How To Sew Lingerie: 3 Easy Steps for a Beginner

March 19, 2018 by Jenny Gomes Leave a Comment

If you are a beginner and you want to learn how to sew lingerie, here are the 3 easy steps to take to start sewing basic but beautiful bralettes, camis, and undergarments. Sewing lingerie is fast, fun, and so satisfying.

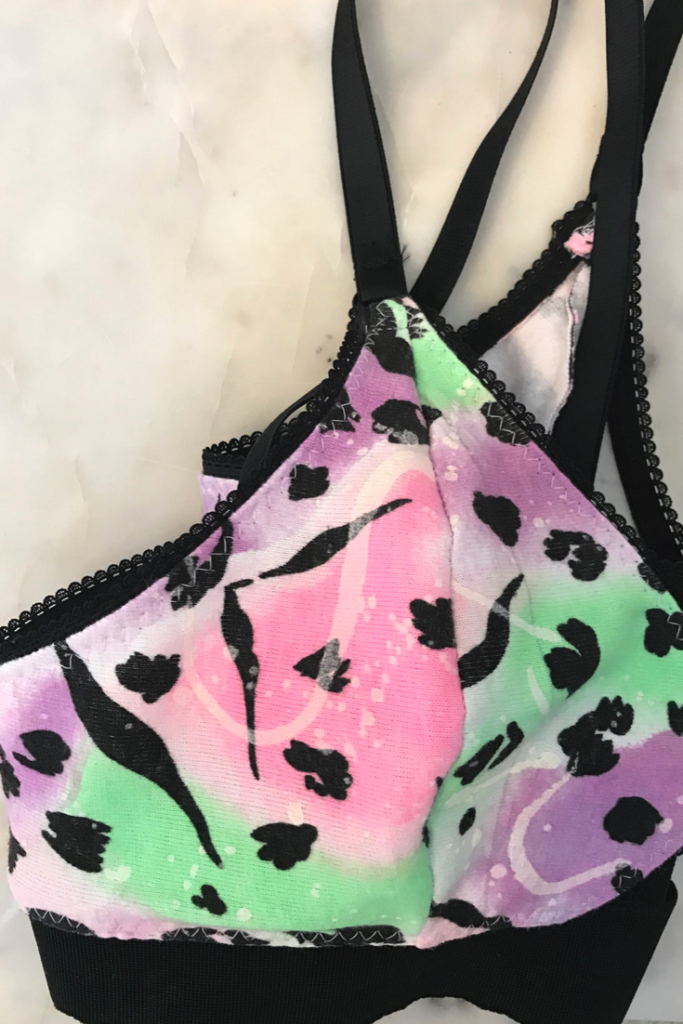
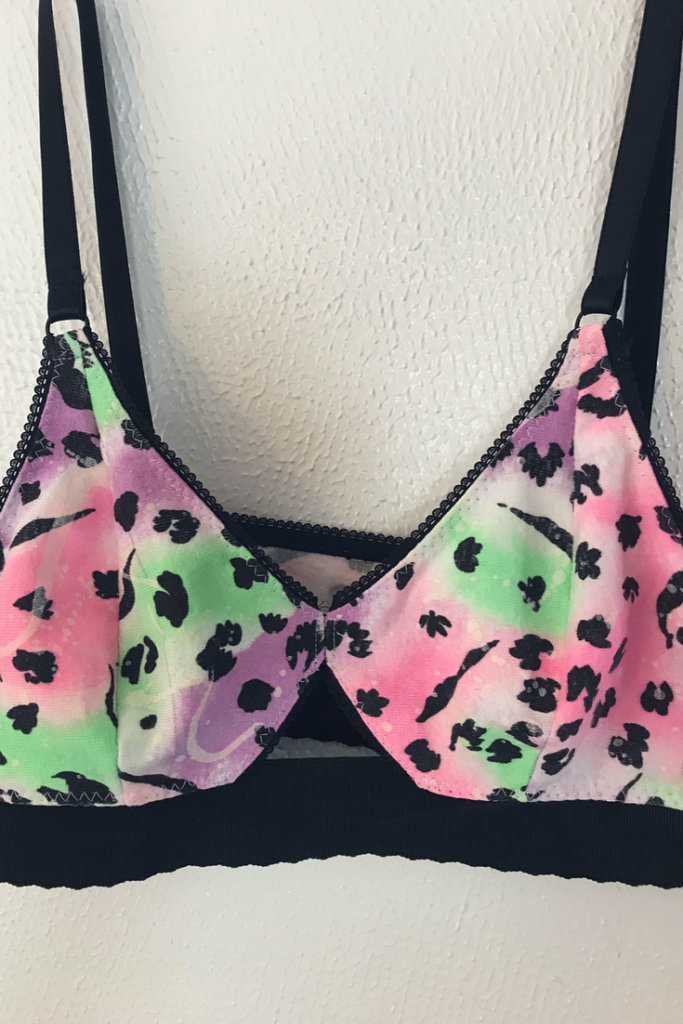
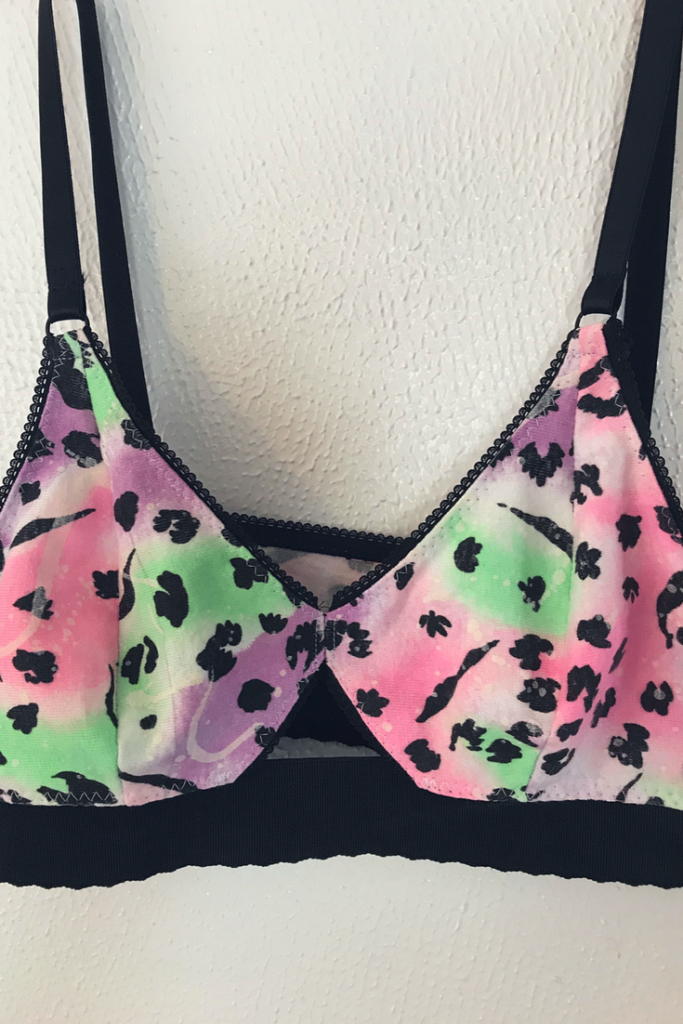
How To Sew Lingerie: 3 Easy Steps for Beginners | How to Sew a Bralette with a free pattern, simple tools, and easy steps!

I had wanted to learn how to sew lingerie for the longest time but was afraid it would be difficult, time consuming, and that the finished product wouldn’t look great.

This post contains affiliate links.

It’s true that there is nothing to fear but fear itself because when my blogging friend Hannah of Palindrome Dry Goods made the Barrett Bralette from Madalynne Intimates with their FREE pattern, I realized my fear was a silly one, and that I needed to dive in. 

STEP 1: GET A GREAT PATTERN

Madalynne Intimates has several free patterns that are excellent in terms of clarity, quality and ease of construction. There’s no underwire or complicated steps in these free patterns. I made the Mallori first, and then the Barrett, and as in intermediate sewist, for example, I was easily able to see that I could skip the lining in the Barrett (because my 80’s neon leopard knit was sturdy enough without it) and thus was able to see how to proceed therein. There are beautiful photographs that actually help you see what to do next and I found them very instructive.

I told myself that I’d try it first with the free pattern and with fabric scraps. I went to my local Walmart (which I NEVER go to- gave all WalMarts up cold turkey in ‘09 and haven’t looked back!) and they of course carried 4 types of elastic and all were ugly.

STEP 2: GET GREAT MATERIALS

Initially, I scored elastic gold at my local thrift shop, Martin’s Experienced Items. For 35 cents a yard I got perfect condition, off the roll strap elastic and picot edge elastic, but no waistband elastic- thus is the thrift store search. You’ll find some gems but not all. I used these on my first bralette, the Mallori, in fuchsia and white, and it turned out darling.

My blogging soul sister Hannah of Palindrome Dry Goods told me about the Etsy shop Porcelynne and they are AMAZING. They have the rings, sliders, straps, elastic of every kind and color…and the prices are so reasonable and shipping was fast. I especially loved their bra straps that are already put together- they are the rings, sliders and straps for about a dollar. Um, yes please!

There I got raspberry colored elastic for around my ribcage for a bralette I haven’t made just yet, black picot edge elastic for my Barrett (seriously, how great did that turn out?!), black ribcage elastic for the Barrett, a bag of clearance pre-made bra straps in pastel colors (#sewallthelingerie) and several sets of silver and black rings and sliders.

How To Sew Lingerie: 3 Easy Steps for Beginners | How to Sew a Bralette with a free pattern, simple tools, and easy steps!

STEP 3: GET A STRETCH NEEDLE

Perhaps the most important step of all is the stretch needle. I know, the stretch needle looks basically exactly the same as a regular sewing needle but it is NOT. I repeat: GET A STRETCH NEEDLE. They are like $3 for a package and they make such an amazing difference in your sewing experience and the resulting product. They the difference between fury and fun, honestly.

You can get them on Etsy HERE.

Or on Amazon HERE.

Stretch needles wiggle unobtrusively in between the knit, as opposed to slicing through the fibers and creating snags and puckers. I know, it hardly makes sense, but it’s true.  

Want to learn to sew? This is the course that I recommend and love!

FABRIC IDEAS FOR BRALETTES:

Bralettes are incredible stash busters, my friends. If you don’t sew much (yet!) this means that they use up a TINY amount of fabric (well under a quarter yard) so they are economical, frugal, and sustainable. They are fun to sew in the same way baby clothes are fun to sew- they are fast! Knit is forgiving so think t-shirt material, and even lighter. You must choose a stretch, but the sky is the limit. I would NOT choose something slippery for your first or second lingerie attempt, however.

Madalynne Intimates sells these GORGEOUS kits with the fabric, elastic, and sliders all in one darling box. I’d highly recommend them especially if you’re uncertain about choosing elastic and fabric on your own or fear you’ll suffer from decision paralysis.

OTHER IMPORTANT TIPS FOR SEWING LINGERIE:

Use zig zag for seams that will go horizontally. This allows for the elastic and the knit/stretchy fabric to do it’s job- to stretch. You can use a straight stitch for vertical seams like the side seams of the bralette and perhaps to attach the bra strap to the rings.

Take the time to change your thread to match the elastic and the fabric. I chose contrasting elastic and fabric (I’m such a peacock!) so I had white bobbin thread and black top thread….for about 2 minutes and then had to switch them out so I had the reverse: black bobbin and white top thread. It was TOTALLY WORTH IT. My Barrett Bralette looks SO professional and sharp because I took the few moments required to switch my thread. I could have perhaps chosen neon purple for top and bobbin and sewn on my merry way…but I’m thrilled with my result.  

If it looks terrible, rip it out and try again. I only had to take out a couple seams- one on my bra strap- it was a tiny bit crooked at the ring- and I’m so glad I did. On a tiny garment, those details really show up.

How To Sew Lingerie: 3 Easy Steps for Beginners | How to Sew a Bralette with a free pattern, simple tools, and easy steps!

If you make the Madalynne Bralettes from the free patterns and are ready to try some of her paid patterns, DIVE IN HERE! She has soft cup bras, high neck lace options (so cute peeking out from a tee!) a knit bodysuit pattern (see how my friend Hannah made it here! ) and tons more.

You may have read my post, 10 Things You’ll Think When Sewing Lingerie For The First Time, and if you haven’t you should for a peek into what will go through your mind when you begin your first project!

10 Things You Will Think When Sewing Lingerie for The First Time | Sewing Lingerie is simple and easy with the right tools. Here's what you'll think when you dive in!

If sewing stretch has lit a fire within, check out one of my most popular sewing posts (ever!) How to Sew Spandex for more stretch sewing tips!

If you want to learn how to sew, check out the courses HERE!

Filed Under: Sew

10 Things You Think When Sewing Lingerie For The First Time

March 18, 2018 by Jenny Gomes Leave a Comment

If you’ve never sewed lingerie, but wanted to, read this post first. Sewing lingerie is fun, easy, and so satisfying! These are the 10 Things You Think When Sewing Lingerie For The First Time. 

10 Things You Will Think When Sewing Lingerie for The First Time | Sewing Lingerie is simple and easy with the right tools. Here's what you'll think when you dive in!

Want to learn to sew? This is the course that I recommend and love!

I wrote a post that so many of you have read that’s called How to Sew Spandex (check it out for how to sew stretch with success!) but sewing stretch is a bit different than sewing undergarments. I’ve wanted to learn how for a long time but I was worried it would be an expensive disaster (can you relate?).

One of my favorite sewing blogs and kindred spirits, Hannah of Palindrome Dry Goods, (check out her Esty shop here!)  suggested I check out Madalynne Intimates for FREE sewing patterns for bralettes. After I saw the darling and frankly easy-looking bralettes that Hannah whipped up, I dove in.

Here’s what I was thinking as I made them.

Note: I sew, comfortably, at an intermediate level. I’ve quilted, mended jeans, and made garments like tops for myself often. I’ve sewn stretch yoga pants, but never anything like lingerie and this is indeed a category of textile sewing all its own.

The links you’ll notice in the post are affiliate links to products I most highly recommend for successful lingerie sewing.

10 Things You Think When Sewing Lingerie For The First Time

  1. This is so much elastic sewing.

2. What if this doesn’t fit?!

3. This is not as hard as I thought.

4. Ok this is sort of hard…

5. I seriously can’t see the difference between a stretch needle and a regular needle. At all.

Get stretch needles on Etsy HERE

Or get them on Amazon HERE

6. Holy Cow, there must be a HUGE difference between a stretch needle and a regular one because this looks terrific.

7. This is going really fast! Tiny garments are awesome!

8. So this is what the zig zag is for!

9. Different elastic color from fabric color means changing thread color every five minutes…and a different bobbin color from my main color! 

10. Omg this is gonna look amazing!

10 Things You Will Think When Sewing Lingerie for The First Time | Sewing Lingerie is simple and easy with the right tools. Here's what you'll think when you dive in!

If this is intriguing to you, check out my blog post about sewing the Madalynne Intimates bralettes right here!

If you want to learn how to sew, check out the courses HERE!

Happy Sewing, Wildflowers!

SaveSave

SaveSaveSaveSaveSaveSave

SaveSave

SaveSave

Filed Under: Sew

Canning Jump Start Guide

February 9, 2018 by Jenny Gomes Leave a Comment

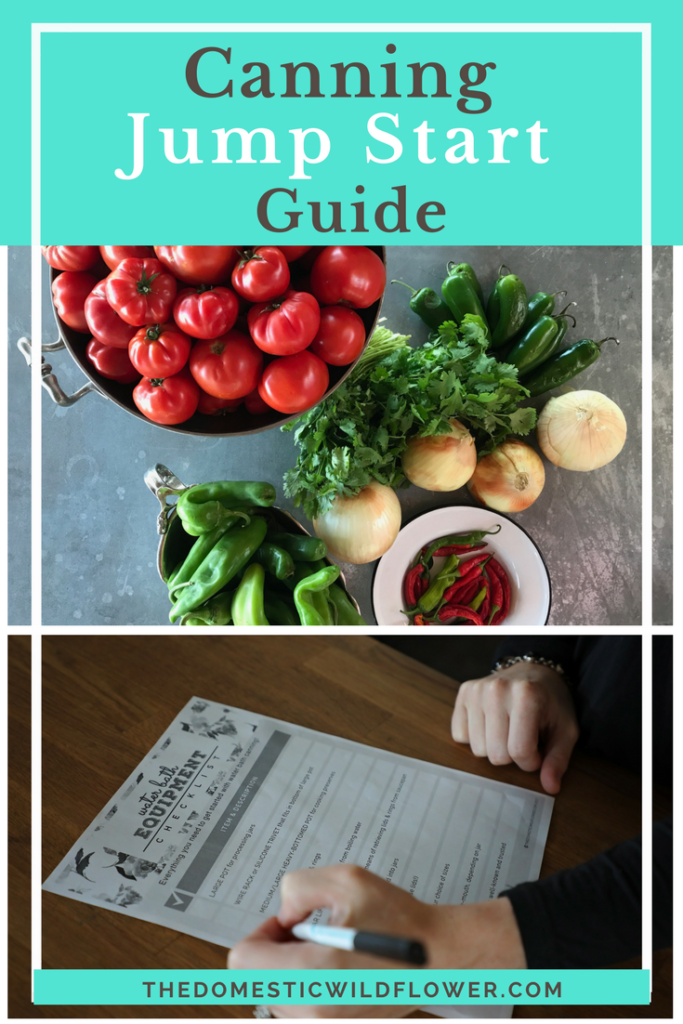
Wish you knew how to can like Grandma did, but think it is too hard or you don’t have the time to learn? This post is for you! I can help you dive into canning with a modern spin with the Canning Jump Start Guide- read on for the guide that will help you get started canning!

Canning Jump Start Guide | Wish you could learn to can like Grandma did? This guide makes canning easy and fun for a modern, busy home! Get started preserving healthy, fresh produce today!

I know you are super busy. But, you are reading this blog post because you WANT to learn how to can and you think maybe, just maybe, you can fit another thing into your schedule. I promise, I can make it work for a modern life, a busy lifestyle, into nap times and in a way that can save you time and money instead of costing much of either.


The Canning Jump Start Guide shares the no-frills Canning Equipment Checklist that will surprise you- no giant, black-and-white speckled pot that Granny used required!- and only a few items that you will need to purchase before diving in. Truly, there’s probably just ONE item that you need for water bath canning that you likely don’t own already- and you’ll learn why inside the Canning Jump Start Guide!

Watch the YouTube Video version of this post below!

Some people are hesitant to start canning for fear that they will mess up the recipe. Inside the Canning Jump Start Guide I include 4 of the easiest, fool-proof beginner friendly recipes that are perfect to get started with.

Think

  • spiced applesauce

  • tomato jam (savory, not sweet)

  • ranch style salsa,

  • and strawberry jam!

This is the best easy applesauce recipe ever. This girl cans it in little convenience sized jars that are perfect for lunch boxes- genius! What a time saver! And applesauce is so healthy and delicious. Totally making this.

The Guide also includes a Canning Season Planner so you can look ahead and plan out which other recipes you’d like to try; there’s nothing worse than missing strawberry season, or hoping to preserve roasted bell peppers and completely forgetting about them until it’s too late!


One step in canning that is critical, and someone foreign is adjusting for altitude. The Canning Jump Start Guide includes a visual guide for knowing exactly how many minutes to add to your processing time based on your elevation.

The pantry checklist inside the Canning Jump Start Guide makes sure you will have what you need when you come home from the grocery store or farmer’s market with fresh produce ready to be preserved.


This super helpful guide is printable, or you can simply view it on your phone or laptop. You can access it as many times as you need, over and over, on all the devices you own.


By purchasing the Canning Jump Start Guide, you’ll be able to pin to the Canning Basics Pinterest Board where beginners like you will share recipes from all over Pinterest. It’s a fun bonus that I think you will love!


Canning saves me time every. Single. Day. When I’m rushed making dinner, I can open a jar of tomato sauce that’s already cooked and has no added sugar, load my kid’s lunch box with healthy pickled carrot sticks, and make my husband a peanut butter and jam sandwich that has a lot more food value than store bought jam.

The Best Part? The Canning Jump Start Guide is just $5. That’s right- It’s time to jump in, Wildflowers! 

I can’t wait for you to dive into the Canning Jump Start Guide!

Buy Now!

Best Home Canning Equipment For A Beginner Join the Start Canning Course to learn how to preserve healthy, homemade food in jars!

SaveSave

SaveSave

Filed Under: Can

How To Create a Minimalist Pantry

January 26, 2018 by Jenny Gomes 2 Comments

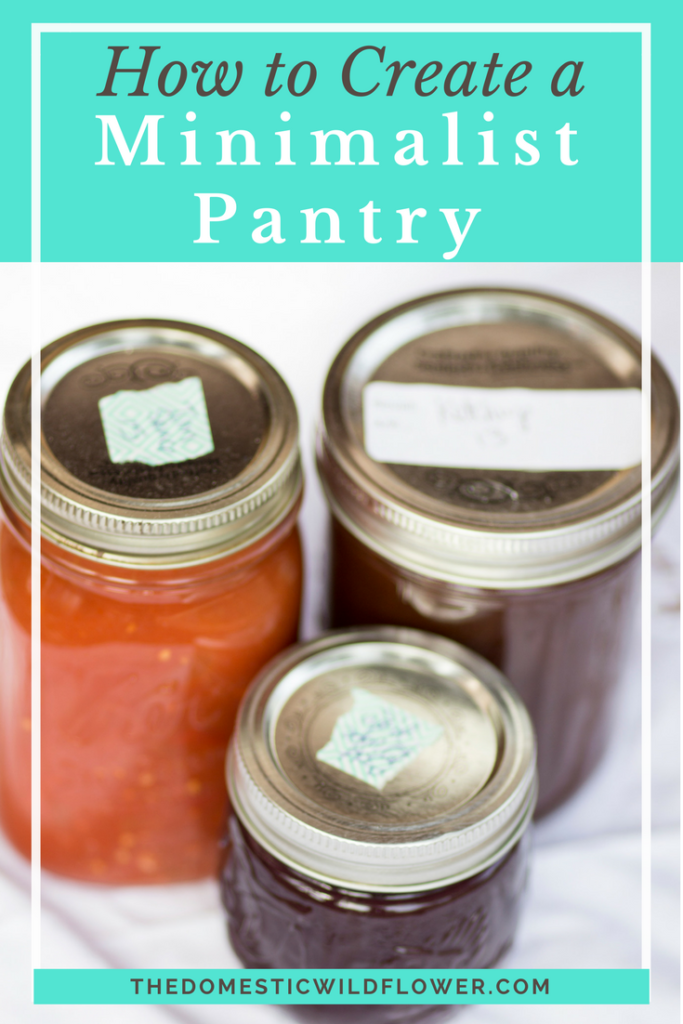
I want to share with you one way we can minimize stress in our kitchens, how to create a minimalist pantry, and that is in minimalism through canning. This post will help you create a minimalist pantry plus there’s a bonus, super versatile tomato sauce recipe included. Read on for the full post! 

How to Create a Minimalist Pantry

This post may contain affiliate links.

Hear me out: I know you probably are remembering canning from when you were a kid, and are thinking that canning took a ton of stuff. I’ve minimized the canning equipment list to reduce the amount of gear you need so you can use what you already have. My favorite pro tip to share is that you don’t need those huge, black and white pots; you can use a large stock pot (the one you use make stew or soup or boil artichokes) and a silicone trivet. Wide mouth pint jars are my go-to canning jar because they double as inexpensive and classic drinking glasses. Whenever I empty a jar that held jam or applesauce, it is washed and reused as a drinking glass or storage container. Bye bye messy and wasteful plastic containers! 

I am a total canning nerd, and I share beginner tutorials and recipes all season long because I love canning and I think you will too. Before I share with you the “how” I want to give you the “why” behind canning.

I have found, as a working mom of 2, that canning gives you CHOICE. It sounds contrary to what you think you are getting when you grab groceries off the store shelves. You seem to have tons of choices in the market, right? There are so many choices that the kids in the cart can’t decide on what flavor they want, which color box to get, or which processed food you really don’t want to buy them anyway gets brought home. If you are part of a tribe of strong, purpose-driven women, you want to make smarter choices to make your lives easier and better. How we think about cooking can be one way that is contributing to mental clutter that canning can help you cut.

How to Create a Minimalist Pantry

Canning can simplify our pantry shelves: Tomato sauce preserved in jars can be used as spaghetti sauce, spread on stromboli, spiced up and used in enchiladas, pureed with a little cream for tomato soup, thinned out in a Bloody Mary, or added to beef stew. A store-bought can of faux Italian, super-processed, and full of added sugar spaghetti sauce is probably destined to only be spaghetti sauce. That doesn’t help when your littles are asking for enchiladas, right? Canning gives you choice.

In addition to adding great flexibility to your pantry, canning gives you control in a very real way. As moms, we cannot control everything in our children’s lives, nor should we. Yet, controlling what they eat to a certain extent is an important job from day one, to the “don’t eat the dog food!” stage, through the “don’t eat your cookies on the bus to school!” and beyond. I’d never tell you to try to manage every bite that passes your baby’s lips but I can tell you that it feels pretty darn good to know that when I open a jar of peaches when my kids are starving that I preserved them myself. I know that I chose each particular peach, washed it, decided which recipe to use based on how much sugar I wanted to include, and I don’t have to worry about what the jar or lid is lined with or if it was clean. That control is a really empowering thing.

I encourage you to try canning as a powerful way of simplifying your pantry and meal preparation. And that versatile tomato sauce recipe I mentioned above? Here it is and don’t worry; I explain in detail exactly what to do. You can totally do this!

Here’s the recipe that I use to work up 12-pound batches of Roma tomatoes, that usually yields 4-5 pints (1 pint =2 measuring cups).

12 pounds peeled tomatoes

1 tablespoon olive oil

12 ounces onion, diced (about 2 small or 1 large)

2 large cloves of garlic

2 teaspoons salt, or to taste

about 2 teaspoons citric acid (a white powder sold in stores, usually near the new canning lids)

Prepare your largest cooking pot with either a metal canning rack or a silicone trivet inside, on the bottom of the pot. Put the canning jars inside (I like largemouth pints for tomato sauce personally), fill the jars with hot water, then the rest of the pot with hot tap water. Bring to a boil.

In a wide preserving pan, heat the oil and saute the onions on medium high for about five minutes. Add the garlic and saute for another five. Combine the peeled tomatoes with the garlic and onions and cook on medium high for about 45 minutes, until the sauce has thickened and darkened in color. Add salt to taste. Stir occasionally and beware of the sauce boiling over the edge or burning on the bottom.

Use a jar lifter (often sold in a kit with a funnel & lid lifter, and readily available at thrift stores and community tool libraries) to remove one canning jar from the boiling water bath at a time. Pour the hot water within back into the pot or into the sink. Set the hot jar gently on a towel-covered countertop.

Add 1/2 teaspoon citric acid (a white powder you get from the grocery store) to each hot jar that is removed from the water bath. Ladle boiling sauce into sterilized jars. Add lids and rings, tightened about as tight as you’d like a bathroom faucet, and return the jars to the boiling water bath. Bring the water back up to boil if need be, and add water from the tap to cover the tops of the jars with 3 inches of water if necessary. Process in a water bath for 35 minutes, adding 5 additional minutes of processing time for every 1000 feet you live above sea level.

When the time is up, you can carefully remove the jars one by one, using the jar lifter, to the towel covered countertop. You will likely hear the lids seal with their tell-tale “ping” sound. The lid will become concave and firm to the touch. If you have a lid fail to seal, never fear. That means there was probably a tiny bit of sauce on the edge of the jar and you should refrigerate that jar and eat it within a week. Label sealed jars with a marker and store.

That’s it! I have a rad little canning basics course that will walk you through the primary lessons in canning so you can complete the recipe above and countless other recipes to minimize your cooking routine. You can enroll right here, for free, in the course that will help you create a minimalist pantry one jar at a time.

Enroll Now!

Best Home Canning Equipment For A Beginner Join the Start Canning Course to learn how to preserve healthy, homemade food in jars!

I hope that canning helps you streamline and de-stress your mealtimes so you can really focus on what’s important so you are living the purposeful life you are destined to live.

Filed Under: Can, Cook

  • « Go to Previous Page
  • Page 1
  • Interim pages omitted …
  • Page 29
  • Page 30
  • Page 31
  • Page 32
  • Page 33
  • Interim pages omitted …
  • Page 66
  • Go to Next Page »

Primary Sidebar

Categories

Follow me here, there, & everywhere!

  • Email
  • Facebook
  • Instagram
  • Pinterest
  • RSS
  • Twitter
  • YouTube

Search

Get The Pressure Canning Cookbook

Get 10 Free Recipes Now!

Best Chicken Coop

Footer

Get Started Pressure Canning

Shrubology Ebook

Shrubology: Refreshing Homemade Fruit and Vinegar Syrups for Cocktails
Make easy, no-cook fruit & vinegar syrups for cocktails & mocktails! This ebook shares crowd pleasing recipes and simple to understand ratios so you can make a shrub on your countertop any time- without a recipe. Dive into these Prohibition Era drinks today!

Copyright

Copyright 2019
The Domestic Wildflower
www.thedomesticwildflower.com.
All content created by Jennifer Gomes unless otherwise noted.

Copyright © 2026 · Lifestyle Pro on Genesis Framework · WordPress · Log in