• Skip to secondary menu
  • Skip to main content
  • Skip to primary sidebar
  • Skip to footer
  • Blog
    • Subscribe
    • Welcome!
  • Perfectly Preserved Podcast
  • About
    • ADW Manifesto
    • Work With Me
      • Read
  • Shop
    • My Account
    • Cart
    • Checkout

The Domestic Wildflower

Handmade Food & Craft Tutorials for Beginners

  • Courses
    • Free Canning Basics
    • Everything Canning Course
    • Steam Canning Workshop
    • Free Homemade Cocktail Mixers
    • Wildflower Mixology
    • Crochet Basket Workshop
  • Can & Preserve
    • Never Canned?
    • Steam Canner Equipment Bundle
    • Shrubs Course
  • Sew
  • Cook
  • Craft
    • Crochet Step-by-Step Guides
      • Crochet Basket
      • Giant Yarn Throw
      • Thick & Thin Throw
  • Living
    • Creativity Challenge
    • Clean
    • Kids
  • Rentals

Featured

29 Reasons You Should Be Using A Steam Canner

March 28, 2017 by Jenny Gomes 2 Comments

This post will explain the reasons why a steam canner is the best thing to happen to the preserving world since Napoleon offered a reward to anyone who could preserve food to feed his soldiers afield. Read on for the list, Wildflowers!

29 Reasons You Should Be Using a Steam Canner | Read this super helpful post that explains all about the hot new technology in the canning world that's perfect for beginners! There's even a free fact sheet & equipment list!

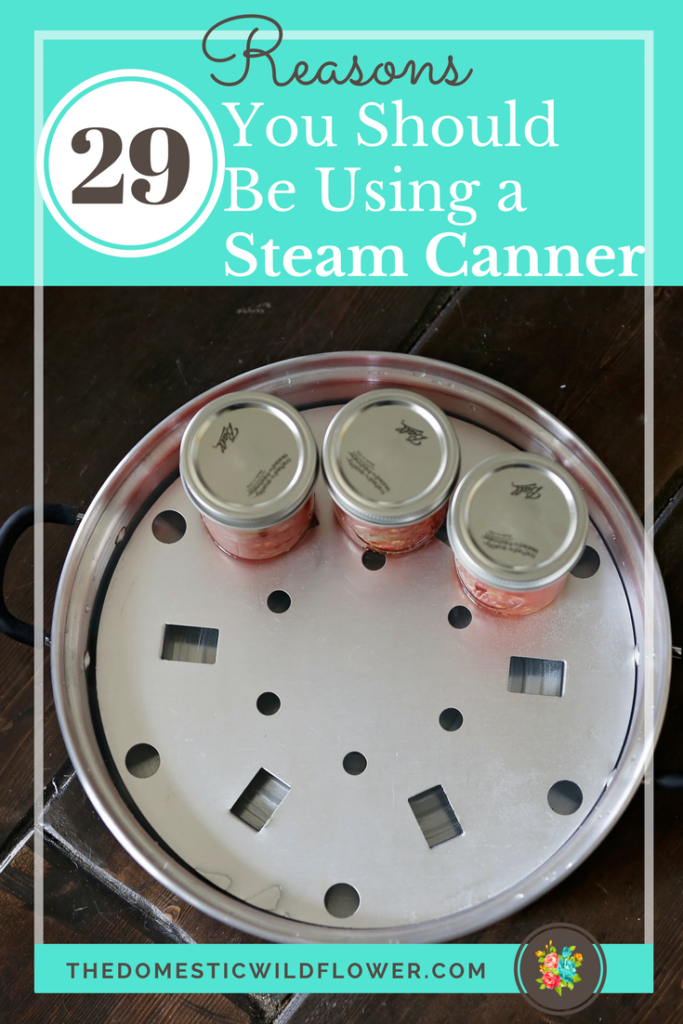
29 Reasons Why You Should Be Using a Steam Canner

  1. Canned food is healthier than store bought.
  2. Steam canners cut canning time in half, if not more.
  3. Thus, steam canners make eating healthier FASTER.
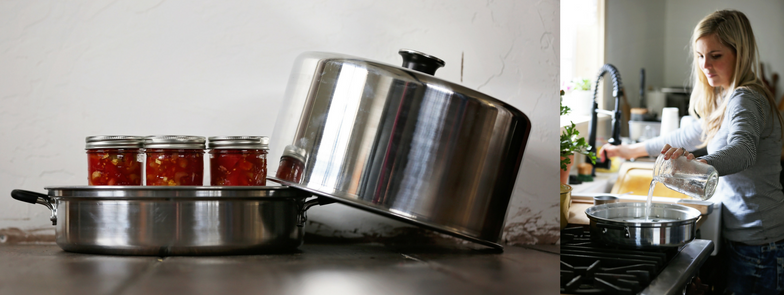
  4. Steam canners use 2.5 quarts of water while a pasta pot with a silicone trivet needs about 4, and a traditional canning pot needs 8 or more.
  5. A steam canner weighs, WITH the water and lid, 8.75 pounds. A pasta pot (and NOT a heavy, high quality one at that) with water weighs 16 pounds, and a traditional canning pot weighs over 35.
  6. Steam canners use less energy.
  7. Steam canners, when empty, are really lightweight– they are aluminum!
  8. Steam canners are ideal for someone in a wheelchair, recovering from illness or surgery, or who cannot lift a heavy pot.
  9. Steam canners have only been approved for about a year by the USDA and National Center For Home Food Preservation- you trendsetter, you!
  10. They are ideal for those living in an RV.
  11. Steam canning is versatile– you can preserve half pints all the way up to quarts! Pro Tip: No steam canning a half gallon or pint-and-a half: those jars are too tall!
  12. Steam canning is ideal for those using solar power.
  13. It is great for those on a budget– one pot replaces the need for a canner with a rack, a jar lifter, a saucepan for simmering the lids, and a lid lifter. You don’t need any of those with a steam canner! Get the Steam Canner Equipment List HERE! 
  14. Home canned food saves money and steam canners make it faster to can…so you save time AND money.
  15. Those who are short on time will love a steam canner. They cut total canning time in half if not more, so if you are busy you you’ll love the simpler process and shorter total time..
  16. They are ideal for short cook time, short process time recipes. That means that if you choose a recipe that takes very little prep and cook time (like carrot pickles, pickled pearl onions, strawberry preserves, etc) then you REALLY save a lot of time by using a steam canner. If you are canning a slow cook, multi ingredient tomato sauce and you don’t care about saving energy or water, well then a steam canner might not seem that amazing. If you ARE cooking a quick cook recipe- you’ll be done in about 20 minutes- or even less!
  17. They are ideal for people living below 7000 feet elevation. In water bath canning, you have to add 5 minutes of process time for every 1000 feet you live above sea level. That means that if you are canning at 7000 feet above sea level, then you would have to add 35 minutes to your processing time. You’d also probably know, since you live there, that you’d have to add time to the brownies baking in the oven and all kinds of other cooking tasks. For steam canning, that means that you’d only be able to can recipes of a 10 minute or less processing time. That’s because steam canners can’t be boiling for more than 45 minutes. For a point of reference, Boulder, CO is at about 5000 feet elevation, Telluride, CO is at about 8000 feet, and there’s about 100 small towns above 7000 feet in America, mostly in Colorado and some in New Mexico that fall in the over 7000 feet category. Canners who live there wouldn’t find a steam canner that useful.  
  18. They are ideal for tiny home living– no jar lifter, no big speckled canning pot…just one pot requiring just 2.5 quarts of water.
  19. They are great if you are conserving water.
  20. They are awesome if you have dietary restrictions. Canning allows you to preserve your own foods with exactly what your diet calls for and nothing else. You can make ketchup with no artificial ingredients, no high fructose corn syrup, no processed junk, and can it in a steam canner. Same goes for applesauce, pickles, jam, jelly, pickled veggies, salsa….
  21. They are awesome if you are busy. Water bath canning doesn’t take all day the way most people think but it does usually take an hour or more to make a batch. Steam canners make the prep time significantly faster because you don’t have to wait for a HUGE pot of water to boil.
  22. Steam canners are amazing for summer time canning. Summer and Fall are the times most of us can things like fresh tomatoes, peppers, cucumbers, dilly beans, salsa, apples, stone fruit, and canning in the summer can be REALLY hot. It’s hot out and water bath canning requires a giant pot of water to be boiling….and boiling….and boiling. Not everyone has AC, and that means you want to can and get it done ASAP so you don’t sweat to death. Steam canners use WAY LESS boiling water, and the whole process is over WAY FASTER so you can count on your kitchen staying much cooler.
  23. Steam canners are better for your hair and makeup. When I’m water bath canning, the steam factor in my tiny, walled-in, weird little kitchen is nuts. Yeah, it would be cool to have an open floor plan kitchen with some great ventilation but until then, I have a stuffy little kitchen. Water bath canning creates a ton of steam- way more than a bathroom during a long, hot shower- and I know I end up looking like I’ve been on a rainforest trek afterwards. And I live where it is NOT HUMID. Thanks for that, Pacific Ocean…I don’t know what my canning comrades in the humid parts of the country do…melt? Never dry out? The steam canner uses the steam INSIDE the pot to can foods in jars and then the overall experience leaves me with hair that’s not plastered to my head and makeup that hasn’t slid down my cheeks. It’s amazing.
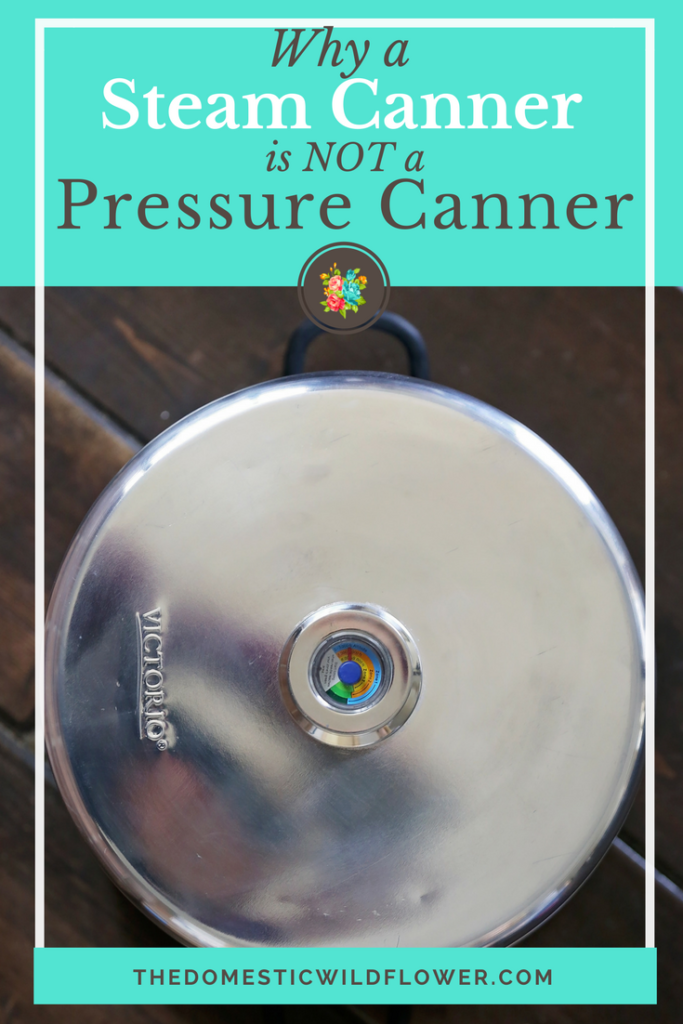
  24. Steam canners have a cool little thermometer on top to tell you when it is safe to start the processing time. The dial indicates when enough steam has built up inside it to be hot enough to start your processing time- you don’t have to get a thermometer and try to measure it yourself.
  25. Steam canners are not scary. Really, NO kind of preserving is scary, but I can totally understand why a person might think a pressure canner is kind of scary. Pressure canners (which kind of look like a steam canner) use a lock, they are rather heavy, and use PRESSURE to build up much higher temperature and preserve foods that are LOW ACID. If you want to learn how to can ocean fresh tuna, or cream of broccoli soup, you need to learn how to use a pressure canner and let me tell you- they are awesome. But a STEAM CANNER is just a lightweight lid that sits on the pan- there’s no lock, or mysterious gauge, or threat of a lid blowing off the top volcano-style. I swear, every person that’s come to my blog has a grandma who has told them a horror story of some pressure canner explosion. A STEAM CANNER won’t have an explosion. It just has 2.5 quarts of water simmering in a pan. That’s it. No pressure. Get it? Pretty punny, right?
  26. Steam canners are low maintenance. A pressure canner can’t be stored outside in a garage where temperatures fluctuate, and have to be checked by a your cooperative extension office routinely. A steam canner could live in your RV storage compartment, in a garage, and doesn’t require calibration.
  27. You should use a steam canner if you have never canned before. They are easy for a beginner, require you to have fewer specific utensils, and use water bath canning recipes which are high acid=foolproof. You can use a water bath canning cookbook exactly the same way with a steam canner- you’d cook your preserve (your jam or salsa or whatever) fill your canning jars, and set them on the steam canner rack. You would put the lid on, turn the burner on, and when the dial indicates that you are at the right temperature, you’d start the timer and use the same process time as the recipe indicates, adjusting for altitude of course.
  28. You should use a steam canner if you HAVE water bath canned before. If you have used the regular boiling water bath method, you’ll be able to appreciate the time advantage, the weight advantage, and the ease it affords you. Those newbies won’t know how good they have it using a steam canner first! You’ll find it a rad addition to your repertoire, and you’ll quickly see which recipes really expound on the next-to-nothing prep time the steam canner offers.
  29. You should use a steam canner because I made a super helpful 2 page PDF that you can read from your phone or tablet or computer OR print off and have right next to you in the kitchen. I tlists the equipment you need as a beginner to start steam canning AND a fact sheet to refer to about what steam canning IS and IS NOT. Grab it completely free, right here!

Differences between water bath canning and steam canning

Want to see more about why a steam canner is NOT the same as a pressure canner? Watch the YouTube video right here, and if you think it’s valuable, be sure to like the video (give it a thumbs up!), & subscribe!

I’ll be sharing videos there more regularly too- can’t wait to see you there!

Filed Under: Can, Featured

Why A Pressure Canner is NOT a Steam Canner

March 27, 2017 by Jenny Gomes Leave a Comment

This post will explain the differences between a pressure canner and a steam canner, and why you’ll definitely want to learn how to use a steam canner. Watch the video below, Wildflowers!

Why A Steam Canner is NOT a Pressure Canner | This post explains the critical differences between a steam canner and a pressure canner including the types of foods you can preserve in them, that a steam canner is ideal for beginners, and why you'll want to start making homemade healthy meals with them for your family!

Get the Steam Canning Fact Sheet & Equipment List here!

Filed Under: Can, Featured

How To Make Shrubs Course

December 19, 2016 by Jenny Gomes Leave a Comment

This post will share the new and improved shrubs email course that you all should sign up for in order to impress this season.

How To Make Shrubs Course

First of all, my devoted readers, I am sorry I haven’t posted a blog post in the last two weeks. I was sick, then my kids were sick, and really, I have been working like mad on some very fun and exciting projects that will be unveiled in the next couple of weeks. I truly didn’t have time to do much beyond the behind the scenes work I was tackling in between bouts of the flu. We are all healthy, happy, thinking about Santa, and back to normal. I am looking forward to revealing several awesome resources for you but the first of which is the new & improved, free, shrubs email course.

Enroll Now!

History of Shrubs

Shrubs were invented in the Colonial era as a way of saving the bounty of the harvest; fresh fruit was preserved (aka saved for later, when it wasn’t growing on the tree, plant or vine) in vinegar and then used as an astringent add-in to water that may or may not has been all that clean to drink, given the absence of sanitation measures. I spent a year teaching Social Studies a couple years ago, (I normally teach English) and enjoyed (note: sarcasm) explaining to my junior highers about how many colonies darn near died out from dysentery, which is basically terrible diarrhea from drinking dirty water. Yucky, but true. Historically, waterborne illness encouraged the creation and consumption of a great many beverages that were safer to drink than plain water, like beer, shrubs, and other liquids that were inhospitable to bugs that are likely to make us sick.

They were revived during the Prohibition era in the US. Alcohol was banned in a variety of states and manners, off and on, during the 1800s as it became clear that the overindulgence of alcohol caused a lot of problems for families. The 18th amendment was ratified in 1919, by which time about 33 states had independently banned alcohol as well. Of course, enforcing the prohibition of alcohol effectively in more rural areas (as poorer folks were less like to be able to afford expensive bootlegged spirits) and less so in urban ones. Overall, those who wanted to drink found ever more inventive ways of drinking; moonshine, speakeasies, and bootlegging all were means to a tipsy, and criminal end. Al Capone, a famous Chicago gangster, supposedly earned $60 million a year from bootlegging, or illegally brewing and distributing, illegal alcohol. In short, Prohibition failed to reduce drinking, crime, or drunkenness, and Franklin D. Roosevelt called for the repeal of the 18th amendment on his election platform and easily won the election. In February of 1933, the 21st amendment repealed the 18th, and alcohol was legal once more.

During Prohibition, the housewife and homemaker were faced with the great question of what to serve guests who came calling. The book, “What To Drink” by Bertha E. L. Stockbridge, 1920, is one that is filled with creative, frugal, and sensible ideas of how to quench the thirst without alcohol. Remember, the Great Depression began in 1929, so Prohibition straddled the end of the Roaring Twenties and the beginning of the depression. The lack of legal alcohol coupled with the lack of disposable income resulted in a revival of shrubs, also known as drinking vinegar, and a great many other drinks.

What is a shrub?


Shrubs are a syrup made with fruit (which spoils rather quickly without refrigeration), sugar or honey, and vinegar. Vinegar is very high in acid, and acid is one way we can make food and drink a place where germs that make us sick cannot thrive. Sugar is a powerful preservative, which is one of the reasons a gummy worm doesn’t rot away when lost under a car seat the way a slice of bread will. The combination of sugar and vinegar means that fresh fruit flavor is preserved in a concoction that will last much longer than fruit left whole. It also made an astringent addition to water, which by Prohibition was a lot cleaner in general, but still was a concern in some areas, or times, as the end of summer when wells were lower, etc.   

Nowadays, we know a lot about the health benefits of drinking vinegar. The darling of the vinegar world currently is apple cider vinegar, the same way the gem of the wine industry is red wine. Generally speaking, vinegar is vinegar, they way darkly colored alcoholic beverages are all darkly colored alcoholic beverages. Dark beer has many of the same health benefits of red wine, just better marketing has been done on red wine’s behalf. The same goes for apple cider vinegar.

At any rate, there’s oodles of information out there on reputable sites about the health benefits of apple cider vinegar specifically, and generally, incorporating vinegar of all kinds into the diet. Vinegar lowers the appetite, speeds up metabolism, reduces inflammation, among other desirable actions. Indeed; consider the diets of many places known for maintaining great health. The Mediterranean diet enjoys balsamic, the Asian diet enjoys rice vinegar, and so on. I’m not saying vinegar is a silver bullet cure-all, I’m just saying it is probably a good thing to incorporate into our diet.

The main opposition I have found to making or drinking shrubs is that people say they don’t like vinegar and they assume that drinking shrub means you are just guzzling plain old white vinegar. Not so, Wildflowers. White vinegar is good for descaling the dishwasher, whitening white laundry, and cleaning windows in my home, NOT for use in shrubs. For one of my very first shrubs I used plain, cheap white vinegar, the very same stuff I use to clean with, and blueberries and there’s no amount of sugar or fruit in the world that will make that taste better.

Best Vinegars for Shrub Making

What IS good, however, is apple cider, balsamic, champagne, rice, and other milder vinegar. THOSE are the hot ticket. The second piece of growing to love shrubs is to understand you usually don’t drink them straight. The recipes in the Prohibition era cookbooks call for just a spoonful of shrub in a glass of cold water. I drink mine with about a shot of shrub, which is just 1-2 ounces, in a 16-ounce wide mouth pint glass, filled with water and a shot of alcohol if the day called for it (a junior high field trip day calls for 2). So, you really aren’t drinking plain vinegar at all, unless of course that you want to. The flavor that I have read enjoyed straight the most is apple shrub, which is a freshly grated apple submerged in apple cider vinegar.

Shrubs are not a fermented concoction. They delicious without the addition of alcohol and all my recipes make it clear that you don’t have to add a shot of booze at all to enjoy them. Most days, I skip the alcohol just to keep my pesky migraines at bay.

All of my shrub making instructions are no-cook. That means there’s no saucepan to heat up, no dishes to scrub clean..NO cooking. Many recipes of yesteryear gave instructions for boiling fruit and sugar together but what is lost is that delicious fresh fruit flavor. I prefer to let the fruit and vinegar sit together to marry, and then add the vinegar. I suppose what I’d be gaining is time if I chose to sacrifice the taste of a perfectly fresh, ripe apple for the 10 minutes of cook time.

Sign up for the free email course that will teach you how to make a no cook syrup from fresh fruit, sugar, and vinegar. These drinking vinegars are fresh, unique and delicious mixed with sparkling water. The optional shot is divine on a hot day & and they are the most gorgeous, bright colors! Sign up for the free course today!

I’m sharing this post now so you can learn how to make these in case you are like me a few years ago in regards to being an underprepared and uninspired hostess.
I love my family and friends but I wasn’t raised in a home that enthusiastically welcomed the idea of having gobs of company over. My mom, who taught me how to be a hard worker and where I get my hustle and height, was a waitress for many years. She was a good, fast, efficient, tip-making machine but that’s not quite the same thing you want to be when having your new in-laws over for supper, right? I wanted to be like the gal on the cover of a magazine, pouring pretty drinks in a white kitchen where something was peacefully baking out of sight and there were never any dishes to be washed. Learning how to make simple, economical, and unique drinks like shrubs can take you one step closer to the cover of that metaphorical magazine. You don’t have to rely on some tired old choice from the grocery store shelf. Your best friend’s brother’s new girlfriend who will be over for drinks has already had that margarita mix a dozen times. That mixer would be okay and no more.

Sign up for my free shrubs making email course and you will be on your way to serving fresh, fun, and unique shrubs this season!

Enroll Now!

Maybe shrubs are a mixer you’ve mastered, and maybe you want to try something fresh and new. I am in that boat, and when I found this amazing graphic, I was in cocktail love. I hope it helps inspire you to fill your mason jar with something farmer’s market fresh, on the double, Wildflowers!

Grow Your Own Cocktail Garden: Mason Jar Garden Cocktails
Source: Fix.com Blog

Filed Under: Cocktails, Featured

Primary Sidebar

Categories

Follow me here, there, & everywhere!

  • Email
  • Facebook
  • Instagram
  • Pinterest
  • RSS
  • Twitter
  • YouTube

Search

Get 10 Free Recipes Now!

Best Chicken Coop

Footer

Start Canning Course

Start Canning Course | The Domestic Wildflower click to read this super helpful list of resources, tools, and gift ideas for the homemade and handmade enthusiast in your life!
This video course will invite you into my kitchen to watch me can a wide variety of recipes and use several beginner friendly techniques. It is the perfect course if you want to learn but have no idea where to start; even if you've never boiled a pot of water! Learn how you will know you are doing it right, safety best practices, simple recipes that are foolproof and guaranteed to impress, and skills to apply to any recipe.

Shrubology Ebook

Shrubology: Refreshing Homemade Fruit and Vinegar Syrups for Cocktails
Make easy, no-cook fruit & vinegar syrups for cocktails & mocktails! This ebook shares crowd pleasing recipes and simple to understand ratios so you can make a shrub on your countertop any time- without a recipe. Dive into these Prohibition Era drinks today!

Copyright

Copyright 2019
The Domestic Wildflower
www.thedomesticwildflower.com.
All content created by Jennifer Gomes unless otherwise noted.

Copyright © 2023 · Lifestyle Pro on Genesis Framework · WordPress · Log in