• Skip to secondary menu
  • Skip to main content
  • Skip to primary sidebar
  • Skip to footer
  • The Pressure Canning Cookbook
  • Blog
    • Subscribe
    • Welcome!
  • Perfectly Preserved Podcast
  • About
    • ADW Manifesto
    • Work With Me
      • Read
  • Shop
    • My Account
    • Cart
    • Checkout

The Domestic Wildflower

Handmade Food & Craft Tutorials for Beginners

  • Courses
    • Free Canning Basics
    • Everything Canning Course
    • Steam Canning Workshop
    • Free Homemade Cocktail Mixers
    • Wildflower Mixology
    • Crochet Basket Workshop
  • Can & Preserve
    • Never Canned?
    • Steam Canner Equipment Bundle
    • Shrubs Course
  • Sew
  • Cook
  • Craft
    • Crochet Step-by-Step Guides
      • Crochet Basket
      • Giant Yarn Throw
      • Thick & Thin Throw
  • Living
    • Creativity Challenge
    • Clean
    • Kids
  • Rentals

Blog

9 Jam Canning Recipes for Beginners

August 8, 2018 by Jenny Gomes Leave a Comment

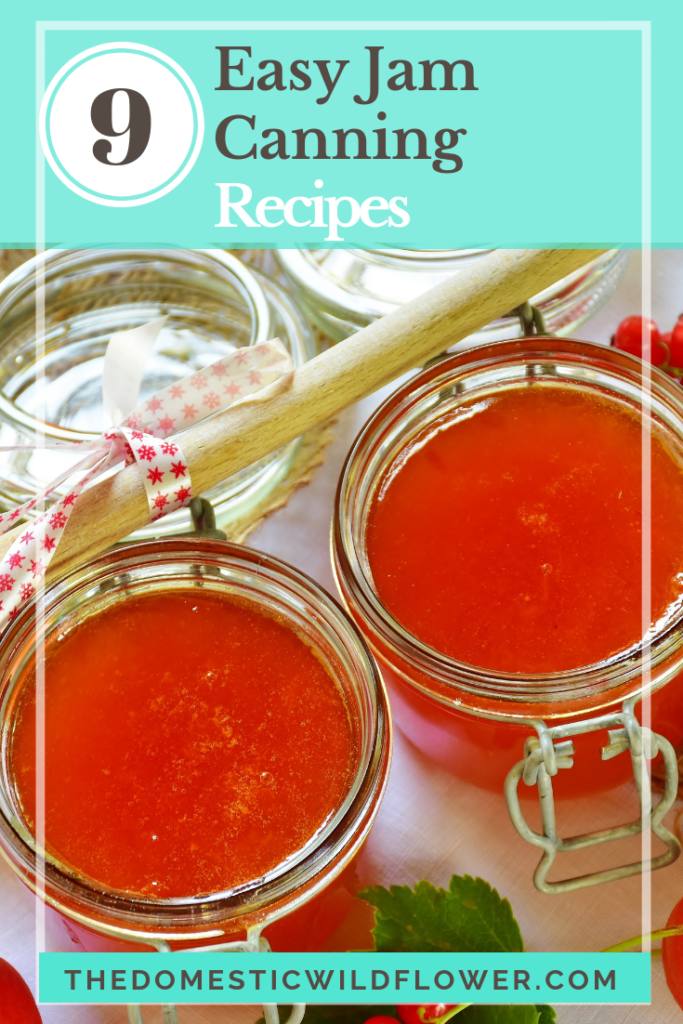
Jam is the first type of preserve that people think of when they think of canning recipes for beginners, for good reason. Jam is nearly foolproof for beginners because the recipes are quite high in acid, making them very safe, and they frequently call for very few ingredients making them fast and simple to prepare. The worst thing that can happen in jam making is it turns out a little bit thin, which is essentially syrup. When syrup is your worst case scenario, I think you should feel confident diving in as a beginner with these 9 jam recipes!

9 Jam Canning Recipes for Beginners

This post contains affiliate links.

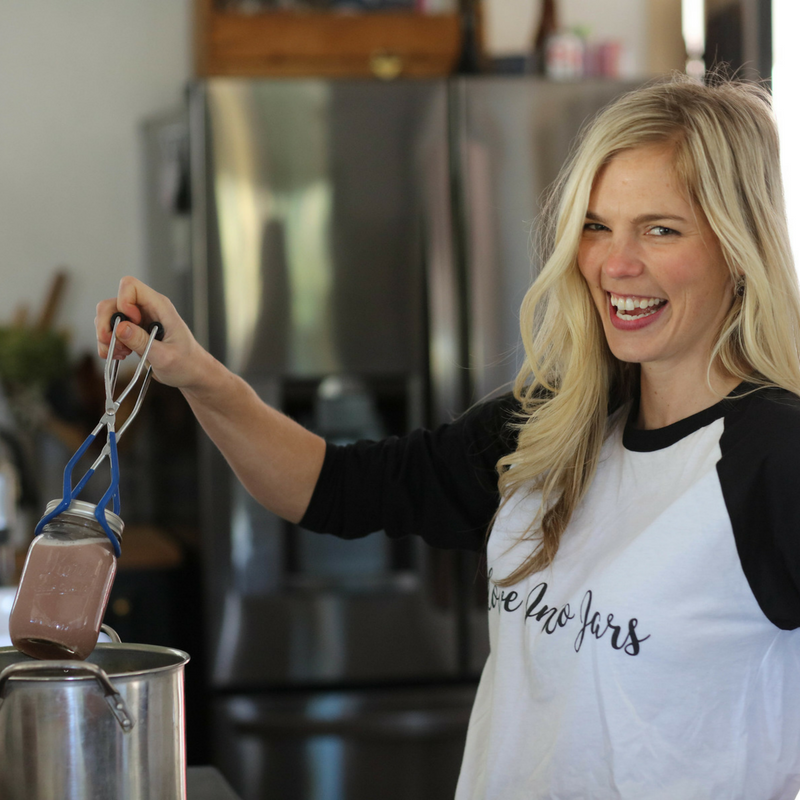
If you are a canning newbie and want to watch someone set up the canning process, I want to invite you to check out the Canning Foundations video course. It walks you through, step-by-step, every single part of the canning process. That course plus this blog post would result in you going from brand new beginner to jam-making machine! Check it out here!

9 Jam Canning Recipes for Beginners

9 Jam Canning Recipes for Beginners

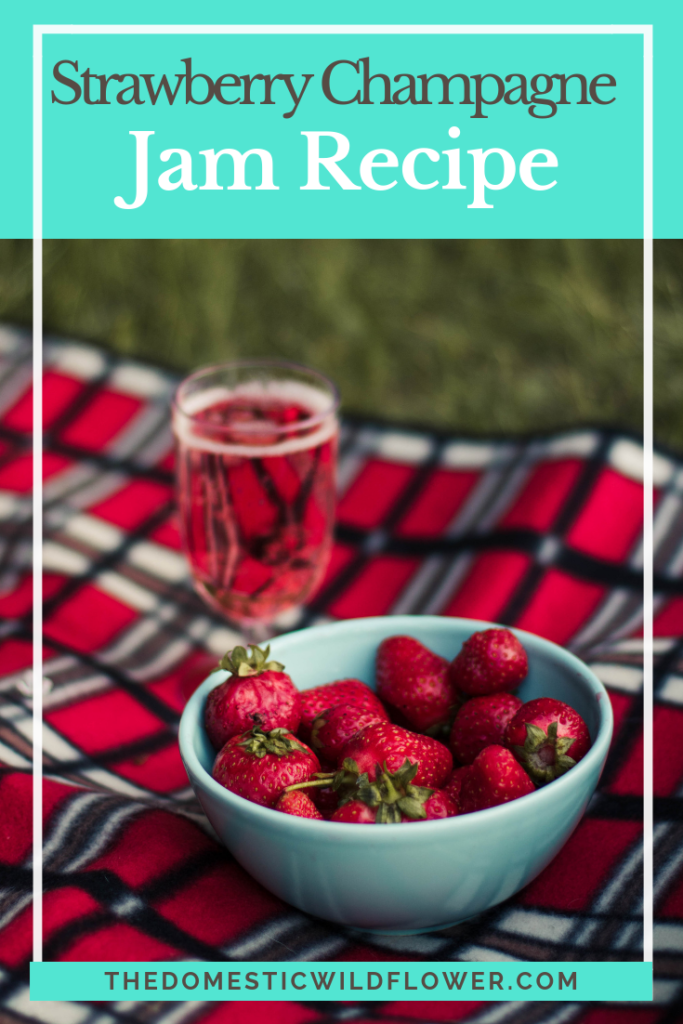
Strawberry Champagne Jam Recipe 

Strawberry Champagne Jam is THE jam to make to celebrate, to give as a gift, and to savor the flavor of spring. It is much easier than you think and there are a few simple pro tips for keeping that champagne flavor in the jar!

9 Jam Canning Recipes for Beginners

Raspberry Jam Recipe 

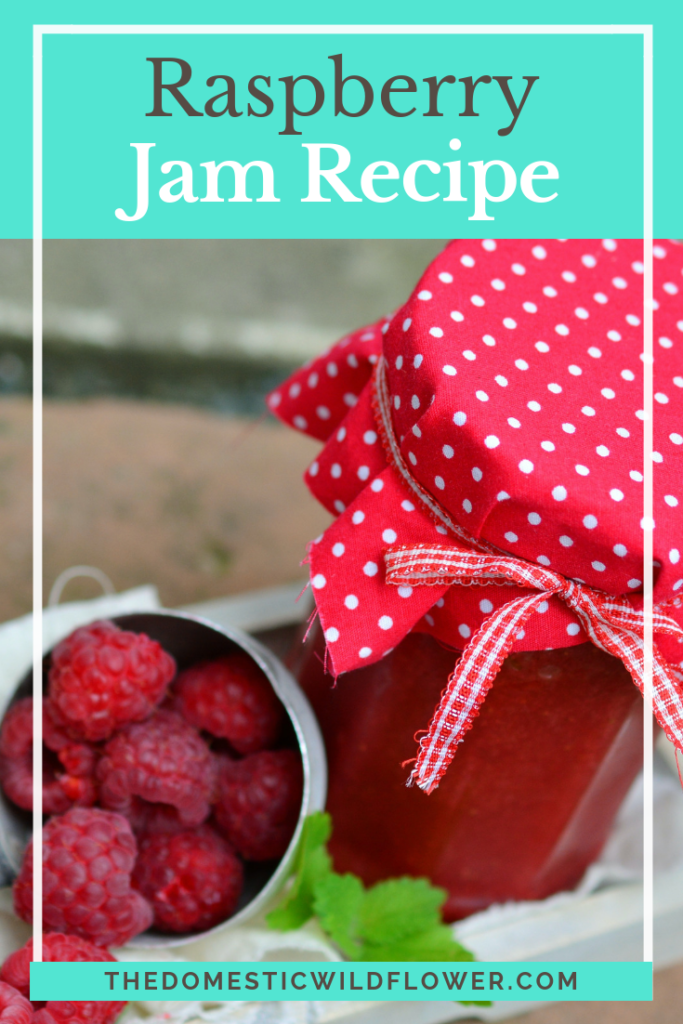
Raspberry jam is a delight to give as gifts, raspberries are easy to pick at U-pick farms, and deliciously gift-able preserved in these tiny mason jars.

9 Jam Canning Recipes for Beginners

Tomato Jam Recipe 

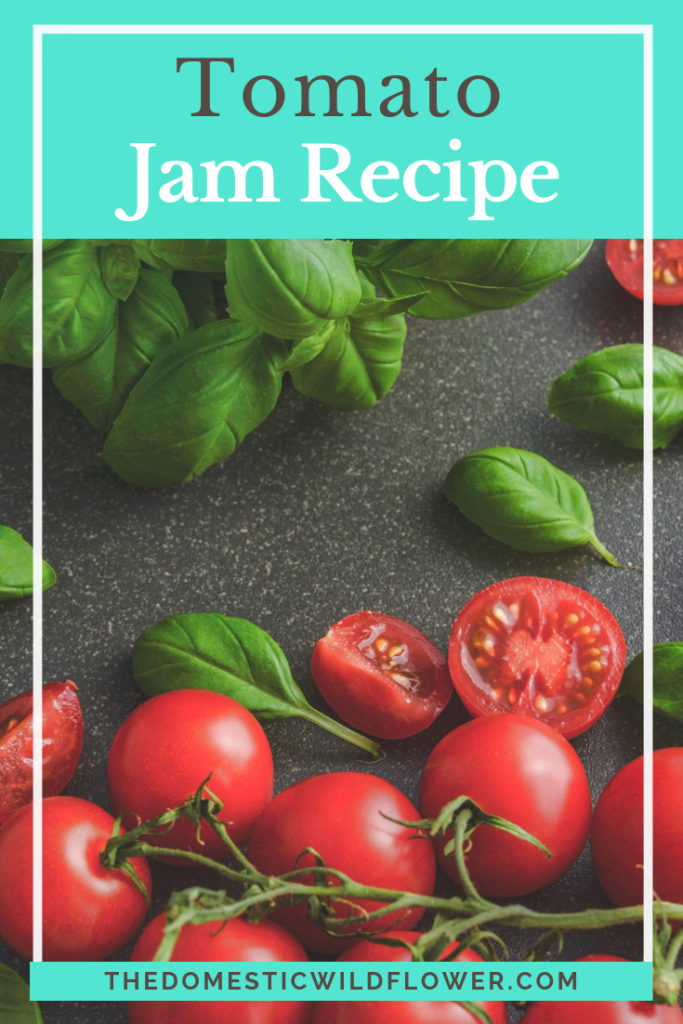
This recipe calls for Roma tomatoes, which are typically denser and thus cook into a thicker sauce a bit faster. You can use whatever tomato you have on hand, however, and this is a great recipe to use a variety if that is what you have. There’s a free download of the jam recipe in the post too!

9 Jam Canning Recipes for Beginners


Strawberry Jam 

Strawberry Jam is THE preserve to try if you’ve never canned because strawberries are so high in acid that the worst thing that could happen is that you’ll have thin jam, which is essentially strawberry syrup.

9 Jam Canning Recipes for Beginners


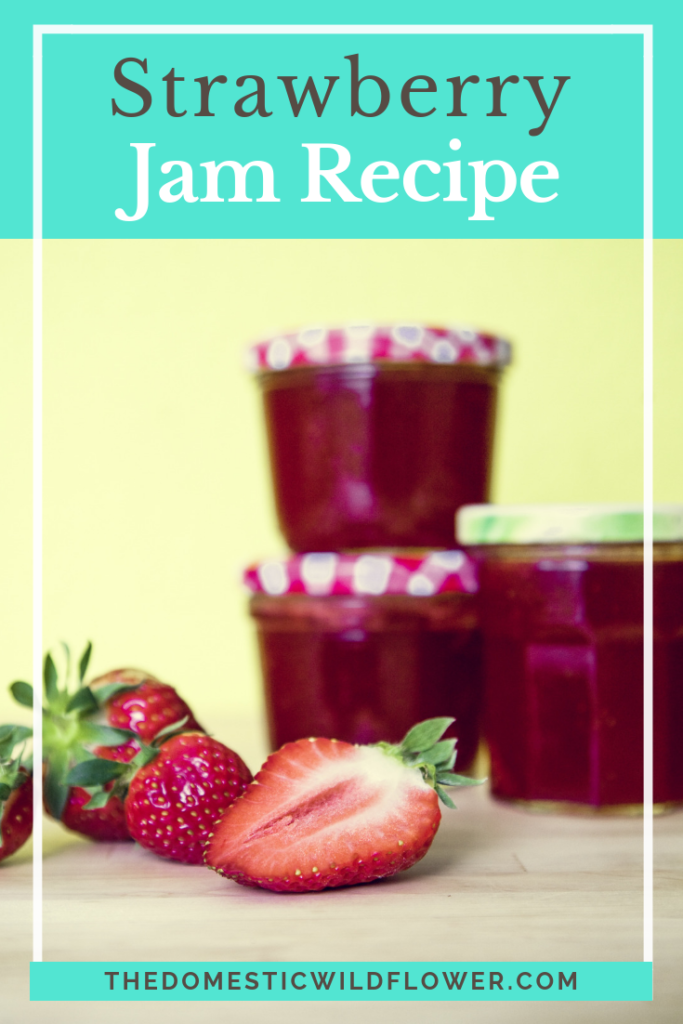
Are you LOVING these strawberry recipes? I have a fun little recipe booklet of JUST strawberry recipes- check it out here! 


Cranberry Lemon Jam 

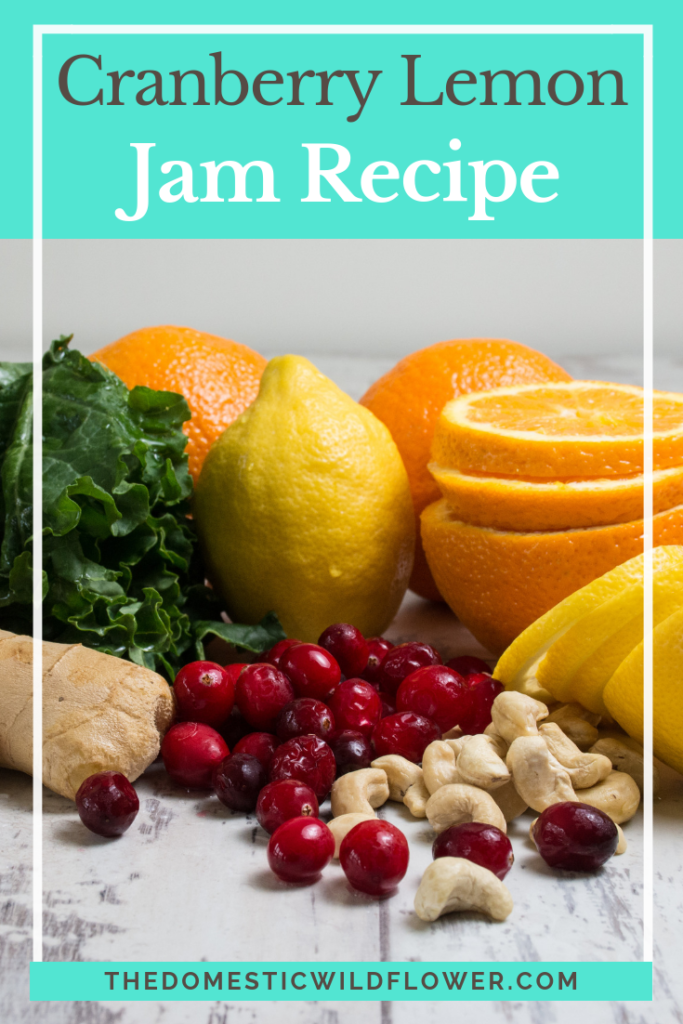
It’s a perfect jam. You definitely can make this cranberry lemon jam and preserve it in a water bath process- you do not have to use a steam canner which is much faster. You can even use frozen cranberries in this recipe!

9 Jam Canning Recipes for Beginners


Smooth Blackberry Jam 

Blackberries are probably my favorite berry. I grew up picking wild blackberries on my family ranch with my mom, grandmother, and brother and sister (with dogs Dodger and Missy keeping an eye out for bears nearby- more than once they saw one!). Blackberries can be a little seedy but they are so, so good and this recipe has a sneaky trick for quickly removing a significant portion of the seeds- enough that a picky child or discriminating adult would be thrilled.

9 Jam Canning Recipes for Beginners

Best Berry Jam 

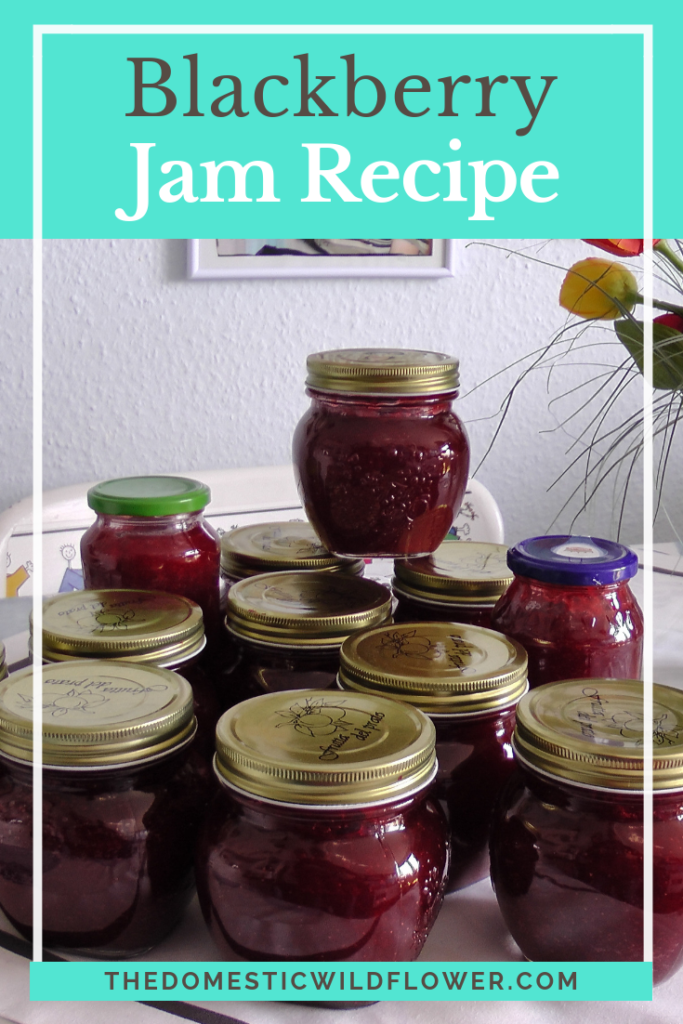
A recipe that is to die for and to please even the pickiest eater. A not-so-seedy jam is also less likely to get an objection from a picky child. Can you gather yet that I have picky kids? It’s a tragedy.

9 Jam Canning Recipes for Beginners


Roasted Plum Jam 

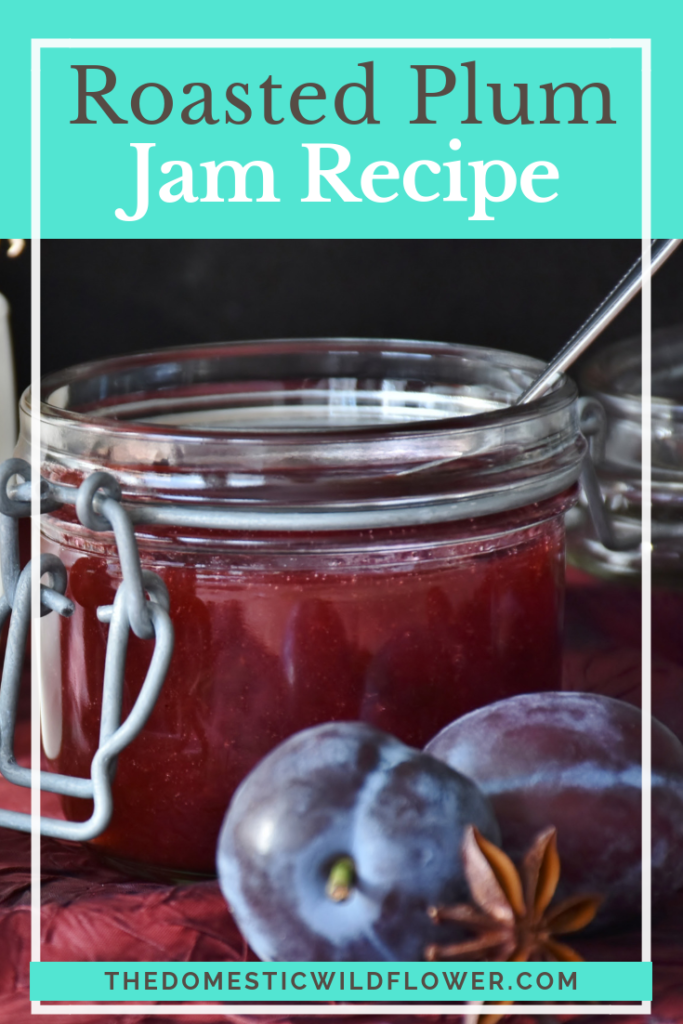
Plum Jam is an easy recipe that is elevated in a wonderful way by roasting the plums. Beginners can easily succeed with this canning recipe and the roasting plums make your home smell heavenly.

9 Jam Canning Recipes for Beginners

Canning Concord Grape Jam 

While we most often see the clear jelly in stores, grape jam is delicious and seems to be a bit more virtuous in my mind because more of the actual grape remains in the pot. It is grape-y in flavor, whole-food in a constitution, and entirely delicious

9 Jam Canning Recipes for Beginners

If you’re not ready for a video course, want to check out some more canning info first, I have a FREE Canning Basics course that you can dive into- I’ll pop into your inbox lessons that will get you off and canning! You can sign up here!

Related Posts:

9 Mistakes Beginners Make When Learning How to Can 

Pickled Bread and Butter Jalapeños

Shrub For Cocktails

Filed Under: Can

What Produce is in Season Now?

July 25, 2018 by Jenny Gomes Leave a Comment

What produce is in season now? This post will explain what produce is in season now so you never throw wasted produce out again. Read on to find out which produce is ripe, ready, and in season!

What Produce is in Season Now? This post will tell you so you never have to throw wasted produce out again!


We’ve all done it: We’ve opened the fruits and vegetables drawer in our fridge only to find out that something has gone rotten, and far sooner than we expected it to. It’s disappointing, and it’s a hard pinch on our wallets, too. No one wants to throw those strawberries that cost a pretty penny—you want to eat them.

There might be a reason for that waste that you haven’t considered, and a way to save yourself the agony of throwing things away (and save some cash, too): think about produce seasonally.

Most people don’t do this. Within reason, they buy what they want to buy at the grocery store, and then they take it home. But a lot of that produce had to trek hundreds, if not thousands, of miles to get to you, meaning it has a greater risk of spoiling when you get it home. So how do you look at things more seasonally? This graphic explains it.

What Produce is in Season Now?

Thanks to to https://zerocater.com for this graphic!

Seasonal Eats: Which Produce Is in Season When

What to do with your seasonal produce:

So, what do you do with this information? Well, I think the advantage of buying produce when it is in season most immediately is that it is less expensive. Cheap produce is often the most plentiful, but buying pound after pound of produce can be overwhelming. Canning your produce when it is ripe and inexpensive is the best option for enjoying produce picked at it’s peak all year round and I have a completely free Canning Basics Course you can sign up for to learn how to preserve food in glass jars!

Sign up now!

What’s your favorite seasonal fruit or veggie, Wildflowers? Let me know in the comments!

Filed Under: Cook

10 Easy to Grow Vegetables for your Fall Garden 

July 20, 2018 by Jenny Gomes Leave a Comment

10 Easy to Grow Vegetables for your Fall Garden is a post that will help you decide what to plant for the easiest, best yield for a successful Fall garden. Read on for the list and for some helpful resources perfect for beginners!

10 Easy to Grow Vegetables for Your Fall Garden This post has tons of great tips for a successful and easy fall gardening experience!

 This post contains affiliate links. 

Confession Time: You may remember me saying that despite being a canning blogger I don’t have a garden. I don’t have a garden yet because I have a 12 foot hand-dug well that likely wouldn’t support a big veggie garden. I have no fences and many wild creatures great and small that would love to eat whatever I planted, and truthfully, I haven’t the thumb for it at this phase of my life. My kids are little and I recently killed the pretty pink cactus in my shower. I have been growing sprouts in a mason jar on my countertop BUT, Wildflowers, I have friends in high places indeed.

My friend Teri Page of the blog Homestead Honey is an amazing gardener and I asked her to share her best gardening tips for us in a  guest post. She knows her stuff, has the right thumb for the job, and has written a fantastic post (with a rad resource at the end! Don’t miss it!) for you all. I’m so grateful for her expertise. Read on for her post; thank you Teri!

10 Easy to Grow Vegetables for Your Fall Garden

Fall gardening is a great way to increase your harvest, save money at the grocery store, and enjoy garden-fresh produce year-round, but if you’re new to fall gardening, it can feel a bit overwhelming! What do you grow? When do you plant it? What about frost? Today I’ve put together a list of my top ten easy to grow vegetables for your fall garden, and I invite you to check out my eBook, Homestead Honey’s Guide to Fall Gardening for step-by-step advice on how to select the best varieties, when to plant, and how to protect your crops from cold weather. 

To start, I recommend taking a look at what your family really enjoys eating and select a few favorites from the list below – no sense in growing food that won’t be enjoyed! For instance, I know that turnips will do really well in my zone 5B garden, but my family does not love them. Instead, I’ll focus on growing beets and greens that I know we will all enjoy.  

Next, take time to select varieties that will do well in cold growing conditions. Seed variety names like “Arctic King” or “Winter Blend” are good clues to cold-hardiness.  

Ready for a few easy-to-grow vegetable ideas for your fall garden? Keep in mind that this list is not at all exhaustive. I’ve suggested plants that have done well for me in my garden in Northeast Missouri. In planting a fall garden, I battle extreme heat, drought, and a fairly high pest load, so if I can grow a successful fall garden, I know you will be able to! 

Ten Easy to Grow Vegetables for your Fall Garden 

1) Lettuce 

Lettuce loves cool weather, so it’s a great choice for your fall garden. I have enjoyed picking salads from the garden through the end of December when I protect beds with floating row cover and clear plastic. 

2) Spinach 

If I had to pick one vegetable for my fall garden, it would be spinach. Enjoyed fresh or cooked, spinach thrives in cool weather, becoming even more sweet tasting after frost.  

3) Mustard Greens 

I like to add a few varieties of mustard greens to my salad blends, to add a bit of spicy kick. They endure the cold quite well, and grow quickly in the late summer and early fall. 

4) Cilantro 

Cilantro is a true cold weather plant that, in my zone 5B garden, will last well into the winter months, even without frost protection. I like to let cilantro re-seed itself by leaving plants in the ground to flower and produce seeds. In the spring, cilantro is often among the first plants to germinate.  

5) Garlic 

Homegrown garlic far exceeds the flavor of anything you will find at the grocery store. Its cold-hardiness makes it an excellent choice for your fall garden. Although you can also plant garlic in the spring, for a later summer harvest, my preferred method is to plant garlic in the fall and let it overwinter, harvesting it in late June. Check out my Ultimate Guide to Growing, Harvesting, and Storing Garlic for more detailed cultivation information! (https://homestead-honey.com/2015/06/21/growing-harvesting-and-storing-garlic/) 

6) Beets 

Beets are one of my favorite crops because you can enjoy the green tops and store the roots for months in cool storage. Beet seeds will need lots of consistent moisture to germinate, but they are a relatively easy and quick growing crop.  

10 Easy to Grow Vegetables for Your Fall Garden This post has tons of great tips for a successful and easy fall gardening experience!

7) Mache 

Mache, also known as corn salad, is a cold-loving green that makes a lovely addition to salads. I will sow it in the fall for fresh eating, and again in the later fall to overwinter for early spring greens. 

8) Kale 

Kale is a powerhouse vegetable that grows year round, gets even sweeter after the first frost, and re-seeds itself in the garden. I love to plant Lacinato and Red Russian kale, but I’ve also heard great things about Vates. Sow your kale in succession from early spring through early fall for a variety of sizes for salads, smoothies, and stir-fries. 

9) Chinese Cabbage 

Chinese cabbage is one of my favorite cool weather vegetables. We sauté it in stir-fries and also enjoy it fermented into Kimchi.  

10 Easy to Grow Vegetables for Your Fall Garden This post has tons of great tips for a successful and easy fall gardening experience!

10) Radishes 

For a quick-win fall crop, be sure to add radishes to your list. In fact, sow radish seeds every two weeks, and enjoy continual harvests.  


For more inspiration, pick up a few seed catalogs (High Mowing Seeds is a great one for fall gardening because they sell many cold-hardy and short season crops that do well in Northern Vermont) and start browsing!

Use this list as a jumping off point, and dive into Homestead Honey’s Guide to Fall Gardening Ebook for more detailed guidance on how to plant a successful and bountiful fall garden. Happy growing! 

Get Homestead Honey's Guide to Fall Gardening! Such a great resource for a successful and fun fall garden!

Wildflowers, this ebook has me thinking of all the ways I CAN garden…I’m so inspired that my husband is going to think I’ve lost my mind! Teri makes a daunting process much simpler and I know so many of you would love to dive in with her to eat fresh, home grown veggies all year long. Imagine the money you’ll save! Get the ebook here!

Teri Page is the creator of Homestead Honey (https://homestead-honey.com) where she writes about gardening, homesteading, fermentation, foraging, and off the grid living. She is the author of Family Homesteading, which is now available for pre-order (https://amzn.to/2O1EpFK)! Teri is also a life and business coach who enjoys working with women who are ready to live their homestead dream!

Get Homestead Honey's Guide to Fall Gardening! Such a great resource for a successful and fun fall garden!

Filed Under: Living

How to Grow Sprouts in a Jar

July 16, 2018 by Jenny Gomes Leave a Comment

Growing microgreen sprouts in a mason jar is easy and inexpensive – even for someone with no green thumb! This tutorial has a few pro tips to ensure you grow tasty, nutritious sprouts in a simple canning jar. Read on to learn how to grow sprouts in a jar! 

How to Grow Sprouts in a Jar | Super simple tutorial with a few pro tips for making this inexpensive, nutritious microgreen in a regular mason jar!

This post contains affiliate links.

When I was growing up in my very rural community, fresh greens out of season were hardly available, and if they were, my frugal mama wasn’t about to purchase them. Mom grew sprouts in a jar often and they were an incredibly cheap way to add crisp flavor and texture to salads, sandwiches, and more.

I’ll admit right here that despite being a canning blogger, I’m no gardener. I have a hard time keeping any plant alive but I can grow these little babies easily. Growing sprouts in a jar are easy with the tips that follow below!

My mom used to get her seeds from the little local grocery or feed store, and you could as well, but the sprouts I used and am so happy with are from Sustainable Sprout. I LOVE their range of options- you could choose a mild mix (if you are living the picky child life like me) a spicy mix for more flavor, radish or broccoli (I did broccoli for my first batch and my kids even liked it…but I did NOT reveal that it was broccoli. They are just sprouts, ‘k?)

How to Grow Sprouts in a Jar Growing microgreen sprouts in a mason jar is easy and inexpensive - even for someone with no green thumb! This tutorial has a few pro tips to ensure you grow tasty, nutritious sprouts in a simple canning jar. When I was growing up in my very rural community, fresh greens out of season were hardly available, and if they were, my frugal mama wasn’t about to purchase them. Mom grew sprouts in a jar often and they were an incredibly cheap way to add crisp flavor and texture to salads, sandwiches, and more. I’ll admit right here that despite being a canning blogger, I’m no gardener. I have a hard time keeping anything alive but I can grow these little babies easily. Growing sprouts in a jar is easy with the tips that follow! My mom used to get her seeds from the little local grocery or feed store, and you could as well, but the sprouts I used and am so happy with are from Sustainable Sprout. I LOVE their range of options- you could choose a mild mix (if you are living the picky child life like me) a spicy mix for more flavor, radish or broccoli (I did broccoli for my first batch and my kids even liked it...but I did NOT reveal that it was broccoli. They are just sprouts, ‘k?) How to Grow Sprouts in a Jar You’ll need a packet (or 2 or 10- might as well stock up because you’ll be making this weekly probably) of seeds A jar A 6 inch square of nylon - as in, from a pair you used to wear but got a run in. My mom always used nylon and it drys faster than cheesecloth (a perfectly acceptable substitute) and drains the jar easily. Drying quickly is desirable because it limits bacteria growth and nylons (or thin tights!) are perfect for that. Place 1 tablespoon of seeds (half a packet!) in the bottom of a perfectly clean quart (4 cup) mason jar. I like using the wide mouth jars for when the sprouts are ready to pull out- it’s easier to reach in to remove them than in a regular mouth jar. Place the nylon or double layer of cheesecloth over the top of the jar and screw on the ring. Fill with water, swish, and drain. Pro Tip: If at all possible, prop the jar in a small casserole dish, or in a saucer with the back end of the jar on a spare canning jar ring so that the bit of water that remains after the twice daily rinsing drains properly. Having this little saucer set up on the counter will save you time and prevent your seeds from having too much water. After you’ve rinsed your seeds the first time, let them rest inverted in the above described set up until evening. Rinse again before bed/after you wash evening dishes/some time at the end of the day. Rinse seeds (which is essentially watering them) twice daily. They should be left to rest in a warm spot if possible- 70 degrees is ideal. I’ve made these once in the winter and I think they didn’t sprout because the spot I had them sitting was too dark and cold. Remember: seeds sprout in the springtime, so you are recreating that in your jar, to some extent. Warm, sunny, and twice daily rinsing will yield germinated (aka sprouted) seeds in a few days, and you’ll be able to watch the seeds grow before your eyes over the course of 5-8 days. If the nylon or cheesecloth smells funky, swap it out and wash in the washing machine. When the sprouts have filled the jar in volume and/or the sprouts look like something you want to eat in color and size, pull them out. I let my sprouts sit in a colander for a few minutes to get any remaining water out of them and store in the refrigerator in a covered container.

How to Grow Sprouts in a Jar

You’ll need a packet (or 2 or 10- might as well stock up because you’ll be making this weekly probably) of seeds

A wide mouth quart jar

A 6 inch square of nylon – as in, from a pair you used to wear but got a run in. My mom always used nylon and it drys faster than cheesecloth (a perfectly acceptable substitute) and drains the jar easily. Drying quickly is desirable because it limits bacteria growth and nylons (or thin tights!) are perfect for that.

Place 1 tablespoon of seeds (about half a packet!) in the bottom of a perfectly clean quart (4 cups) mason jar. I like using the wide mouth jars for when the sprouts are ready to pull out- it’s easier to reach in to remove them than in a regular mouth jar. Place the nylon or double layer of cheesecloth over the top of the jar and screw on the ring. Fill with water, swish, and drain.

How to Grow Sprouts in a Jar Growing microgreen sprouts in a mason jar is easy and inexpensive - even for someone with no green thumb! This tutorial has a few pro tips to ensure you grow tasty, nutritious sprouts in a simple canning jar. When I was growing up in my very rural community, fresh greens out of season were hardly available, and if they were, my frugal mama wasn’t about to purchase them. Mom grew sprouts in a jar often and they were an incredibly cheap way to add crisp flavor and texture to salads, sandwiches, and more. I’ll admit right here that despite being a canning blogger, I’m no gardener. I have a hard time keeping anything alive but I can grow these little babies easily. Growing sprouts in a jar is easy with the tips that follow! My mom used to get her seeds from the little local grocery or feed store, and you could as well, but the sprouts I used and am so happy with are from Sustainable Sprout. I LOVE their range of options- you could choose a mild mix (if you are living the picky child life like me) a spicy mix for more flavor, radish or broccoli (I did broccoli for my first batch and my kids even liked it...but I did NOT reveal that it was broccoli. They are just sprouts, ‘k?) How to Grow Sprouts in a Jar You’ll need a packet (or 2 or 10- might as well stock up because you’ll be making this weekly probably) of seeds A jar A 6 inch square of nylon - as in, from a pair you used to wear but got a run in. My mom always used nylon and it drys faster than cheesecloth (a perfectly acceptable substitute) and drains the jar easily. Drying quickly is desirable because it limits bacteria growth and nylons (or thin tights!) are perfect for that. Place 1 tablespoon of seeds (half a packet!) in the bottom of a perfectly clean quart (4 cup) mason jar. I like using the wide mouth jars for when the sprouts are ready to pull out- it’s easier to reach in to remove them than in a regular mouth jar. Place the nylon or double layer of cheesecloth over the top of the jar and screw on the ring. Fill with water, swish, and drain. Pro Tip: If at all possible, prop the jar in a small casserole dish, or in a saucer with the back end of the jar on a spare canning jar ring so that the bit of water that remains after the twice daily rinsing drains properly. Having this little saucer set up on the counter will save you time and prevent your seeds from having too much water. After you’ve rinsed your seeds the first time, let them rest inverted in the above described set up until evening. Rinse again before bed/after you wash evening dishes/some time at the end of the day. Rinse seeds (which is essentially watering them) twice daily. They should be left to rest in a warm spot if possible- 70 degrees is ideal. I’ve made these once in the winter and I think they didn’t sprout because the spot I had them sitting was too dark and cold. Remember: seeds sprout in the springtime, so you are recreating that in your jar, to some extent. Warm, sunny, and twice daily rinsing will yield germinated (aka sprouted) seeds in a few days, and you’ll be able to watch the seeds grow before your eyes over the course of 5-8 days. If the nylon or cheesecloth smells funky, swap it out and wash in the washing machine. When the sprouts have filled the jar in volume and/or the sprouts look like something you want to eat in color and size, pull them out. I let my sprouts sit in a colander for a few minutes to get any remaining water out of them and store in the refrigerator in a covered container.

Pro Tip: If at all possible, prop the jar in a small casserole dish, or in a saucer with the back end of the jar on a spare canning jar ring so that the bit of water that remains after the twice-daily rinsing drains properly. Having this little saucer set up on the counter will save you time and prevent your seeds from having too much water.

After you’ve rinsed your seeds the first time, let them rest inverted in the above-described set-up until evening. Rinse again before bed/after you wash evening dishes/some time at the end of the day.

Rinse seeds (which is essentially watering them) twice daily. They should be left to rest in a warm spot if possible- 70 degrees is ideal. I’ve made these once in the winter and I think they didn’t sprout because the spot I had them sitting was too dark and cold. Remember: seeds sprout in the springtime, so you are recreating that in your jar, to some extent. Warm, sunny, and twice daily rinsing will yield germinated (aka sprouted) seeds in a few days, and you’ll be able to watch the seeds grow before your eyes over the course of 5-8 days. If the nylon or cheesecloth smells funky, swap it out and wash in hot water in the washing machine. When the sprouts have filled the jar in volume and/or the sprouts look like something you want to eat in color and size, pull them out.

How to Grow Sprouts in a Jar Growing microgreen sprouts in a mason jar is easy and inexpensive - even for someone with no green thumb! This tutorial has a few pro tips to ensure you grow tasty, nutritious sprouts in a simple canning jar. When I was growing up in my very rural community, fresh greens out of season were hardly available, and if they were, my frugal mama wasn’t about to purchase them. Mom grew sprouts in a jar often and they were an incredibly cheap way to add crisp flavor and texture to salads, sandwiches, and more. I’ll admit right here that despite being a canning blogger, I’m no gardener. I have a hard time keeping anything alive but I can grow these little babies easily. Growing sprouts in a jar is easy with the tips that follow! My mom used to get her seeds from the little local grocery or feed store, and you could as well, but the sprouts I used and am so happy with are from Sustainable Sprout. I LOVE their range of options- you could choose a mild mix (if you are living the picky child life like me) a spicy mix for more flavor, radish or broccoli (I did broccoli for my first batch and my kids even liked it...but I did NOT reveal that it was broccoli. They are just sprouts, ‘k?) How to Grow Sprouts in a Jar You’ll need a packet (or 2 or 10- might as well stock up because you’ll be making this weekly probably) of seeds A jar A 6 inch square of nylon - as in, from a pair you used to wear but got a run in. My mom always used nylon and it drys faster than cheesecloth (a perfectly acceptable substitute) and drains the jar easily. Drying quickly is desirable because it limits bacteria growth and nylons (or thin tights!) are perfect for that. Place 1 tablespoon of seeds (half a packet!) in the bottom of a perfectly clean quart (4 cup) mason jar. I like using the wide mouth jars for when the sprouts are ready to pull out- it’s easier to reach in to remove them than in a regular mouth jar. Place the nylon or double layer of cheesecloth over the top of the jar and screw on the ring. Fill with water, swish, and drain. Pro Tip: If at all possible, prop the jar in a small casserole dish, or in a saucer with the back end of the jar on a spare canning jar ring so that the bit of water that remains after the twice daily rinsing drains properly. Having this little saucer set up on the counter will save you time and prevent your seeds from having too much water. After you’ve rinsed your seeds the first time, let them rest inverted in the above described set up until evening. Rinse again before bed/after you wash evening dishes/some time at the end of the day. Rinse seeds (which is essentially watering them) twice daily. They should be left to rest in a warm spot if possible- 70 degrees is ideal. I’ve made these once in the winter and I think they didn’t sprout because the spot I had them sitting was too dark and cold. Remember: seeds sprout in the springtime, so you are recreating that in your jar, to some extent. Warm, sunny, and twice daily rinsing will yield germinated (aka sprouted) seeds in a few days, and you’ll be able to watch the seeds grow before your eyes over the course of 5-8 days. If the nylon or cheesecloth smells funky, swap it out and wash in the washing machine. When the sprouts have filled the jar in volume and/or the sprouts look like something you want to eat in color and size, pull them out. I let my sprouts sit in a colander for a few minutes to get any remaining water out of them and store in the refrigerator in a covered container.

I let my sprouts sit in a colander for a few minutes to get any remaining water out of them and store in the refrigerator in a covered container.

I added mine to a chicken salad and they are amazing on a BLT…hold the L 😉

How to Grow Sprouts in a Jar Growing microgreen sprouts in a mason jar is easy and inexpensive - even for someone with no green thumb! This tutorial has a few pro tips to ensure you grow tasty, nutritious sprouts in a simple canning jar. When I was growing up in my very rural community, fresh greens out of season were hardly available, and if they were, my frugal mama wasn’t about to purchase them. Mom grew sprouts in a jar often and they were an incredibly cheap way to add crisp flavor and texture to salads, sandwiches, and more. I’ll admit right here that despite being a canning blogger, I’m no gardener. I have a hard time keeping anything alive but I can grow these little babies easily. Growing sprouts in a jar is easy with the tips that follow! My mom used to get her seeds from the little local grocery or feed store, and you could as well, but the sprouts I used and am so happy with are from Sustainable Sprout. I LOVE their range of options- you could choose a mild mix (if you are living the picky child life like me) a spicy mix for more flavor, radish or broccoli (I did broccoli for my first batch and my kids even liked it...but I did NOT reveal that it was broccoli. They are just sprouts, ‘k?) How to Grow Sprouts in a Jar You’ll need a packet (or 2 or 10- might as well stock up because you’ll be making this weekly probably) of seeds A jar A 6 inch square of nylon - as in, from a pair you used to wear but got a run in. My mom always used nylon and it drys faster than cheesecloth (a perfectly acceptable substitute) and drains the jar easily. Drying quickly is desirable because it limits bacteria growth and nylons (or thin tights!) are perfect for that. Place 1 tablespoon of seeds (half a packet!) in the bottom of a perfectly clean quart (4 cup) mason jar. I like using the wide mouth jars for when the sprouts are ready to pull out- it’s easier to reach in to remove them than in a regular mouth jar. Place the nylon or double layer of cheesecloth over the top of the jar and screw on the ring. Fill with water, swish, and drain. Pro Tip: If at all possible, prop the jar in a small casserole dish, or in a saucer with the back end of the jar on a spare canning jar ring so that the bit of water that remains after the twice daily rinsing drains properly. Having this little saucer set up on the counter will save you time and prevent your seeds from having too much water. After you’ve rinsed your seeds the first time, let them rest inverted in the above described set up until evening. Rinse again before bed/after you wash evening dishes/some time at the end of the day. Rinse seeds (which is essentially watering them) twice daily. They should be left to rest in a warm spot if possible- 70 degrees is ideal. I’ve made these once in the winter and I think they didn’t sprout because the spot I had them sitting was too dark and cold. Remember: seeds sprout in the springtime, so you are recreating that in your jar, to some extent. Warm, sunny, and twice daily rinsing will yield germinated (aka sprouted) seeds in a few days, and you’ll be able to watch the seeds grow before your eyes over the course of 5-8 days. If the nylon or cheesecloth smells funky, swap it out and wash in the washing machine. When the sprouts have filled the jar in volume and/or the sprouts look like something you want to eat in color and size, pull them out. I let my sprouts sit in a colander for a few minutes to get any remaining water out of them and store in the refrigerator in a covered container.

Have you made sprouts like this? Let me know in the comments, Wildflowers! If you’re looking for more fresh recipes, check out my NO-COOK Strawberry Pineapple Shrub!

Filed Under: Cook

How to Adjust for Altitude When Canning

June 11, 2018 by Jenny Gomes Leave a Comment

Adjusting the processing time of your canning recipe based on your elevation or altitude sounds scary and is enough to make a beginning canner back up her canning jars and stick to freezer jam. Adjusting for altitude is actually very simple, and this post will explain exactly how to make the time adjustments so you know you are canning safely!

How to Adjust for Altitude When Canning This post explains how to adjust your processing times clearly, and there's a great visual guide in the post as well!

Adjusting for altitude when canning:

This is not as scary as it sounds. For every 1000 feet that you live (and thus are canning) above sea level, add 5 minutes to the processing time (the time the jars filled with food are in the boiling water bath or on the steam canner). We add additional time, as per official recommendations, to ensure that the food inside the jar is at the proper temperature for the correct length of time to kill spoilers. For example, those canning at 3000 feet elevation will add 15 minutes (5 minutes per each 1000 feet increment!) of processing time to all their canning recipes- go ahead and pencil in the additional time on all the recipes in your favorite cookbooks, Dear Reader! That way you won’t ever forget.


Why we have to adjust for altitude when canning:

It takes longer for water to boil the farther up in elevation you are, and the same is true for the contents of your canning jar. The inside of your canning jar takes longer (5 minutes longer per every 1000 feet!) to come to a boil and thus kill spoilers and force the oxygen OUT of the jar and create that nice seal we love to hear “ping!”


Which recipes need to be adjusted for altitude:

All canning recipes need to be adjusted. All of them 🙂 You’ll notice that on your box of muffin mix, there’s additional cooking time for higher elevations…everything takes a bit longer in the mountains!


How to adjust for altitude:

Add 5 minutes of processing time (once the hot jars full of hot food is submerged in the boiling water bath) to the time in the recipe. For example, if the recipe for jam says to process for 10 minutes, and you live at 2000 feet elevation, then you’ll be processing for a total of 20 minutes. 10 minutes is the base time, PLUS 5 minutes for each 1000 feet.


I made this beautiful, FREE, PDF printable for you to download so you can have a handy visual guide for adjusting for altitude. This would be especially helpful if you can in different locations (your summer vacation place versus your home, your hometown versus current home, etc.) Download it HERE and never wonder how to adjust for altitude again!

How to Adjust for Altitude When Canning This post explains how to adjust your processing times clearly, and there's a great visual guide in the post as well!

Want to learn more about the basics of canning? I have a FREE Canning Basics Course that I want to invite you to join. I’ll pop in your inbox with high value lessons to get you started canning the easy way! Sign up here!

Looking for more beginner-friendly canning posts?

How to Prepare for Canning Season

The Canning Essentials Workbook

Carrot Pickles

Do You Need to Use Pickling Salt?

Fast Raspberry Jam Recipe

How to Adjust for Altitude When Canning This post explains how to adjust your processing times clearly, and there's a great visual guide in the post as well!


SaveSave

Filed Under: Can

  • « Go to Previous Page
  • Page 1
  • Interim pages omitted …
  • Page 26
  • Page 27
  • Page 28
  • Page 29
  • Page 30
  • Interim pages omitted …
  • Page 66
  • Go to Next Page »

Primary Sidebar

Categories

Follow me here, there, & everywhere!

  • Email
  • Facebook
  • Instagram
  • Pinterest
  • RSS
  • Twitter
  • YouTube

Search

Get The Pressure Canning Cookbook

Get 10 Free Recipes Now!

Best Chicken Coop

Footer

Get Started Pressure Canning

Shrubology Ebook

Shrubology: Refreshing Homemade Fruit and Vinegar Syrups for Cocktails
Make easy, no-cook fruit & vinegar syrups for cocktails & mocktails! This ebook shares crowd pleasing recipes and simple to understand ratios so you can make a shrub on your countertop any time- without a recipe. Dive into these Prohibition Era drinks today!

Copyright

Copyright 2019
The Domestic Wildflower
www.thedomesticwildflower.com.
All content created by Jennifer Gomes unless otherwise noted.

Copyright © 2025 · Lifestyle Pro on Genesis Framework · WordPress · Log in