• Skip to secondary menu
  • Skip to main content
  • Skip to primary sidebar
  • Skip to footer
  • The Pressure Canning Cookbook
  • Blog
    • Subscribe
    • Welcome!
  • Perfectly Preserved Podcast
  • About
    • ADW Manifesto
    • Work With Me
      • Read
  • Shop
    • My Account
    • Cart
    • Checkout

The Domestic Wildflower

Handmade Food & Craft Tutorials for Beginners

  • Courses
    • Free Canning Basics
    • Everything Canning Course
    • Steam Canning Workshop
    • Free Homemade Cocktail Mixers
    • Wildflower Mixology
    • Crochet Basket Workshop
  • Can & Preserve
    • Never Canned?
    • Steam Canner Equipment Bundle
    • Shrubs Course
  • Sew
  • Cook
  • Craft
    • Crochet Step-by-Step Guides
      • Crochet Basket
      • Giant Yarn Throw
      • Thick & Thin Throw
  • Living
    • Creativity Challenge
    • Clean
    • Kids
  • Rentals

Cook

1 Hour Homemade Coffee Liqueur

October 21, 2018 by Jenny Gomes 10 Comments

 This 1-hour homemade coffee liqueur recipe can be prepared and dispensed into bottles for gifting or enjoying yourself in an hour. It is a simple recipe that my mother has used for years and this coffee liqueur is delicious both hot or cold in a variety of mixed drinks. It also is easily doubled and is best made with friends. Read on for a delicious homemade coffee liqueur recipe that won’t have you tied up in the kitchen all afternoon!
 
1 Hour Coffee Liqueur | This recipe and video tutorial makes a copycat Kahlua that is to die for- so good! And it is perfect for gifting and the best part is that it is done in an hour!

This post may contain affiliate links. All opinions remain my own.

This recipe really is SO EASY. I hope you are ready to share this video to show how simple it is!

https://thedomesticwildflower.com/wp-content/uploads/2018/10/1-Hour-Homemade-Coffee-Liqueur-Get-the-Recipe.mp4

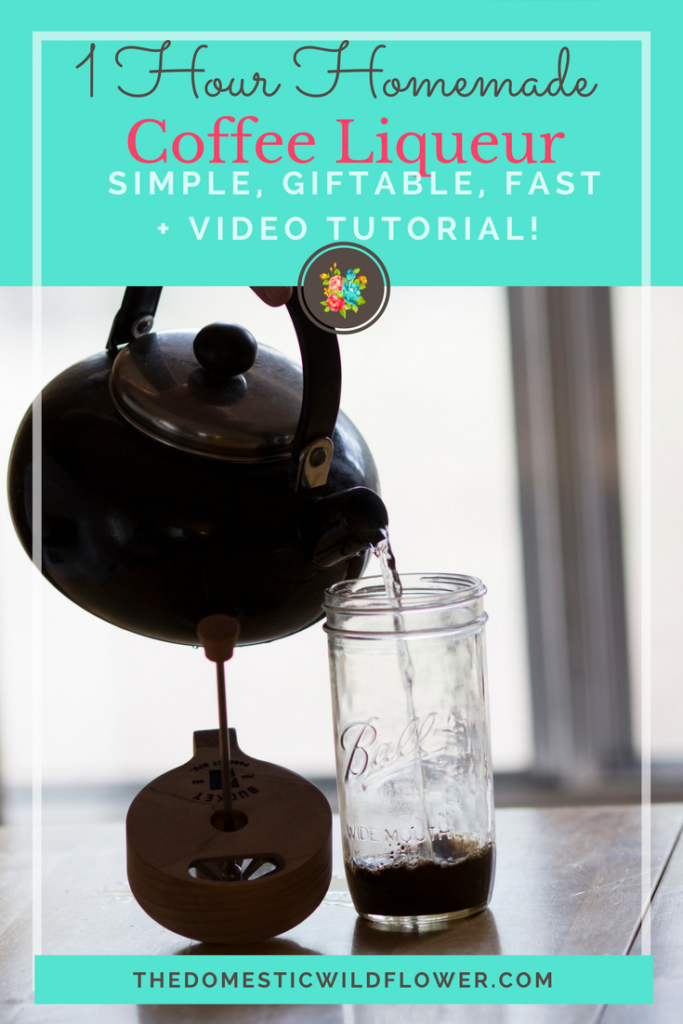
My mom made this 1-hour homemade coffee liqueur recipe every fall I was growing up, set the bottles on the shelf, and then had a bottle to take as a hostess gift to every holiday party, every progressive dinner, or to add to a gift basket.

In addition to the following ingredients, you will need jars for storing or gifting. You can pour some of the coffee liqueur back into the fifth bottle, use canning jars, or any variety of the Grolsch brand (or similar) bottle. I scored a dozen bottles at a homebrew shop while in college and they were inexpensive and well made. I love the rubber flange which ensures a great seal and mine have lasted 10 years without needing replacement. If I had to buy more bottles, I might get the clear glass as it is fun to see the color of the concoction you are serving. You’ll want to get these jars for sure!

Let’s get cooking! Watch this video to see the 1-hour homemade coffee liqueur making process!

Love this recipe? Become the hostess with the most-ess in my Wildflower Mixology video course!

Enroll Now!

How to Make 1-Hour Homemade Coffee Liqueur

Combine in a large saucepan:

3 cups white sugar (I have used turbinado sugar and it was delicious also and contributed to the maple-y flavor to good effect)
12 tablespoons instant coffee
4 cups of water

[Read more…] about 1 Hour Homemade Coffee Liqueur

Filed Under: Cocktails, Cook

20 Back to School Recipes

August 20, 2018 by Jenny Gomes Leave a Comment

Back to school time means packing lunches, after school lunches, eating on the go, and getting back into the routine. This collection of recipes is perfect for back to school!

This post contains affiliate links.

20 Back to School Recipes

At the end of the post check out my recommendation for the BEST lunchbox! 

Applesauce Muffins Recipe

This recipe for applesauce muffins is is a great way to use a healthy ½ cup of your homemade applesauce (or store-bought if you haven’t learned how to make it from me yet!) into a portable snack.

20 Back to School Recipes

Applesauce Canning Recipe

Homemade applesauce is something that is easy to make, fast (only 10 minutes in the canning process and there’s an easy trick to skipping peeling and coring I’ll explain in a moment) and you can skip the sugar entirely especially if you have sweet apples on hand.

20 Back to School Recipes

Strawberry Jam 

Strawberry Jam is THE preserve to try if you’ve never canned because strawberries are so high in acid that the worst thing that could happen is that you’ll have thin jam, which is essentially strawberry syrup. It’s also a great gift jam, holding it’s color nicely in jars. Hello, peanut butter and jam sandwiches!

20 Back to School Recipes

Strawberry Champagne Jam Recipe 

Strawberry Champagne Jam is THE jam to make to celebrate, to give as a gift, and to savor the flavor of spring. It is much easier than you think and there are a few simple pro tips for keeping that champagne flavor in the jar! You can head to the blog post, or download the printable PDF right here! I love this jam for MY jam & almond butter sandwiches for when I’m driving kids around; filling AND delicious!

Strawberry Kiwi Lemonade Concentrate

This recipe is for Strawberry Kiwi Lemonade concentrate and that is the best part. You can pour a spoonful or two into a glass and fill it with water (or sparkling water if you want to trick them even further!) and stir it up and it is suddenly a natural soda that you made yourself. If I want to add a shot of grown-up libation to it, I can, and if my youngest wants to have some I can make his weaker still. I can put a little in a cup, add water, and send it to school instead of super sugary, store-bought drink. Winning!

20 Back to School Recipes

If you want to dive into these canning recipes, but need some help, I have an affordable visual guide to SHOW you STEP BY STEP what to do, when! The Canning Jump Start Guide has no-frills equipment checklists for traditional water-bath canning and steam canning, a stovetop guide, an altitude adjustment guide, canning season planner, the pantry checklist, and MORE! Get it here! Buy Now!

Canning Jump Start Guide

Strawberry Syrup

I don’t strain this back to school recipe with cheesecloth because I personally don’t care about things like tiny strawberry seeds and I am not interested in perfectly clear syrup. Feel free to strain of course as you wish. This post will share a recipe that is a very simple recipe for strawberry syrup and I hope to remind you also that syrup is not just for pancakes. I think pancakes are a great way to ring in the weekend, don’t you think?

Best Old-Fashioned Banana Muffin Recipe

This recipe is based on one from the 1942 version of the Good Housekeeping Cook Book. It is originally titled, “Banana Tea Bread” but when I read the recipe, given to me by my Gram, I swapped out a few ingredients and decided muffins would serve my lunchbox-toting kindergartener better than bread that I would have to slice, wrap, etc. in the busy mornings before school. This recipe is easy, and filling! If you like to print recipes, you can download it for free right here:

20 Back to School Recipes

Carrot Pickles

Carrot pickles are one of my favorite pickles because they aren’t cucumbers ? I actually don’t care for cucumbers much, to be honest, which I know is really silly but they just don’t light my fire. Canning this recipe is EASY and they pack so well in a lunch box!

20 Back to School Recipes

Pickled Bread and Butter Jalapeños

This recipe is a great way to take a veggie that is in season around back to school time and preserve it in an easy, sandwich-friendly ingredient or bento-box-style lunch component. Be sure to read to the bottom for my lunch box suggestion!

20 Back to School Recipes

Raspberry Jam Recipe 

Raspberry jam is a delight to give as gifts, raspberries are easy to pick at U-pick farms, and deliciously gift-able preserved in these tiny mason jars. I also love this jam stirred into a container of plain yogurt or on top of oatmeal in the morning.

20 Back to School Recipes

Tomato Jam Recipe 

This recipe calls for Roma tomatoes, which are typically denser and thus cook into a thicker sauce a bit faster. You can use whatever tomato you have on hand, however, and this is a great recipe to use a variety if that is what you have. There’s a free download of the jam recipe in the post too! This recipe is great for kids and teens with a slightly more sophisticated palate, or just for parents eating on the go. Try it on an everything bagel with cream cheese and you won’t share with the kids at all.

Cranberry Lemon Jam 

This cranberry lemon jam is super smooth, perfect for Thanksgiving, even better on a sandwich the day after Thanksgiving with turkey slices, great on bagels with cream cheese, and the lemon makes it seem bright and summery too. It’s a perfect jam. You definitely can make this cranberry lemon jam and preserve it in a water bath process- you do not have to use a steam canner. Or you can make it and eat it fresh. Store it in the refrigerator if you do. Can this jam this fall, and when the lunch box fillings are getting tired and boring around February, open this jam to revive everyone’s senses.

20 Back to School Recipes

Smooth Blackberry Jam 

Blackberries are a funny thing. They are probably my favorite berry, definitely, if we are talking about eating out of hand, and of course, they have the worst thorns. I suppose we can complain that a blackberry bush has thorns, or rejoice that a thorn bush has blackberries. Because they are so, so good, I’ll go with the later. School is a lot like that, isn’t it? We can be happy that there’s activities, friends, learning, and new experiences, or we can focus on the early wake-up, the homework, the forgotten forms, and the like. Focus on the fun, and the berries, and enjoy this on some toast on the way out the door in the morning, Wildflowers!

20 Back to School Recipes

Best Berry Jam 

I recently shared a post about why you should head to a U-Pick berry patch this summer after I spent a lovely morning picking a mix of mostly marionberries (similar to blackberries), strawberries, and a handful of raspberries. With this mix, I adapted a recipe from the well worn Farm Journal Freezing & Canning Cookbook written in 1962. I checked my adaptation against other trusted recipes published in my lifetime and it is safe to say that it is a homerun berry jam recipe.

20 Back to School Recipes

Roasted Plum Jam 

Plum Jam is an easy recipe that is elevated in a wonderful way by roasting the plums. Beginners can easily succeed with this canning recipe and the roasting plums make your home smell heavenly. Lining your shelves with these jams will make for easy mornings and lunch-prep all school year long!

Canning Concord Grape Jam 

Canning grape jam is a fairly simple task because the recipe is straightforward and brief, grapes are not difficult to collect (no thorns like blackberries) and are sweet enough that they don’t require a lot of extra sugar. While we most often see the clear jelly in stores, grape jam is delicious and seems to be a bit more virtuous in my mind because more of the actual grape remains in the pot.

Canning Tomato Sauce

Canning tomato sauce is one of the most satisfying tasks a home canner could ask for because of the versatility of tomato sauce. When people start preserving, they often make jam because it is fairly simple and of course delicious but I find the savory preserves, like this tomato sauce, are the most useful. Open a jar of this after a busy school day and have instant pasta sauce, stromboli filling, the base for stew, blank – slate enchilada sauce, and so much more. If I had to can ONE recipe for the rest of my life, it would be this recipe because we eat so much wholesome, no sugar tomato sauce.

Chocolate Cranberry Mole

Chocolate Cranberry Mole: A Fermented Paste from The Fermentista’s Kitchen is a fermented food that you definitely have to try if you are fermenting-curious. I have a real sweet tooth and this sounded weird and delicious and because it pairs with ice cream I had to try it. Here is her recipe and I will note where I changed a few things; namely I used frozen cranberries instead of fresh. Fermented foods are a wise addition to the diet in terms of gut health and they are EASY.

Mailanderli: Swiss Shortbread Cookie

This classic Swiss cookie recipe is a rich shortbread type of cookie that is easy to prepare and my favorite with hot coffee or cocoa. Mailanderli has a variety of spellings on the internet and on recipe cards, you might come across but they all refer to the Swiss version of the sugar cookie. Try this simple recipe that belonged to my Great Grandma Frieda. It is best made with real butter, and extra good if made in the company of loved ones. This is a great lunch box cookie. My daughter always has a raised eyebrow at the end of the day if there was nothing “sweet” in her lunch box (no fruit or treat for her- she hates it if there are only carrot sticks and celery to conclude her meal!) and this is a great recipe for an easy treat.

Swiss Muesli

Muesli is a widely used descriptor referring to breakfasts made with grains, dairy, and fresh fruit. The recipe that follows in this post is adapted from the excellent “The Swiss Cookbook” by Betty Bossi gifted to me by my kind Swiss cousins. If you are hungry for a wholesome breakfast that is fast and delicious, read on. Top with any of the jams listed above!

Back to School Recommendation: My Favorite Lunchbox

I got this lunchbox for my daughter last year. I should back up a bit and tell you all I taught junior high and high school English for 9 years. I’ve seen a lot of lunch boxes. I have seen most of them end up in the garbage (ahem, landfill) before Christmas break, and I really didn’t want to have the hassle of finding a suitable lunchbox again, plus having to figure out if it was recyclable (likely not), plus having to pay for a second (and third, and fourth) lunchbox. I did a ton of research and chose the Planetbox lunch boxes. We used it, the accompanying bag, ice pack, silo and cups for a year and it looks almost brand-new. I justified the cost (it’s more than a crappy plastic lunchbox) thinking that if my daughter hated it, then I would carry it to college where I teach till I die. Well, no such luck because my daughter loves it.

They are super well made lightweight but not flimsy stainless steel lunch boxes. The genius part is you can choose from a really wide selection of magnets to stick on the front (above is the “Animal” option my son chose for this year!) that slide off when you want to put the whole lunch box in the dishwasher or submerge in the sink, which isn’t necessary all the time, but just when you want to. The hinge wasn’t too difficult for my 5-year-old to manage and it was easy to slide it in and out of the insulated bag.

Because it was stainless, I didn’t wrap up her sandwiches or snacks nowhere nearly as often as I would have if it were a more traditionally sized and shaped plastic lunchbox because you can nestle the food neatly into the cubbies and there’s no worry about the food staining – it’s stainless 😉 – and the lid fits perfectly down on the bottom.

This isn’t a sponsored post, and I didn’t get them for free- I just love them and I think you would too!

Happy Back to School, Wildflowers!

Filed Under: Cook

What Produce is in Season Now?

July 25, 2018 by Jenny Gomes Leave a Comment

What produce is in season now? This post will explain what produce is in season now so you never throw wasted produce out again. Read on to find out which produce is ripe, ready, and in season!

What Produce is in Season Now? This post will tell you so you never have to throw wasted produce out again!


We’ve all done it: We’ve opened the fruits and vegetables drawer in our fridge only to find out that something has gone rotten, and far sooner than we expected it to. It’s disappointing, and it’s a hard pinch on our wallets, too. No one wants to throw those strawberries that cost a pretty penny—you want to eat them.

There might be a reason for that waste that you haven’t considered, and a way to save yourself the agony of throwing things away (and save some cash, too): think about produce seasonally.

Most people don’t do this. Within reason, they buy what they want to buy at the grocery store, and then they take it home. But a lot of that produce had to trek hundreds, if not thousands, of miles to get to you, meaning it has a greater risk of spoiling when you get it home. So how do you look at things more seasonally? This graphic explains it.

What Produce is in Season Now?

Thanks to to https://zerocater.com for this graphic!

Seasonal Eats: Which Produce Is in Season When

What to do with your seasonal produce:

So, what do you do with this information? Well, I think the advantage of buying produce when it is in season most immediately is that it is less expensive. Cheap produce is often the most plentiful, but buying pound after pound of produce can be overwhelming. Canning your produce when it is ripe and inexpensive is the best option for enjoying produce picked at it’s peak all year round and I have a completely free Canning Basics Course you can sign up for to learn how to preserve food in glass jars!

Sign up now!

What’s your favorite seasonal fruit or veggie, Wildflowers? Let me know in the comments!

Filed Under: Cook

How to Grow Sprouts in a Jar

July 16, 2018 by Jenny Gomes Leave a Comment

Growing microgreen sprouts in a mason jar is easy and inexpensive – even for someone with no green thumb! This tutorial has a few pro tips to ensure you grow tasty, nutritious sprouts in a simple canning jar. Read on to learn how to grow sprouts in a jar! 

How to Grow Sprouts in a Jar | Super simple tutorial with a few pro tips for making this inexpensive, nutritious microgreen in a regular mason jar!

This post contains affiliate links.

When I was growing up in my very rural community, fresh greens out of season were hardly available, and if they were, my frugal mama wasn’t about to purchase them. Mom grew sprouts in a jar often and they were an incredibly cheap way to add crisp flavor and texture to salads, sandwiches, and more.

I’ll admit right here that despite being a canning blogger, I’m no gardener. I have a hard time keeping any plant alive but I can grow these little babies easily. Growing sprouts in a jar are easy with the tips that follow below!

My mom used to get her seeds from the little local grocery or feed store, and you could as well, but the sprouts I used and am so happy with are from Sustainable Sprout. I LOVE their range of options- you could choose a mild mix (if you are living the picky child life like me) a spicy mix for more flavor, radish or broccoli (I did broccoli for my first batch and my kids even liked it…but I did NOT reveal that it was broccoli. They are just sprouts, ‘k?)

How to Grow Sprouts in a Jar Growing microgreen sprouts in a mason jar is easy and inexpensive - even for someone with no green thumb! This tutorial has a few pro tips to ensure you grow tasty, nutritious sprouts in a simple canning jar. When I was growing up in my very rural community, fresh greens out of season were hardly available, and if they were, my frugal mama wasn’t about to purchase them. Mom grew sprouts in a jar often and they were an incredibly cheap way to add crisp flavor and texture to salads, sandwiches, and more. I’ll admit right here that despite being a canning blogger, I’m no gardener. I have a hard time keeping anything alive but I can grow these little babies easily. Growing sprouts in a jar is easy with the tips that follow! My mom used to get her seeds from the little local grocery or feed store, and you could as well, but the sprouts I used and am so happy with are from Sustainable Sprout. I LOVE their range of options- you could choose a mild mix (if you are living the picky child life like me) a spicy mix for more flavor, radish or broccoli (I did broccoli for my first batch and my kids even liked it...but I did NOT reveal that it was broccoli. They are just sprouts, ‘k?) How to Grow Sprouts in a Jar You’ll need a packet (or 2 or 10- might as well stock up because you’ll be making this weekly probably) of seeds A jar A 6 inch square of nylon - as in, from a pair you used to wear but got a run in. My mom always used nylon and it drys faster than cheesecloth (a perfectly acceptable substitute) and drains the jar easily. Drying quickly is desirable because it limits bacteria growth and nylons (or thin tights!) are perfect for that. Place 1 tablespoon of seeds (half a packet!) in the bottom of a perfectly clean quart (4 cup) mason jar. I like using the wide mouth jars for when the sprouts are ready to pull out- it’s easier to reach in to remove them than in a regular mouth jar. Place the nylon or double layer of cheesecloth over the top of the jar and screw on the ring. Fill with water, swish, and drain. Pro Tip: If at all possible, prop the jar in a small casserole dish, or in a saucer with the back end of the jar on a spare canning jar ring so that the bit of water that remains after the twice daily rinsing drains properly. Having this little saucer set up on the counter will save you time and prevent your seeds from having too much water. After you’ve rinsed your seeds the first time, let them rest inverted in the above described set up until evening. Rinse again before bed/after you wash evening dishes/some time at the end of the day. Rinse seeds (which is essentially watering them) twice daily. They should be left to rest in a warm spot if possible- 70 degrees is ideal. I’ve made these once in the winter and I think they didn’t sprout because the spot I had them sitting was too dark and cold. Remember: seeds sprout in the springtime, so you are recreating that in your jar, to some extent. Warm, sunny, and twice daily rinsing will yield germinated (aka sprouted) seeds in a few days, and you’ll be able to watch the seeds grow before your eyes over the course of 5-8 days. If the nylon or cheesecloth smells funky, swap it out and wash in the washing machine. When the sprouts have filled the jar in volume and/or the sprouts look like something you want to eat in color and size, pull them out. I let my sprouts sit in a colander for a few minutes to get any remaining water out of them and store in the refrigerator in a covered container.

How to Grow Sprouts in a Jar

You’ll need a packet (or 2 or 10- might as well stock up because you’ll be making this weekly probably) of seeds

A wide mouth quart jar

A 6 inch square of nylon – as in, from a pair you used to wear but got a run in. My mom always used nylon and it drys faster than cheesecloth (a perfectly acceptable substitute) and drains the jar easily. Drying quickly is desirable because it limits bacteria growth and nylons (or thin tights!) are perfect for that.

Place 1 tablespoon of seeds (about half a packet!) in the bottom of a perfectly clean quart (4 cups) mason jar. I like using the wide mouth jars for when the sprouts are ready to pull out- it’s easier to reach in to remove them than in a regular mouth jar. Place the nylon or double layer of cheesecloth over the top of the jar and screw on the ring. Fill with water, swish, and drain.

How to Grow Sprouts in a Jar Growing microgreen sprouts in a mason jar is easy and inexpensive - even for someone with no green thumb! This tutorial has a few pro tips to ensure you grow tasty, nutritious sprouts in a simple canning jar. When I was growing up in my very rural community, fresh greens out of season were hardly available, and if they were, my frugal mama wasn’t about to purchase them. Mom grew sprouts in a jar often and they were an incredibly cheap way to add crisp flavor and texture to salads, sandwiches, and more. I’ll admit right here that despite being a canning blogger, I’m no gardener. I have a hard time keeping anything alive but I can grow these little babies easily. Growing sprouts in a jar is easy with the tips that follow! My mom used to get her seeds from the little local grocery or feed store, and you could as well, but the sprouts I used and am so happy with are from Sustainable Sprout. I LOVE their range of options- you could choose a mild mix (if you are living the picky child life like me) a spicy mix for more flavor, radish or broccoli (I did broccoli for my first batch and my kids even liked it...but I did NOT reveal that it was broccoli. They are just sprouts, ‘k?) How to Grow Sprouts in a Jar You’ll need a packet (or 2 or 10- might as well stock up because you’ll be making this weekly probably) of seeds A jar A 6 inch square of nylon - as in, from a pair you used to wear but got a run in. My mom always used nylon and it drys faster than cheesecloth (a perfectly acceptable substitute) and drains the jar easily. Drying quickly is desirable because it limits bacteria growth and nylons (or thin tights!) are perfect for that. Place 1 tablespoon of seeds (half a packet!) in the bottom of a perfectly clean quart (4 cup) mason jar. I like using the wide mouth jars for when the sprouts are ready to pull out- it’s easier to reach in to remove them than in a regular mouth jar. Place the nylon or double layer of cheesecloth over the top of the jar and screw on the ring. Fill with water, swish, and drain. Pro Tip: If at all possible, prop the jar in a small casserole dish, or in a saucer with the back end of the jar on a spare canning jar ring so that the bit of water that remains after the twice daily rinsing drains properly. Having this little saucer set up on the counter will save you time and prevent your seeds from having too much water. After you’ve rinsed your seeds the first time, let them rest inverted in the above described set up until evening. Rinse again before bed/after you wash evening dishes/some time at the end of the day. Rinse seeds (which is essentially watering them) twice daily. They should be left to rest in a warm spot if possible- 70 degrees is ideal. I’ve made these once in the winter and I think they didn’t sprout because the spot I had them sitting was too dark and cold. Remember: seeds sprout in the springtime, so you are recreating that in your jar, to some extent. Warm, sunny, and twice daily rinsing will yield germinated (aka sprouted) seeds in a few days, and you’ll be able to watch the seeds grow before your eyes over the course of 5-8 days. If the nylon or cheesecloth smells funky, swap it out and wash in the washing machine. When the sprouts have filled the jar in volume and/or the sprouts look like something you want to eat in color and size, pull them out. I let my sprouts sit in a colander for a few minutes to get any remaining water out of them and store in the refrigerator in a covered container.

Pro Tip: If at all possible, prop the jar in a small casserole dish, or in a saucer with the back end of the jar on a spare canning jar ring so that the bit of water that remains after the twice-daily rinsing drains properly. Having this little saucer set up on the counter will save you time and prevent your seeds from having too much water.

After you’ve rinsed your seeds the first time, let them rest inverted in the above-described set-up until evening. Rinse again before bed/after you wash evening dishes/some time at the end of the day.

Rinse seeds (which is essentially watering them) twice daily. They should be left to rest in a warm spot if possible- 70 degrees is ideal. I’ve made these once in the winter and I think they didn’t sprout because the spot I had them sitting was too dark and cold. Remember: seeds sprout in the springtime, so you are recreating that in your jar, to some extent. Warm, sunny, and twice daily rinsing will yield germinated (aka sprouted) seeds in a few days, and you’ll be able to watch the seeds grow before your eyes over the course of 5-8 days. If the nylon or cheesecloth smells funky, swap it out and wash in hot water in the washing machine. When the sprouts have filled the jar in volume and/or the sprouts look like something you want to eat in color and size, pull them out.

How to Grow Sprouts in a Jar Growing microgreen sprouts in a mason jar is easy and inexpensive - even for someone with no green thumb! This tutorial has a few pro tips to ensure you grow tasty, nutritious sprouts in a simple canning jar. When I was growing up in my very rural community, fresh greens out of season were hardly available, and if they were, my frugal mama wasn’t about to purchase them. Mom grew sprouts in a jar often and they were an incredibly cheap way to add crisp flavor and texture to salads, sandwiches, and more. I’ll admit right here that despite being a canning blogger, I’m no gardener. I have a hard time keeping anything alive but I can grow these little babies easily. Growing sprouts in a jar is easy with the tips that follow! My mom used to get her seeds from the little local grocery or feed store, and you could as well, but the sprouts I used and am so happy with are from Sustainable Sprout. I LOVE their range of options- you could choose a mild mix (if you are living the picky child life like me) a spicy mix for more flavor, radish or broccoli (I did broccoli for my first batch and my kids even liked it...but I did NOT reveal that it was broccoli. They are just sprouts, ‘k?) How to Grow Sprouts in a Jar You’ll need a packet (or 2 or 10- might as well stock up because you’ll be making this weekly probably) of seeds A jar A 6 inch square of nylon - as in, from a pair you used to wear but got a run in. My mom always used nylon and it drys faster than cheesecloth (a perfectly acceptable substitute) and drains the jar easily. Drying quickly is desirable because it limits bacteria growth and nylons (or thin tights!) are perfect for that. Place 1 tablespoon of seeds (half a packet!) in the bottom of a perfectly clean quart (4 cup) mason jar. I like using the wide mouth jars for when the sprouts are ready to pull out- it’s easier to reach in to remove them than in a regular mouth jar. Place the nylon or double layer of cheesecloth over the top of the jar and screw on the ring. Fill with water, swish, and drain. Pro Tip: If at all possible, prop the jar in a small casserole dish, or in a saucer with the back end of the jar on a spare canning jar ring so that the bit of water that remains after the twice daily rinsing drains properly. Having this little saucer set up on the counter will save you time and prevent your seeds from having too much water. After you’ve rinsed your seeds the first time, let them rest inverted in the above described set up until evening. Rinse again before bed/after you wash evening dishes/some time at the end of the day. Rinse seeds (which is essentially watering them) twice daily. They should be left to rest in a warm spot if possible- 70 degrees is ideal. I’ve made these once in the winter and I think they didn’t sprout because the spot I had them sitting was too dark and cold. Remember: seeds sprout in the springtime, so you are recreating that in your jar, to some extent. Warm, sunny, and twice daily rinsing will yield germinated (aka sprouted) seeds in a few days, and you’ll be able to watch the seeds grow before your eyes over the course of 5-8 days. If the nylon or cheesecloth smells funky, swap it out and wash in the washing machine. When the sprouts have filled the jar in volume and/or the sprouts look like something you want to eat in color and size, pull them out. I let my sprouts sit in a colander for a few minutes to get any remaining water out of them and store in the refrigerator in a covered container.

I let my sprouts sit in a colander for a few minutes to get any remaining water out of them and store in the refrigerator in a covered container.

I added mine to a chicken salad and they are amazing on a BLT…hold the L 😉

How to Grow Sprouts in a Jar Growing microgreen sprouts in a mason jar is easy and inexpensive - even for someone with no green thumb! This tutorial has a few pro tips to ensure you grow tasty, nutritious sprouts in a simple canning jar. When I was growing up in my very rural community, fresh greens out of season were hardly available, and if they were, my frugal mama wasn’t about to purchase them. Mom grew sprouts in a jar often and they were an incredibly cheap way to add crisp flavor and texture to salads, sandwiches, and more. I’ll admit right here that despite being a canning blogger, I’m no gardener. I have a hard time keeping anything alive but I can grow these little babies easily. Growing sprouts in a jar is easy with the tips that follow! My mom used to get her seeds from the little local grocery or feed store, and you could as well, but the sprouts I used and am so happy with are from Sustainable Sprout. I LOVE their range of options- you could choose a mild mix (if you are living the picky child life like me) a spicy mix for more flavor, radish or broccoli (I did broccoli for my first batch and my kids even liked it...but I did NOT reveal that it was broccoli. They are just sprouts, ‘k?) How to Grow Sprouts in a Jar You’ll need a packet (or 2 or 10- might as well stock up because you’ll be making this weekly probably) of seeds A jar A 6 inch square of nylon - as in, from a pair you used to wear but got a run in. My mom always used nylon and it drys faster than cheesecloth (a perfectly acceptable substitute) and drains the jar easily. Drying quickly is desirable because it limits bacteria growth and nylons (or thin tights!) are perfect for that. Place 1 tablespoon of seeds (half a packet!) in the bottom of a perfectly clean quart (4 cup) mason jar. I like using the wide mouth jars for when the sprouts are ready to pull out- it’s easier to reach in to remove them than in a regular mouth jar. Place the nylon or double layer of cheesecloth over the top of the jar and screw on the ring. Fill with water, swish, and drain. Pro Tip: If at all possible, prop the jar in a small casserole dish, or in a saucer with the back end of the jar on a spare canning jar ring so that the bit of water that remains after the twice daily rinsing drains properly. Having this little saucer set up on the counter will save you time and prevent your seeds from having too much water. After you’ve rinsed your seeds the first time, let them rest inverted in the above described set up until evening. Rinse again before bed/after you wash evening dishes/some time at the end of the day. Rinse seeds (which is essentially watering them) twice daily. They should be left to rest in a warm spot if possible- 70 degrees is ideal. I’ve made these once in the winter and I think they didn’t sprout because the spot I had them sitting was too dark and cold. Remember: seeds sprout in the springtime, so you are recreating that in your jar, to some extent. Warm, sunny, and twice daily rinsing will yield germinated (aka sprouted) seeds in a few days, and you’ll be able to watch the seeds grow before your eyes over the course of 5-8 days. If the nylon or cheesecloth smells funky, swap it out and wash in the washing machine. When the sprouts have filled the jar in volume and/or the sprouts look like something you want to eat in color and size, pull them out. I let my sprouts sit in a colander for a few minutes to get any remaining water out of them and store in the refrigerator in a covered container.

Have you made sprouts like this? Let me know in the comments, Wildflowers! If you’re looking for more fresh recipes, check out my NO-COOK Strawberry Pineapple Shrub!

Filed Under: Cook

How To Create a Minimalist Pantry

January 26, 2018 by Jenny Gomes 2 Comments

I want to share with you one way we can minimize stress in our kitchens, how to create a minimalist pantry, and that is in minimalism through canning. This post will help you create a minimalist pantry plus there’s a bonus, super versatile tomato sauce recipe included. Read on for the full post! 

How to Create a Minimalist Pantry

This post may contain affiliate links.

Hear me out: I know you probably are remembering canning from when you were a kid, and are thinking that canning took a ton of stuff. I’ve minimized the canning equipment list to reduce the amount of gear you need so you can use what you already have. My favorite pro tip to share is that you don’t need those huge, black and white pots; you can use a large stock pot (the one you use make stew or soup or boil artichokes) and a silicone trivet. Wide mouth pint jars are my go-to canning jar because they double as inexpensive and classic drinking glasses. Whenever I empty a jar that held jam or applesauce, it is washed and reused as a drinking glass or storage container. Bye bye messy and wasteful plastic containers! 

I am a total canning nerd, and I share beginner tutorials and recipes all season long because I love canning and I think you will too. Before I share with you the “how” I want to give you the “why” behind canning.

I have found, as a working mom of 2, that canning gives you CHOICE. It sounds contrary to what you think you are getting when you grab groceries off the store shelves. You seem to have tons of choices in the market, right? There are so many choices that the kids in the cart can’t decide on what flavor they want, which color box to get, or which processed food you really don’t want to buy them anyway gets brought home. If you are part of a tribe of strong, purpose-driven women, you want to make smarter choices to make your lives easier and better. How we think about cooking can be one way that is contributing to mental clutter that canning can help you cut.

How to Create a Minimalist Pantry

Canning can simplify our pantry shelves: Tomato sauce preserved in jars can be used as spaghetti sauce, spread on stromboli, spiced up and used in enchiladas, pureed with a little cream for tomato soup, thinned out in a Bloody Mary, or added to beef stew. A store-bought can of faux Italian, super-processed, and full of added sugar spaghetti sauce is probably destined to only be spaghetti sauce. That doesn’t help when your littles are asking for enchiladas, right? Canning gives you choice.

In addition to adding great flexibility to your pantry, canning gives you control in a very real way. As moms, we cannot control everything in our children’s lives, nor should we. Yet, controlling what they eat to a certain extent is an important job from day one, to the “don’t eat the dog food!” stage, through the “don’t eat your cookies on the bus to school!” and beyond. I’d never tell you to try to manage every bite that passes your baby’s lips but I can tell you that it feels pretty darn good to know that when I open a jar of peaches when my kids are starving that I preserved them myself. I know that I chose each particular peach, washed it, decided which recipe to use based on how much sugar I wanted to include, and I don’t have to worry about what the jar or lid is lined with or if it was clean. That control is a really empowering thing.

I encourage you to try canning as a powerful way of simplifying your pantry and meal preparation. And that versatile tomato sauce recipe I mentioned above? Here it is and don’t worry; I explain in detail exactly what to do. You can totally do this!

Here’s the recipe that I use to work up 12-pound batches of Roma tomatoes, that usually yields 4-5 pints (1 pint =2 measuring cups).

12 pounds peeled tomatoes

1 tablespoon olive oil

12 ounces onion, diced (about 2 small or 1 large)

2 large cloves of garlic

2 teaspoons salt, or to taste

about 2 teaspoons citric acid (a white powder sold in stores, usually near the new canning lids)

Prepare your largest cooking pot with either a metal canning rack or a silicone trivet inside, on the bottom of the pot. Put the canning jars inside (I like largemouth pints for tomato sauce personally), fill the jars with hot water, then the rest of the pot with hot tap water. Bring to a boil.

In a wide preserving pan, heat the oil and saute the onions on medium high for about five minutes. Add the garlic and saute for another five. Combine the peeled tomatoes with the garlic and onions and cook on medium high for about 45 minutes, until the sauce has thickened and darkened in color. Add salt to taste. Stir occasionally and beware of the sauce boiling over the edge or burning on the bottom.

Use a jar lifter (often sold in a kit with a funnel & lid lifter, and readily available at thrift stores and community tool libraries) to remove one canning jar from the boiling water bath at a time. Pour the hot water within back into the pot or into the sink. Set the hot jar gently on a towel-covered countertop.

Add 1/2 teaspoon citric acid (a white powder you get from the grocery store) to each hot jar that is removed from the water bath. Ladle boiling sauce into sterilized jars. Add lids and rings, tightened about as tight as you’d like a bathroom faucet, and return the jars to the boiling water bath. Bring the water back up to boil if need be, and add water from the tap to cover the tops of the jars with 3 inches of water if necessary. Process in a water bath for 35 minutes, adding 5 additional minutes of processing time for every 1000 feet you live above sea level.

When the time is up, you can carefully remove the jars one by one, using the jar lifter, to the towel covered countertop. You will likely hear the lids seal with their tell-tale “ping” sound. The lid will become concave and firm to the touch. If you have a lid fail to seal, never fear. That means there was probably a tiny bit of sauce on the edge of the jar and you should refrigerate that jar and eat it within a week. Label sealed jars with a marker and store.

That’s it! I have a rad little canning basics course that will walk you through the primary lessons in canning so you can complete the recipe above and countless other recipes to minimize your cooking routine. You can enroll right here, for free, in the course that will help you create a minimalist pantry one jar at a time.

Enroll Now!

Best Home Canning Equipment For A Beginner Join the Start Canning Course to learn how to preserve healthy, homemade food in jars!

I hope that canning helps you streamline and de-stress your mealtimes so you can really focus on what’s important so you are living the purposeful life you are destined to live.

Filed Under: Can, Cook

  • « Go to Previous Page
  • Page 1
  • Page 2
  • Page 3
  • Page 4
  • Page 5
  • Page 6
  • Interim pages omitted …
  • Page 9
  • Go to Next Page »

Primary Sidebar

Categories

Follow me here, there, & everywhere!

  • Email
  • Facebook
  • Instagram
  • Pinterest
  • RSS
  • Twitter
  • YouTube

Search

Get The Pressure Canning Cookbook

Get 10 Free Recipes Now!

Best Chicken Coop

Footer

Get Started Pressure Canning

Shrubology Ebook

Shrubology: Refreshing Homemade Fruit and Vinegar Syrups for Cocktails
Make easy, no-cook fruit & vinegar syrups for cocktails & mocktails! This ebook shares crowd pleasing recipes and simple to understand ratios so you can make a shrub on your countertop any time- without a recipe. Dive into these Prohibition Era drinks today!

Copyright

Copyright 2019
The Domestic Wildflower
www.thedomesticwildflower.com.
All content created by Jennifer Gomes unless otherwise noted.

Copyright © 2025 · Lifestyle Pro on Genesis Framework · WordPress · Log in